今天和大家分享一个非常酷炫的 API CSS Painting API。
它能做什么呢?简单点说,它可以让网页开发人员干预浏览器的绘制(Paint)环节。
为什么要干预绘制环节呢?干预绘制,意味着开发人员可以自行决定页面要绘制成的样子,而不一定非要等到浏览器支持才行。
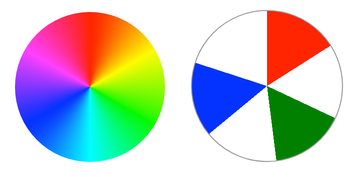
举个例子,CSS3 的新属性conic-gradient圆锥形渐变:
<style>
    div {
        display: inline-block;
        width: 150px; height: 150px; margin: 10px;
        border-radius: 50%;
    }
    .color-palette {
        background: conic-gradient(red, yellow, lime, aqua, blue, magenta, red);
    }
    .color-rgb {
        border: 1px solid #999;
        background: conic-gradient(red 0, red 16%,white 16%, white 32%,green 32%, green 48%,white 48%, white 64%,blue 64%, blue 80%,white 80%, white);
    }
</style>

<div class="color-palette"></div>
<div class="color-rgb"></div>以上代码的运行效果如下,也可在线预览(Chrome 69+):
根据 Can I use,目前仅 Chrome 支持conic-gradient。但是,有了CSS Painting API,我们就可以自己画出类似效果,然后在项目中使用了,而不用等到所有的浏览器都支持conic-gradient。
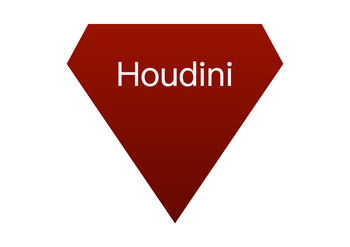
当然,除了充当 CSS3 新特性的 polyfill 之外,我们还可以用它画任意形状。比如钻石状的 Div:
比如,符合 Google Material Design 的波纹效果:
截止目前,CSS Painting API 的浏览器支持情况1如下:
- Chrome 65+ 和 Opera 52+ 已经支持
- Firefox 有实现的意愿
- Safari 还在考虑中
- Edge 暂无反馈
也有相应的 CSS Paint Polyfill2 供我们选择。
CSS Painting API Level 1 已于今年8月9日成为候选推荐标准,这意味着该模块的所有已知 Issues 均已被解决,并且已经开始向浏览器厂商征集实现。
接下来,我们通过一个实例来理解下 Paint API。
使用挺简单的,就这三步:
- 在 CSS 中使用指定的 Paint Worklet,用
paint() - 加载定义了 Paint Worklet 的脚本文件,用
CSS.paintWorklet.addModule() - 定义 Paint Worklet,用
registerPaint()
在 index.html 里
<style>
  .css-paint {
    /* 1. 通过 paint() 调用指定的 Paint Worklet 'checkerboard'*/
    background-image: paint(checkerboard);
  }
</style>

<div class="css-paint"></div>

<script>
  // 2. 加载 Paint Worklet
  CSS.paintWorklet.addModule('my_paint_worklet.js');
</script>
在 my_paint_worklet.js 里
class CheckerboardPainter {
  paint(ctx, geom) {
    const size = 30;
    const spacing = 10;
    const colors = ['red', 'green', 'blue'];
    for(let y = 0; y < geom.height/size; y++) {
      for(let x = 0; x < geom.width/size; x++) {
        ctx.fillStyle = colors[(x + y) % colors.length];
        ctx.beginPath();
        ctx.rect(x*(size + spacing), y*(size + spacing), size, size);
        ctx.fill();
      }
    }
  }
}
// 3. 定义 Paint Worklet 'checkerboard'
registerPaint('checkerboard', CheckerboardPainter);
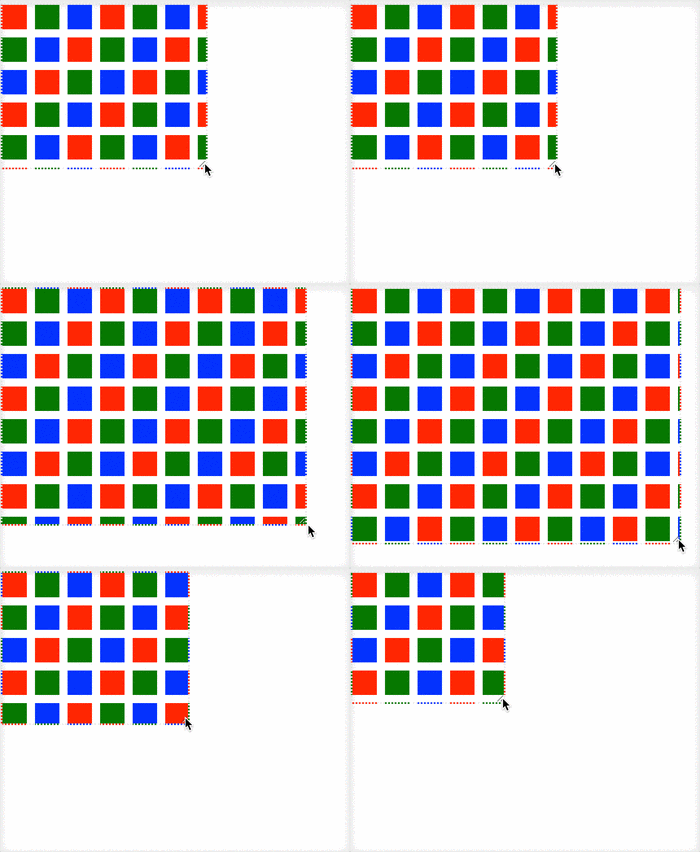
运行后的效果如下。我们可以看到,绘制的背景是响应式的。
Paint Worklet 也支持自定义参数,我们通过自定义属性来实现。
改动三处即可:
- 在 CSS 里增加自定义属性
- 在定义 Paint Worklet 时
- 指定绘制时可以访问的属性列表
- 绘制时,获取属性的值
具体代码如下:
在 index.html 里,自定义 CSS 属性
<style>
  .css-paint {
    --checkerboard-size: 32;   /* 1. 自定义2个参数 */
    --checkerboard-spacing: 10;
    background-image: paint(checkerboard);
  }
</style>
在 my_paint_worklet.js 里,接收参数
class CheckerboardPainter {
    // 2.1 静态方法,返回 paint() 可以访问的 CSS 属性列表
    static get inputProperties() {
      return ['--checkerboard-spacing', '--checkerboard-size'];
    }

    // 注意:新增了第三个参数 properties
    paint(ctx, geom, properties) {
      // 2.2 获取输入参数的值
      const size = parseInt(properties.get('--checkerboard-size').toString());
      const spacing = parseInt(properties.get('--checkerboard-spacing').toString());
      // ... 同上
    }
}
registerPaint('checkerboard', CheckerboardPainter);
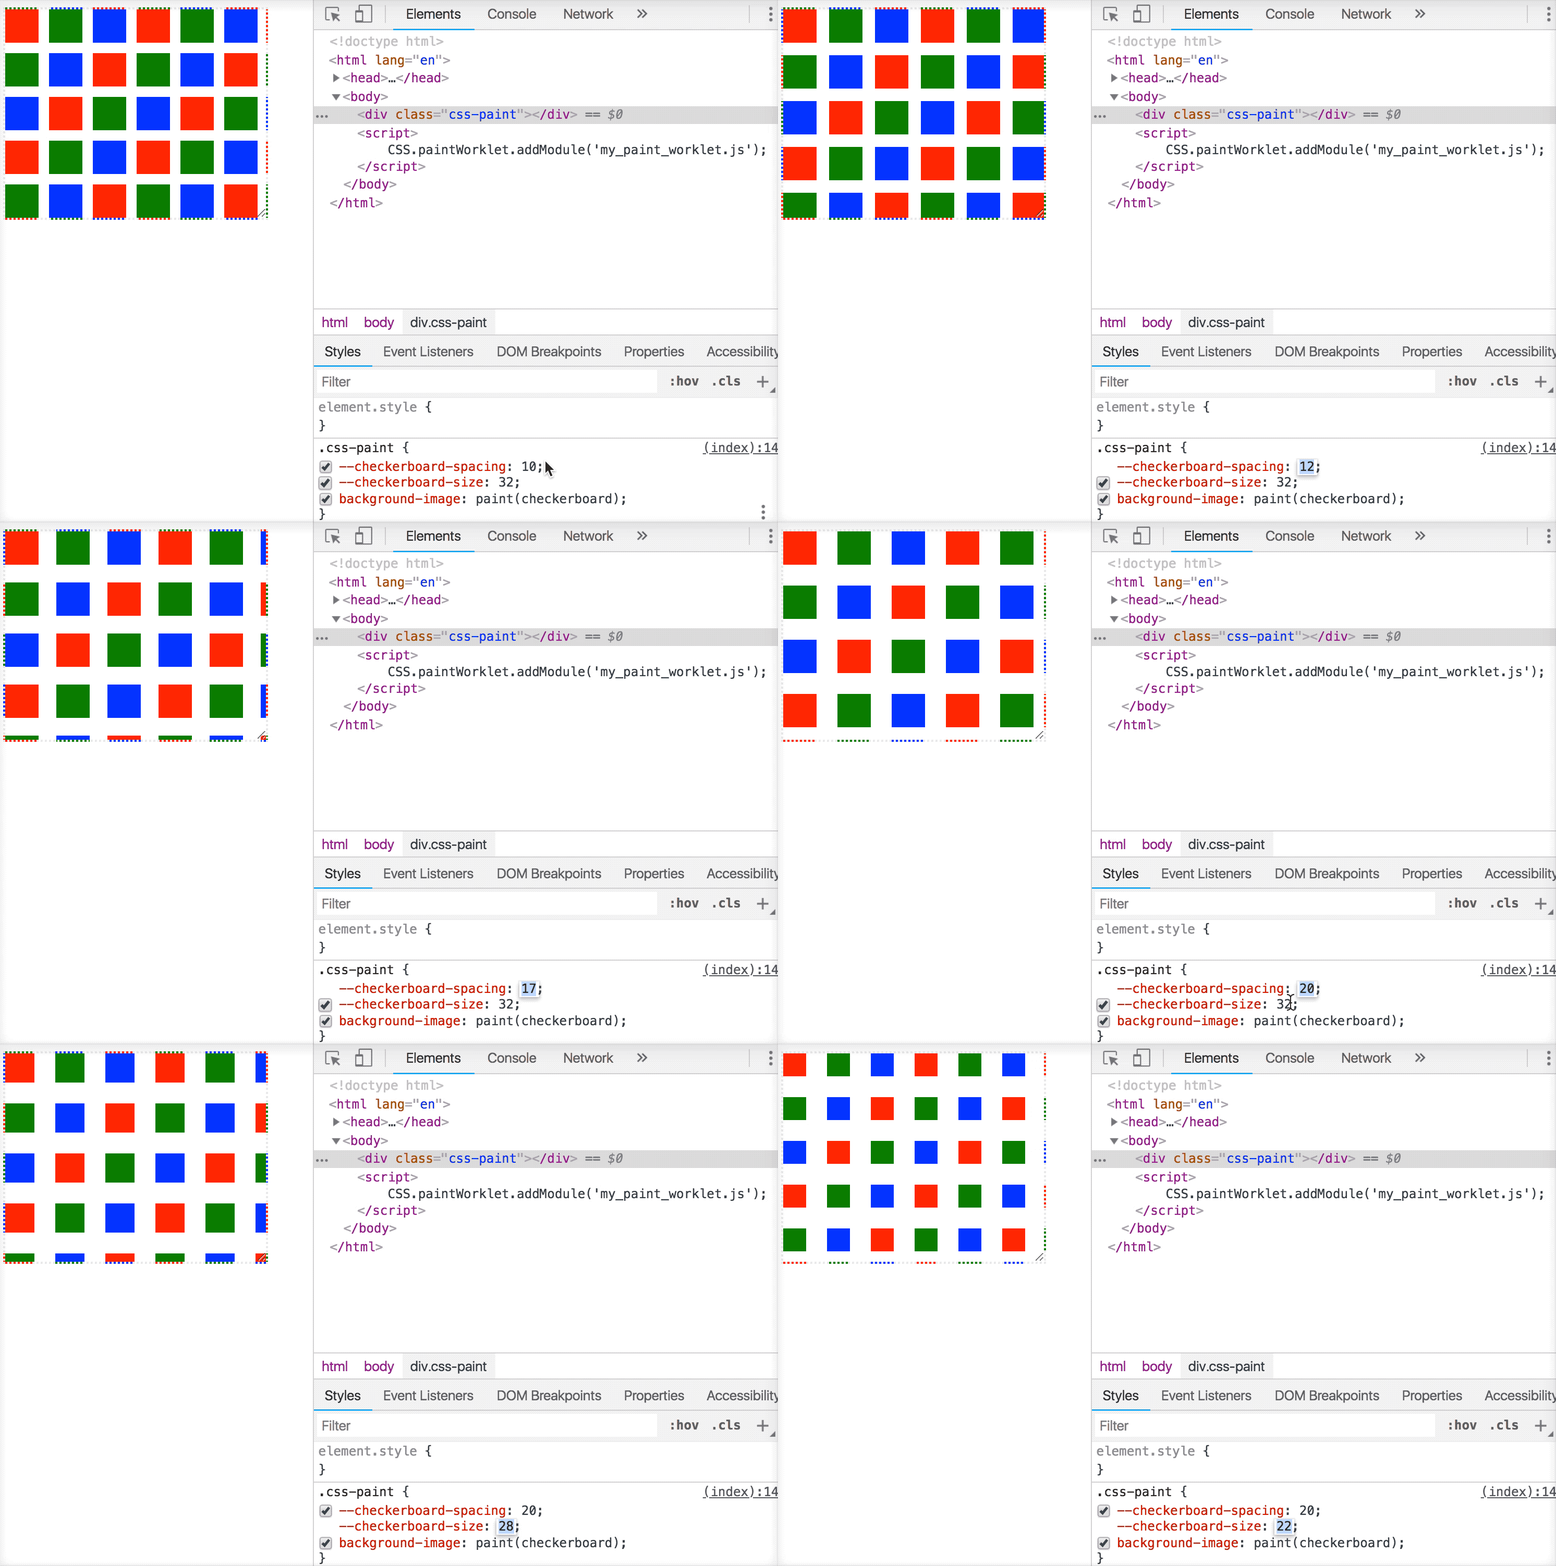
这样,当修改自定义属性时,绘制的图像也会相应变化。效果如下:
当浏览器不支持 Paint API 时,我们需要向前兼容。修改以下两处:
- 在写 CSS 时,给属性写个备用值
- 在 JS 里加载 Paint Worklet 之前,先做个判断
具体代码如下:
在 index.html 里,修改两处
<style>
  .css-paint {
    background-image: linear-gradient(0, red, blue);  /* 1. 备用值 */
    background-image: paint(checkerboard);
  }
</style>

<script>
  // 2. 判断是否支持
  if ('paintWorklet' in CSS) {
    CSS.paintWorklet.addModule('my_paint_worklet.js');
  }
</script>
完整代码见 https://github.com/anjia/blog/tree/master/src/css-paint-api
注意,代码需要运行在 localhost 或 HTTPS 下
在该实例中,我们用到了三个函数:
paint():在 CSS 中使用指定的 Paint WorkletCSS.paintWorklet.addModule():加载定义了 Paint Worklet 的脚本文件registerPaint():定义 Paint Worklet
下面,我们将对它们进行进一步介绍。
CSS 的 paintWorklet 属性提供了与绘制相关的 Worklet,它的全局执行上下文是 PaintWorkletGlobalScope。PaintWorkletGlobalScope 里存了 devicePixelRatio 属性,它和 Window.devicePixelRatio 一样。
CSS.paintWorklet.addModule('filename.js')负责加载定义了 Paint Worklet 的脚本文件。
下面是文件 my_paint_worklet.js 里的内容。
class CheckerboardPainter {
  static get inputProperties() {
    return ['--checkerboard-spacing', '--checkerboard-size'];
  }

  paint(ctx, geom, properties) {
    const size = parseInt(properties.get('--checkerboard-size').toString());
    const spacing = parseInt(properties.get('--checkerboard-spacing').toString());
    const colors = ['red', 'green', 'blue'];
    for(let y = 0; y < geom.height/size; y++) {
      for(let x = 0; x < geom.width/size; x++) {
        ctx.fillStyle = colors[(x + y) % colors.length];
        ctx.beginPath();
        ctx.rect(x*(size + spacing), y*(size + spacing), size, size);
        ctx.fill();
      }
    }
  }
}
registerPaint('checkerboard', CheckerboardPainter);
Paint Worklet 的全局脚本上下文只给开发人员暴露了一个方法registerPaint(),用来注册。
registerPaint(name, paintCtor) 有两个参数:
name是 Paint Worklet 的名字。必填,且全局唯一paintCtor是一个类。之所以用类,是考虑到:- 类之间可以相互组合,比如继承
- 类可以执行一些预初始化的工作,比如只执行一次的 CPU 密集型工作
e.g. 继承
class RectPainter {
  static get inputProperties() {
    return ['--rect-color'];
  }
  paint(ctx, size, style) {
    //...
  }
}

class BorderRectPainter extends RectPainter {
  static get inputProperties() {
    return ['--border-color', ...super.inputProperties];
  }
  paint(ctx, size, style) {
    super.paint(ctx, size, style);
    //...
  }
}

registerPaint('border-rect', BorderRectPainter);
e.g. 预初始化工作
registerPaint('lots-of-paths', class {

  constructor() {
    this.paths = performPathPreInit();
  }

  performPathPreInit() {
    // Lots of work here to produce list of Path2D object to be reused.
  }

  paint(ctx, size, style) {
    ctx.stroke(this.paths[i]);
  }
});在paintCtor的类里有个函数paint(),它是渲染引擎在浏览器绘制阶段的回调。
回调会传3个参数 paint(ctx, geom, properties):
ctx绘制的渲染上下文 PaintRenderingContext2Dgeom绘制的图像大小 pageSize,它有两个只读属性 width 和 heightproperties当前绘制元素的计算样式,它只包含inputProperties里列出的属性
以下三种情况,都会触发回调的调用:
- 视口要显示绘制的元素了。i.e. 初始创建 Paint 类的实例对象时
- 绘制区域的大小变了。i.e. 网页响应式
inputProperties列出的属性值变了。i.e. 图像可根据参数的改变而改变
PaintRenderingContext2D 是 CanvasRenderingContext2D 的子集。所以,会用 Canvas 的小伙伴也就会在 Paint Worklet 里绘制图像了。
它目前不支持 CanvasImageData, CanvasUserInterface, CanvasText, CanvasTextDrawingStylesAPI 。详见 PaintRenderingContext2D3
PaintRenderingContext2D 对象有一个输出位图,当类的实例被创建时,它就被初始化。输出位图的大小,不一定等于实际渲染的位图大小,因为实际输出的图像会根据设备像素比的不同而不同。浏览器会记住paint()里绘制的操作序列,以便动态适应不同的设备像素比,这样就保证了图像在高清屏下的显示质量。
未来的规范会提供不同类型的渲染上下文,比如 WebGL 的渲染上下文,这样就能绘制 3D 效果了
在输入属性列表inputProperties里列出的属性,意味着:
- 可以在
paint()回调里访问它们,这些属性会通过第三个参数properties传过去 - Paint Worklet 会订阅这些属性,以便在它们的值发生改变时触发
paint()回调,以实时重新绘制图像
最后,就是在 CSS 中使用写好的 Paint Worklet 了。写法如下:
.css-paint {
  background-image: paint(checkerboard);
}
参数 checkerboard 就是 Paint Worklet 的名字,即在registerPaint(name, paintCtor)里提供的 name。
paint()是 CSS 的 <image> 类型支持的一种写法。我们平时用url()加载图片或者用渐变函数linear-gradient()的地方都可以使用paint()。它可以用在 background-image、border-image、list-style-image 和 cursor 等属性上。
并不是在 CSS 里每调用一次piant()就执行一次 Paint Worklet 类的 paint 方法,而是当元素的大小改变时,或者 inputProperties 里声明的属性值改变时才会触发。
CSS Painting API 给网页开发人员提供了通过 JS 绘制<image>的能力,具体图像长什么样子以及页面如何交互,我们可以充分发挥自己的想象力。可以留意日常工作和业务里的点滴,也可以去 CSS Houdini4 寻找灵感。
[1] 浏览器支持情况:https://ishoudinireadyyet.com
[2] CSS Paint Polyfill:https://github.com/GoogleChromeLabs/css-paint-polyfill
[3] PaintRenderingContext2D:https://www.w3.org/TR/css-paint-api-1/#2d-rendering-context
[4] CSS Houdini:https://css-houdini.rocks
- https://www.w3.org/TR/css-paint-api-1/
- https://developers.google.com/web/updates/2018/01/paintapi
- https://github.com/w3c/css-houdini-drafts/blob/master/css-paint-api/EXPLAINER.md
- CSS Houdini 的九大内容:https://drafts.css-houdini.org
- 谈谈 Animation Worklet:https://mp.weixin.qq.com/s/Tixer_ezqyk793gqqKKQDg


