简体中文 | English
Table of contents
** Dependencies used in the following annotation examples:**
- Python 3.8+
- label-studio == 1.6.0
Use pip to install label-studio in the terminal:
pip install label-studio==1.6.0Once the installation is complete, run the following command line:
label-studio startOpen http://localhost:8080/ in the browser, enter the user name and password to log in, and start using label-studio for labeling.
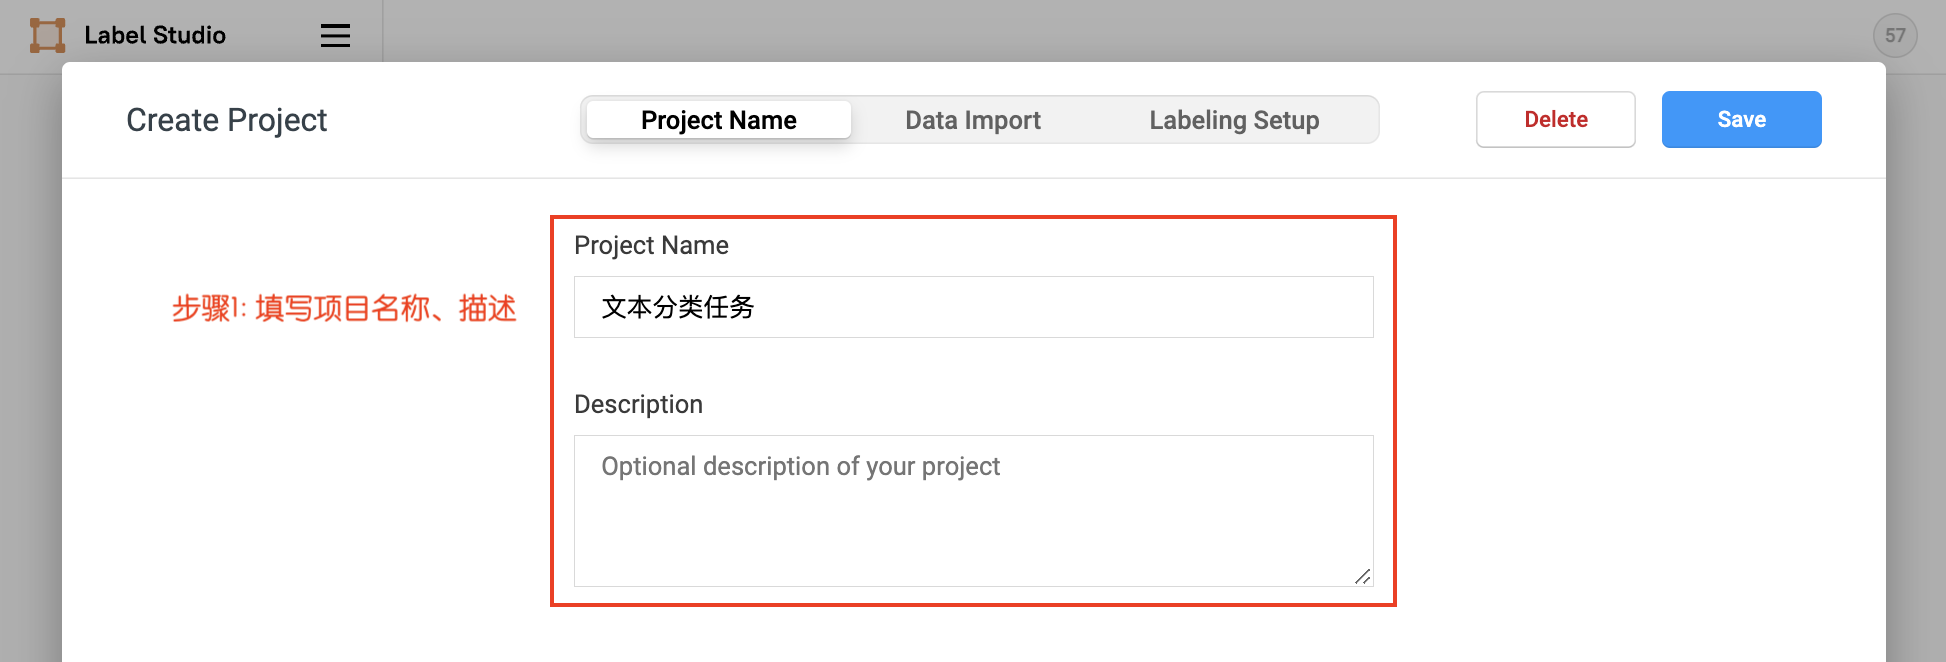
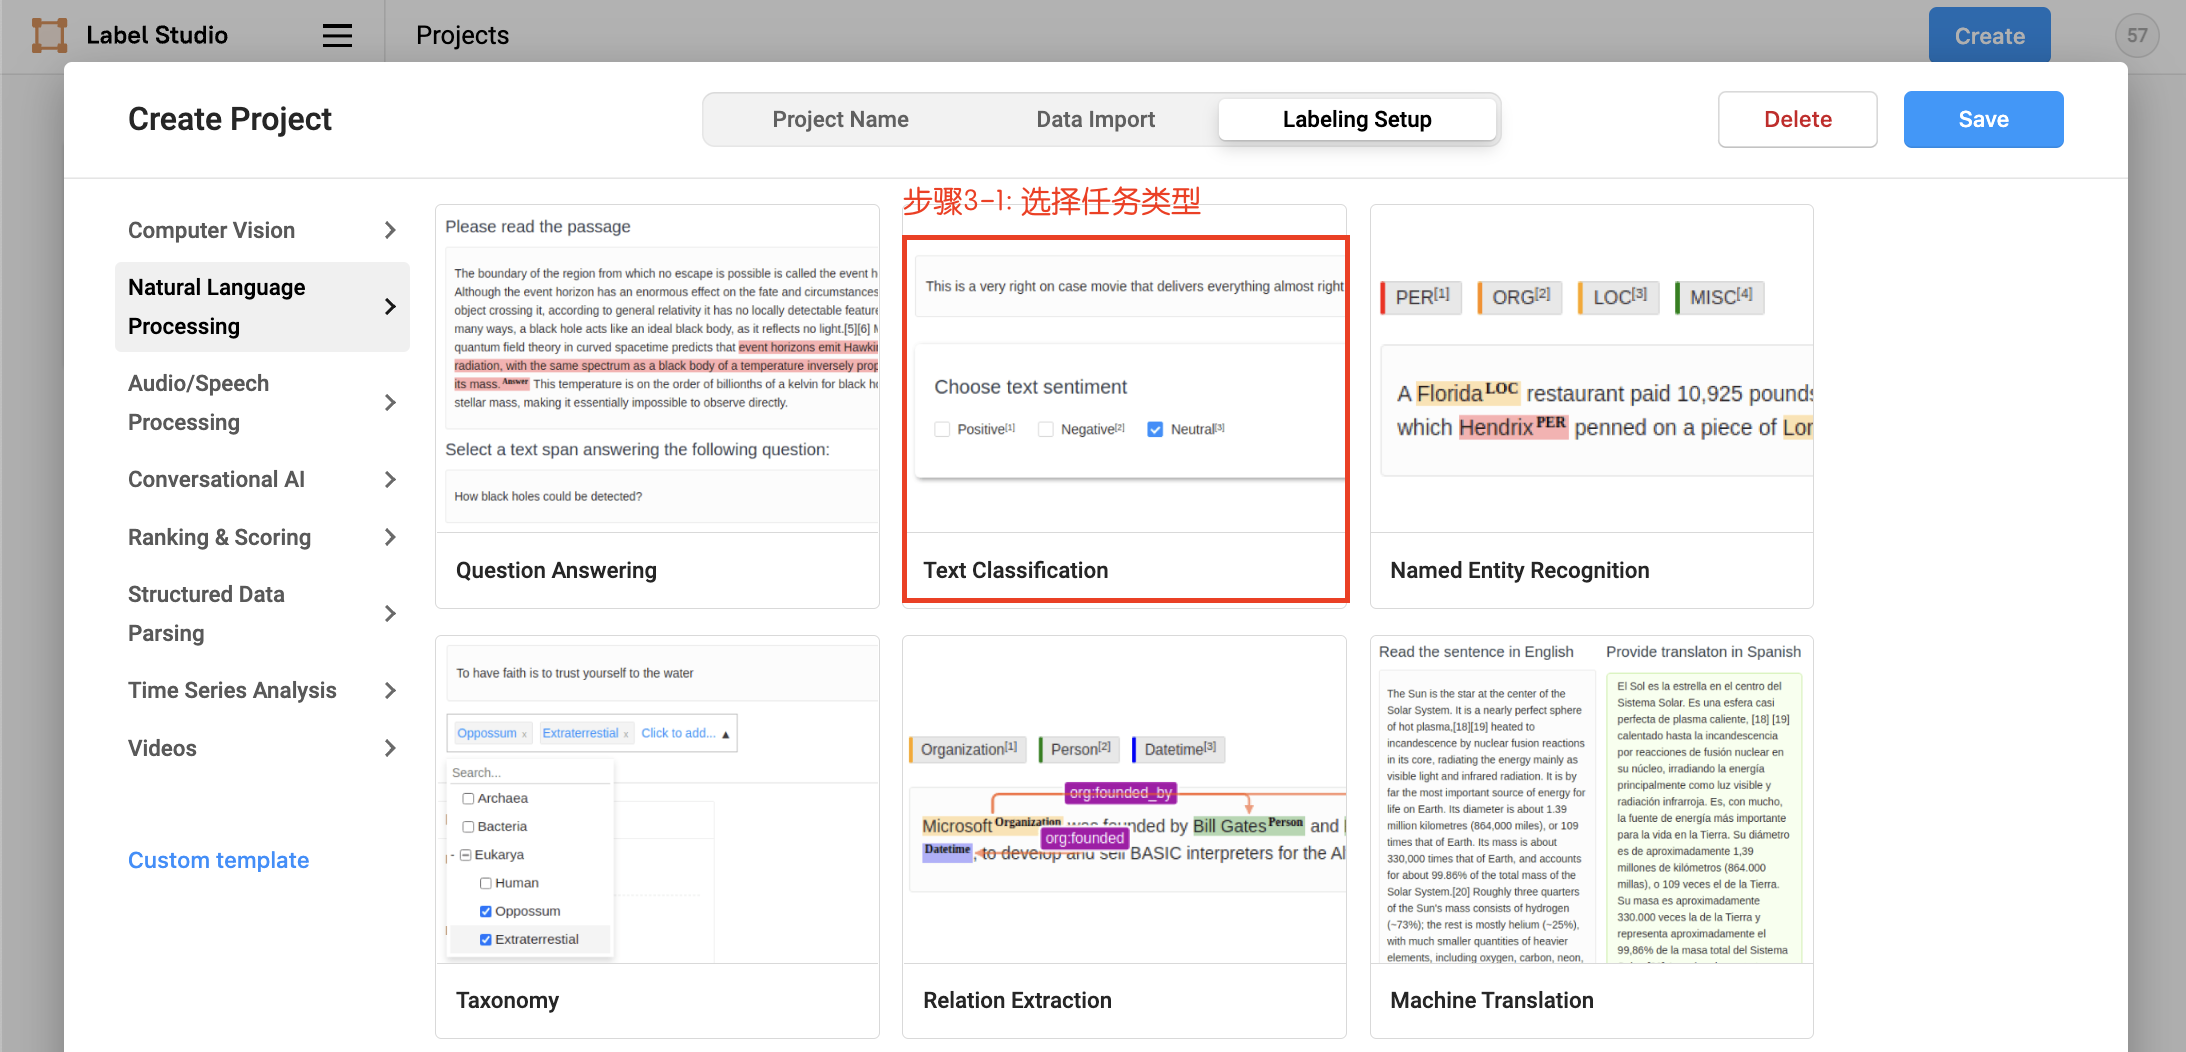
Click Create to start creating a new project, fill in the project name, description, and select Text Classification in Labeling Setup.
- Fill in the project name, description
- Upload the txt format file locally, select
List of tasks, and then choose to import this project.
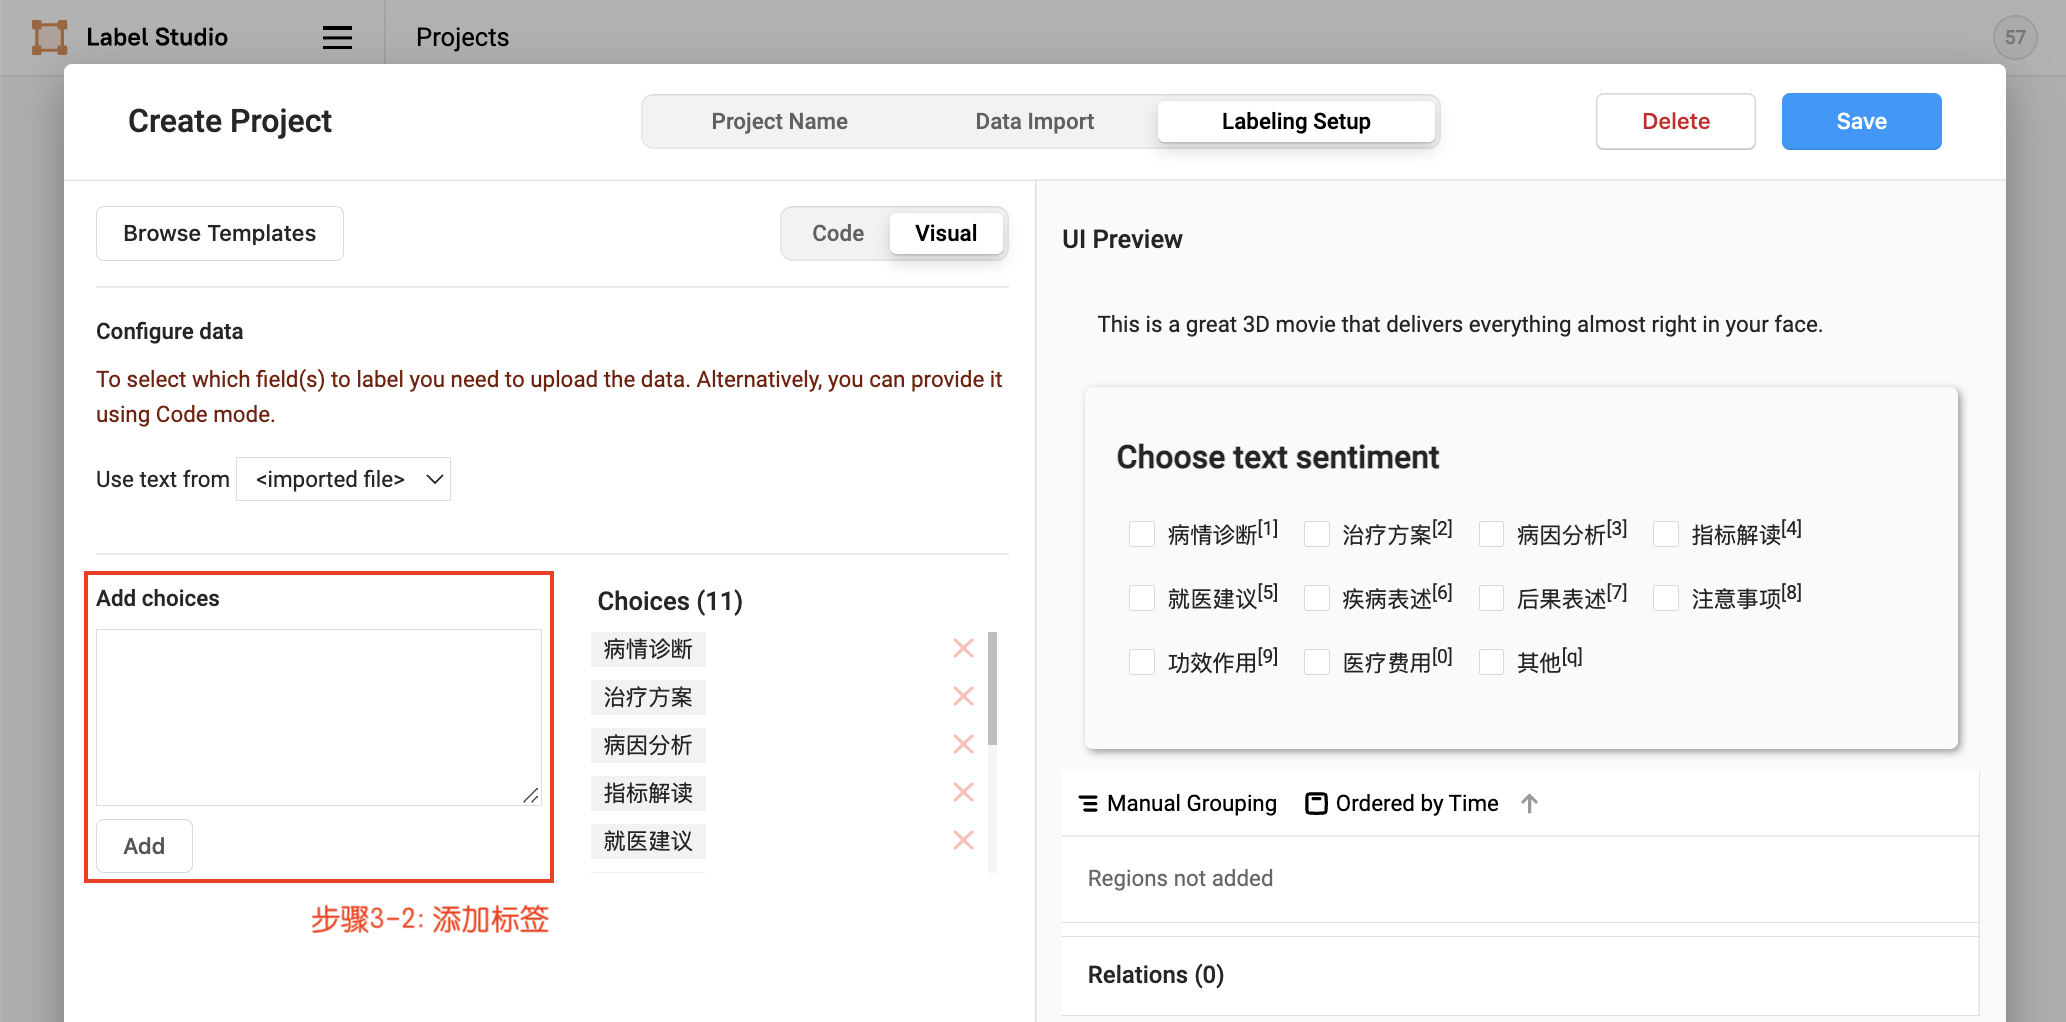
- Define labels
You can continue to import local txt format data after project creation. See more details in Project Creation.
After project creation, you can add/delete labels in Setting/Labeling Interface just as in Project Creation
Check the marked text ID, select the exported file type as JSON, and export the data:
First, create a label file in the ./data directory, with one label candidate per line. You can also directly set label condidates list by options. Rename the exported file to label_studio.json and put it in the ./data directory. Through the label_studio.py script, it can be converted to the data format of UTC.
python label_studio.py \
    --label_studio_file ./data/label_studio.json \
    --save_dir ./data \
    --splits 0.8 0.1 0.1 \
--options ./data/label.txtlabel_studio_file: Data labeling file exported from label studio.save_dir: The storage directory of the training data, which is stored in thedatadirectory by default.splits: The proportion of training set and validation set when dividing the data set. The default is [0.8, 0.1, 0.1], which means that the data is divided into training set, verification set and test set according to the ratio of8:1:1.options: Specify the label candidates set. For filename, there should be one label per line in the file. For list, the length should be longer than 1.is_shuffle: Whether to randomly shuffle the data set, the default is True.seed: random seed, default is 1000.
Note:
- By default the label_studio.py script will divide the data proportionally into train/dev/test datasets
- Each time the label_studio.py script is executed, the existing data file with the same name will be overwritten
- For files exported from label_studio, each piece of data in the default file is correctly labeled manually.


