The Discord application is used before and during Project Week for team communication (as opposed to Zoom, which is used for community wide meetings). Before the workshop, Discord can be used by teams to coordinate, prepare work and create project pages. During Project Week, Discord is used mostly by online only or hybrid teams to meet. It can also be used by in-person participants to schedule small meetings and advertize them to the rest of the community.
Discord is a chat app, similar to programs such as Skype, TeamSpeak, or Slack. Primarily built for video gamers, it supports video calls, voice chat, and text. It offers an efficient and semipublic, forum-style community platform and allows the creation of channels devoted to specific topics. Discord allows for the creation of servers and Project Week has its dedicated server.
Discord can be downloaded for free from https://discord.com/ and is available for all major platforms.
After Discord installation, please open the Discord server link. After clicking the link in a browser of your choice it will open Discord and ask you to "Join" the Project Week server. After login, you should see Discord opening like this:
The left panel lists text and voice/video channels. Each project gets its own text channel to chat and exchange links about the project progress. Additional text channels can be used by anyone for general announcements (#announcements), general discussion (#Lobby-1), gathering people for social event (#social), asking admins for the creation of a text channel for your project (#request-a-project-channel) or posting a job ad (#job-board). Voice channels are virtual meeting rooms that can be booked by creating an event or used spontaneously when available. Additional voice channels (Lobbys) can be used to gather randomly and chat.
The same Discord server is used for each edition of Project Week. It is thus possible to continue projects in the next Project Weeks and check out the chat history of that project. However, important information about the project should be copied to the project page on GitHub.
In text channels, enter your chat message in the bottom message input field. If the channel or the meeting room has a
symbol you may enter the channel by left-clicking onto it and joining the audio chat. If you can not find your project as a project channel please drop a line on the Discord lobby (top) - one of the server admins will see it and create the channel. See who is online in the right Discord tab. You can mention the person by using the @ symbol in the message input field. You can send private messages in Discord, but please refrain from doing so. Use project channels or the lobby wherever possible so everyone can follow.
Double click on your nickname in the right "users online" and select "Edit Profile" Please set the Discord nickname to your real name and affiliation, e.g. "Simon Drouin (ETS Montreal)". A real name usage policy may be defined for each Discord server.
Fortunately, you can edit your messages in Discord chat like this:
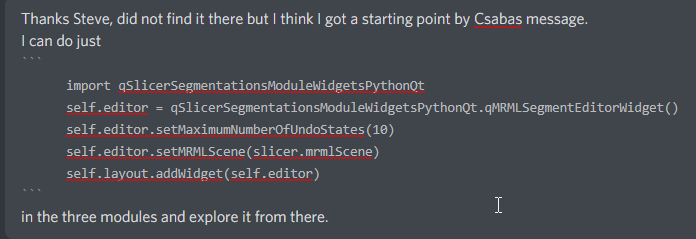
Please use three backticks (```) to include source code in the text message.
Example:
Result:
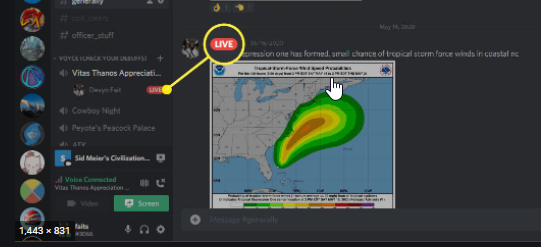
Join a voice channel, e.g. one of the meeting rooms. Press "Screen" (lower left) to share one of your screens.
To be able to look at the screen someone else shares, you need to click "LIVE" and join the shared window stream (right to the name to that streaming in the voice channel)
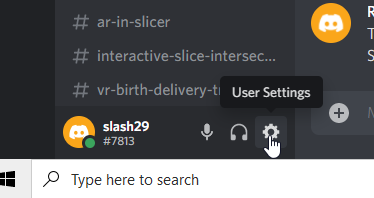
Go "User settings" (see below) and switch all those off:
Simply click "Disconnect" next to your nickname (lower left).
This is easy. Go "User settings" (see below) and
Go "User Settings"
Go "Voice & Video" and select the correct input and output devices. When you are done, click ESC (right top symbol on screenshot)


