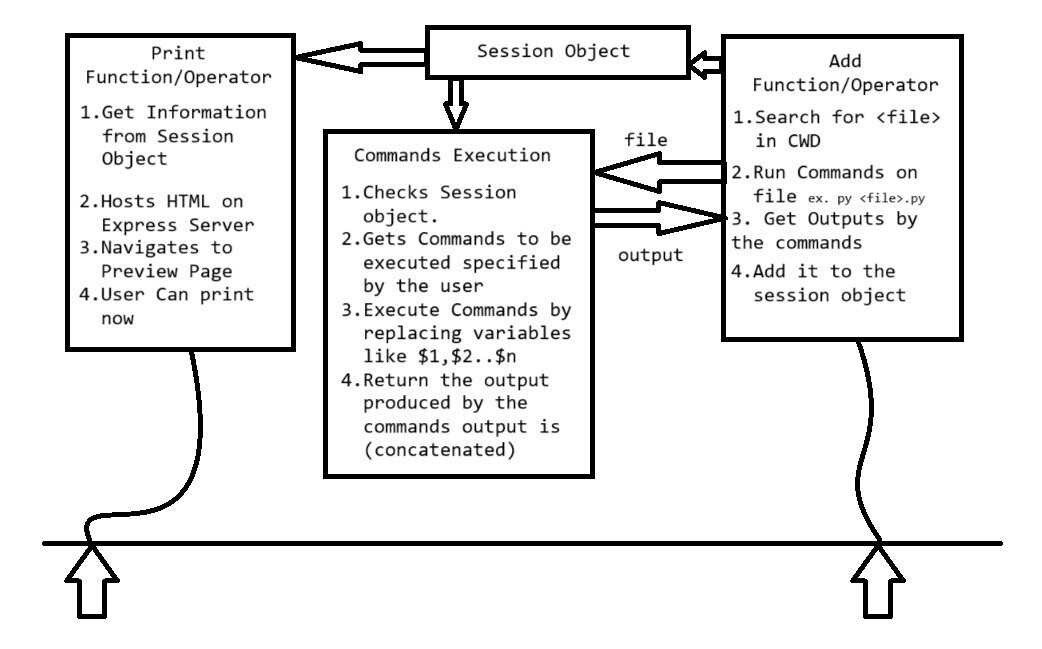
CHNP (Code highlight and print) which is the project I developed in my first year of Diploma for the purpose of code printing where I can use a certain format to create a PDF from my code and it's output. It was helpful throughout my diploma where I have to submit prints of my code. You can checkout that repo here
CHNP is an webapp where I have to copy my code and paste which is very hard to manage in case we've multiple codes for same practical/experiments. You've to copy them one by one and paste them there. So, to tackle this problem and make tool more convenient I developed a Command Line application in Nodejs.

1.Session Object: This is where all of your codes and settings for current working directory is stored. (A Json File) 2.Commands: Currently there are 2 commands details
- cohl: It is for operations like exporting or printing the session object i.e. it only reads the session objects.
- cohls: It is for operations like editing your style preferences, staging codes for printing and many more i.e. for editing session object
3.Operators: These are the always first arguments passed to commands like to perform add operation we'll use add operator. details
CHNP Cli uses Nodejs as runtime
Nodejs is only Prerequisites you have to install You can install it from here
After Installing the Nodejs you will type following command into terminal in any directory.
npm install -g chnp-cli
This will install the CHNP-Cli
Always you've to create session object so to do that you can use following command
cohls create "<MyObjectName>""
Cohls will ask you for filename enter like following
cohls create "JavaSessionObject"
Enter filename while adding: $1.java
here $1 will be replaced with 2nd arg passed while add operator because 1st arg will alway be the add operator.
To Execute Source Code of java we require 2 commands usually which are javac and java.
So, Specify Them As Follows
$ cohls create "JavaSessionObject"
Enter filename while adding: $1.java
Enter commands to run program while adding:
1. > javac $1.java
2. > java $1
3. >
Now whenever we've to stage a java file we can use following command
$ cohls add App
Source Code file will be App.java which will produce App.class and wil execute it.
Like
$ cohls create "JavaSessionObject"
Enter filename while adding: $1.java
Enter commands to run program while adding:
1. > javac $1.java
2. > java $1
3. >
Enter watermark for your codes: CODE_BY_SHUBHAM
Operation is SUCCESSFULL
You can add your file by using add operator
cohls add App.java
<
YOUR CODE EXECUTION WILL BE HERE
>
OPERATION IS SUCCESSFUL
You can use this project for printing your codes with output.
Made with 💖 by Shubham