Setup SVF in CLion
1.2 Briefly install and use pre-built binaries LLVM-10.0.0.
2.1 Install CLion from JetBrains.

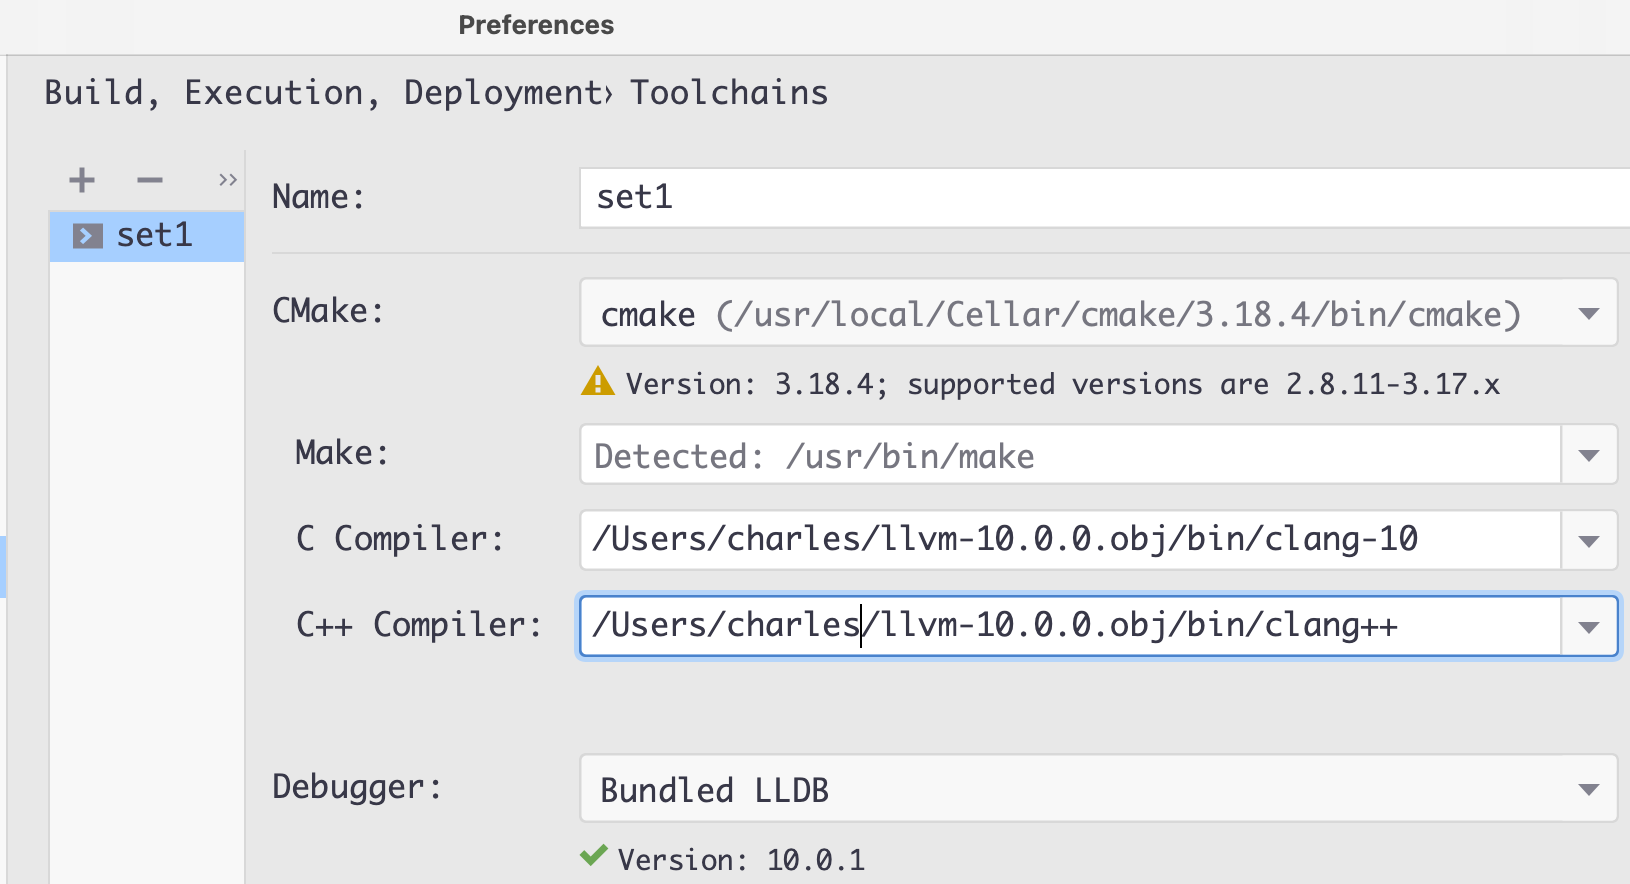
3.1 Choose Settings / Preferences to set Build, Execution, Deployment toolchains C/C++ compiler with the just downloaded binaries LLVM_10.0.0 path.
- For C compiler, choose the executable file.(LLVM/bin/clang-10)
- For C++ compiler, choose the executable file.(LLVM/bin/clang++)
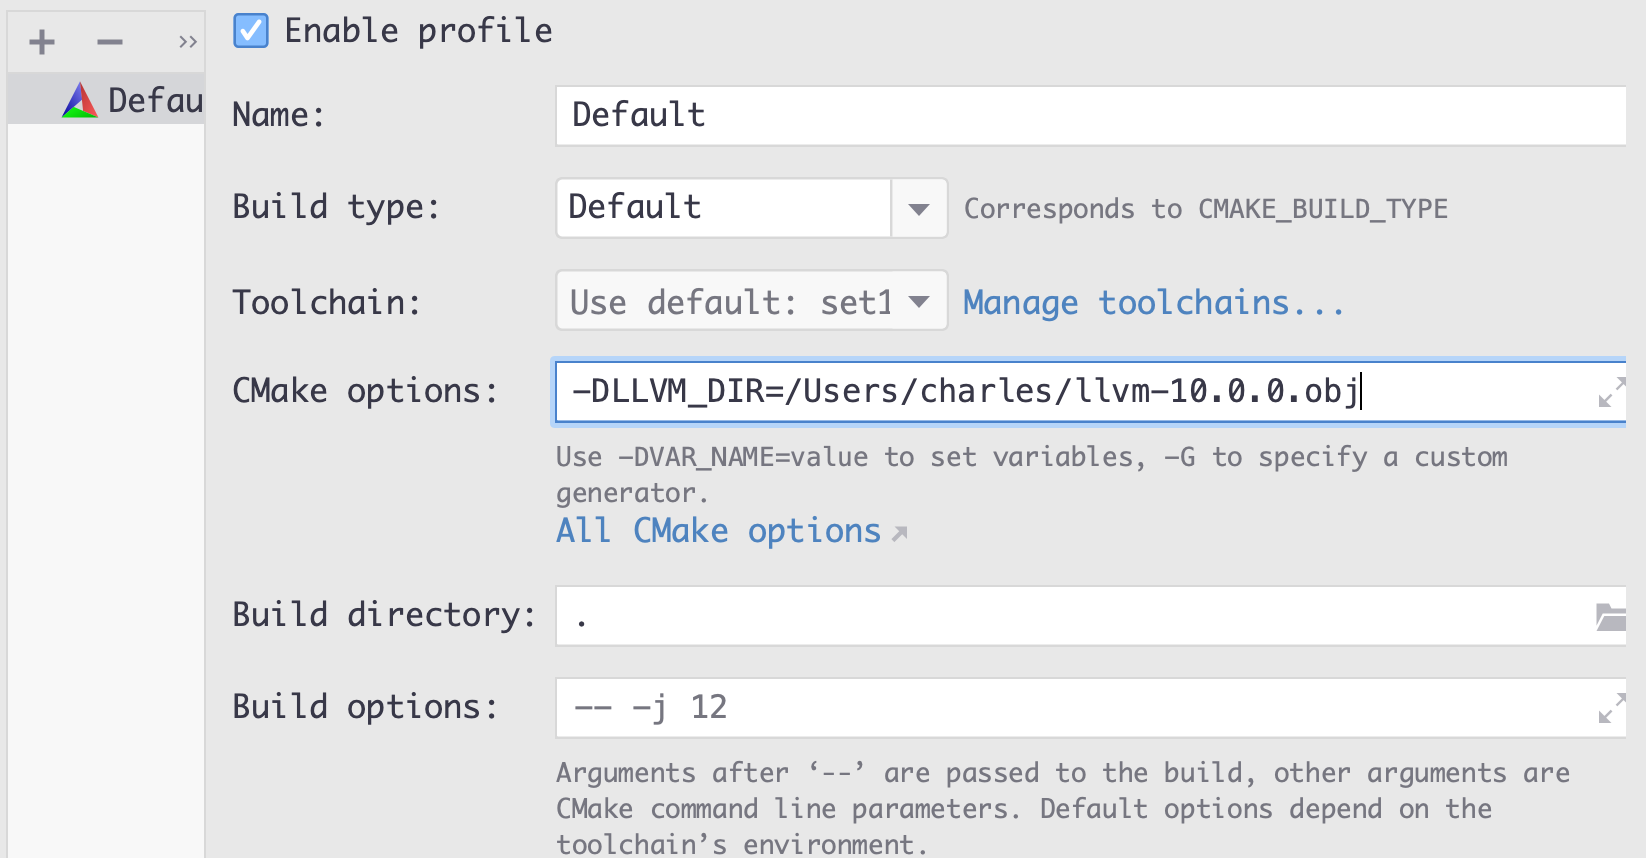
3.2 Choose Settings / Preferences to set CMake.
- Set CMake options with
-DLLVM_DIR=/Users/charles/llvm-10.0.0.obj(should change to your downloaded directory). - Set CMake options debug mode
-DCMAKE_BUILD_TYPE:STRING=Debug(optional). - Build directory to current path. (You may also change to directory to 'build-outof-source')
- Build options
-j 12depends on your own computer cores.

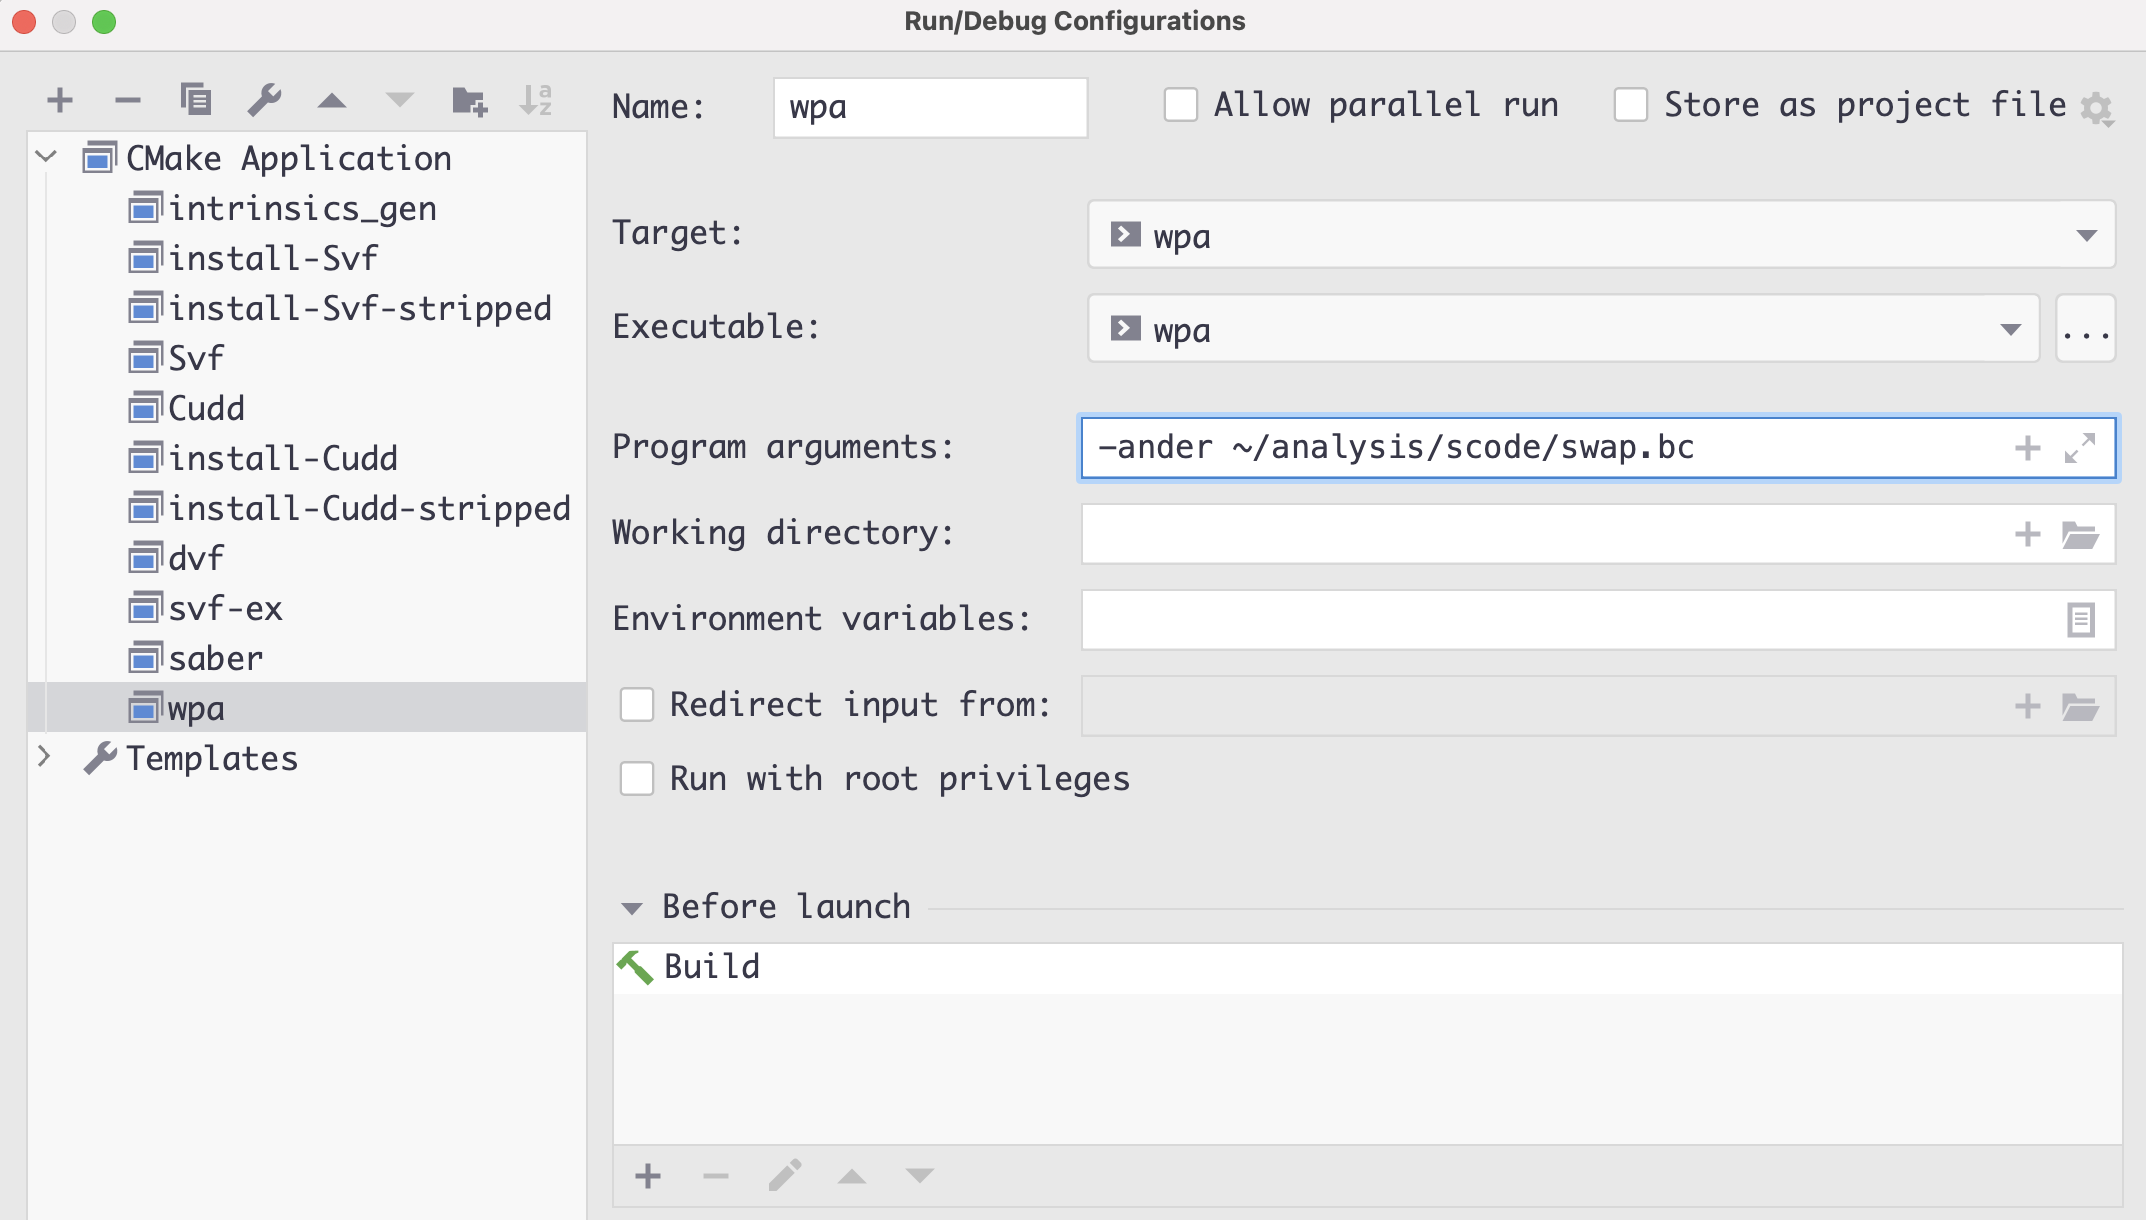
4.2 Set Run/Debug Configurations
- Select CMake Applications from left (e.g. wpa).
- Program Arguments accept the applications options and followed with code assembly file.
4.3 Press build and debug. You will see all variable and functions in your dash board.
