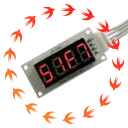
A SwiftyGPIO based driver for the TM1637 7-segment chipset, as used in the LK-Digi LinkerKit element.
The module is heavily inspired by the Python code example shown at the LK-Digi wiki.
A simple digital clock:
import Foundation
import SwiftyGPIO
import SwiftyTM1637

let gpios   = SwiftyGPIO.GPIOs(for: .RaspberryPi3)

// E.g. a LK-Digi connected to the P4/P5 digital pins
let display = TM1637(clock: gpios[.P4]!, data: gpios[.P5]!)

display.turnOff()
display.brightness = .typical

while true {
  let cal = Calendar.current
  let now = cal.dateComponents([.hour, .minute, .second], from: Date())

  let hour   = now.hour   ?? 0
  let minute = now.minute ?? 0
  let second = now.second ?? 0

  let segment2 = SevenSegment(digit: hour % 10, dot: second % 2 != 0)

  display.show(s1: hour   / 10, s2: segment2,
               s3: minute / 10, s4: minute % 10)

  Thread.sleep(forTimeInterval: 0.5)
}Note: This is for 32-bit, 64-bit doesn't seem to work yet.
You don't have to, but I recommend running things in a HypriotOS docker container.
Setup is trivial. Grab the flash tool, then insert your empty SD card into your Mac and do:
$ flash --hostname zpi3 \
  https://github.com/hypriot/image-builder-rpi/releases/download/v1.8.0/hypriotos-rpi-v1.8.0.img.zip
Boot your Raspi and you should be able to reach it via zpi3.local.
I also recommend to use docker-machine (e.g. see here), but that is not necessary either.
Boot the container like so:
$ docker run --rm \
  --cap-add SYS_RAWIO \
  --privileged \
  --device /dev/mem \
  -it --name swiftfun \
  helje5/rpi-swift-dev:4.1.0 /bin/bash
You end up in a Swift 4.1 environment with some dev tools like emacs
pre-installed. Sudo password for user swift is swift.
In the container:
swift@fb630076e0ec:~/testit$ mkdir testit && cd testit && swift package init --type executable
Creating executable package: testit
Creating Package.swift
Creating README.md
Creating .gitignore
Creating Sources/
Creating Sources/testit/main.swift
Creating Tests/
Then edit the Package.swift file to look like this:
// swift-tools-version:4.0

import PackageDescription

let package = Package(
    name: "testit",
    dependencies: [
        .package(url: "https://github.com/uraimo/SwiftyGPIO.git",
                 from: "1.0.0"),
        .package(url: "https://github.com/SwiftyLinkerKit/SwiftyTM1637.git",
                 from: "0.1.2"),
    ],
    targets: [
        .target(
            name: "testit",
            dependencies: [ "SwiftyTM1637", "SwiftyGPIO" ]),
    ]
)
Edit the Sources/testit/main.swift and add the Swift code above.
Build everything:
swift@fb630076e0ec:~/testit$ swift build
Fetching https://github.com/uraimo/SwiftyGPIO.git
Fetching https://github.com/AlwaysRightInstitute/SwiftyTM1637.git
Cloning https://github.com/uraimo/SwiftyGPIO.git
Resolving https://github.com/uraimo/SwiftyGPIO.git at 1.0.5
Cloning https://github.com/SwiftyLinkerKit/SwiftyTM1637.git
Resolving https://github.com/SwiftyLinkerKit/SwiftyTM1637.git at 0.1.0
Compile Swift Module 'SwiftyGPIO' (10 sources)
Compile Swift Module 'SwiftyTM1637' (4 sources)
Compile Swift Module 'testit' (1 sources)
Linking ./.build/armv7-unknown-linux-gnueabihf/debug/testit
You need to run it using sudo, password is swift:
swift@fb630076e0ec:~/testit$ sudo .build/armv7-unknown-linux-gnueabihf/debug/testitIf your LK-Digi is connected to port D4/D5, it should now show a nice digital clock!
Want to see it in action? SwiftyGPIO driven input/output using LinkerKit components
SwiftyTM1637 is brought to you by AlwaysRightInstitute. We like feedback, GitHub stars, cool contract work, presumably any form of praise you can think of.
There is a channel on the Swift-ARM Slack.


