A simple kit to use computational notebooks for more openness, reproducibility, and productivity in research
This repository contains a starter-kit to use so called "computational notebooks" to structure your work.
Computational notebooks are files that contain descriptive text, as well as code and its outputs, in a single, dynamic and visually appealing file (usuallly .html, but .pdf is also possible).
Using this file to organize your work should facilitate:
- traceability: the notebook file contains all the reasoning behind the study. Moreover, the file formats suggested here facilitate version control, arguably one of the best tools for tracking the development of a project.
- reproducibility: by concentrating the computational work in a single, descriptive file, along with a fixed file structure, the notebook facilitates reproduction of the study in question.
- reporting: the notebook can be an accompanying piece to share with co-authors during the development of the work, or to share with reviewers and readers, as supplementary material.
In Figueiredo et al. (2022), we report our reasoning for the kits in this repository and provide examples of implementation. Below, you can find the basic instructions on how to use it, as well as a video tutorial.
Before starting, make sure you have installed RStudio (if you are using R or Python) or the Pluto package (if you are using Julia).
In the kits
folder, you can find a set_kit function in both R and Julia languages - set_kit.R can also be used to setup a Python project.
To use the function, you first have to load it into your environment (run source("path/where/you/saved/set_kit.R") or include("path/where/you/saved/set_kit.jl")). When calling the function, you must provide two arguments: proj_path to specify where you want the project folder to be created, and proj_name to specify the name of the project folder inside proj_path. For set_kit.R you can also provide the lang argument, to choose between R and Python (defaults to "r"). Note that proj_path does not have to (arguably should not) be the same where set_kit is stored.
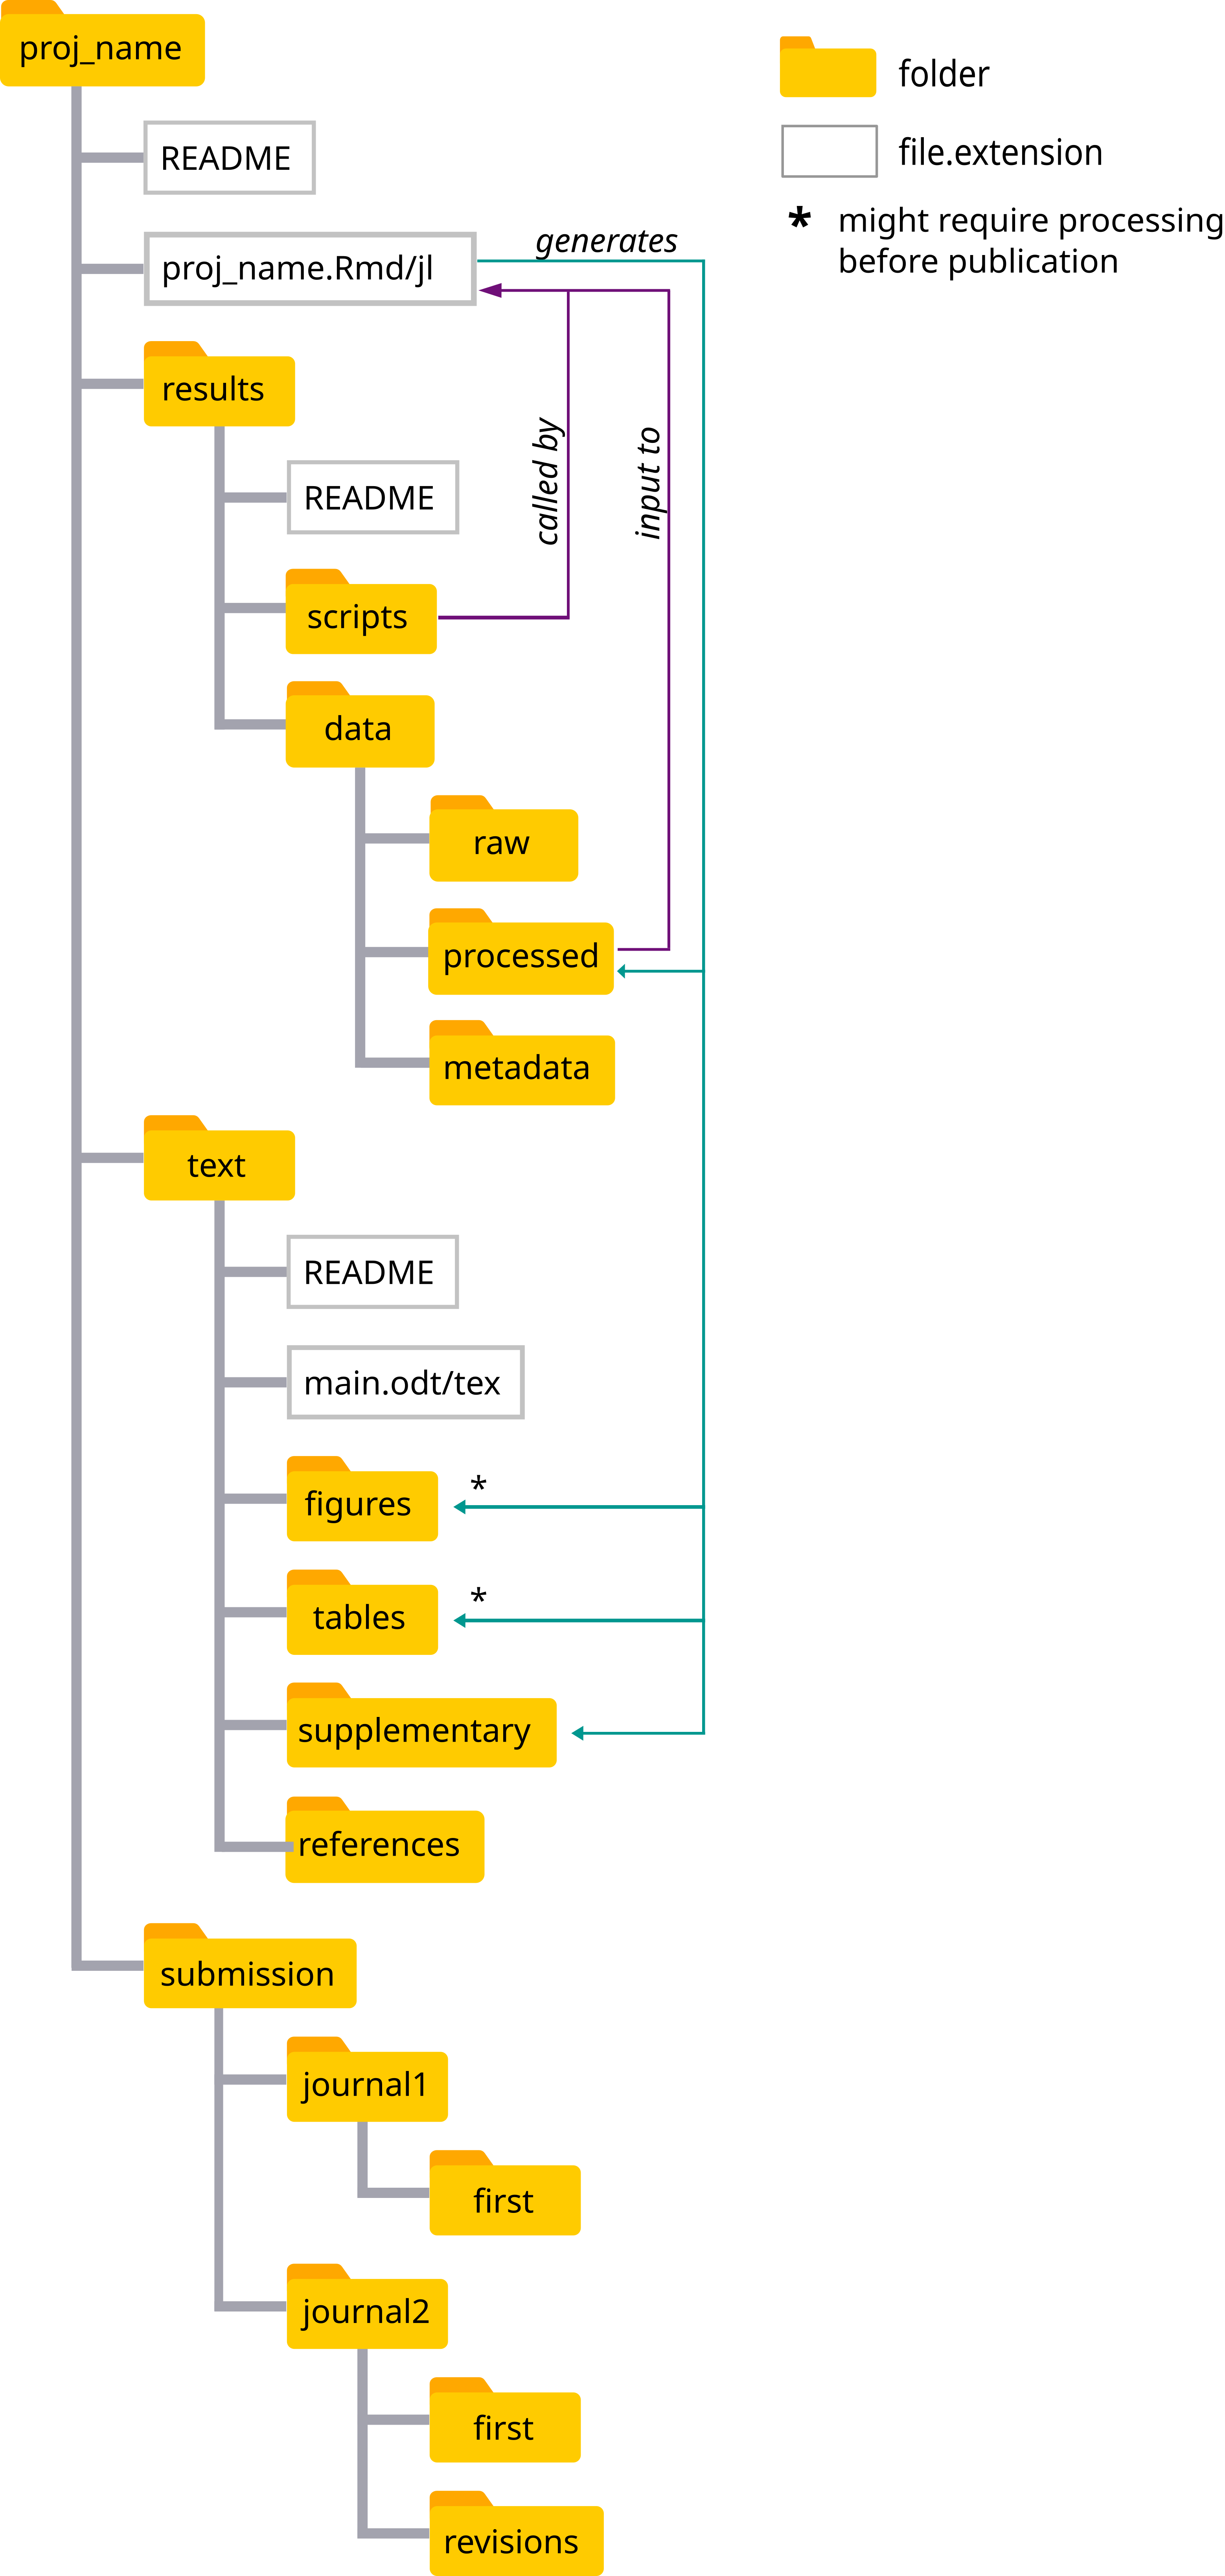
This will create:
- a computational notebook (an
RMarkdownorPlutofile) with a suggestion on how the contents of the file should be organized
- a file structure for easy access of relevant files and less wordy code (through relative paths)
The results folder contains all files related to data processing:
-
data/raw: your raw data files. These should protected against any change after the first storage -
data/processed: these are files generated by any processing the raw data and these are the ones used in the analysis. It can also be a copy of the raw data if that is already ready to use. Any processing of the raw data to generate the files here should be documented in the notebook. -
scripts: all code used to process the data, and which, for some reason or another is not included in the notebook (e.g. code is too cumbersome or not of upmost relevancy for comprehension).
The text folder contains the main text of the manuscript, folders containing the figures and tables (unformatted) to be included in it, as well as a folder with the supplementary material.
The submission folder contains the files specific to journal submissions, e.g. cover letters, submitted versions.
The set_kit functions also create the README.md files describing the contents of each of the main folders (i.e. proj_name, results, text, and submission).
In the examples folder, we provide examples of how the notebooks can be used.
In the following tutorials, we show you how to use our kits to set up projects and how to build your research workflow around computational notebooks.
https://zenodo.org/record/6531211/files/rpythonproject_tutorial.mp4?download=1
https://zenodo.org/record/6531211/files/juliaproject_tutorial.mp4?download=1
This starter-kit is an attempt to have the simplest, yet effective, reproducible workflow for people unfamiliar with the computational practices involved in it.
Once users are comfortable with this set up, they are encouraged to try more complex packages and/or practices, e.g.:
- Writing manuscripts in RMarkdown as demonstrated by Hartgerink, Hemberger, Rodriguez-Sanchez, and the rticles package
- Using workflows suggested by the workflowr and drake packages.
- Organizing your code as an R package: Hanß & Baldauf tutorial, Boettiger, and (Marwick)
- Trying out RStudio's Quarto.
I, Ludmilla Figueiredo, also acknowledge valuable mentoring from Dr. Johanna Havemann, as well as valuable feedback from members of the Ecosystem modeling group and the CCTB, at the University of Würzburg.


