![]()
The toolkit content is stored on the github servers under the OAD-Data-Science-Toolkit repository. Content is added by individual contributors by cloning the repository, making the changes, then creating a pull request. A description of the workflow can be found here. Github members of the astro4dev data science working group are automatically informed about the new pull request. The request is then verified before it is added to the main astro4dev repository.
Once the content has been uploaded to GitHub it has to be added to the MySQL database manually. This is done by a member of the astro4dev data science working group. The database is composed of many tables which can be divided into two types.
- Content tables
- Relational tables
The content tables have one word names, e.g. skills and contain information such as the title of the contribution and the link to where it is located on GitHub.
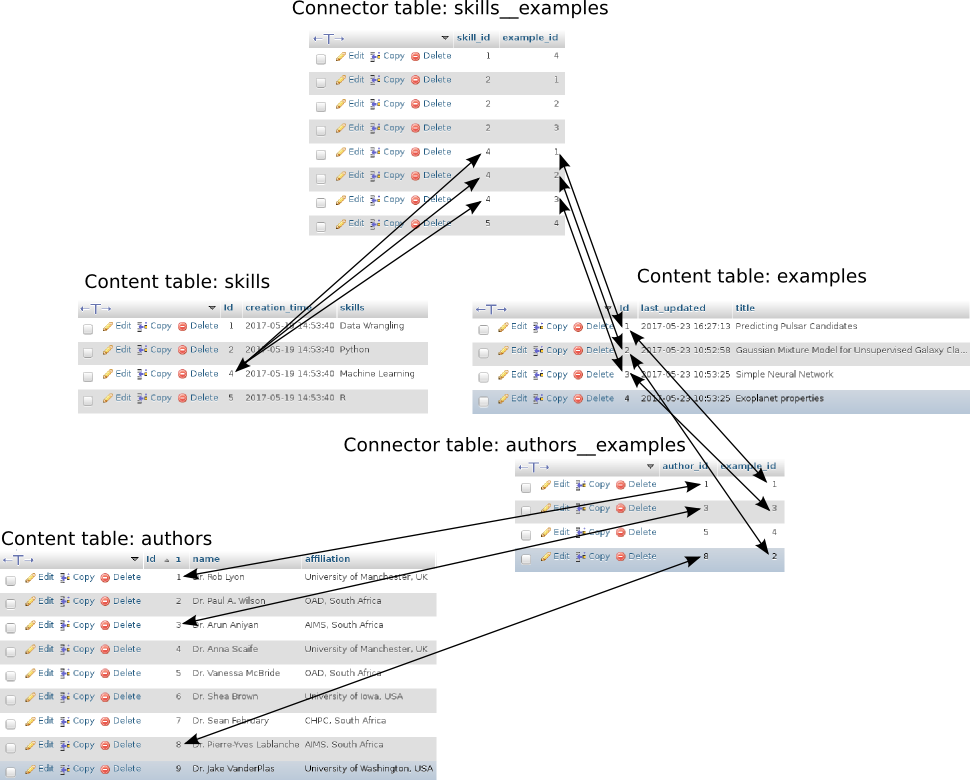
These tabels are required to connect the content tables in the database. Connector tables all contain a double underscore '__' so they can easily be identified. Connector tables drastically cut down the size of each individual table (look up relational databases) in the database. If we wish to connect two content tables, such as skills and examples we have to create an entry in the connector table skills__examples. Each time a new piece of content is added to GitHub a minimum of three tables have to be updated. Say an example has been added. For it to be properly added to the database, each table with "example" in it's name has to be updated. Here is an example of how the tables are connected.
This step happens without user intervention. Once the actual content is uploaded (Step 1) and the database has been updated (Step 2), the web interface to the toolkit will automatically reflect the new content.