This repository contains a .NET project that defines an ASP.NET API. You'll secure this API with Auth0 to practice making secure API calls from a client application.
Open the appsettings.json file in the HelloworldApplication folder. Its content should look like the following:
{
  "Logging": {
    "LogLevel": {
      "Default": "Information",
      "Microsoft": "Warning",
      "Microsoft.Hosting.Lifetime": "Information"
    }
  },
  "AllowedHosts": "*",
  "Auth0": {
    "Domain": "{DOMAIN}",
    "Audience": "{API_IDENTIFIER}"
  }
}-
Open the APIs section of the Auth0 Dashboard.
-
Click on the Create API button.
-
Provide a Name value such as Hello World API Server.
-
Set its Identifier to
https://api.example.comor any other value of your liking. -
Leave the signing algorithm as
RS256as it's the best option from a security standpoint. -
Click on the Create button.
View "Register APIs" document for more details.
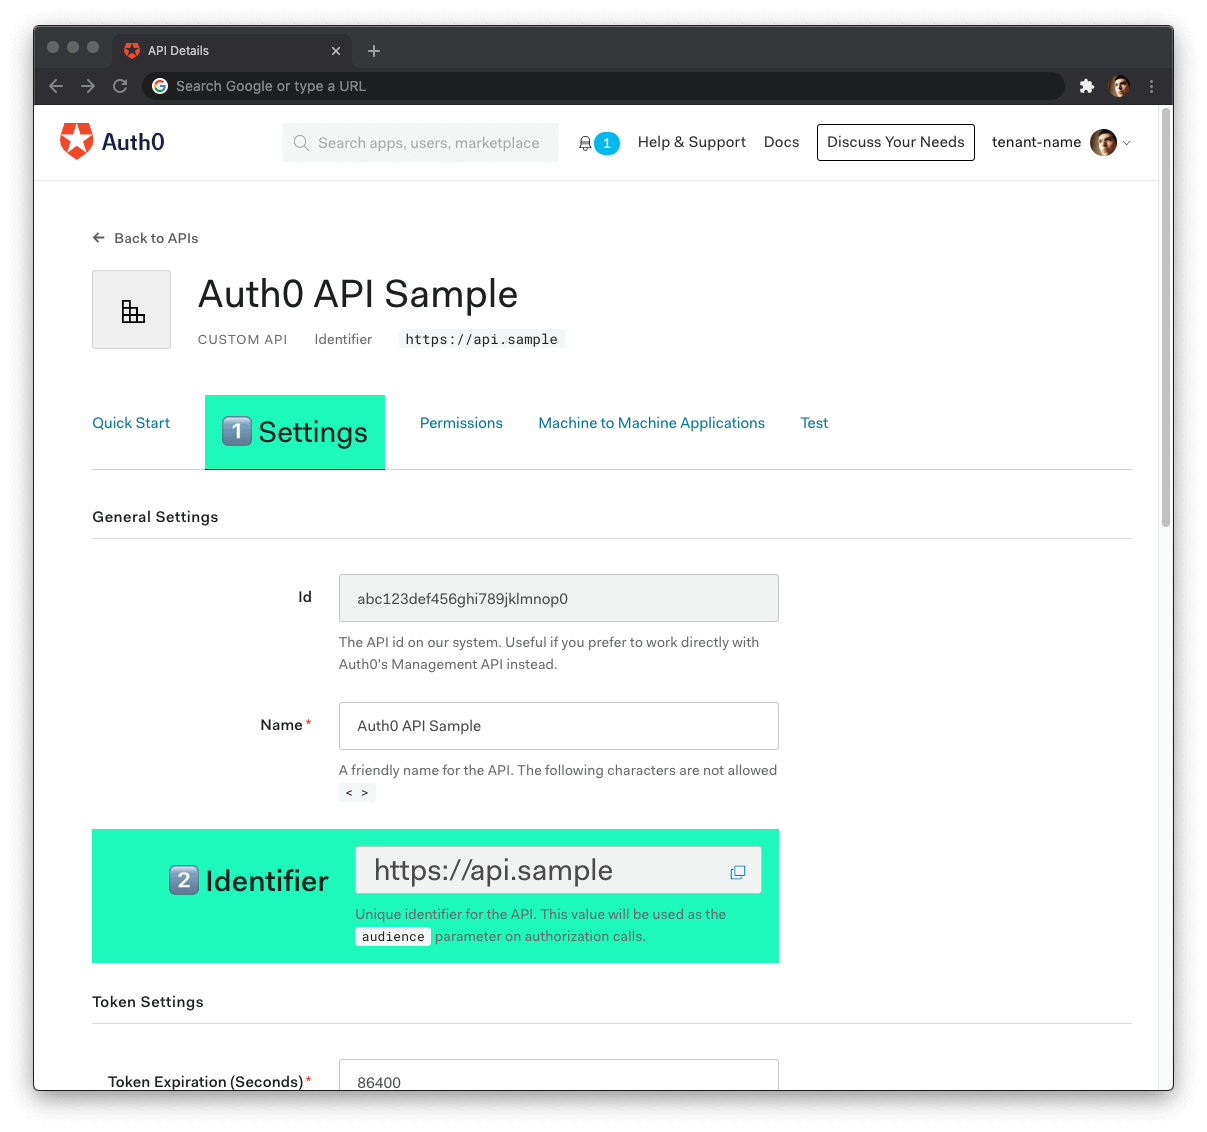
Head back to your Auth0 API page, and follow these steps to get the Auth0 Audience:
-
Click on the "Settings" tab.
-
Locate the "Identifier" field and copy its value.
-
Paste the "Identifier" value as the value of
Audienceinappsettings.json.
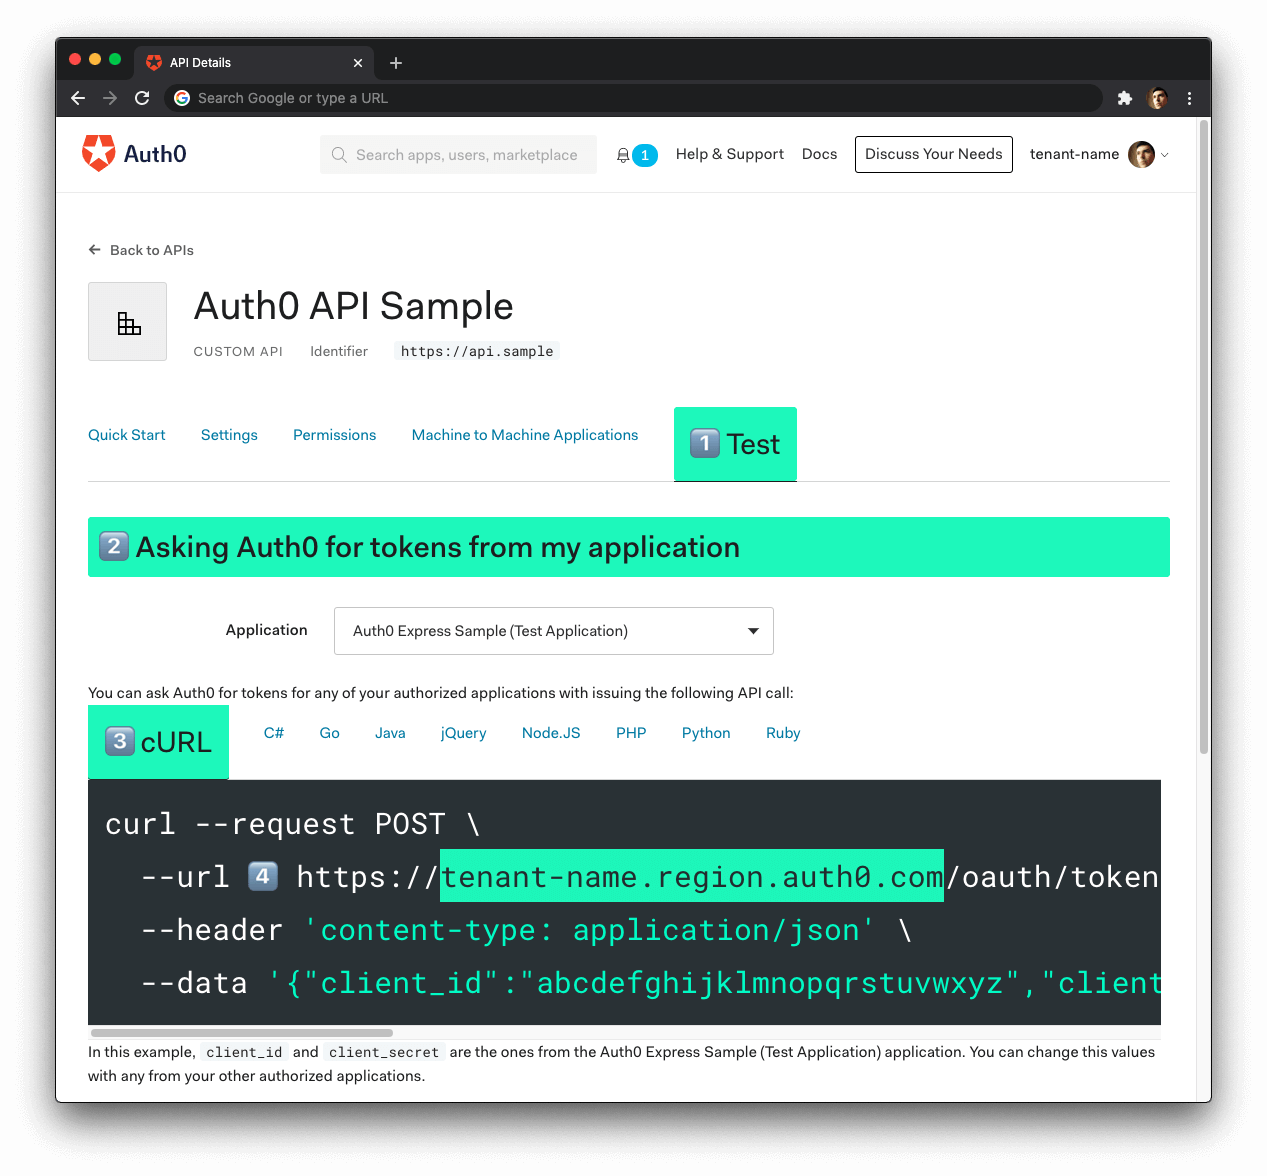
Now, follow these steps to get the Auth0 Domain value:
-
Click on the "Test" tab.
-
Locate the section called "Asking Auth0 for tokens from my application".
-
Click on the cURL tab to show a mock
POSTrequest. -
Copy your Auth0 domain, which is part of the
--urlparameter value:tenant-name.region.auth0.com. -
Paste the Auth0 domain value as the value of
Domaininappsettings.json.
Tips to get the Auth0 Domain
-
The Auth0 Domain is the substring between the protocol,
https://and the path/oauth/token. -
The Auth0 Domain follows this pattern:
tenant-name.region.auth0.com. -
The
regionsubdomain (au,us, oreu) is optional. Some Auth0 Domains don't have it.
With the appsettings.json configuration values set, run the API server by issuing the following command:
dotnet run --project ./HelloworldApplicationYou can get an access token from the Auth0 Dashboard to test making a secure call to your protected API endpoints.
Head back to your Auth0 API page and click on the "Test" tab.
Locate the section called "Sending the token to the API".
Click on the cURL tab of the code box.
Copy the sample cURL command:
curl --request GET \
  --url http://path_to_your_api/ \
  --header 'authorization: Bearer really-long-string-which-is-test-your-access-token'
Replace the value of http://path_to_your_api/ with your protected API endpoint path (you can find all the available API endpoints in the next section) and execute the command. You should receive back a successful response from the server.
You can try out any of our full stack demos to see the client-server Auth0 workflow in action using your preferred front-end and back-end technologies.
The /admin endpoint requires the access token to contain the read:admin-messages permission. The best way to simulate that client-server secured request is to use any of the Hello World client demo apps to log in as a user that has that permission.
You can use the Auth0 Dashboard to create an admin role and assign it theread:admin-messages permission. Then, you can assign the admin role to any user that you want to access the /admin endpoint.
GET /api/messages/publicStatus: 200 OK{
"message": "The API doesn't require an access token to share this message."
}🔐 Protected Endpoints: These endpoints require the request to include an access token issued by Auth0 in the authorization header.
GET /api/messages/protectedStatus: 200 OK{
"message": "The API successfully validated your access token."
}Requires the user to have the
read:admin-messagespermission.
GET /api/messages/adminStatus: 200 OK{
"message": "The API successfully recognized you as an admin."
}
