This file includes instructions for installing the Amazon IVS Auto-record to S3 web demo serverless infrastructure. The serverless infrastructure runs the backend code for this demo and is deployed using an AWS CloudFormation template: r2s3-serverless.yaml.
You can view the source code for the template in ./lambda, but to make deployable changes, you will need to update the r2s3-serverless.yaml CloudFormation template file.
There are two methods you can use to deploy this app:
These are instructions for using the command-line (AWS CLI tool or AWS Cloudshell) to deploy this app. We recommend having a text editor handy for making changes to commands and keeping track of the commands you need to run.
First, create an Amazon S3 bucket to upload the template file. Your S3 bucket name must be all lowercase characters or numbers, and unique across all of Amazon S3. Use dashes - or underscores _ instead of spaces. More information is available in the naming rules section.
To create the bucket, execute the following command:
aws s3api create-bucket --bucket <my-bucket-name> --region <my-region> --create-bucket-configuration LocationConstraint=<my-region>- Replace
<my-bucket-name>with the name you chose for your bucket. - Replace
<my-region>with the AWS Region where you want the bucket to reside. An example of an AWS region is:us-west-2.
Navigate to the amazon-ivs-auto-record-to-s3-web-demo/serverless folder and run the following command. Make sure to replace <my-bucket-name> with the name of the S3 bucket you created.
aws s3 cp ./r2s3-serverless.yaml s3://<my-bucket-name>/Execute the following command to deploy the serverless backend. Make sure to replace the following items:
- Replace
<title>with the title for your channel. - Replace
<subtitle>with the subtitle for your channel. - Replace
<my-region>with the AWS Region where your bucket resides. - Replace
<my-bucket-name>with the name of the S3 bucket you created.
aws cloudformation deploy \
   --s3-bucket <my-bucket-name> \
   --template-file r2s3-serverless.yaml \
   --stack-name IVS-R2S3 \
   --parameter-overrides Title=<title> \ Subtitle=<subtitle> \
   --capabilities CAPABILITY_IAM CAPABILITY_NAMED_IAM \
--region=<my-region>Execute the following command to see the outputs of the CloudFormation stack.
aws cloudformation describe-stacks --stack-name "IVS-R2S3"The command will return a set of information about the stack, including the output keys and values. You may need some of the following values to finish run the included client app.
- ApiGatewayStageUrl
- IvsChannelArn
- IvsStorageBucketName
- IvsStreamKey
- IvsChannelIngestEndpointOutput
Now that the serverless app is deployed, set up the client app included in the web-ui folder of this repository.
Important CloudFront information: Given the distributed nature of the CloudFront distribution used in the serverless backend, you may get 404 errors if you try to use it before CloudFront has completed its propagation to all EDGE locations. If you are experiencing errors with the application, wait a least an hour before you try to use the web-ui client on a new stack.
Complete the following steps to create an Amazon S3 bucket:
- Sign in to the AWS Management Console and open the Amazon S3 console.
- Choose Create bucket. The Create bucket wizard will open.
- In Bucket name, enter a name for your bucket.
- In Region, choose the AWS Region where you want your bucket to reside.
- In Bucket settings for Block Public Access, choose the Block Public Access settings that you want to apply to the bucket. As a best practice, it is recommended to block all public access.
When you finish, choose Create bucket to create the bucket.
Complete the following steps to upload the CloudFormation template to your S3 bucket.
- In the Buckets list, choose the bucket you created in the previous step.
- Choose Upload.
- In the Upload window, select and upload the
r2s3-serverless.yamlfile from theserverlessfolder. You can also drag and drop the file on the browser window - Scroll to the bottom of the page and choose Upload.
Complete the following steps to deploy the serverless backend:
- Sign in to the AWS Management Console and open the Amazon CloudFormation console.
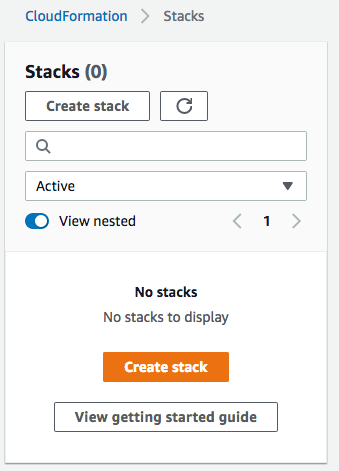
- Create a new stack by using one of the following options:
- Choose Create Stack. This is the only option if you have a currently running stack.
- Choose Create Stack on the Stacks page. This option is visible only if you have no running stacks.
- On the Specify template page, choose a stack template selecting the Template is ready option.
- Select the Upload a template file option.
- Click on the Choose file button and upload the
r2s3-serverless.yamltemplate from theserverlessfolder. - Click Next.
- In the Stack name field, enter IVS-R2S3.
- In the Title field, enter a title for your channel.
- In the Subtitle field, enter a subtitle for your channel.
- Click Next to advance to the Configure Stack Options / Advanced Options page, then click Next again to advance to the Review "Stackname" page.
- Review the settings and use the Edit button to make any changes you want to make.
- Scroll to the bottom of the page and select all of the checkboxes in the Capabilities and Transforms section.
- Click on Create stack to finalize the settings and create the stack. You will see the Stack Details page, and the Events / Status field will display the progress of the stack creation process.
Once the stack creation process is complete, the Events report will list all of the creation events and their status.
Once your stack is finished creating, click the Outputs tab. You may need some of the following values to finish run the included client app.
- ApiGatewayStageUrl
- IvsChannelArn
- IvsStorageBucketName
- IvsStreamKey
- IvsChannelIngestEndpointOutput
Now that the serverless app is deployed, set up the client app included in the web-ui folder of this repository.
Important CloudFront information: Given the distributed nature of the CloudFront distribution used in the serverless backend, you may get 404 errors if you try to use it before CloudFront has completed its propagation to all EDGE locations. If you are experiencing errors with the application, wait a least an hour before you try to use the web-ui client on a new stack.
The application uses a small amount of AWS resources even when not in active use. If you wish to uninstall the software to prevent ongoing AWS charges or just to clean up your AWS account, just follow these steps to remove the installed components.
- Sign in to the AWS Management Console and open the S3 Management Console.
- Select the bucket for the IVS software. (The bucket name is also viewable as the value of IVSStorageBucketName shown in Step 2, "...Outputs of the CloudFormation Stack".)
- Click on the Empty button, type "permanently delete" in the confirmation textbox and then click on the Empty button again.
- Sign in to the AWS Management Console and open the Amazon CloudFormation console.
- Select the stack you created in step # (default name IVS-R2S3).
- Click on the "Delete" button.
- Click on the "Delete stack" button.
- After you have deleted the CloudFormation stack, sign in to the AWS Management Console and open the Amazon IVS console.
- Click on the Recording configurations section.
- Select the recording configuration that you created on step #4.
- Click on the Delete button.
- Type Delete in the confirmation textbox.
- Click on the Delete button.
That's it! You have successfully removed all of the IVS R2S3 software components from your AWS account.
Here are some rules to follow when naming your Amazon S3 bucket:
- All lowercase letters or numbers, with dashes allowed (but no other special characters).
- Must begin and end with a letter or number.
- Must not be formatted as an IP address (for example, 192.168.5.4).
- Between 3 and 63 characters long.
- Unique across all of Amazon S3 (you may need a couple of tries to create a unique one). View all rules