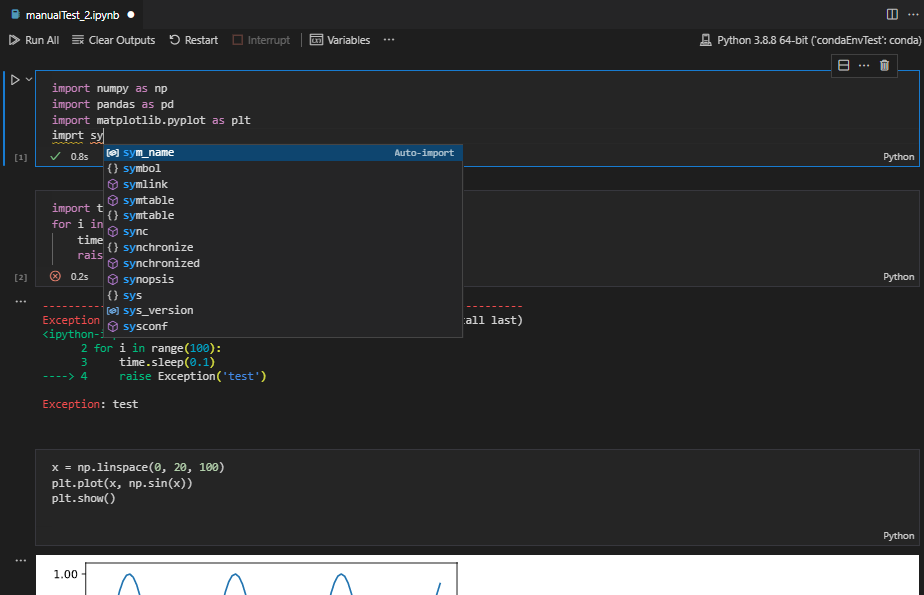
A Visual Studio Code extension that provides basic notebook support for language kernels that are supported in Jupyter Notebooks today. Many language kernels will work with no modification. To enable advanced features, modifications may be needed in the VS Code language extensions.
The Jupyter Extension includes the Jupyter Keymaps and the Jupyter Notebook Renderers extensions by default. The Jupyter Keymaps extension provides Jupyter-consistent keymaps and the Jupyter Notebook Renderers extension provides renderers for MIME types such as latex, plotly, vega, and the like. Both of these extensions can be disabled or uninstalled.
| Link | Description |
|---|---|
| File an issue | Report problems and suggest enhancements |
| Go to docs | Jupyter extension and data science in VS Code documentation, tutorials, and more |
| Discussions | Post questions, and engage in community discussions |
The Jupyter Extension uses the built-in notebook support from VS Code. This UI gives a number of advantages to users of notebooks:
- Out of the box support for VS Code's vast array of basic code editing features like hot exit, find & replace, and code folding.
- Editor extensions like VIM, bracket colorization, linters and many more are available while editing a cell.
- Deep integration with general workbench and file-based features in VS Code like outline view (Table of Contents), breadcrumbs and other operations.
- Fast load times for Jupyter notebook (.ipynb) files. Any notebook file is loaded and rendered as quickly as possible, while execution-related operations are initialized behind the scenes.
- Includes a notebook-friendly diff tool, making it much easier to compare and see differences between code cells, output and metadata.
- Extensibility beyond what the Jupyter extension provides. Extensions can now add their own language or runtime-specific take on notebooks, such as the .NET Interactive Notebooks and Gather
- While the Jupyter extension comes packaged with a large set of the most commonly used renderers for output, the marketplace supports custom installable renderers to make working with your notebooks even more productive. To get started writing your own, see VS Code's renderer api documentation.

If you would like to work with Python just make sure you're using the latest version of the Python Extension to enjoy the joint partnership of the Python and Juypter Extensions.
Please follow the Python Extension ReadMe instructions to get started and visit the Python Documentation to learn more about how the Python and Jupyter Extension are working together to provide an optimum Python notebooks experience.
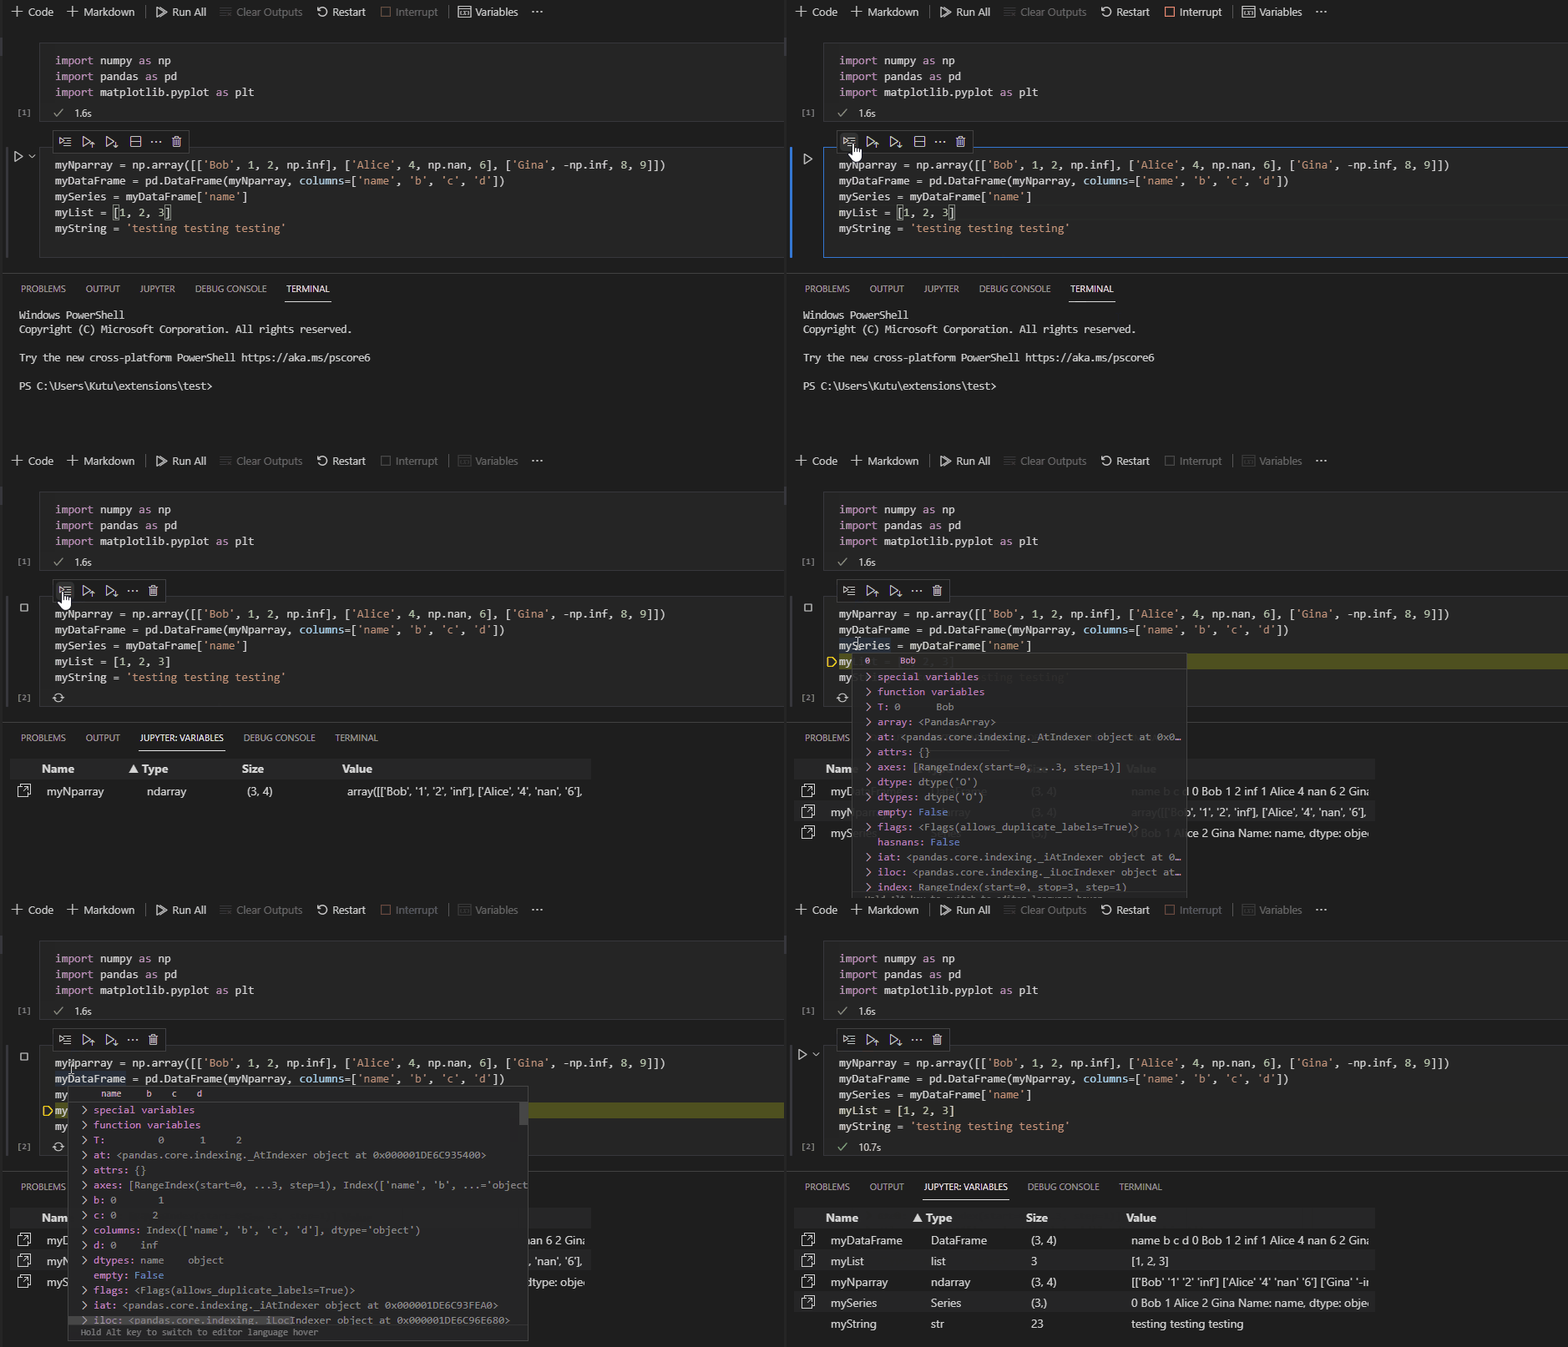
To start a lightweight debugging session and run code cells line by line in Python notebooks, press F10 while selecting a cell or click the Run by Line button on the cell toolbar. It also supports remote kernels.
Once you start a Run by Line session the Variable Explorer will appear and variable values will update as you iterate through your code.
To run through the rest of the cell during a Run by Line session hit Ctrl+Enter. To stop, you can click the interrupt button on the left side of the cell.
To set it up, follow the steps here.

The Jupyter Extension supports other languages in addition to Python such as Julia, R, and C#.
-
Step 1. Install VS Code
-
Step 2 If not working with Python, make sure to have a Jupyter kernelspec that corresponds to the language you would like to use installed on your machine.
-
Step 3. Install the Jupyter Extension
-
Step 4. Open or create a notebook file and start coding.
-
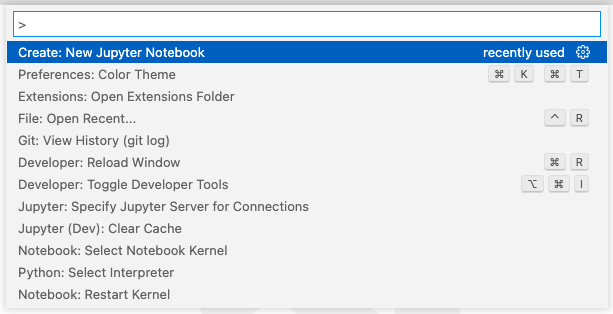
To create a new notebook open the command palette (Windows: Ctrl + Shift + P, macOS: Command + Shift + P) and select the command
"Jupyter: Create New Jupyter Notebook"
-
Select your kernel by clicking on the kernel picker in the top right of the notebook or by invoking the
"Notebook: Select Notebook Kernel"command.
-
Change the cell language by clicking the language picker or by invoking the
"Notebook: Change Cell Language"command.
Open the Command Palette (Command+Shift+P on macOS and Ctrl+Shift+P on Windows/Linux) and type in one of the following commands:
| Command | Description |
|---|---|
Jupyter: Create New Jupyter Notebook |
Create a new blank Jupyter Notebook |
Notebook: Select Notebook Kernel |
Select or switch kernels within your notebook |
Notebook: Change Cell Language |
Change the language of the cell currently in focus |
Jupyter: Export to HTML Jupyter: Export to PDF |
Create a presentation-friendly version of your notebook in HTML or PDF |
To see all available Jupyter Notebook commands, open the Command Palette and type Jupyter or Notebook.
Learn more about the rich features of the Jupyter extension:
-
IntelliSense: Edit your code with auto-completion, code navigation, syntax checking and more.
-
Jupyter Notebooks: Create and edit Jupyter Notebooks, add and run code/markdown cells, render plots, create presentation-friendly versions of your notebook by exporting to HTML or PDF and more.
The extension is available in multiple languages: de, en, es, fa, fr, it, ja, ko-kr, nl, pl, pt-br, ru, tr, zh-cn, zh-tw
-
If you have a question about how to accomplish something with the extension, please ask on Discussions. Our wiki can be a source of information as well.
-
Any and all feedback is appreciated and welcome! If you come across a problem or bug with the extension, please file an issue.
- If someone has already filed an issue that encompasses your feedback, please leave a 👍/👎 reaction on the issue.
-
Contributions are always welcome, so please see our contributing guide for more details.
-
If you're interested in the development of the extension, you can read about our development process
The Microsoft Jupyter Extension for Visual Studio Code collects usage data and sends it to Microsoft to help improve our products and services. Read our privacy statement to learn more. This extension respects the telemetry.enableTelemetry setting which you can learn more about at https://code.visualstudio.com/docs/supporting/faq#_how-to-disable-telemetry-reporting.
This project may contain trademarks or logos for projects, products, or services. Authorized use of Microsoft trademarks or logos is subject to and must follow Microsoft's Trademark & Brand Guidelines. Use of Microsoft trademarks or logos in modified versions of this project must not cause confusion or imply Microsoft sponsorship. Any use of third-party trademarks or logos are subject to those third-party's policies.