Home for qualitative spectral typing GUI that follows the Cruz Method as proposed in <Cruz et al. (2017)>. Currently this GUI spectral types L field, L beta and L gamma brown dwarfs. This code is written in Python 3.6, and does not yet have functionality for Python 2 and works with input fits files of NIR spectra.
To install clone this repository:
$ git clone https://github.com/BDNYC/UltracoolTypingKit
$ cd UltracoolTypingKit/
$ mkdir new_types
UltracoolTypingKit (UTK) requires Python 3.5 to run properly. We recommend running in an environment to ensure usage of the correct version of Python and all the necessary modules.
$ conda create --name UTK python=3.5 ipython
$ source activate UTK
$ pip install -r requirements.txt
This code currently requires this directory tree to run properly:
UltracoolTypingKit/
├── TypeFinder.py
├── new_types/
│   └── saves selected spectral type image here
├── spectra/
│   ├── store T0 and M9 spectral standards here
│   └── nir/
│       ├── store NIR spectra here
│       └── store NIR spectral standards (Table 9, Cruz et al. 2017) here
└── templates/
    └── store Cruz2017_Templates.hdf5 here
If you aren't already in the UTK environment, activate UTK.
$ source activate UTKUTK relies on an interactive backend and works best with TkAgg. ipython pylab uses this as its default.
$ ipython --pylab
To run UTK on one spectrum, use the following input.
from TypeFinder import *
typing_kit("spectra/nir/spectra_file.fits")
To run many spectra consecutively, the following wrapper can be helpful. It will print out the file name and wait for the user to press enter before continuing.
from TypeFinder import *
f = open("list_of_file_names.txt", "r")
lines = f.read().splitlines()

for file in range(len(lines)):
   ...:     print(lines[file])
   ...:     typing_kit("spectra/nir/"+lines[file])
   ...:     input("Press Enter to continue...")
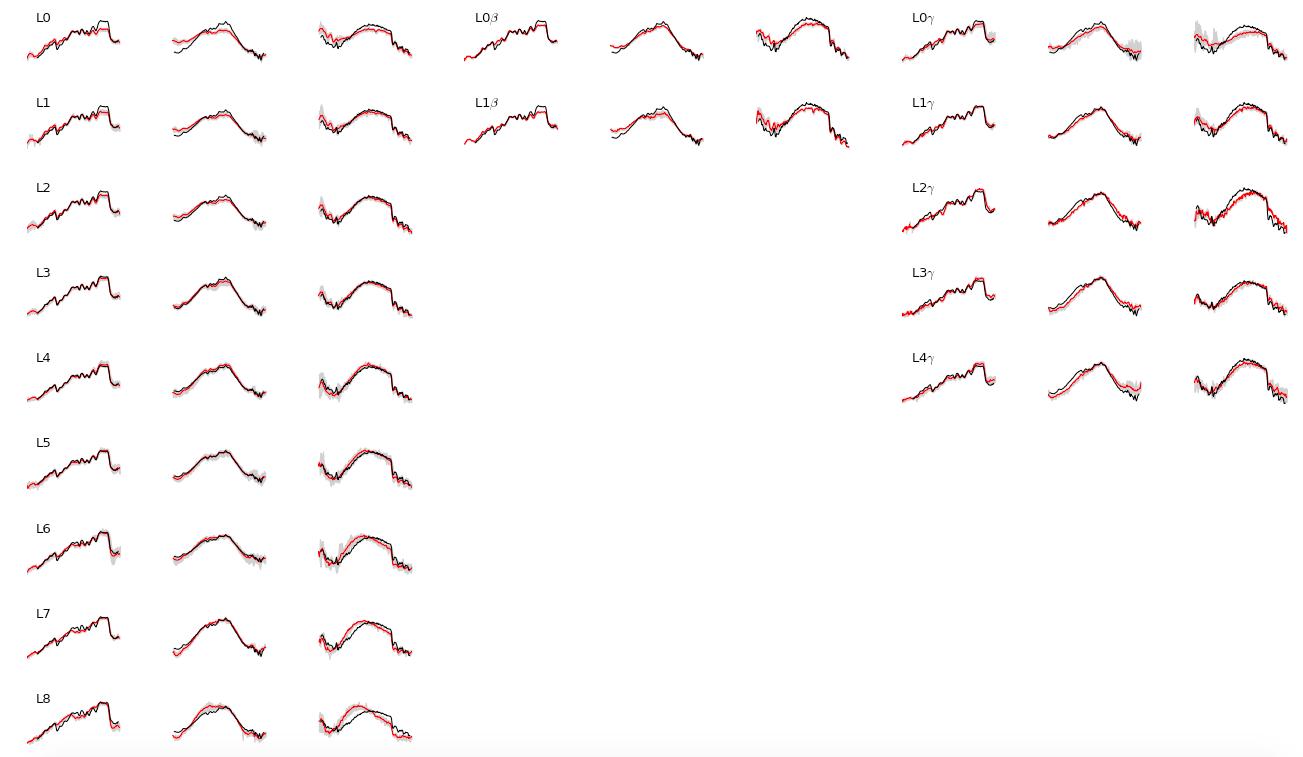
After about 10 seconds, this initial window will pop up:

Your input spectra will be shown in black, over the Cruz et al. (2017) J-H-K band templates shown in red. The initial grid shows each spectral type band-by-band.
To view a specific spectral type in more detail, key in the number you would like to see while your mouse is over the grid. To see a field object, press the corresponding spectral type number key on your keyboard.
For example, for an L3 press:
3
To see a beta object, press the control key and the corresponding number. (Make sure to press control first)
For example for an L1-beta press:
ctrl + 1
To see a gamma object, press the alt key and the corresponding number. (Make sure to press alt first)
For example for an L2-gamma press:
alt + 1
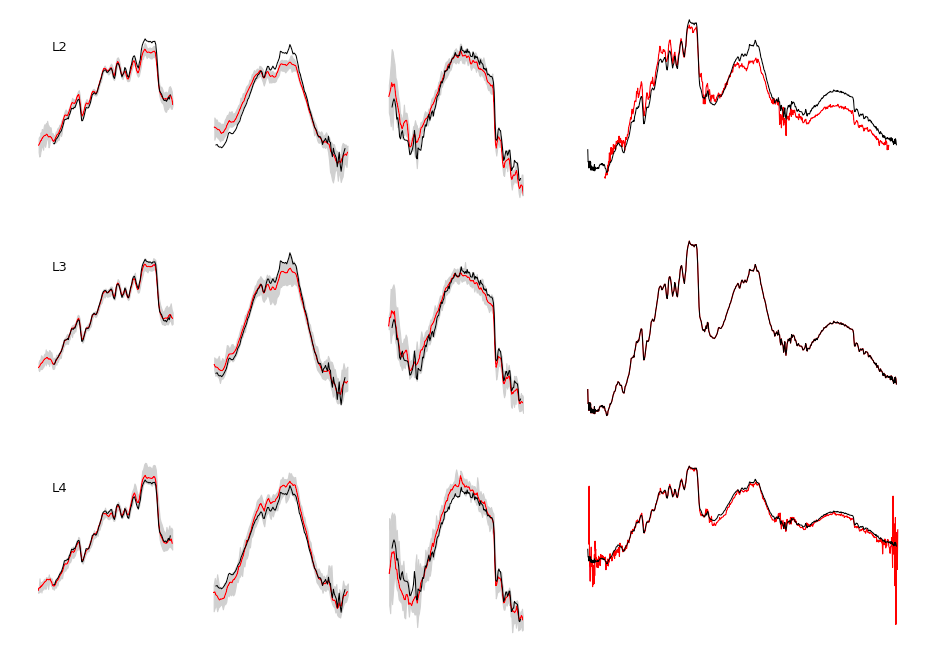
After keying in your selection, a window centered on your spectral type will pop up:

This grid shows your selected spectral type bracketed by it's neighboring types, both band-by-band and across the entire NIR spectrum at once in the right-hand column, following the same color scheme as the initial grid. The templates used in for the entire NIR spectrum follow the templates specified in Cruz et al. (2017).
If you keyed in a spectral type and you want to see a different one, press q to close the window containing your initial selection and to return to the initial grid window.
Once you have settled on a spectral type, you can save the image of the selected type by pressing w. This will create a csv file in the folder new_types/ that will save your input file name in column 1 and your selected spectral type in column 2. The csv file is named XX-XX-XXXX_SpecTypes.csv, XX represents today's date in day-month-year format. As you spectral type more objects, they will append as new rows to the csv file.
Pressing w will also save an image of the current plot view as a .png to the new_types/ folder with the name of your input spectrum file and your selected spectral type appended after an underscore, for example, like this for an L0: InputFileName_L0.png
You can then close the selection window by pressing q and then the grid window by again pressing q.
Copyright 2017 Ellianna Schwab, Kelle Cruz
If you make use of this code, please cite Cruz et al. (2017) and the zenodo DOI for the code,