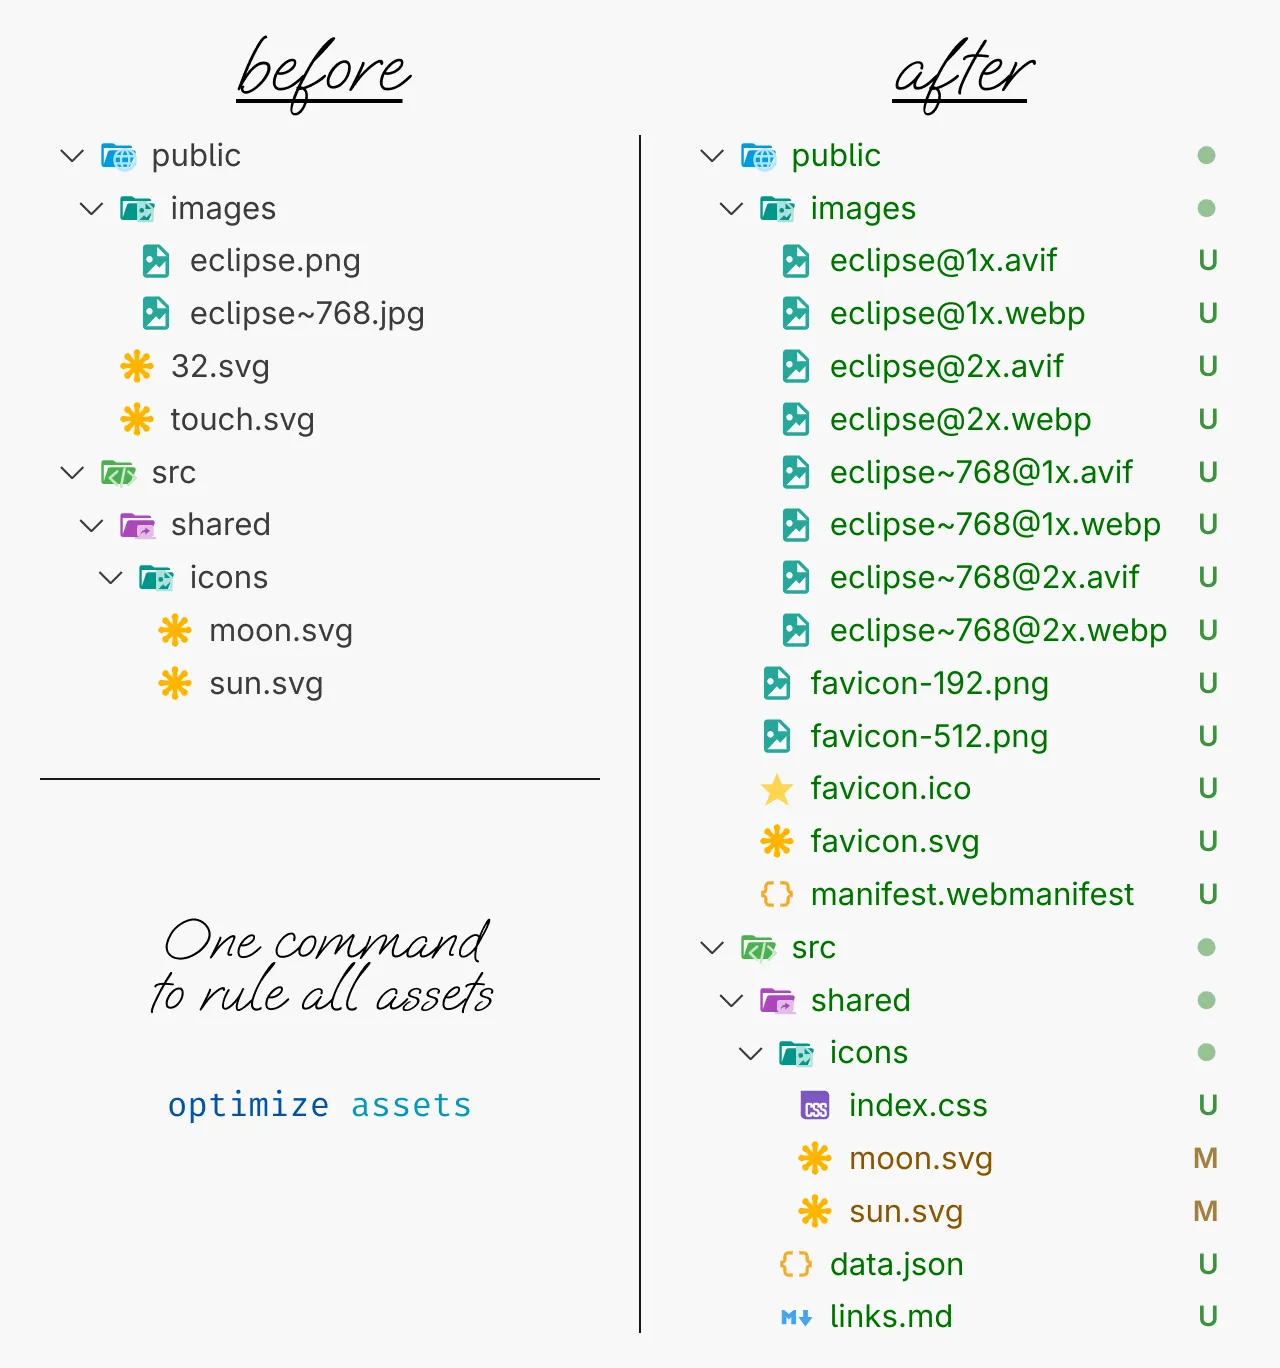
🪄 Conjure images, icons and favicons for your frontend project.

In most frontend projects, you have to perform the same and rather boring actions with images between exporting them from Figma and deploying the project to the server. Spare yourself from this routine!
Conjure is a command line utility for optimizing vector images, converting raster images to modern formats for different pixel densities and also preparing favicons.
To install Conjure, you need to have Node.js installed on your machine. Then you can install in your project using pnpm (for npm, just remove the first p):
pnpm add @firefoxic/conjure -Dor globally
pnpm add @firefoxic/conjure -gConjure is invoked via the command line:
-
with globally installation:
conjure <command> [options]
-
with locally installation (in a project):
pnpm exec conjure <command> [options]
-
without installation:
pnpm dlx @firefoxic/conjure <command> [options]
-
images— Optimize SVGs and convert raster images to modern formats (Avif and Webp by default). -
icons— Optimize SVG icon files. -
favicons— Convert the original SVG favicons (expect at least one oftouch.svg,32.svg, and16.svg) to optimized vector and all raster favicons, including ICO format and necessary PNG and Webp, and also generate a webmanifest (read this article about favicons by Andrey Sitnik). -
all— Run all the above commands.Notice: Individual commands handle the contents of the specified directory. But the general
allcommand expects the path to the directory containing theimages,iconsandfaviconsdirectories (see examples below).
- Type:
String - Default:
src/shared - Description: Path to the directory containing raw files
- Type:
String - Default: the value of
--inputDirectory - Description: Path to the directory where processed files will be placed
- Type:
String - Default:
public - Description: Path to the directory with the static assets (e.g. favicons)
- Type:
Number - Default:
2 - Description: Pixel density in dppx of the raw raster images (
0works like1, but without adding the density suffix to the filename)
- Type:
String - Default:
avif,webp - Description: Comma-separated list of formats for output raster images
- Type:
Boolean - Default:
false - Description: Add the original raster format to the list of output formats
- Type:
Boolean - Default:
false - Description: Remove the original raster files after successful processing
- Type:
Boolean - Default:
false - Description: Create JSON and JS files with metadata of the raster images and CSS file for the icons
When processing raster images, the
-m(--addMetaData) flag enables generation of metadata files in JSON and JS formats. Metadata files are convenient for generating thepicturetag. For macro of templating engines (like Nunjucks) a JSON file is more suitable. And for a component of frameworks (especially Vite-based frameworks such as Astro) JS file is more convenient, because its dynamic imports when building a project will trigger hashing of image files and return paths to new files.
-
In the
source/imagesfolder, optimize all SVGs and convert the raster images toavifandwebpformats at the original size for2xpixel density and at a reduced size for1xpixel density; and after processing the raster images, delete their original files and generate JSON and JS files with metadata:conjure images --inputDirectory=source/images --removeOrigin -m
If you have finally managed to give up old formats (such as JPG and PNG) and use only modern Avif and Webp, it is better to export raster layers from Figma only to PNG. JPG will only add artifacts on them. Avoid unnecessary quality loss.
-
Take all vector and raster images from the
raws/imagesfolder; optimize vector images and put them insource/images; convert raster images towebpformat and to the original format, optimizing them for2xand1xpixel densities, placing these results also insource/images; when processing is completed, delete the original raster images fromraws/images:conjure images -i raws/images -o source/images -f webp -a -r
-
Optimize SVG icons in the default
src/shared/iconsfolder and create the CSS file that contain custom properties with paths to the icons:conjure icons -m
-
In the
assetsfolder, convert filestouch.svg,32.svg(and optionaly16.svg) to:favicon.icoin size32×32(and optionaly with second layer in size16×16)favicons/icon.svg— optimized version of32.svg(ortouch.svgif32.svgand16.svgare missing)favicons/icon-180.pngin size180×180for old iPhonesfavicons/icon-192.pngandfavicons/icon-192.webpin size192×192favicons/icon-512.pngandfavicons/icon-512.webpin size512×512manifest.webmanifestwith thenameanddescriptionfields from yourpackage.jsonand theiconsfield for the192and512filesLinks.md— advice on code of links for generated files, moving files, and fixing paths to files.
conjure favicons -p assets
- The most optimal composition of source files is a couple of files:
32.svg— the drawing is adjusted to a32×32pixel grid, may transparent areas such as rounded corners of the background;touch.svg— the drawing is prepared for large touch icons with solid background without rounding, with margins much larger than32.svg.
- If you don't have a variant specially prepared by the designer for the pixel grid size
16×16, then don't create a file16.svgfrom variants of other sizes — it will only increase the weight of the finalfavicon.ico. - If you don't have a
32×32variant, but you have a16×16variant, there is no need to make a32.svgfile,conjurewill make all the variants for you. - If you have only one variant and it's not
16×16, it doesn't matter what you name the file,32.svgortouch.svg(as long as it's not16.svg) — a file with either of these two names will be used byconjureto generate the entire set of favicons.
-
Run all three special commands with default settings, but deleting the original raster images, i.e.:
- run
conjure imagesin thesrc/shared/imagesfolder with deleting the original raster images and generating JSON and JS files with metadata, - run
conjure iconsin thesrc/shared/iconsfolder, - run
conjure faviconsin thepublicfolder,
conjure all -r -m
- run


