Continuing the 15 APIs in 15 Days challenge, I think we'll stick with the social media theme for now and check out the Instagram API.
First though, two things to consider:
- If you're unfamiliar with APIs, read this first to familiarize yourself with the concept.
- Install Postman, which allows you to access API endpoints without having to write an app.
Like the Twitter API we looked at yesterday, the Instagram API also requires authenticating (proving you're a valid Instagram member) before you can use it. Where the Twitter API uses OAuth 1.0 though, the Instagram API uses OAuth 2.0. We'll see how that differs in practice.
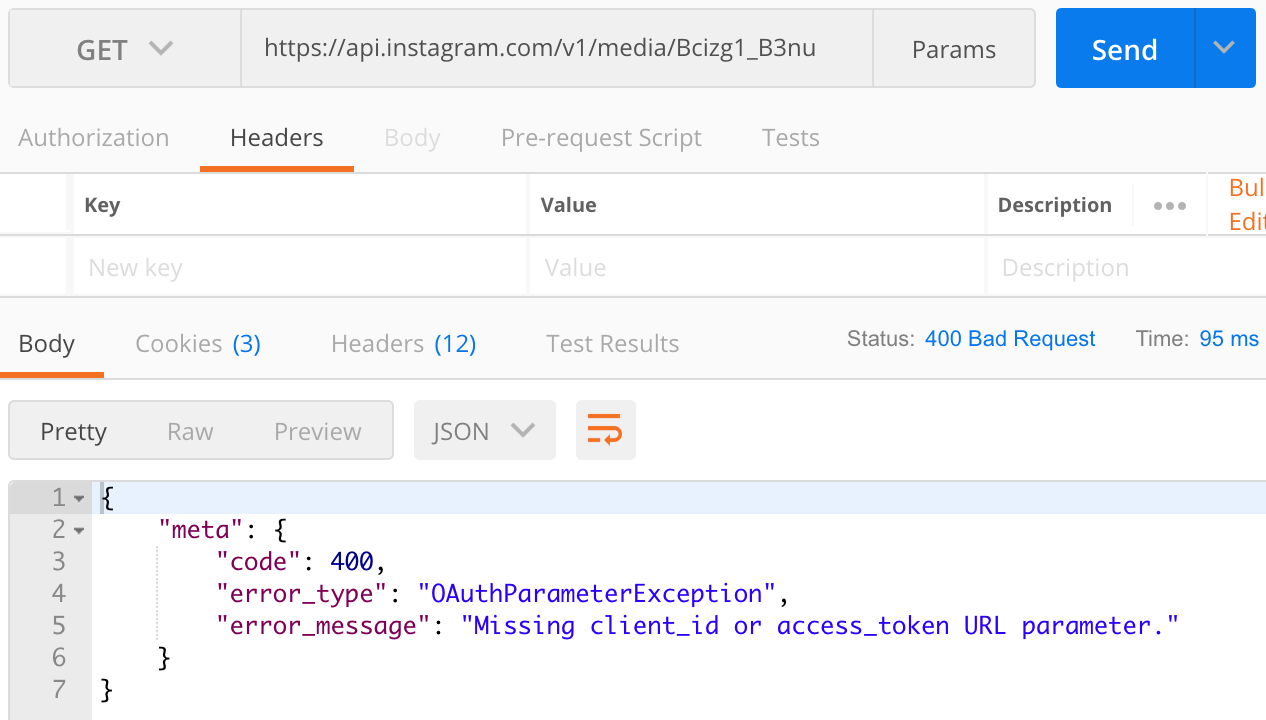
Every request requires the auth access token be included as a query parameter, and trying to make a request (like requesting metadata on an image) without one returns an error instead.
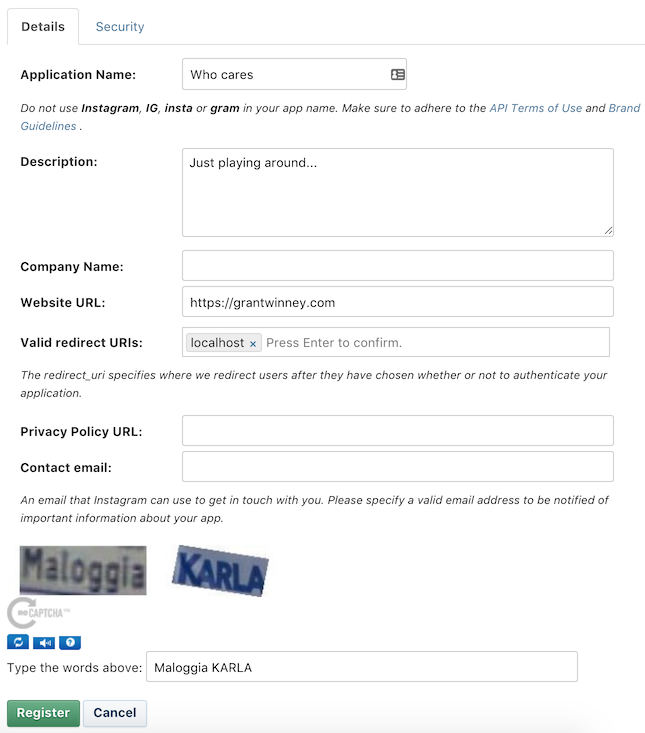
Starting at the start, click the "Register Your Application" button, and then on the next page click "Register a New Client". Normally we'd be using the API for a legitimate app we're trying to create, and this would be our chance to tell Instagram about it. Instead, just fill in a bunch of bogus details - we're just experimenting after all.
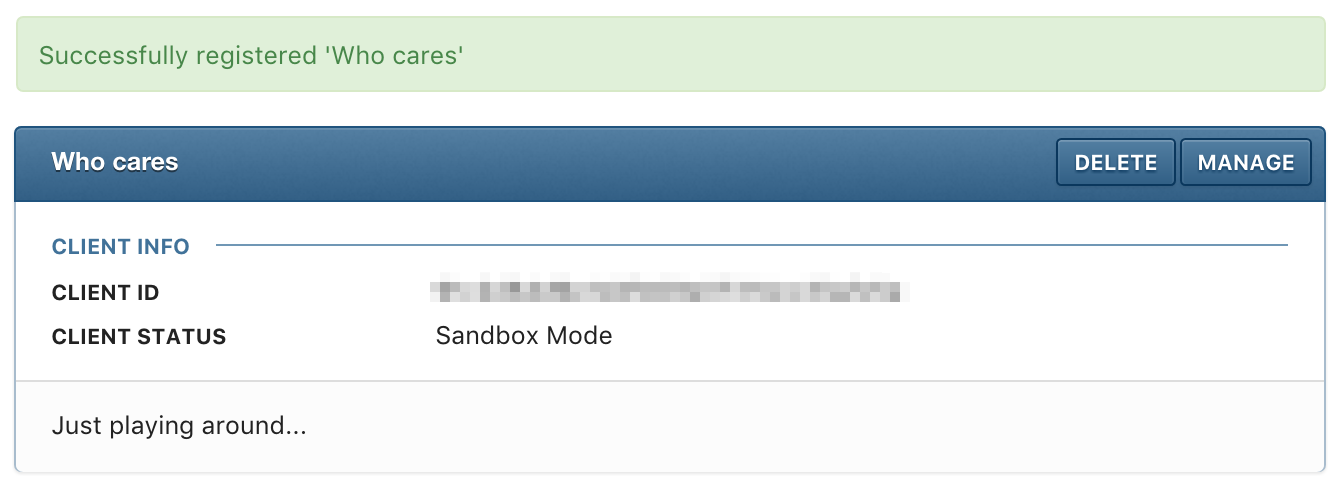
If all goes well, you should be taken to a screen that confirms your "app" has been setup, and you're presented with a "client id". Hang on to that. If your browser closes or something, just go back to the Manage Clients dashboard.
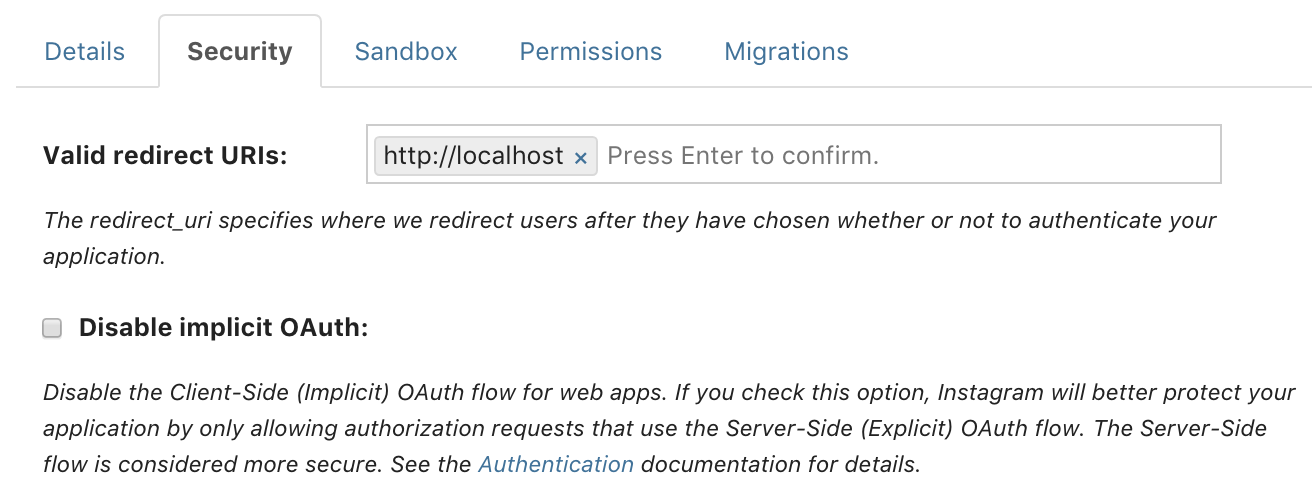
There's a more secure way to generate an access token, but we don't need to do that for our simple experimenting. So go back to the Manage Client screen and uncheck the "Disable implicit OAuth" checkbox.
Doing this allows us to generate an access token in an easier way without getting an error like this one:
{
    "error_type": "OAuthForbiddenException",
    "code": 403,
"error_message": "Implicit authentication is disabled"}Having the client id is only halfway there. If you try to use that in an API call, you'll just get an error like "The access_token provided is invalid". Because well... it's invalid.
The next step is to pass the client id to Instagram's authorization url, in order to generate an access token. The redirect URI has to match what you entered when you created your "app", otherwise the only response you'll get is something like this, which thankfully is at least very specific.
{
    "error_type": "OAuthException",
    "code": 400,
    "error_message": "Redirect URI does not match registered redirect URI"}
So plug the correct values into the following URL (grab the client id from the Manage Client screen) and just paste it into your browser address bar. If you followed what I did and just used "localhost", then replace REDIRECT-URI with "http://localhost".
For a legitimate app, you'd want to use a legitimate website you control for the REDIRECT-URI, so you could read the return value and do what you need with it. In our case, all we want is to have the code pasted in our address bar, so it's perfectly fine to tell Instagram to just redirect to localhost... even if you don't have a website running on your machine.
Your browser should be directed to the URI you specified, and it should have your access token appended after it. (I removed mine below.)
http://localhost/#access_token=<your_access_token>
Now pick a photo - one you've uploaded or someone else's that's public - and try accessing its metadata. I don't have too many photos on Instagram, so I picked one I took of our garden over the summer.
<script async defer src="//platform.instagram.com/en_US/embeds.js"></script>Snap peas in our garden, summer 2017
A post shared by Grant (@grantwinney) on Dec 10, 2017 at 5:39pm PST
Here's what I put into Postman, and the response I got back. Pretty cool, huh? There's a ton of info, from the caption and numbers of likes and comments, to stuff I can't see through the website like URLs for various image sizes.
GET https://api.instagram.com/v1/media/shortcode/Bcizg1_B3nu?access_token=<my_access_token>
{
    "data": {
        "id": "1667121369441597934_3657782666",
        "user": {
            "id": "3657782666",
            "full_name": "Grant",
            "profile_picture": "https://instagram.fymy1-2.fna.fbcdn.net/t51.2885-19/11906329_960233084022564_1448528159_a.jpg",
            "username": "grantwinney"
        },
        "images": {
            "thumbnail": {
                "width": 150,
                "height": 150,
                "url": "https://scontent.cdninstagram.com/t51.2885-15/s150x150/e35/25015742_1019539261522471_6659134500804493312_n.jpg"
            },
            "low_resolution": {
                "width": 320,
                "height": 320,
                "url": "https://scontent.cdninstagram.com/t51.2885-15/s320x320/e35/25015742_1019539261522471_6659134500804493312_n.jpg"
            },
            "standard_resolution": {
                "width": 640,
                "height": 640,
                "url": "https://scontent.cdninstagram.com/t51.2885-15/s640x640/sh0.08/e35/25015742_1019539261522471_6659134500804493312_n.jpg"
            }
        },
        "created_time": "1512956375",
        "caption": {
            "id": "17899911943100617",
            "text": "Snap peas in our garden, summer 2017",
            "created_time": "1512956375",
            "from": {
                "id": "3657782666",
                "full_name": "Grant",
                "profile_picture": "https://instagram.fymy1-2.fna.fbcdn.net/t51.2885-19/11906329_960233084022564_1448528159_a.jpg",
                "username": "grantwinney"
            }
        },
        "user_has_liked": false,
        "likes": {
            "count": 0
        },
        "tags": [],
        "filter": "Normal",
        "comments": {
            "count": 0
        },
        "type": "image",
        "link": "https://www.instagram.com/p/Bcizg1_B3nu/",
        "location": null,
        "attribution": null,
        "users_in_photo": []
    },
    "meta": {
        "code": 200
    }
}Once you're authorized, you can make a lot of other requests as defined in their API Endpoints documentation.
Well, me. You can request information about the current user attached to the access token:
GET https://api.instagram.com/v1/users/self?access_token=<my_access_token>
{
    "data": {
        "id": "3657782666",
        "username": "grantwinney",
        "profile_picture": "https://instagram.fsaw1-7.fna.fbcdn.net/t51.2885-19/11906329_960233084022564_1448528159_a.jpg",
        "full_name": "Grant",
        "bio": "",
        "website": "https://grantwinney.com/",
        "is_business": false,
        "counts": {
            "media": 7,
            "follows": 21,
            "followed_by": 16
        }
    },
    "meta": {
        "code": 200
    }
}I'll try an example using the previous photo's ID (1667121369441597934_3657782666) which got returned along with the rest of the image metadata.
GET https://api.instagram.com/v1/media/1667121369441597934_3657782666/likes?access_token=<my_access_token>
{
    "data": [
        {
            "id": "3657782666",
            "username": "grantwinney",
            "full_name": "Grant",
            "profile_picture": "https://instagram.frir1-1.fna.fbcdn.net/t51.2885-19/11906329_960233084022564_1448528159_a.jpg"
        }
    ],
    "meta": {
        "code": 200
    }
}
Hey, look at this. Someone liked my photo! Oh. It's me.
<iframe src="https://giphy.com/embed/OcZp0maz6ALok" width="200" height="200" frameBorder="0" class="giphy-embed" allowFullScreen></iframe>What happens if we try to delete a "Like" though? Well, then we get an error message like this one, because we didn't explicitly request permission to do that when we got the access token.
DELETE https://api.instagram.com/v1/media/1667121369441597934_3657782666/likes?access_token=<my_access_token>
{
    "meta": {
        "code": 400,
        "error_type": "OAuthPermissionsException",
        "error_message": "This request requires scope=likes, but this access token is not authorized with this scope. The user must re-authorize your application with scope=likes to be granted this permissions."
    }
}
Instagram calls them "scopes", but it's the same as permissions - you don't want everyone to be able to do everything, so you only give them what they need.
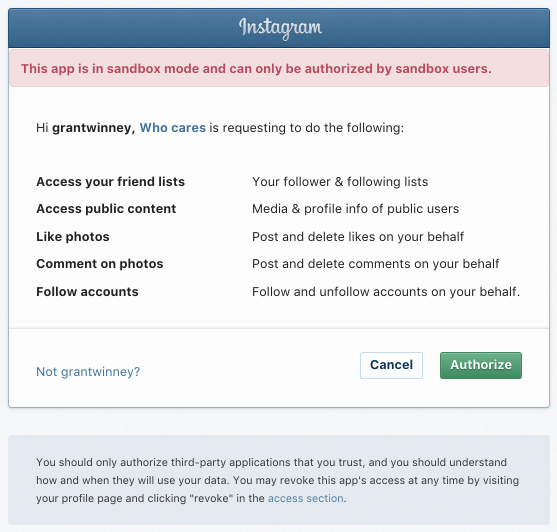
Let's try using the authorization url in the browser again, but this time with additional scopes tacked on to the end of it. In fact, I'm just going to request everything.
https://api.instagram.com/oauth/authorize/?client_id=<my_client_id>&redirect_uri=http://localhost&response_type=token&scope=public_content+follower_list+comments+relationships+likes
Press the "Authorize" button and you'll be redirected to localhost again. The address bar should have the same token as before, so go back to Postman and try deleting the "Like" again. When I did, it worked this time. I checked the image on instagram.com to be sure, and it was gone.
{
    "data": null,
    "meta": {
        "code": 200
    }
}I gotta say, both the Twitter API and the Instagram API are very well documented. They have nice guides that step you through everything you need to do, and they're pretty easy to read. Documentation is usually the thing that suffers first on a lot of projects.
I like that Instagram has a concept of scopes so you only grant the required access. I'm confused why the scopes page says "(applications no longer accepted)" next to every scope except basic though. It sounds like all the scopes work fine in sandbox mode or for personal apps, but for anything else being used in production, your app needs to be reviewed and approved for the requested permissions, which depends on how your app is being used.
I guess this hands-on approach leads to more secure apps, but then it's got to be time-consuming to review them all... which is probably why they're not accepting applications! Kinda weird. It really seems to shut the door on anyone creating applications that build on the Instagram platform.

