| title | description | image | authorUsername |
|---|---|---|---|
Midjourney AI art tutorial: Midjourney an interactive Bot to generate images from text. |
Midjourney is an AI bot that generates images from text. Enter some text to describe an image and let Midjourney create the image for you. |
yattishr |
There are two ways to experience the tools: the Midjourney Bot, which you can use to generate images, and the web app at https://www.midjourney.com/, where you can find a gallery of your own work and other users' creations.
You can use the Midjourney Bot on the official Discord server (https://discord.gg/midjourney) as well as on any other Discord server where it has been set up.
If you wish to invite the bot to your own community, follow the instructions on this page: Use Midjourney on your own Discord Server.
When you start using the Midjourney tool, you will be able to create a limited number of images before requiring a subscription.
You will have around 25 free uses of the /imagine command or other query variations. These are known as "jobs" or "GPU-minutes".
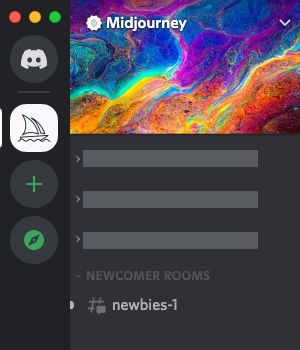
If you don't see any #newbies channels on the Discord server, try restarting your Discord app. The other reason might be that you are on the wrong Discord server. Here is the link to the Midjourney Discord server
To get started using the Midjourney Bot, use a Discord Slash Command in one of the newbies channels. Start typing /imagine and you will notice something pop up above your text

When creating your Midjourney images be mindful of the following:
- Do not use Midjourney to make images that could inflame, upset, or cause drama. That includes gore and adult content
- Be respectful to other people and the Midjourney team.
- Make sure to be respectful of Midjourney's Content and Moderation policy
- Keep your images PG-13 and avoid explicit images of any sort. This is required wherever you are using the Midjourney bot.
You can also try pressing the Spacebar, Tab, or Enter keys to create the prompt field. Bot slash commands will only work in Bot channels. Note: typing the /imagine command will not work in regular Discord channels, such as $trialsupport.
Once you are satisfied with the image prompt you typed out, press Enter, or send message. That will send the request to the Midjourney Bot, which will begin generating your image.
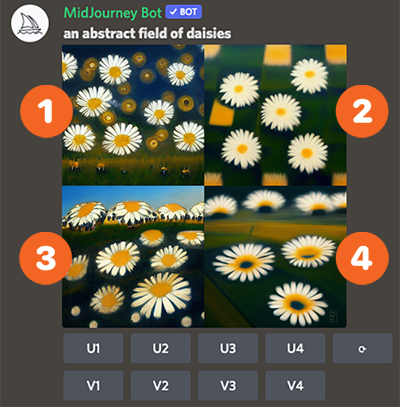
The Midjourney Bot will take a minute to generate four image options based on your /imagine prompt
After your 2 x 2 grid of images has completed generating, two rows of buttons will appear:
-
In the top row: U1, U2, U3, and U4 are buttons for Upscaling your selected image. Upscaling and image generates a higher resolution, roughly 1024x1024 image. By default, this also generates additional details
-
In the bottom row: V1, V2, V3, and V4 are buttons for creating Variations of your selected image. Creating variations will generate four new images, similar in style and composition to the image you selected.
After using the U button to upscale your image, you will have a few additional options:
- Make Variations does the same as the V buttons, generating new alternatives in a grid.
- Upscale to Max upscales the image to a higher resolution of 1664x1664
- Light Upscale Redo upcales the image once more, starting over, without adding further detail.
Note
Using these buttons will also use upp some of your 25 free jobs. To check how many uses you have remaining, use the /info command in the same way you used the /imagine command.

Your upscaled image (and 2x2 grid images) will immeditately be visible on your website gallery at (https://www.midjourney.com/app/). You have to be signed into Discord first.
You can ask the Midjourney Bot to send you a Discord direct message containing your final results. To do so, react with the envolope emoji to one of the bots messages which contain a generated image. This works with both the single upscaled images and 2x2 grids, as shown below;
Your 25 free jobs do not expire but will not be renewed. Once you have used all 25 free jobs, you can use /subscribe in any Bot channel to purchase a membership. Click the link that Midjourney generates to to to the subscription page.
If you are a paid subscriber, you can use the bot in your Direct Messages instead of the public channel with other people. Images created within a direct message are subject to Midjourneys content and moderation rules and will be visible on your Midjourney website gallery.
If you have any questions about the Midjourney Bot, these pages would be helpful:
- The User Manual, for a full list of Midjourney commands and features.
- Resource Links, for tips, tricks, and experiments by the Midjourney community
- The Midjourney Discord server can be found here; (https://discord.gg/midjourney)
- In the #rules and #faq channels you can find additional information about Midjourneys services.
- In the #announcements and #status channels you will find all important updates and news.
- Visit the #trial-support or #member-support channels if you have additional questions
{/To add image to your tutorial use component with params:/}
{/<Img src={path_to_your_img}, alt={img_alt}, caption={short_img_caption_below_it}/}
{/This is just a template for tutorials .mdx/}
{/Please yse mainly ##, ###, #### for headings, don't use number e.g. '1. abc' in front of them (if not needed)/}
{/After creation of tutorial (and techs if needed), go to /tutorial and add your tutorial. Image and description will be automaticly downloaded from this file./}