Run untrusted or AI-generated code locally with the security guarantees of microVM and ease of use from containers.
There's a managed cloud layer through cloudflare, globally deployed Worker/API, jump to cloudflare/README.md.
What runs where
agentCLI, Buildah, and krunvm all run on your local machine inside a case-sensitive volume.- [Experimental] The optional Cloudflare Worker package allows you to package and execute code on cloudflare's remote sandbox.
# 1. install the tap
brew tap binsquare/era-agent-cli
# 2. install era agent
brew install binsquare/era-agent-cli/era-agent
# 3. install dependencies
brew install krunvm buildah
# 4. verify the CLI is on PATH
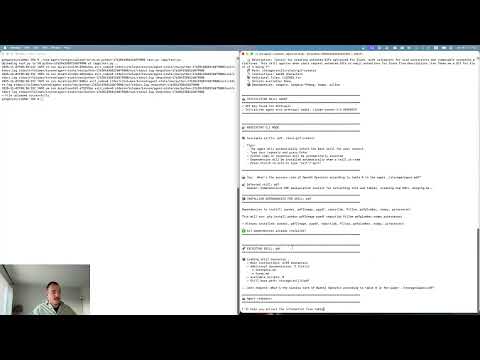
agent vm exec --help
# 4. follow platform-specific setup (see below)# 1. install dependencies
brew install krunvm buildah # on macos
# 2. clone the repository
git clone https://github.com/binsquare/era
cd era-agent
# 3. build the agent
make
# 4. follow platform-specific setup (see below)brew tap binsquare/era-agent-cli
brew install binsquare/era-agent-cli/era-agent
brew install krunvm buildah
# the CLI is installed as `agent` on your PATH
agent vm exec --helpRun the post-install helper to prepare the case-sensitive volume/state dir on macOS:
$(brew --prefix era-agent)/libexec/setup/setup.shif you installed era agent via homebrew, use the setup script from the installed location:
# for macos users with homebrew installation
$(brew --prefix era-agent)/libexec/setup/setup.sh

# or run the setup script directly after installation
$(brew --prefix)/bin/era-agent-setup # if setup script is linked separately-
Run
scripts/macos/setup.shto bootstrap dependencies, validate (or create) a case-sensitive volume, and prepare an agent state directory (the script may prompt for your password to rundiskutil). The script will also detect your Homebrew installation and recommend the correct value for theDYLD_LIBRARY_PATHenvironment variable, which may be required forkrunvmto find its dynamic libraries. -
If you prefer to create the dedicated volume manually, open a separate terminal and run (with
sudoas required):diskutil apfs addVolume disk3 "Case-sensitive APFS" krunvm(replace
disk3with the identifier reported bydiskutil list). The operation is non-destructive, does not requiresudo, and shares space with the source container volume. -
When prompted by the setup script, accept the default mount point (
/Volumes/krunvm) or provide your own. Afterwards, export the environment variables printed by the script (at minimumAGENT_STATE_DIR,KRUNVM_DATA_DIR, andCONTAINERS_STORAGE_CONF) before invokingagentor runningkrunvm/buildahdirectly. The helper now prepares a matching container-storage configuration under the case-sensitive volume so the CLI can run without extra manual steps.- The script also writes
policy.json/registries.confunder the same directory so Buildah doesn't look for root-owned files in/etc/containers. Export the variables it prints (CONTAINERS_POLICY,CONTAINERS_REGISTRIES_CONF) if you invoke Buildah manually.
- The script also writes
- Install
krunvmandbuildahusing your package manager (the specific installation method may vary) - Ensure the system is properly configured to run microVMs (may require kernel modules or specific privileges)
- Consider setting
AGENT_STATE_DIRto a writable location if running as non-root
krunvmmust be installed and available on$PATH(Homebrew:brew install krunvm; see upstream docs for other platforms).buildahmust also be present becausekrunvmshells out to it for OCI image handling.- On macOS,
krunvmrequires a case-sensitive APFS volume; see the macOS setup notes above.
make          # builds the agent CLI
make clean    # removes build artifacts (Go cache)
Full platform-specific steps (macOS volume setup, Linux env vars, troubleshooting) live in era-agent/README.md.
A demo video showing how to install and use the CLI tool is available in the era-agent directory. This video covers:
- Installing dependencies and compiling the CLI tool
- Creating and accessing local VMs
- Running code and agents through commands or scripts
- Uploading and downloading files to/from a VM
# create a long-running VM
agent vm create --language python --cpu 1 --mem 256 --network allow_all

# run something inside it
agent vm exec --vm <id> --cmd "python -c 'print(\"hi\")'"

# ephemeral one-off execution
agent vm temp --language javascript --cmd "node -e 'console.log(42)'"

# inspect / cleanup
agent vm list
agent vm stop --all
agent vm clean --all
Supported --language values: python, javascript/node/typescript, go, ruby. Override the base image with --image if you need a custom runtime.
AGENT_STATE_DIR: writable directory for VM metadata, krunvm state, and Buildah storage. The macOS setup script prints the correct exports.AGENT_LOG_LEVEL(debug|info|warn|error) andAGENT_LOG_FILE: control logging.AGENT_ENABLE_GUEST_VOLUMES=1: re-enable/in,/out,/persistmounts for advanced workflows.
See era-agent/README.md for every tunable.
cd era-agent
make agent
./agent vm temp --language python --cmd "python -c 'print(\"Smoke test\")'"
Integration helpers and sample recipes live under examples/, recipes/, and docs/.
To deploy ERA as a Cloudflare Worker with Durable Object-backed sessions and HTTP APIs:
- Follow cloudflare/README.md for setup, local Wrangler dev, and deployment.
- The Worker reuses the same Go agent primitives but adds session orchestration, package caching, and REST endpoints.
- era-agent/README.md – detailed CLI usage, setup scripts, troubleshooting.
- cloudflare/README.md – Worker/API deployment guide.
- docs/ – HTTP quickstart, storage notes, MCP adapters.
- recipes/README.md – ready-to-run workflows.
- examples/README.md – language samples.
Apache 2.0