


Welcome to the System Control Dashboard, a sleek, web-based application for remotely managing Desktop and Server devices using Wake-on-LAN (WOL) and MQTT. Featuring a modern dark-themed UI, interactive animations, and real-time updates, this dashboard is designed for ease of use and reliability.
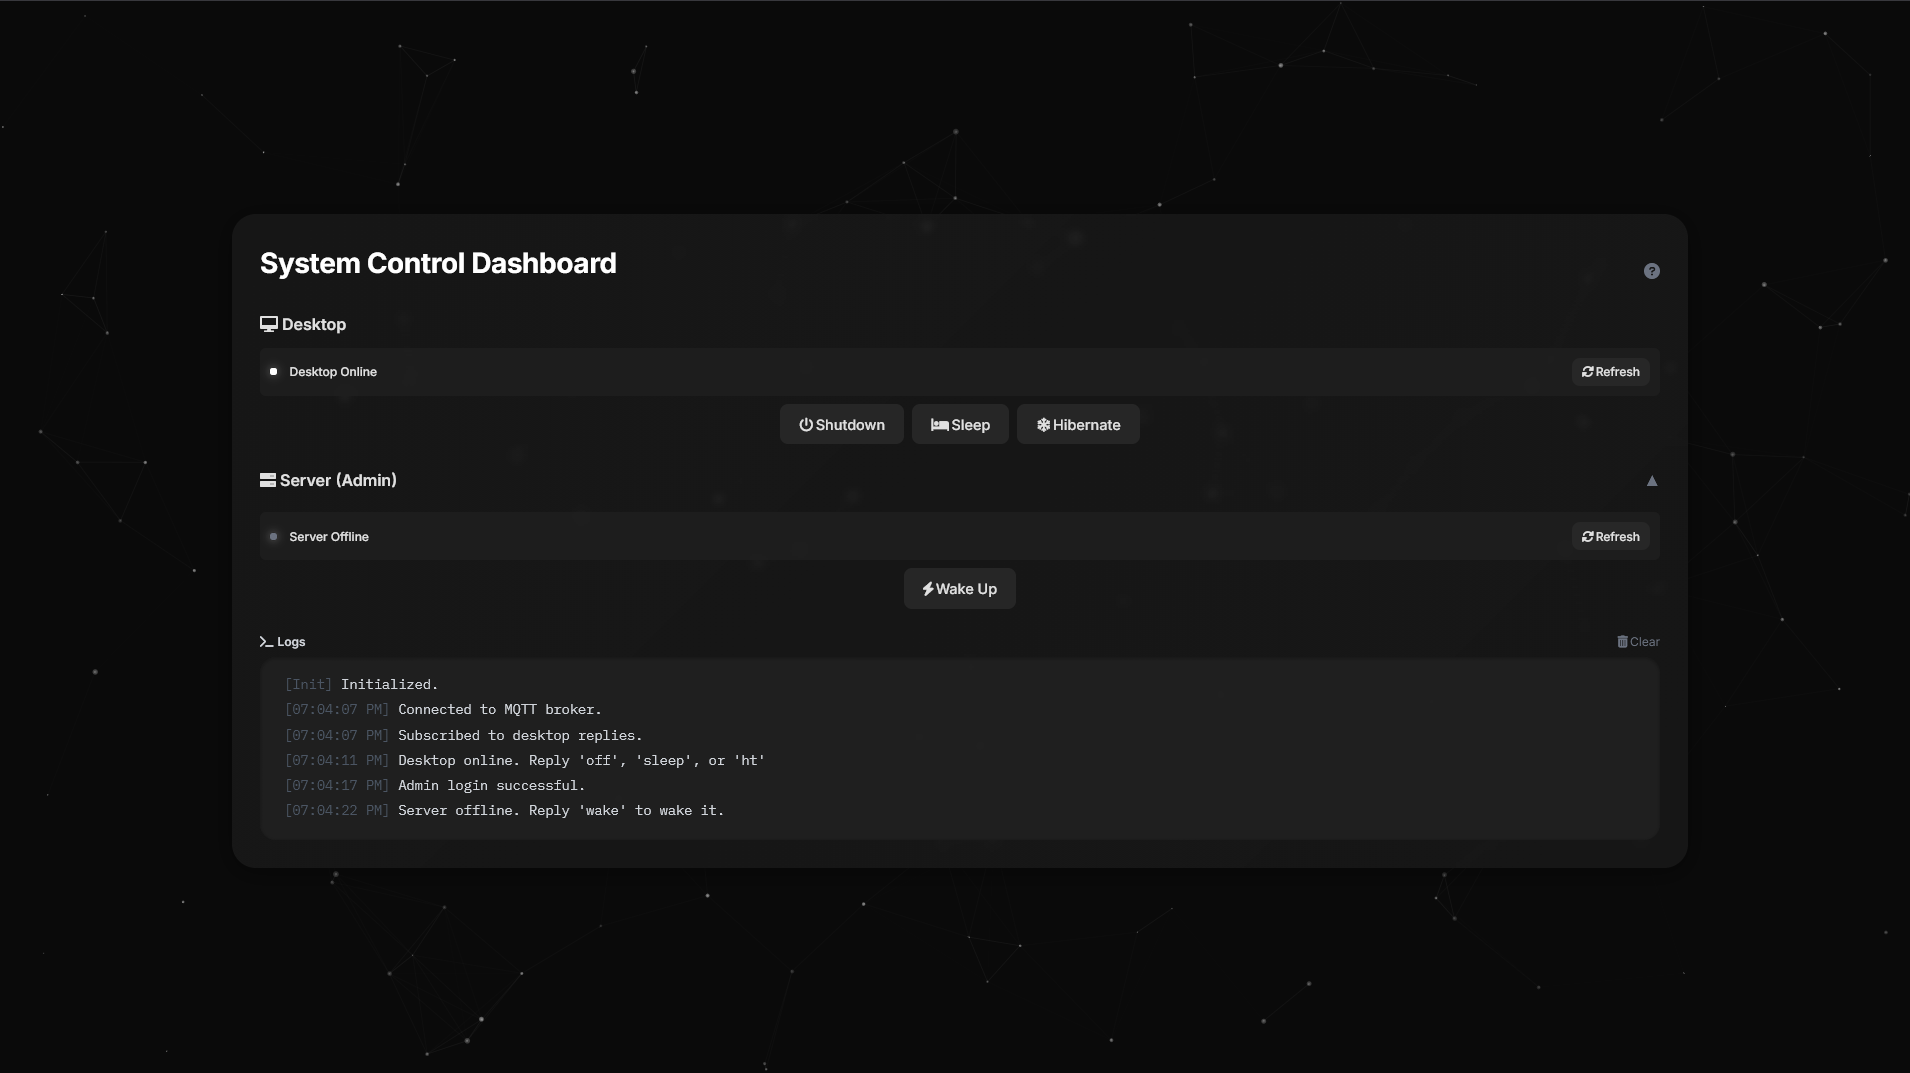
System Control Dashboard preview
- ✨ Overview
- 🌟 Features
- 🎥 Demo
- 🛠️ Prerequisites
- 📦 Installation
- 📖 Usage
- 🐛 Troubleshooting
- 🧑💻 Technical Details
- 🤝 Contributing
- 📜 License
The System Control Dashboard enables remote management of a Desktop (192.168.100.99) and a Server (192.168.100.95) over a local network (192.168.100.0/24). Powered by an ESP8266 microcontroller and MQTT communication, it offers:
- Status Monitoring: Check if devices are online or offline.
- Wake-on-LAN: Wake devices remotely with a single click.
- Power Commands: Shutdown, Sleep, or Hibernate (Desktop only).
- Secure Access: Admin login required for Server controls.
- Interactive UI: Dark theme with animated background and responsive design.
Built with Tailwind CSS, Font Awesome, and JavaScript, the dashboard is both visually appealing and functional, suitable for beginners and advanced users alike.
- 🖥️ Responsive Design: Adapts to mobile and desktop screens.
- 🎨 Interactive Background: Animated dots that respond to mouse movement.
- 🔄 Real-Time Updates: Instant device status and logs via MQTT.
- 🔒 Admin Authentication: Secure login for Server controls (
admin/admin). - ⚡ Wake-on-LAN: Wake devices remotely.
- 📜 Log Panel: Real-time, timestamped logs with clear functionality.
- 📚 In-App Guide: Detailed instructions for all features.
- 🚀 Single-File Frontend: Easy deployment with
index.html.
Note: Demo video coming soon! For now, check the Installation section to try it yourself.
Below is a preview of the System Control Dashboard's sleek and modern interface:
Before setting up, ensure you have:
| Requirement | Details |
|---|---|
| Hardware | - ESP8266 (e.g., NodeMCU) - Desktop and Server with Wake-on-LAN enabled - Local network ( 192.168.100.0/24) |
| Software | - Arduino IDE with ESP8266 support - Python 3.x with paho-mqtt, customtkinter, CTkMessagebox- Modern web browser (Chrome, Firefox, etc.) |
| Network | - Wi-Fi with SSID and password - MQTT broker (e.g., HiveMQ Cloud) - Static IPs: - Desktop: 192.168.100.99 (MAC: D8:BB:C1:CE:CF:93)- Server: 192.168.100.95 (MAC: 00:19:66:3D:F0:42)- ESP8266: 192.168.100.101 |
🔧 Click to expand installation steps
-
Clone the Repository:
git clone https://github.com/your-username/system-control-dashboard.git cd system-control-dashboard -
Set Up the ESP8266:
- Install Arduino IDE and add ESP8266 board support.
- Install libraries:
ESP8266WiFi,PubSubClient,ESPping. - Open
esp8266.inoin Arduino IDE. - Update Wi-Fi credentials:
const char* ssid = "Your-WiFi-SSID";
const char* password = "Your-WiFi-Password";
- Update MQTT broker details (if using a custom broker):
const char* mqttServer = "your-mqtt-broker";
const char* mqttUser = "your-mqtt-username";
const char* mqttPassword = "your-mqtt-password";
- Upload to ESP8266.
-
Set Up the Desktop Client:
- Install Python 3.x and required libraries:
pip install paho-mqtt customtkinter CTkMessagebox
- Save the Python script as
desktop_client.py. - Update MQTT broker details (if necessary):
MQTT_SERVER = "your-mqtt-broker"
MQTT_USER = "your-mqtt-username"
MQTT_PASS = "your-mqtt-password"
- Run the script:
python desktop_client.py
- Install Python 3.x and required libraries:
-
Host the Dashboard:
- Place
index.htmlin a web server directory (e.g., usinghttp-server):npm install -g http-server http-server
- Alternatively, open
index.htmlin a browser (note: WebSocket may be restricted). - Access via
http://localhost:8080or the server URL.
- Place
-
Configure Devices:
- Enable Wake-on-LAN in BIOS/UEFI for Desktop and Server.
- Set static IPs and MAC addresses as listed in Prerequisites.
- Ensure all devices are on the same network.
📚 Click to expand usage guide
- Open the dashboard in a browser.
- The Desktop section automatically checks the device's status.
- Click the Guide button (❓) in the top-right to view the in-app guide.
- To access Server controls, click "Server (Admin)" and log in with
admin/admin.
Control your Desktop (192.168.100.99) with these actions:
-
Check Status:
- Click
Refresh(🔄) to check if the Desktop is online/offline. - Status Indicators:
- 🟢 White Dot: Online (
Shutdown,Sleep,Hibernatebuttons). - ⚪ Gray Dot: Offline (
Wake Upbutton). - ⚪ Waking Up...: During wake-up attempts.
- ⚪ Offline (Timeout): Wake-up fails after 60 seconds.
- 🟢 White Dot: Online (
- Click
-
Wake Up:
- Click
Wake Up(⚡) to send a Wake-on-LAN signal. - Logs show:
Sent wake-up signal to Desktop. Waiting for it to come online....
- Click
-
Power Commands (when online):
Shutdown(⏻): Powers off the Desktop.Sleep(🛌): Low-power sleep mode.Hibernate(❄): Saves state and powers off.- A 5-second auto-confirm popup appears on the Desktop.
Control the Server (192.168.100.95) after logging in:
-
Accessing Controls:
- Click "Server (Admin)" to expand.
- Enter
admin/adminin the login modal. - Server controls appear after login.
-
Check Status:
- Click
Refresh(🔄) to check Server status. - Status Indicators:
- 🟢 White Dot: Online (
Shutdown,Sleepbuttons). - ⚪ Gray Dot: Offline (
Wake Upbutton). - ⚪ Waking Up...: During wake-up attempts.
- ⚪ Offline (Timeout): Wake-up fails after 3 minutes.
- 🟢 White Dot: Online (
- Click
-
Wake Up:
- Click
Wake Up(⚡) to send a Wake-on-LAN signal (up to 3 minutes). - Logs show:
Server starting. 15 seconds before checking again..
- Click
-
Power Commands (when online):
Shutdown(⏻): Powers off the Server.Sleep(🛌): Low-power sleep mode.
The log panel (📜) displays real-time, timestamped logs:
-
Example Logs:
[06:28:03 PM] Desktop online. Reply 'off', 'sleep', or 'ht' [06:28:10 PM] Sent wake-up signal to Server. Waiting for it to come online... [06:28:25 PM] Timeout: Desktop did not come online in time. -
Manage Logs:
- Scroll: View older logs (max height: 20rem).
- Clear: Click
Clear(🗑️) to reset (Logs cleared.).
🔍 Click to expand troubleshooting tips
- Status Stuck on "Checking status...":
- Refresh the page or click
Refresh(🔄). - Ensure internet and MQTT broker (
wss://5239ffaebcbc49c6890527ee9c4b76e8.s1.eu.hivemq.cloud:8884/mqtt) are accessible.
- Refresh the page or click
- Wake-Up Fails with "Timeout":
- Verify Wake-on-LAN is enabled in BIOS/UEFI.
- Check network connectivity and ESP8266 power.
- Confirm MAC/IP addresses in
esp8266.ino.
- Admin Login Fails:
- Use
admin/admin(case-sensitive).
- Use
- No Device Response:
- Check logs for
Disconnected from broker. - Refresh the page to reconnect.
- Check logs for
- Buttons Disabled:
- For Server: Log in as admin.
- For Desktop: Wait for status check to complete.
- ESP8266 Issues:
- Use Serial Monitor (115200 baud) for errors.
- Verify Wi-Fi/MQTT credentials.
ℹ️ Click to expand technical details
-
Frontend (
index.html):- Built with HTML, JavaScript, Tailwind CSS, and
mqtt.min.js. - Features an interactive canvas with animated dots responding to mouse movement.
- Uses Font Awesome for icons (e.g.,
fa-desktop,fa-bolt). - Responsive modals for admin login and guide.
- Built with HTML, JavaScript, Tailwind CSS, and
-
ESP8266 Backend (
esp8266.ino):- Runs on ESP8266 with
ESP8266WiFi,PubSubClient,ESPping. - Sends Wake-on-LAN UDP magic packets.
- Supports proxy connections (e.g., SSH on port 2222).
- Subscribes to MQTT topics:
status/desktop,status/server,wake/desktop,wake/server.
- Runs on ESP8266 with
-
Desktop Client (
desktop_client.py):- Python script using
paho-mqtt,customtkinter,CTkMessagebox. - Listens on
desktop/commandsforoff,sleep,ht. - Displays 5-second auto-confirm popups.
- Executes system commands (
shutdown /s,rundll32.exe,shutdown /h).
- Python script using
-
MQTT Setup:
- Broker:
wss://5239ffaebcbc49c6890527ee9c4b76e8.s1.eu.hivemq.cloud:8884/mqtt - Credentials:
ESP_WOL/@PasswordMQTT404* - Topics:
status/desktop,status/server: Status and commands.wake/desktop,wake/server: Wake-on-LAN triggers.desktop/commands/reply,server/commands/reply: Responses.
- Broker:
-
Timeouts:
- Desktop wake-up: 60 seconds.
- Server wake-up: 3 minutes.
- Proxy connection: 3 minutes.
Contributions are welcome! To contribute:
- Fork the repository.
- Create a feature branch:
git checkout -b feature/YourFeature. - Commit changes:
git commit -m 'Add YourFeature'. - Push to the branch:
git push origin feature/YourFeature. - Open a Pull Request.
Please include tests and update this README as needed.
This project is licensed under the MIT License.