This repository contains a Python script (display_driver.py) that enables a Raspberry Pi with an Adafruit Mini PiTFT (ST7789 display) to serve as a controller for AllStarLink nodes. It shows system IP, uptime, connected nodes, and favorites, with button-based navigation for connecting/disconnecting nodes. The accompanying install script (installdisplay.sh) automates the setup process, including dependency installation, virtual environment creation, and systemd service configuration for automatic startup on boot.
NEW: Simple install instructions on my website https://g1lro.uk/?p=848
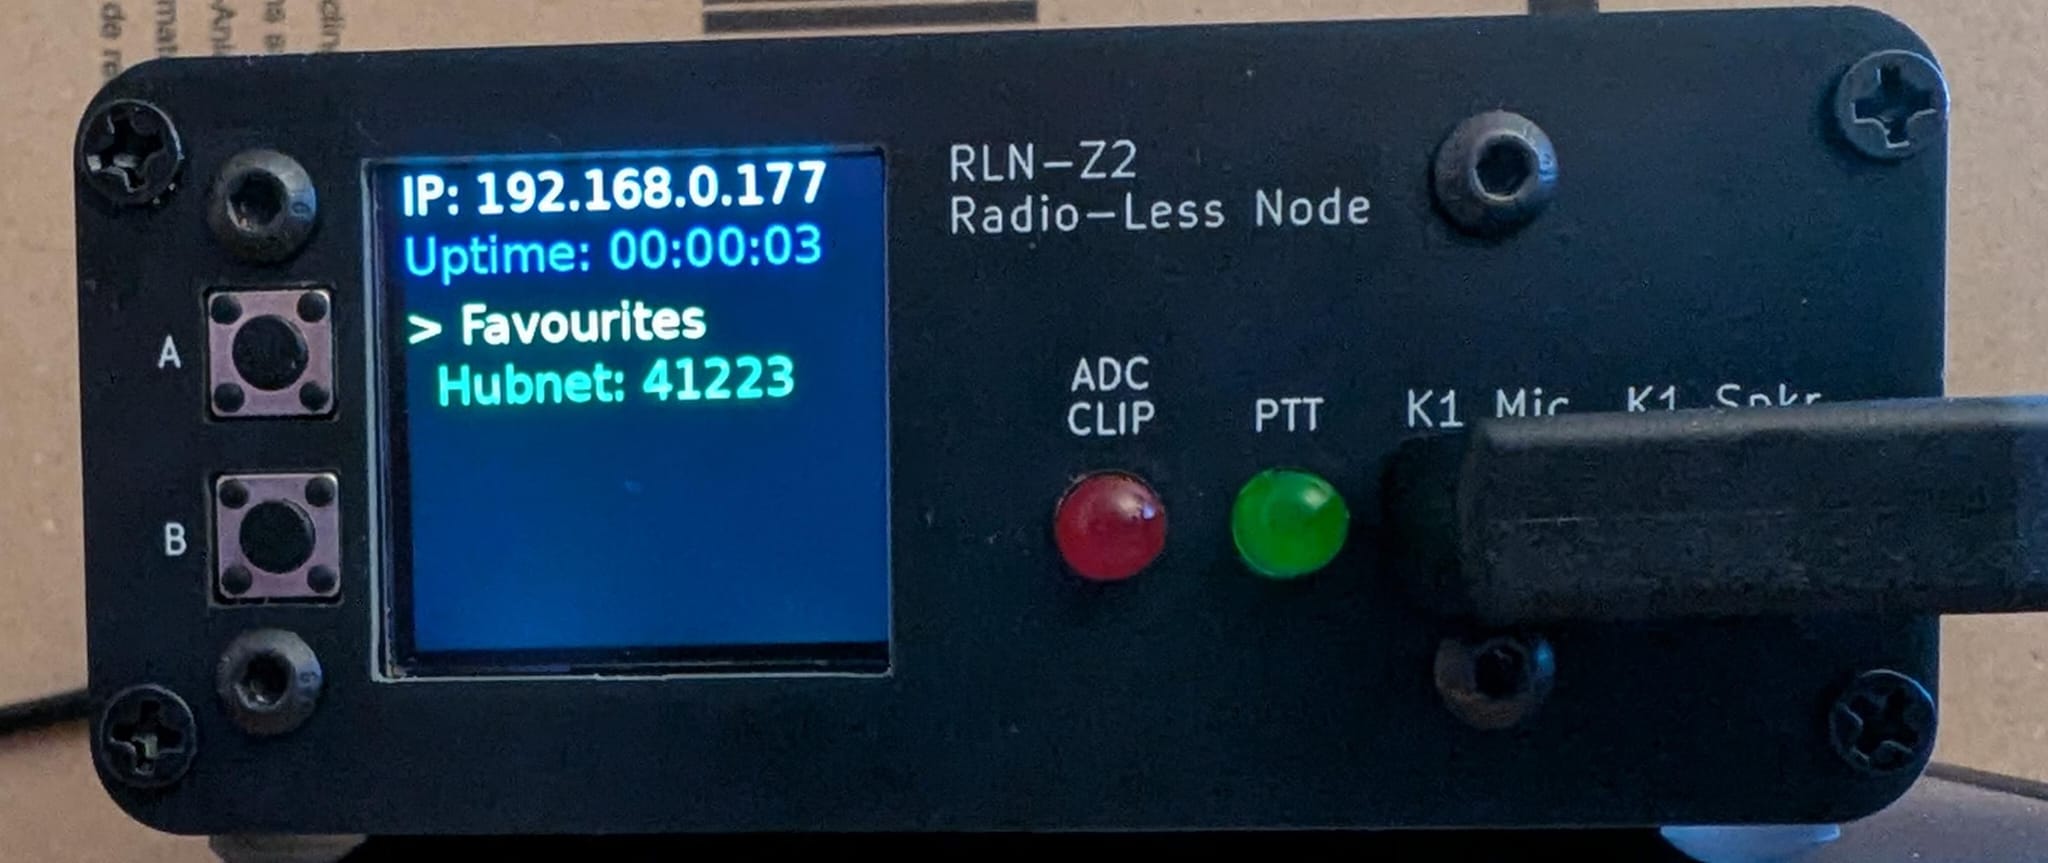
- Real-Time Display: Shows local IP address, system uptime, connected AllStarLink nodes (up to 3), and a favorites menu for quick connections (up to 6 nodes).
- Button Controls:
- Button A: Move Cycles through selections (e.g., favorites or nodes).
- Button B: Do Connects/disconnects nodes, switches to favorites mode, or exits.
- Automatic Updates: Display refreshes every 1 second; node status updates every 5 seconds.
- Favorites Support: Load node names and numbers from a simple text file (
favourites.txt). - Error Handling: Graceful handling for display, font, favorites file, and Asterisk commands.
- Debug Output: Prints to console for button presses, node connections, and errors.
- Raspberry Pi (tested on Raspberry Pi OS, Debian-based).
- Adafruit Mini PiTFT or equivalent ST7789-based 240x240 display.
- Also available from AliExpress
- Wiring (expected standard on this model):
- CS: GPIO CE0 (pin 24)
- DC: GPIO D25 (pin 22)
- Backlight: GPIO D22 (pin 15)
- Reset: Not connected (None)
- SPI: MOSI (pin 19), SCLK (pin 23)
- Buttons: Connected to GPIO D23 (pin 16) for Button A and GPIO D24 (pin 18) for Button B.
- AllStarLink hardware setup with Asterisk installed.
- Python 3 (installed via
apt). - Raspberry Pi OS or similar (Debian-based).
- AllStarLink with Asterisk for node management.
- SPI interface enabled (handled by the install script).
-
Clone the Repository:
git clone https://github.com/G1LRO/ASL-Display.git cd ASL-Display -
Download or Copy Files:
- Ensure
display_driver.pyandinstalldisplay.share in/home/admin/. - Alternatively, download from g1lro.uk (script) and place in
/home/admin/.
- Ensure
-
Make the Install Script Executable:
chmod +x installdisplay.sh -
Run the Install Script:
./installdisplay.sh- The script will:
- Update the system and install dependencies (Python libraries like Pillow, Adafruit RGB Display).
- Enable SPI.
- Create a virtual environment (
/home/admin/myenv). - Add the user to the
gpiogroup for hardware access. - Verify Asterisk installation.
- Create a sample
favourites.txt. - Set up a systemd service (
display_driver.service) to run the script on boot. - Test run the script and log output to
/tmp/display_driver_test.log.
- The script will:
-
Reboot the Raspberry Pi:
sudo reboot- The display should come to life after reboot, showing IP, uptime, favorites, and nodes.
- Node Number: Open
display_driver.pyand editnode_number = "58175"to your AllStarLink node ID. - Favorites File: Edit
/home/admin/favourites.txtwith one entry per line inName,NodeNumberformat (e.g.,Hub,12345). Limited to 6 entries. - Manual Test: Activate the virtual environment and run:
source /home/admin/myenv/bin/activate python display_driver.py - Systemd Service Management:
- Status:
sudo systemctl status display_driver.service - Logs:
journalctl -u display_driver.service -b - Restart:
sudo systemctl restart display_driver.service - Stop:
sudo systemctl stop display_driver.service - Disable auto-start:
sudo systemctl disable display_driver.service
- Status:
-
Blank Display:
- Check hardware connections and SPI status (
lsmod | grep spi_bcm2835). - Verify service logs for errors (
journalctl -u display_driver.service -b). - Test hardware with the simple script below.
- Check hardware connections and SPI status (
-
Asterisk Errors: Ensure AllStarLink is running and test commands like
sudo asterisk -rx "rpt lstats 58175". Add passwordless sudo if needed (see script comments). -
Font or Favorites Errors: Confirm files exist (
ls /usr/share/fonts/truetype/dejavu/DejaVuSans.ttfand/home/admin/favourites.txt). -
Button Not Working: Verify wiring and GPIO group membership (
groups | grep gpio). -
Simple Hardware Test Script (save as
test_display.py):#!/home/admin/myenv/bin/python import digitalio import board from adafruit_rgb_display import st7789 from PIL import Image, ImageDraw cs_pin = digitalio.DigitalInOut(board.CE0) dc_pin = digitalio.DigitalInOut(board.D25) reset_pin = None spi = board.SPI() disp = st7789.ST7789(spi, cs=cs_pin, dc=dc_pin, rst=reset_pin, baudrate=24000000, width=240, height=240, x_offset=0, y_offset=80) image = Image.new("RGB", (240, 240)) draw = ImageDraw.Draw(image) draw.rectangle((0, 0, 240, 240), fill=(255, 0, 0)) # Red screen disp.image(image, 180)
Run:
source /home/admin/myenv/bin/activate && python test_display.py. A red screen confirms hardware setup. -
Install Script Stuck: If locked on
apt(e.g., "Waiting for cache lock"), wait or kill the blocking process (see logs withps aux | grep apt).
This project is licensed under the Creative Commons Attribution-NonCommercial 4.0 International (CC BY-NC 4.0). Portions based on Adafruit code are under MIT. Retain all copyright notices in modifications or distributions.
- Inspired by Adafruit's RGB display examples.
- Developed by GU1LRO for non-commercial ham radio use.
- Original script available at g1lro.uk.
Contributions welcome! Open an issue for bugs or feature requests, or submit a pull request.