udap-dotnet tutorial.
UDAP is the acronym for Unified Data Access Profiles. The HL7 "Security IG" is a constraint on UDAP. The actual implementation guide has a long name of "Security for Scalable Registration, Authentication, and Authorization".
- FHIR® is the registered trademark of HL7 and is used with the permission of HL7. Use of the FHIR trademark does not constitute endorsement of the contents of this repository by HL7.
- UDAP® and the UDAP gear logo, ecosystem gears, and green lock designs are trademarks of UDAP.org. UDAP Draft Specifications are referenced and displayed in parts of this source code to document specification implementation.
- 🧩 Host UDAP Metadata on a FHIR Server
- 🧩 Host UDAP Dynamic Client Registration (DCR RFC 7591) on an Identity Server.
- 🧩 Secure the FHIR Server with UDAP
Clone the udap-dotnet repository.
git clone https://github.com/udap-tools/udap-dotnet.git
We will run the UdapEd.Server project locally to test Discovery, DCR, Token Access and finally request a resource. Ensure you can compile and run UdapEd.Server ahead of time. It requires .NET 7.0.
Within this udap-devdays-2023: udap-dotnet tutorial repository ensure you can compile and run both udap.fhirserver.devdays and udap.authserver.devdays
udap.fhirserver.devdays has one patient resource loaded. This FHIR server is a simple DemoFileSystemFhirServer implementation of Brian Postlethwaite’s fhir-net-web-api.
udap.authserver.devdays is a Duende Identity Server implementation with a SQLite data store without DCR on UDAP. When the tutorial starts we will add DCR on UDAP to the Identity Server.
🗒️ Note: the udap.authserver.devdays prerequisite was built from the EntityFramework Quickstart.
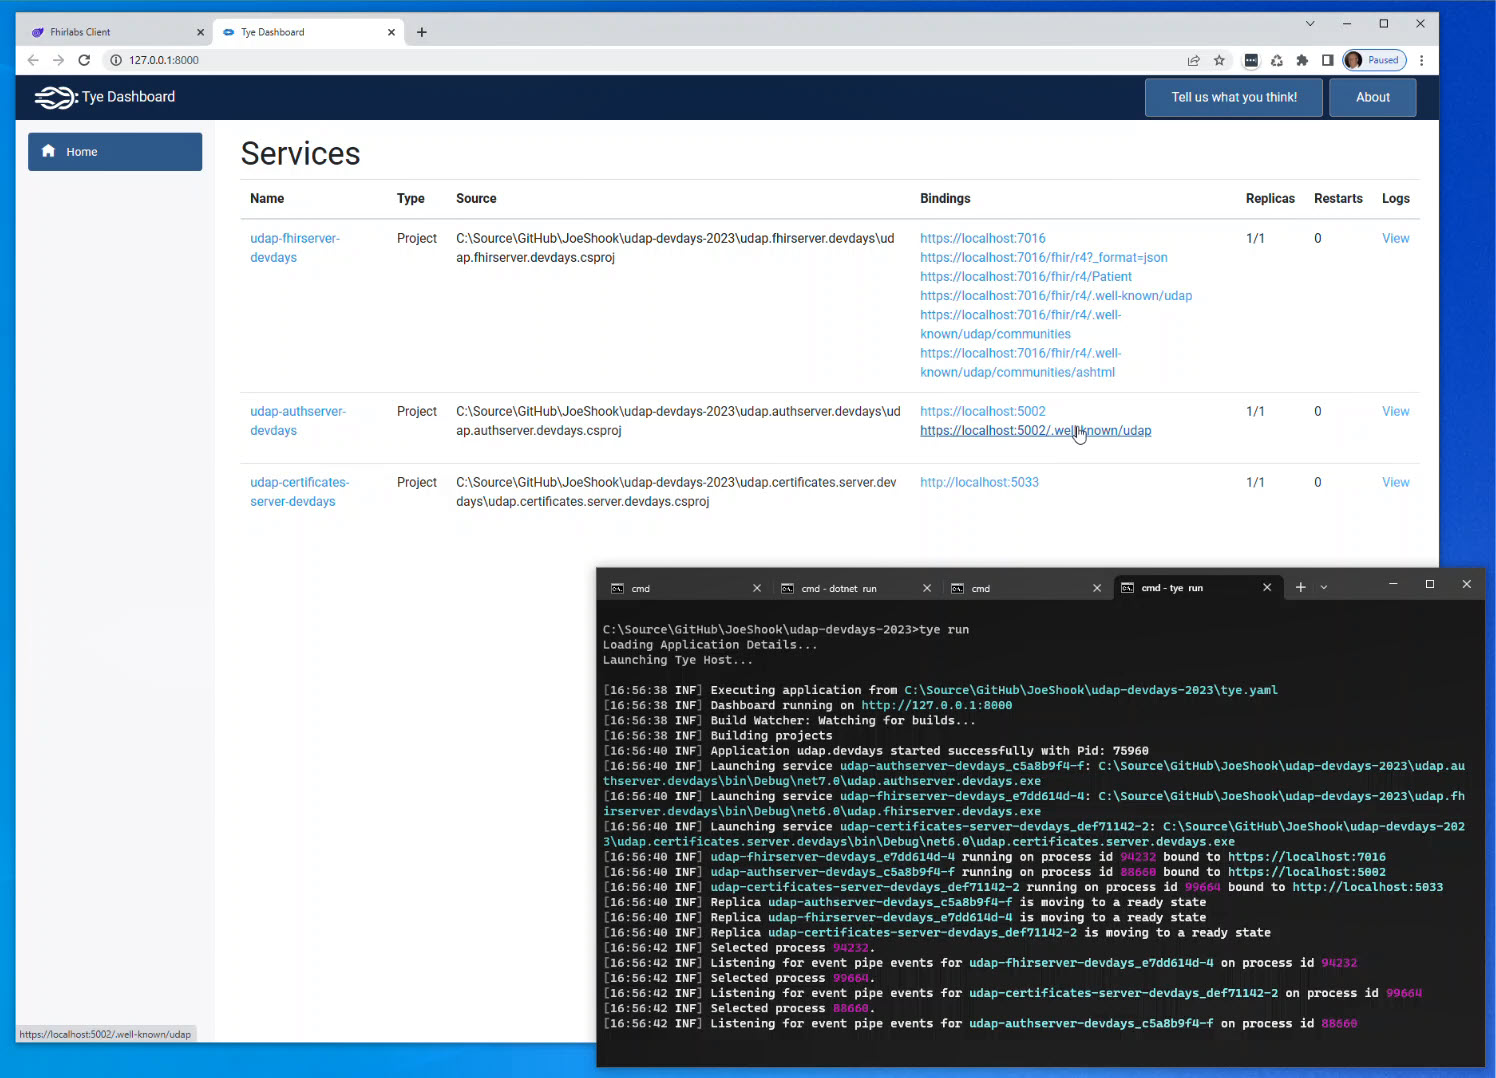
dotnet tye is not required. The included tye.yaml is pre-configured to launch three services needed for the tutorial and includes handy links. Try it out!
dotnet tool install -g Microsoft.Tye --version "0.12.0-*" --add-source https://pkgs.dev.azure.com/dnceng/public/_packaging/dotnet6/nuget/v3/index.json- Start at the prerquisite branch and ensure all services start
- Along the way there are branches that satisfy the objectives.
- prerequisite branch is the starting point. It is the intended branch to start and complete the tutorial.
- fhirserverWithUdap branch is the tutorial solution configuring the FHIR Server correctly.
- authServerWithUdap branch is the full working solution.
If the developer regenerates certificates with the udap.pki.devdays project during the Tutorial delete the udap.authserver.devdays.EntityFramework.db database. And restart udap.authserver.devdays.
If the developer regenerates certificates with the udap.pki.devdays during the Tutorial they may then need to launch mmc.exe, the Certificates snap-in for the current user. Go to Intermediate Certification Authorities and delete the DevDaysSubCA_1.
The following configures Udap.Metadata as an Endpoint. There is an alternative configuration where Udap.Metadata is configured as a Controller. See the WeatherApi example.
dotnet add package Udap.Metadata.Serverbuilder.Services.AddUdapMetadataServer(builder.Configuration);Place it just before the MapControllers() extension method.
app.UseUdapMetadataServer();- Add the configuration to point the FHIR Server to the Authorization Server.
"Jwt": {
    "Authority": "https://localhost:5002"
}- The CertificateStore folder has already been added to the project.
- Add the following UdapMetadataOptions section to appsettings.json
"UdapMetadataOptions": {
  "Enabled": true,
  "UdapMetadataConfigs": [
    {
      "Community": "udap://Community1",
      "SignedMetadataConfig": {
        "AuthorizationEndPoint": "https://localhost:5002/connect/authorize",
        "TokenEndpoint": "https://localhost:5002/connect/token",
        "RegistrationEndpoint": "https://localhost:5002/connect/register"
      }
    },
    {
      "Community": "udap://Community2",
      "SignedMetadataConfig": {
        "RegistrationSigningAlgorithms": [ "ES384" ],
        "TokenSigningAlgorithms": [ "ES384" ],
        "Issuer": "https://localhost:7016/fhir/r4",
        "Subject": "https://localhost:7016/fhir/r4",
        "AuthorizationEndPoint": "https://localhost:5002/connect/authorize",
        "TokenEndpoint": "https://localhost:5002/connect/token",
        "RegistrationEndpoint": "https://localhost:5002/connect/register"
      }
    },
    {
      "Community": "udap://Community3",
      "SignedMetadataConfig": {
        "AuthorizationEndPoint": "https://localhost:5002/connect/authorize",
        "TokenEndpoint": "https://localhost:5002/connect/token",
        "RegistrationEndpoint": "https://localhost:5002/connect/register"
      }
    }
  ]
}- Add the following UdapFileCertStoreManifest section to appsettings.json
"UdapFileCertStoreManifest": {
  "ResourceServers": [
    {
      "Name": "udap.fhirserver.devdays",
      "Communities": [
        {
          "Name": "udap://Community1",
          "IssuedCerts": [
            {
              "FilePath": "../../../CertificateStore/Community1/issued/DevDaysRsaClient.pfx",
              "Password": "udap-test"
            }
          ]
        },
        {
          "Name": "udap://Community2",
          "IssuedCerts": [
            {
              "FilePath": "../../../CertificateStore/Community2/issued/DevDaysECDSAClient.pfx",
              "Password": "udap-test"
            }
          ]
        },
        {
          "Name": "udap://Community3",
          "IssuedCerts": [
            {
              "FilePath": "../../../CertificateStore/Community3/issued/DevDaysRevokedClient.pfx",
              "Password": "udap-test"
            }
          ]
        }
      ]
    }
  ]
}Default UDAP metadata endpoint.
Convenience links to find community specific UDAP metadata endpoints
- https://localhost:7016/fhir/r4/.well-known/udap/communities
- https://localhost:7016/fhir/r4/.well-known/udap/communities/ashtml
💥 Launch UdapEd.Server
Validate the https://localhost:7016/fhir/r4/.well-known/udap signed metadata with UdapEd UI Client. Upload the Community1 anchor as the clients known trust anchor.
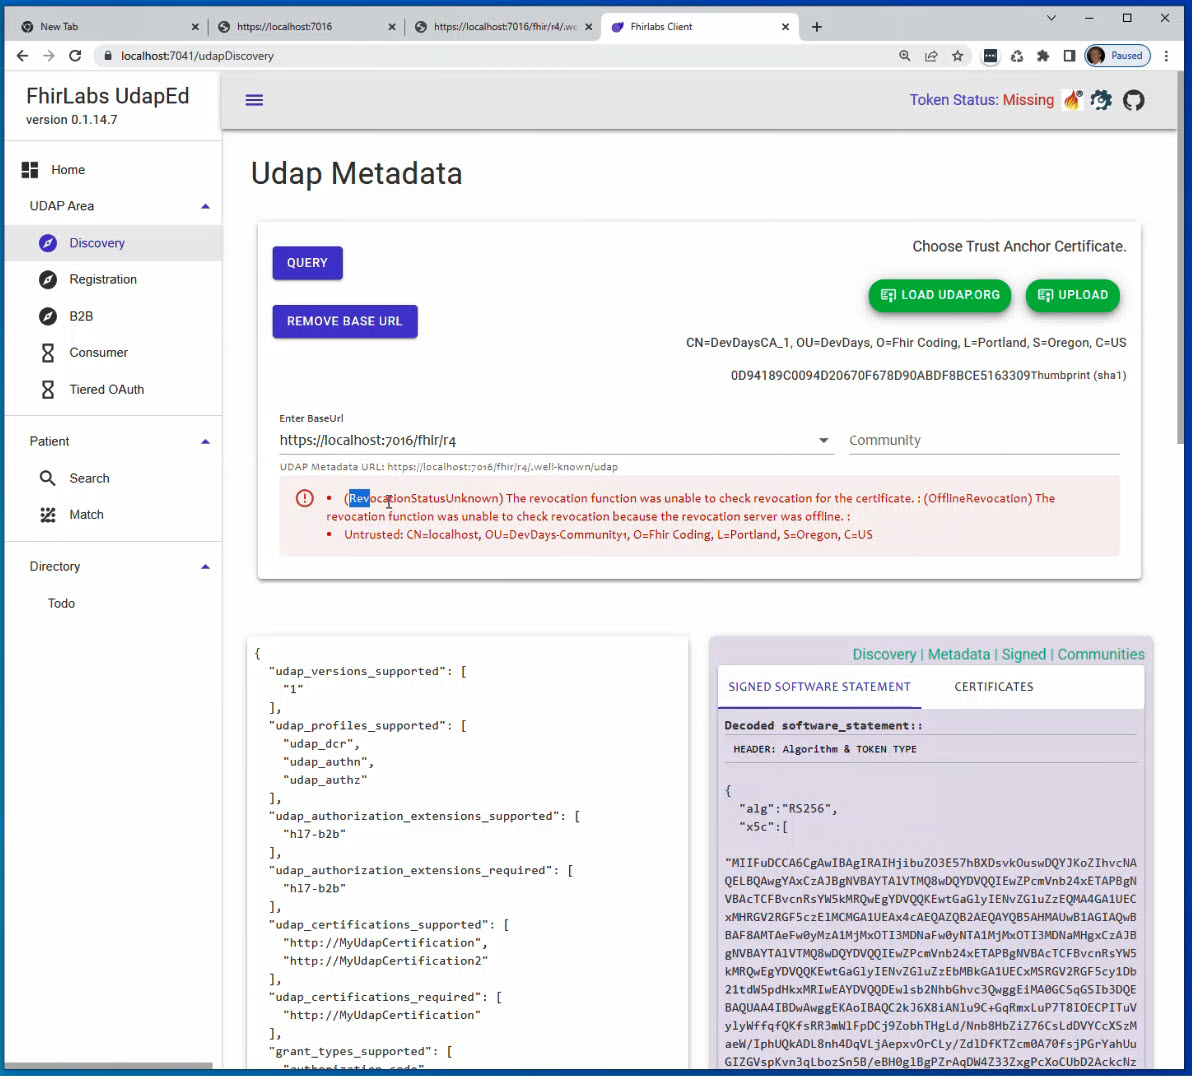
Notice in the image below.
- ❗ (RevocationStatusUnknown) The revocation function was unable to check revocation for the certificate.
This error will be present in almost every case when a X509 Chain cannot be built and verified. Always look at the other errors first. For example, if an intermediate certificate cannot be resolved nor found in a trusted store, such as the Windows Certificate store or a Linux trust store then the RevocationStatusUnknown will pre presented by the Udap.Client during validation. The Untrusted error should clue us into checking the Trust Anchor and Intermediate Certificate if one exists. Intermediate Certificates can be resolved via the AIA (Authority Information Access) extension. Look at the UdapEd tool to see where that extension points too. Remember that Trust Anchor chosen for the Udap.Client is loaded into it' trusted root store. It is the top of the store and the whole chain from Trust Anchor to the Client Certificate used to sign the metadata must be build and validated including CRL (Certificate Revocation List) checks. This can be tricky especially in development while regenerating PKI structures and running tests. Windows and Linux will cache the CRL requests and sometimes load intermediates into trust stores. The UdapEd tool may evolve more to try and find these tricky strategies based on operating systems and visualize what is happening.
An actual revoked certificate will be reported like the following. This can be tested by setting the BaseUrl to https://localhost:7016/fhir/r4 and the Community to udap://Community3. And don't forget to choose the udap://Community3 community anchor, otherwise you will not be able to build the chain. Without a built chain the CRL endpoint cannot be checked because we do not trust the X509 Chain.
- ❗ (Revoked) The certificate is revoked.
dotnet add package Microsoft.AspNetCore.Authentication.JwtBearer -v 6.*Register services required by authentication services. Specifically the Bearer schema.
builder.Services.AddAuthentication(
  OidcConstants.AuthenticationSchemes.AuthorizationHeaderBearer)

  .AddJwtBearer(OidcConstants.AuthenticationSchemes.AuthorizationHeaderBearer,
    options =>
    {
      options.Authority = builder.Configuration["Jwt:Authority"];
      options.RequireHttpsMetadata =
          bool.Parse(
              builder.Configuration["Jwt:RequireHttpsMetadata"] ?? "true"
              );

      options.TokenValidationParameters = new TokenValidationParameters
      {
          ValidateAudience = false
      };
    }
  );
Add the AuthorizationMiddleware with the UseAuthentication() and UseAuthorization() extensions. Add the the authorization policy to the endpoints with the RequireAuthorization() extension. The order of the middleware is demonstrated in the following code.
  app.UsePathBase(new PathString("/fhir/r4"));
  app.UseRouting();

  app.UseAuthentication();
  app.UseAuthorization();

  app.UseHttpsRedirection();
  app.UseUdapMetadataServer();
  app.MapControllers().RequireAuthorization();
Requesting a Patient should now result in a HTTP Status code of 401.
To finish objective #2 the udap.authserver.devdays Project will need to be configured as the UDAP authorization server. Re-test this in section 3.B 🧩 later.
Let's enable DCR on UDAP
1. 💥 Apply the AddUdapServer extension method to the AddIdentityServer extension. This will enable DCR on UDAP
dotnet add package Udap.Serverbuilder.Services.AddIdentityServer()
.AddUdapServer(
options =>
{
var udapServerOptions = builder.Configuration.
GetOption<ServerSettings>("ServerSettings");
options.DefaultSystemScopes = udapServerOptions.DefaultSystemScopes;
options.DefaultUserScopes = udapServerOptions.DefaultUserScopes;
options.ServerSupport = udapServerOptions.ServerSupport;
options.ForceStateParamOnAuthorizationCode = udapServerOptions.
ForceStateParamOnAuthorizationCode;
},
options =>
options.UdapDbContext = b =>
b.UseSqlite(connectionString,
dbOpts =>
dbOpts.MigrationsAssembly(typeof(Program).Assembly.FullName))
),
baseUrl: "http://localhost:5002/connect/register"Add UdapServer() to the pipeline. Place it before app.UseIdentityServer().
app.UseUdapServer();
app.UseIdentityServer()Uncomment await InitializeDatabaseWithUdap(serviceScope, configDbContext); in SeedData.cs
Run Entity Framework Migrations
Install dotnet-ef if it does not exist
dotnet tool install --global dotnet-efdotnet ef migrations add InitialIdentityServerUdapDbMigration -c UdapDbContext -o Data/Migrations/IdentityServer/UdapDb
🗒️ Note: You can launch all apps with tye run from solution folder.
See it in action in the following demo. Details steps below the demo.
Start in ➡️ Discovery area. Enter the FHIR Server's Base URL; https://localhost:7016/fhir/r4 and click the query button 🔳.
Without an anchor loaded to validate trust the following alert should be presented:
- ❗ No anchor loaded. Un-Validated resource server.
Load the trust anchor for the default community ( udap://Community1 ). Find the anchor in the Anchors/Community1 folder of this repository.
Click the query button 🔳 again and you should see the alert is resolved.
Read more on the home page of the UdapEd tool on how to experiment with more interesting failure cases and multi community use cases.
Continue in the ➡️ Registration area. Experiment with and without a client certificate loaded. Click the Client Cert button 🔳 to load a client certificate. This time you will need to supply a password to load a P12 file. All of the certificates generated for testing the udap-dotnet RI use "udap-test" as a password to keep it simple. Find the udap://Community1 client certificate with key in the Issued/Community1 folder of this repository.
🗒️ Note: In the Raw Software Statement area the user can change the software statement before continuing to signing the message via the Build Request Body button 🔳. Uses could be to simply edit requested scopes or invalidated the request by changing the subject (iss).
Continue in the ➡️ B2B area. Depending on which Grant Type was registered for click the Build... button 🔳.
🗒️ Note: When using Authorization Code Grant type the user can alter the GET request to /authorize. This will again allow scope changes or other changes to experiment with force failures.
Continue in the ➡️ Search area or take the Access Token and use it in something like Postman.
At this point using the Access Token successfully will satisfy the objective.
🗒️ Note: Match is not supported on this sample FHIR server.
Demo if we have time.
The 📦Udap.Server package is an implementation of DCR on UDAP. At the time of writing this package, Identity Server did not have DCR (Dynamic Client Registration). It has been added in the recent past. The plan is to revisit this area and see how much of 📦Udap.Server package code can be removed in favor of the Identity Server core DCR API.

