-
Notifications
You must be signed in to change notification settings - Fork 15
GitHub
Have you ever found yourself naming files into something like homework1.txt, homework1-final.txt, homework1-final2.txt, etc.? To make things worse, can you imagine collaborating with multiple developers with all these mess? You should try version control with GitHub!
Git and GitHub are not exactly the same thing. Git is a version control system which you can use with or without the internet, whereas GitHub (GitLab, Bigbucket, etc.) is a kind of hosting service built on top of Git and allows developers to collaborate more easily online. In our club, we will be using GitHub extensively for the projects.
If you are familiar with command-line interface (CLI), you can start by learning the git command. Otherwise, it is usually better to start with GitHub and use some IDE that supports Git / GitHub, e.g. VS Code. This wiki article will mostly be focusing on the later approach.
First, go to https://github.com/, and make sure you have signed in. If you do not have an account yet, visit https://github.com/signup. You can link more than one emails to your GitHub account. If one of the emails is an MSU email, it is possible for you to get the GitHub Student Developer Pack, which gives you access to GitHub Pro until your graduation.
Once you have a GitHub account, click the "plus" icon at the top-right corner and select "New repository". Or you can just visit https://github.com/new.
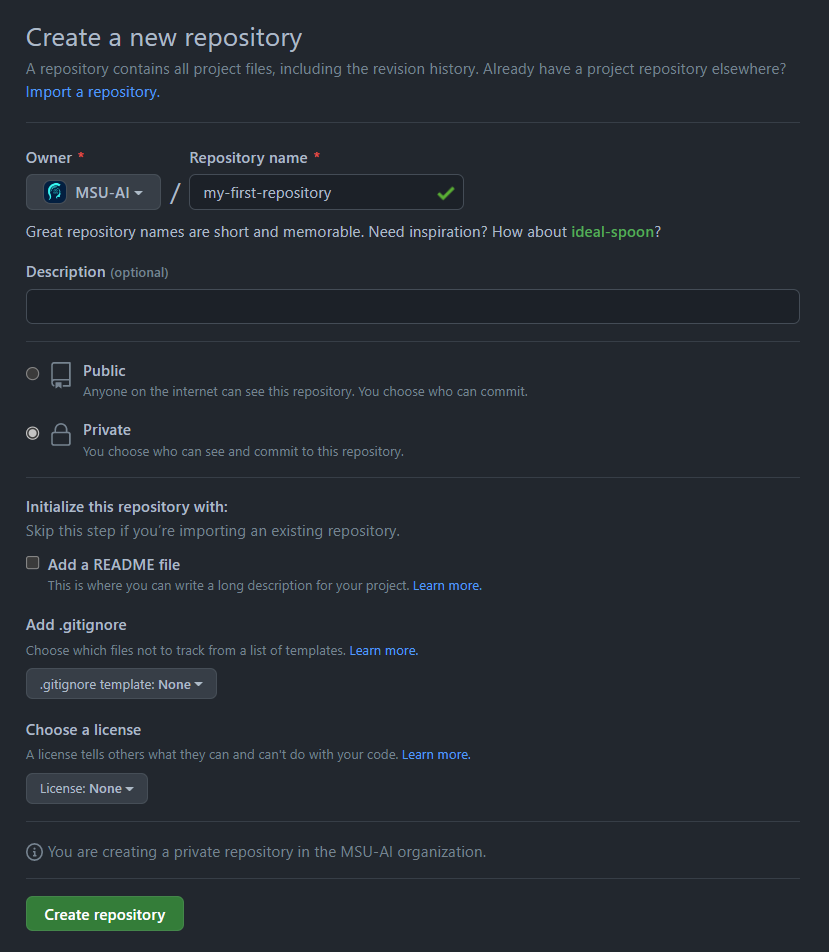
- Repository name: Give your repo a cool name. You can always rename it later, but then your repo's URL will be changed too.
- Description: This is where you put down what your project is trying to achieve. This should not be too long. You can write longer description in README later.
- Public / Private: For all club projects, you should select "Public".
- README: You are highly encouraged to provide a README for every repo. Here are some tips on how to write a good README: https://www.freecodecamp.org/news/how-to-write-a-good-readme-file/
-
.gitignore: This is the file where you specify files or folders that do not want to be tracked by git. If you do not understand what it does, simply select a template according to the primary language of your project. - License: Always select a license for your repo, even if you don't care about people "stealing" your ideas. If you truly do not care, just go with "MIT License". Nonetheless, it is important to realize that everything put on GitHub is considered open-source, regardless of the license you choose. The license will not stop anyone from using your code (legally). It's just there to specify how you allow your code to be used, e.g. "GNU General Public License" (GPL) requires people who use your code to use the same license and make their code open-source too. Here is a nice GitHub Gist explaining all the licenses in simple English: https://gist.github.com/nicolasdao/a7adda51f2f185e8d2700e1573d8a633
Once you have created the repo, go to your profile and select the "Repositories" tab. You should now see the new repo there.
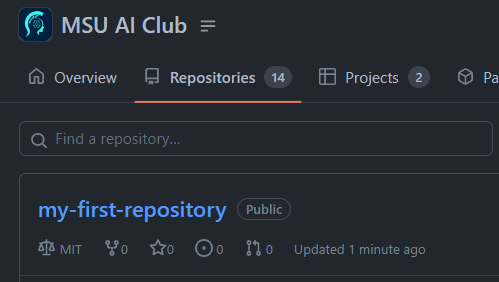
To start working on the repo we just created, we may want to download the repo to our local computer. There are many ways to do this, but we are going to use git. For Linux and Mac OS users, simply open your terminal and try typing
git --versionMost likely, git is already pre-installed. Otherwise, you can install it as following:
- Windows: https://git-scm.com/download/win (most people should select the Standalone Installer for "64-bit Git for Windows Setup").
- Mac OS: https://git-scm.com/download/mac
- Linux: https://git-scm.com/download/linux
To download or to git clone a GitHub repo, open the repo on GitHub, and click on the green button "Code". Copy the web URL under the HTTPS tab. You can just click the ![]() icon to copy the whole URL. Notice that this URL is slightly different from the one on your browser's address bar - the URL for git clone has a suffix of
icon to copy the whole URL. Notice that this URL is slightly different from the one on your browser's address bar - the URL for git clone has a suffix of .git attached to the end.
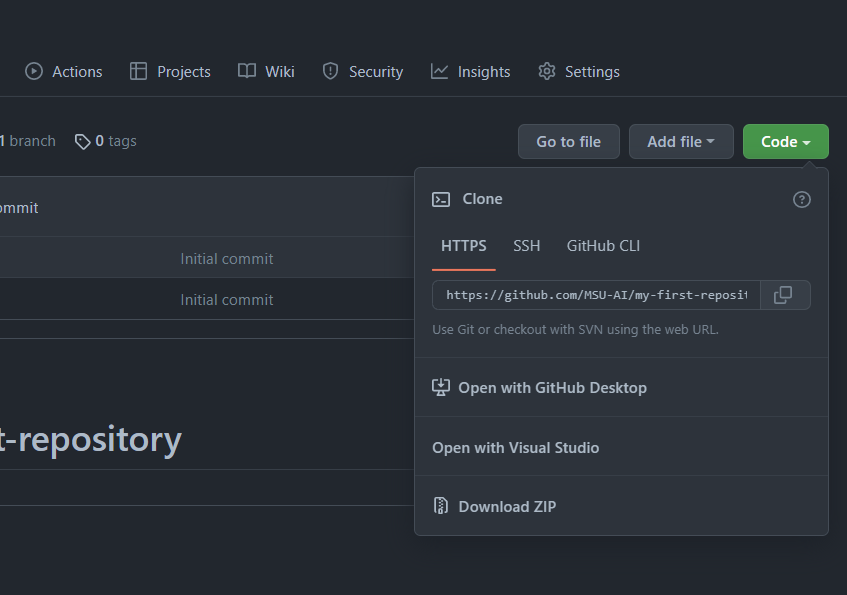
Next, open up a terminal and navigate to a directory where you want to download the GitHub repo. The GitHub repo will be downloaded as a directory, so you do not have to create another directory for it. Now do
git clone https://github.com/MSU-AI/my-first-repository.gitAnd you should see a directory named my-first-repository has been created.
If you are using VS Code, you should be able to open the directory by invoking the code command:
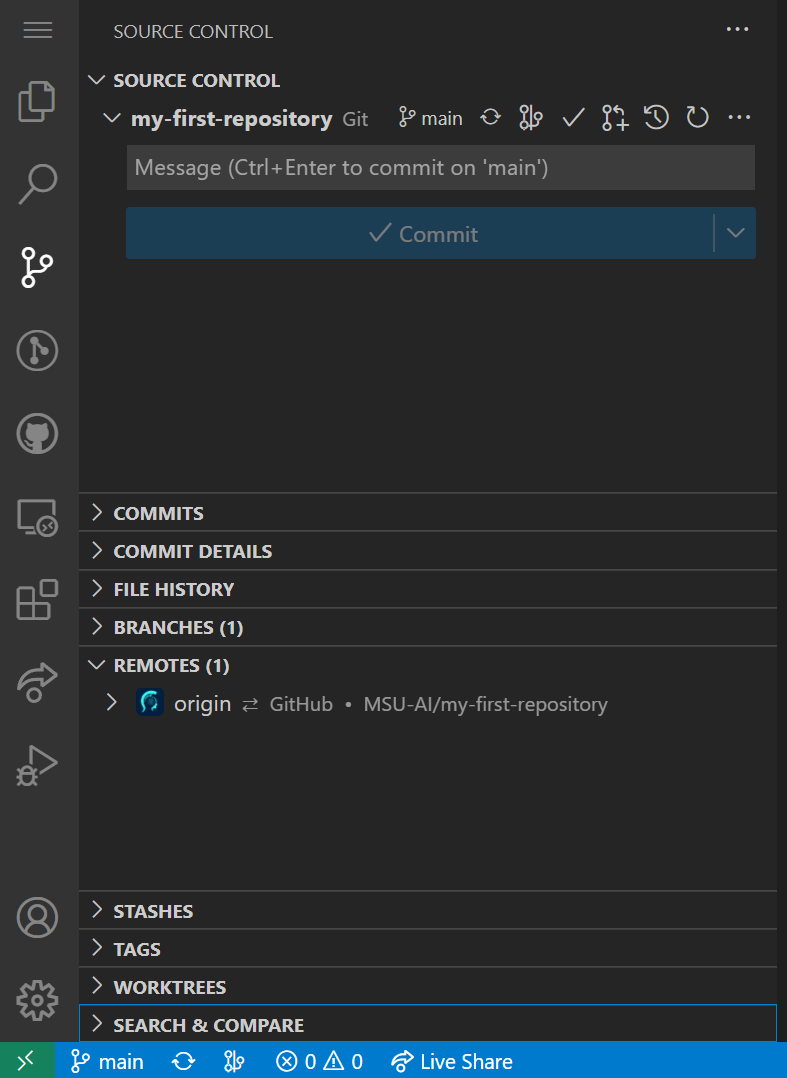
code my-first-repositoryThis opens up VS Code with my-first-repository as the selected folder. This allows VS Code to identify the "git structure" of your repo, minimizing the need for command-line interface (CLI).
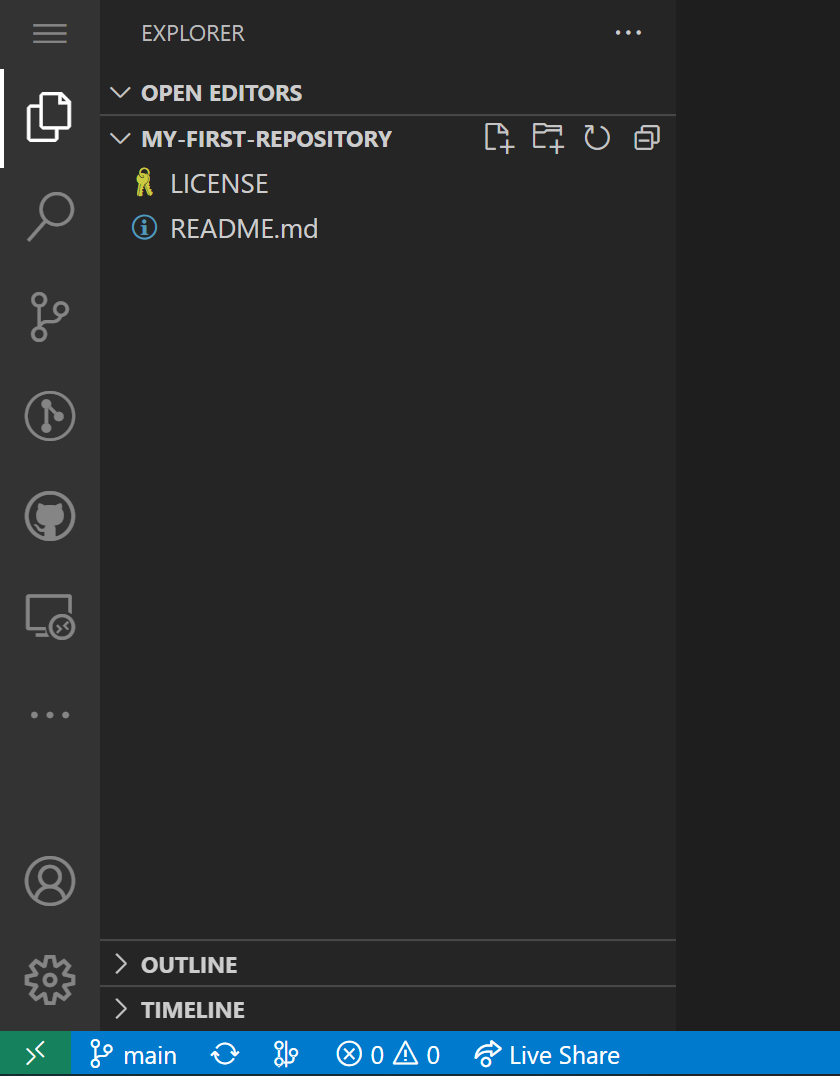
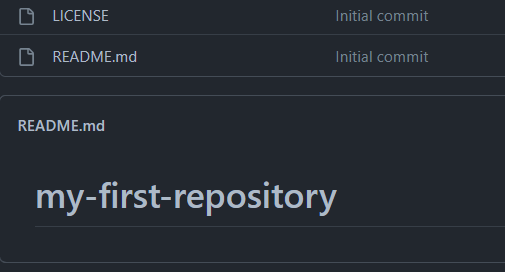
The default README generated by GitHub when we first created the repo is kind of ugly:
Let's change it into something nicer, and use this as an opportunity to learn about git commit.
On VS Code, open the file README.md. The file extension .md means the document is written in Markdown. GitHub supports Markdown rendering, so any .md files will be rendered for display instead of displaying the raw text content.
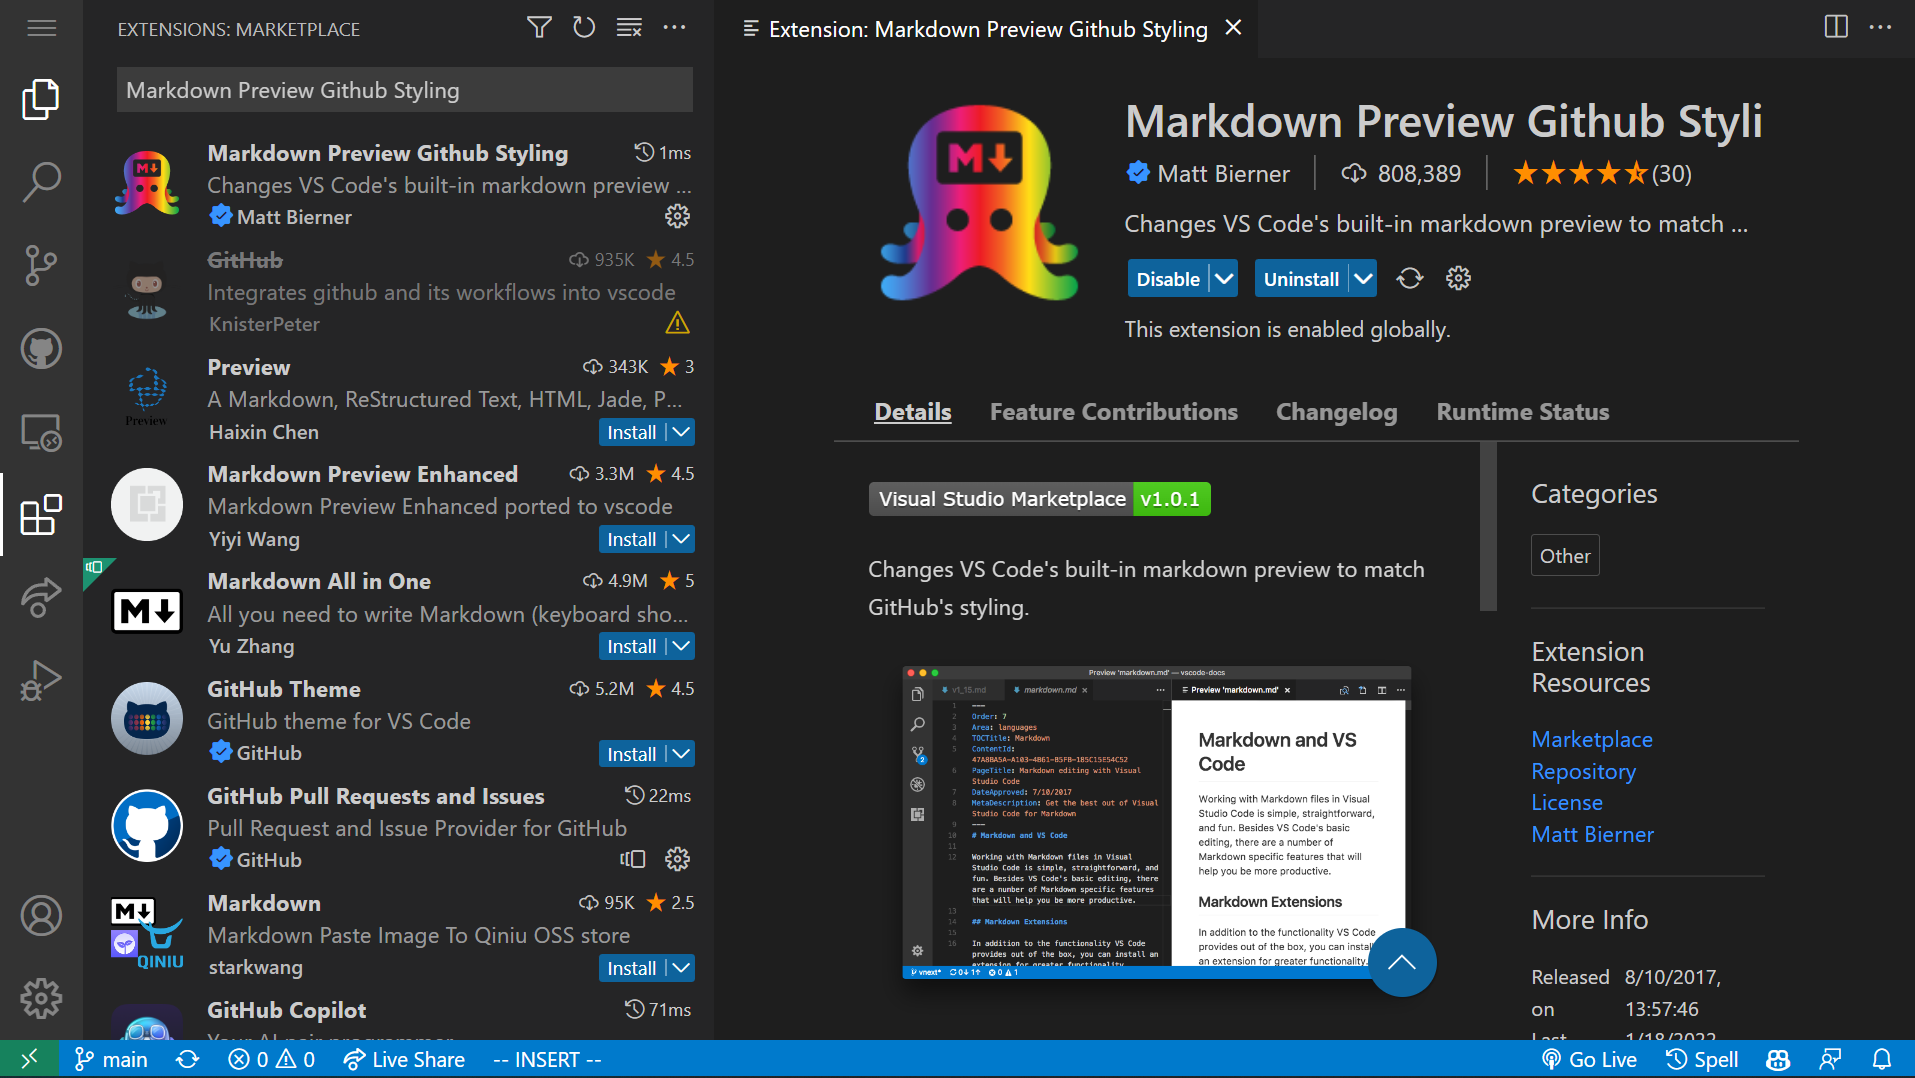
To create a title with Markdown, we use the character # followed by a space. To see how README.md will get rendered inside VS Code, you can install the extension Markdown Preview Github Styling.
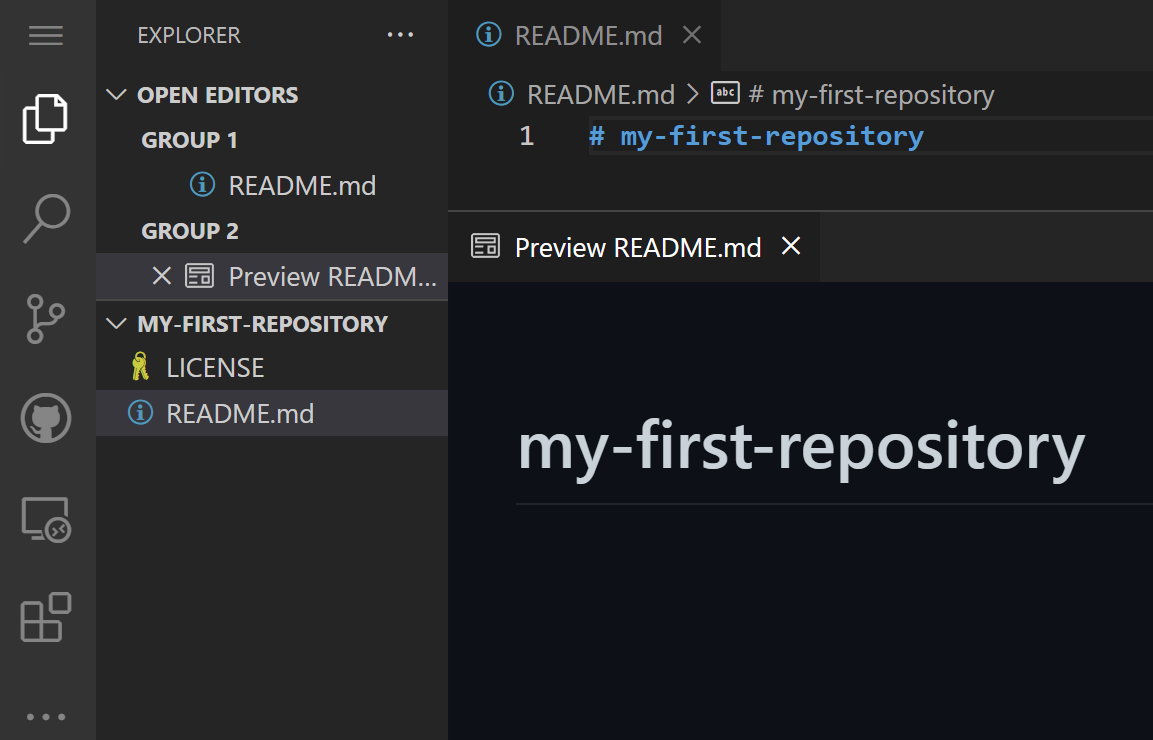
It is awkward to see our title hyphenated. We did that because a GitHub repo's name must not be separated by any space. But in a documentation like README, we should just write regular English:
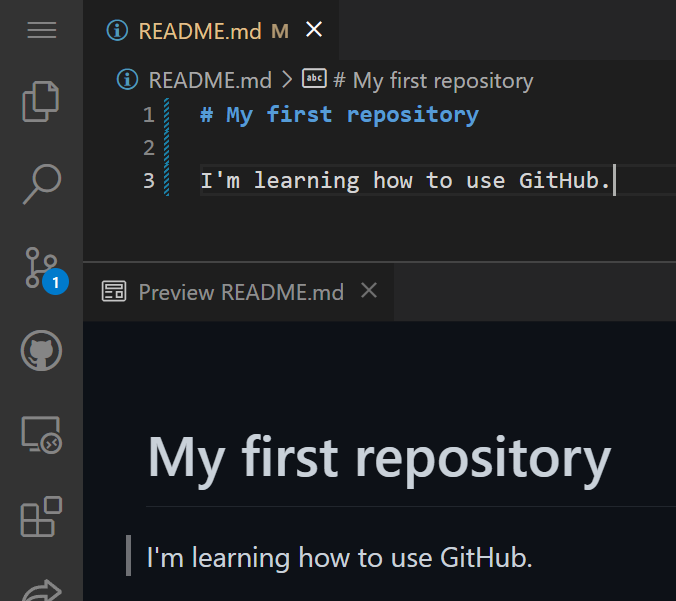
Two things to take note:
- In
README.md, you can see a blue vertical line between the line numbers and the text content . This is called a gutter indicator, indicating the content from these lines have been modified.
 - On the left panel, we see a blue circle "notification" at the source control icon
 , indicating that one change has been observed in current git repository.
One nice thing about Git is the ability to quickly inspect all changes that have been made. Click on the "Source Control" icon, and then the README.md. VS Code will open up a "Working Tree" view for the file:

A commit is pretty much like saving a file, but it is usually done much less frequently. On a Git repository, a git commit will permanently save the state of the repo. So any time in the future, it is always possible to revert your project back into any committed state. Of course, Git does not actually save many copies of the whole project. Instead, it saves only the changes in each commit, and uses some intelligent algorithm to manage all those git commits.
To commit a change, there are three steps.
We have already done the first step: make some modification. Any files that have been modified since previous git commit will automatically be identified as "Changes not staged for commit" (try git status on terminal). What does it mean by "not staged"? That brings us to the second step: staging changes. To better explain what it does, let us make another modification in our repo, in the LICENSE file:

So now we have two changes that are not staged. To stage a change, we simply click on the plus icon ![]() :
:
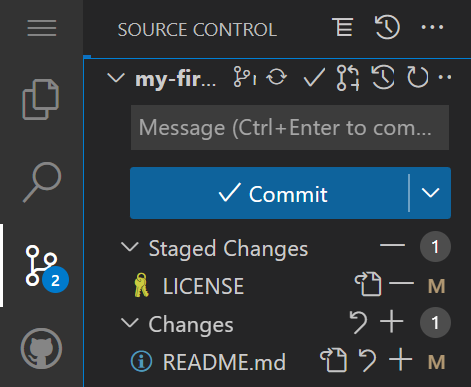
We have staged LICENSE. Finally the third step: commit. To make a git commit, you must provide a commit message. A commit message should be succinct yet descriptive in telling the future developers what were the changes. Once you are done, just click the "Commit" button.
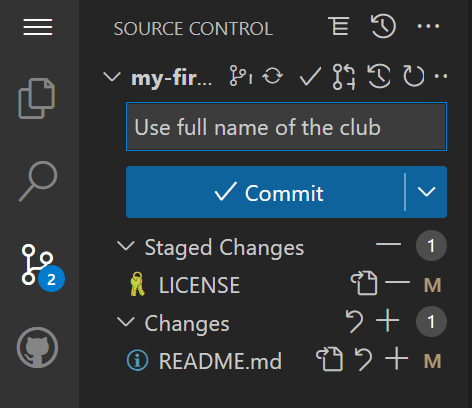
It is now time to explain why there is a staging step before commit. When working on a project, you will often find yourself having made changes to multiple files. Some changes might be ready to share with other collaborators (so you need a commit), whereas some might not be done yet. This extra staging step allows users to commit only part of the changes. In fact, even within one single file, you can choose to stage just some of lines, but not the rest.

After you have made a commit, the commit is only available in your own local computer. To share it back with other collaborators on GitHub, you need to git push your commit(s) to "remote" (GitHub). On VS Code, this can be done by clicking the synchronization icon  :
:
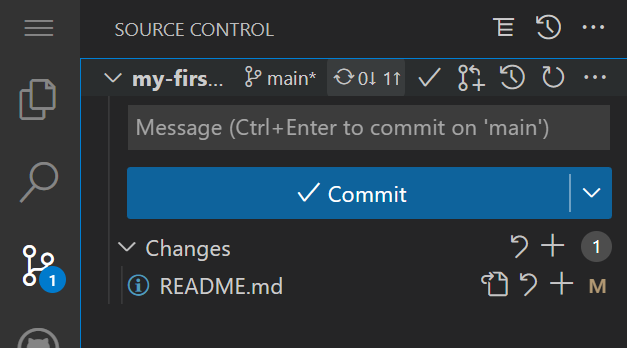
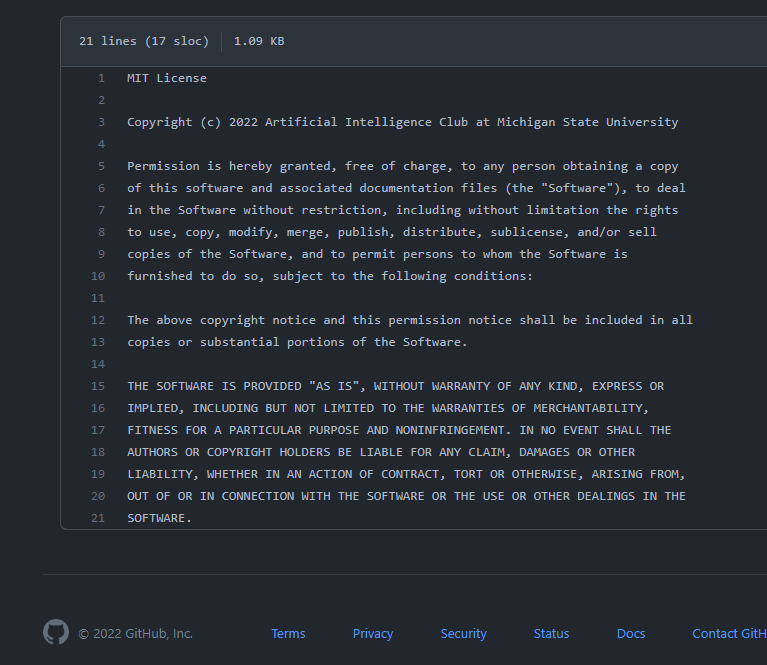
Now that you have pushed your commit, if you visit the GitHub repo, you will see the change has been applied:
Conversely, if there are changes made in the remote source (GitHub) but not in your local copy, you would need to do a git pull to pull those commits from GitHub to your local computer.
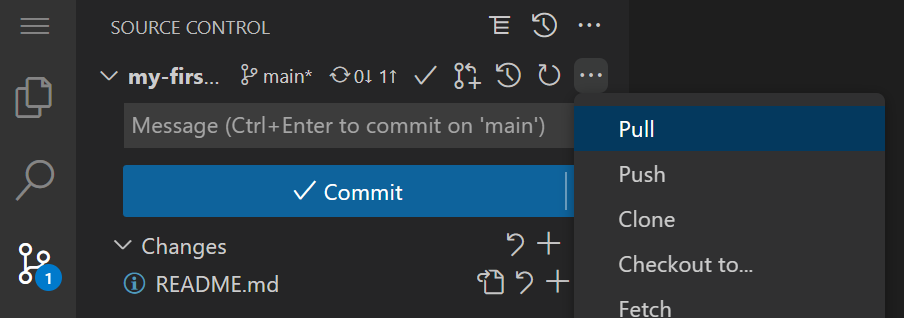
Git pull is pretty much like "download". Notice that we do not have to git clone again. Nor do we have to copy the URL or open up browser in anyway to "download" any files. This is where using Git can be convenient for synchronizing the entire codebase between local and remote. Imagine the other way of doing things, say, you had chosen to download the repo as a ZIP file, then synchronizing changes would have been tedious.

Branches come in handy when collaborating with multiple developers. Below is a schematic drawing of what branches are for:
When a repo is first created, there is only one branch called the main branch (used to be called the master branch). Things will turn messy real quick if everyone starts making their own changes and commits directly to this one branch. To solve this issue, Git allows the creation of branches, where each branch have ideally one person working on it for one single feature. A develop branch is also very common if the project has deployment step (e.g. publishing an app). In that case, feature branches will only be merged into the develop branch. The main branch only gets updated when a new version of the app is released.
To create a new branch on VS Code, we click at the following icon:
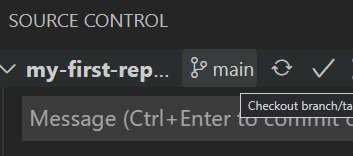

For now, we can just select "+ Create new branch...", but you can imagine scenarios when "+ Create new branch from..." to be useful, too. We should give the new branch a name:
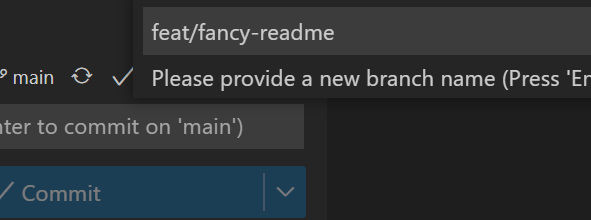
Here, the new branch is named feat/fancy-readme to indicate we are about to add a feature (feat) of fancy README content. Every project has its own naming guidelines. Here is a reference: https://learn.microsoft.com/en-us/azure/devops/repos/git/git-branching-guidance?view=azure-devops#name-your-feature-branches-by-convention
Once the new branch is created, you will notice a button that allows you to "Publish" your branch. This means to "push" the feat/fancy-readme to GitHub. Not all branches need to be pushed to GitHub. Sometimes you could be just making your own little experimentation, then it is fine to keep their branch local only. Publishing a local branch to remote is useful when you want other developers to review your work (on the branch), or you are trying to make a "pull request".
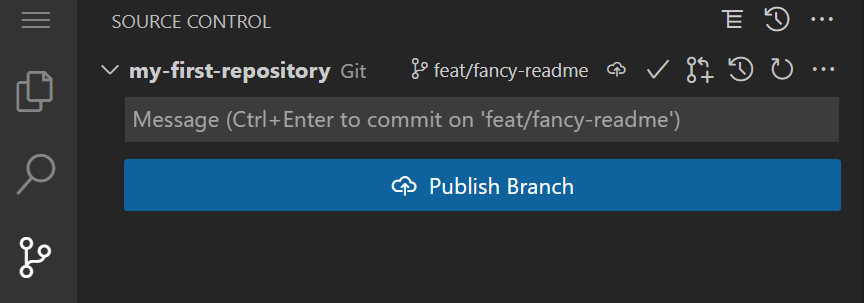
There are many ways for branch merging to happen. Most of the time, we merge two branches by opening a pull request (PR). To see how this can be done, we first make some changes on the README.md and commit. Make sure you are already on the feature branch, feat/fancy-readme.

Now we would like have this fancies README content to be merged back into the main branch. Since the main branch is public and crucial, it is better to have the merging happens on GitHub remotely, rather than just locally. This way, all developers can be aware of the merging immediately.
Click the "publish branch" icon ![]() . Now open your browser and go to the GitHub repo, you should see a notice like below:
. Now open your browser and go to the GitHub repo, you should see a notice like below:

Click "Compare & pull request", and that should bring you to a page that opens a PR:

Fill in the PR form accordingly. The title for this PR is the same as our commit message because there was only one commit. If there have been more than one commits, please use give a title that can summarize the feature you are implementing.
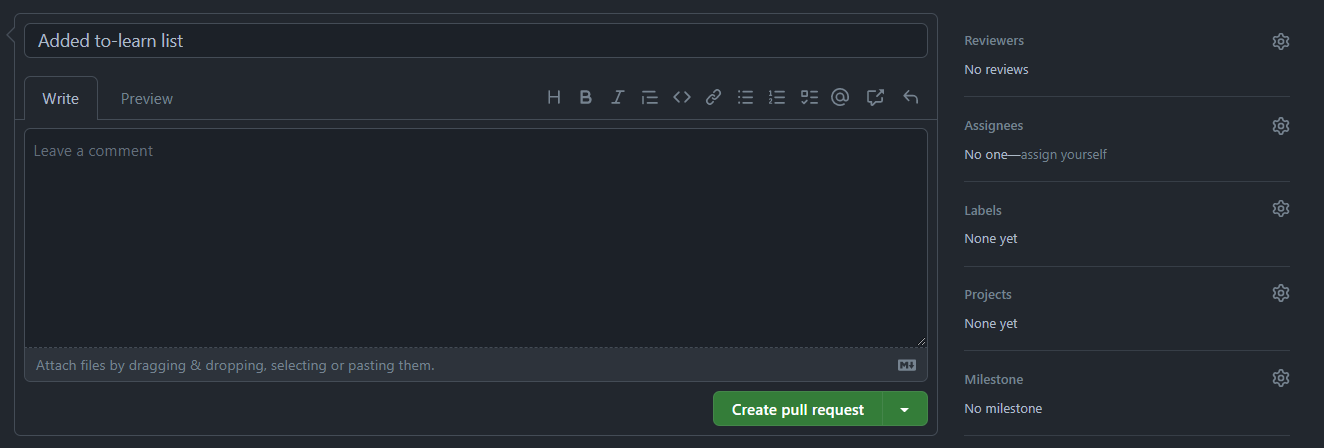
Once a pull request has been created, GitHub will tell you know merging is possible. There are many scenarios that could happen from this point onward, we will mention one scenario, which is the case where you are not the owner, and merging is blocked until your PR has been reviewed.
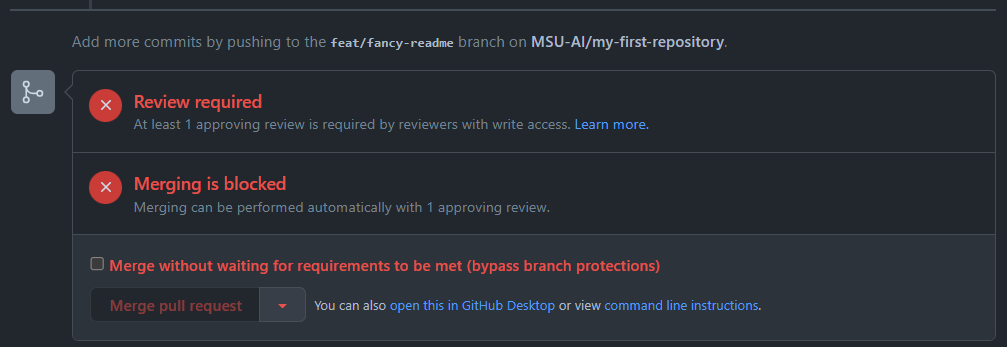
In this example, there is a checkbox saying "Merge without waiting for requirements to be met (bypass branch protections)". This is because the author of this PR (me, the writer) is the owner of the repo. You may or may not see this option available to you. Either way, a good practice is to always wait for reviews even if you have direct access, unless you are the only one working on that repo.
If your contribution is good, your PR will be approved and merged. You can then choose to delete the branch or keep it. Usually it is good to keep the branch for some time in case you still somehow need it in the future.

If we now go back to the GitHub repo's page, we will notice that our fancy "to-learn" list has been updated to the main branch!
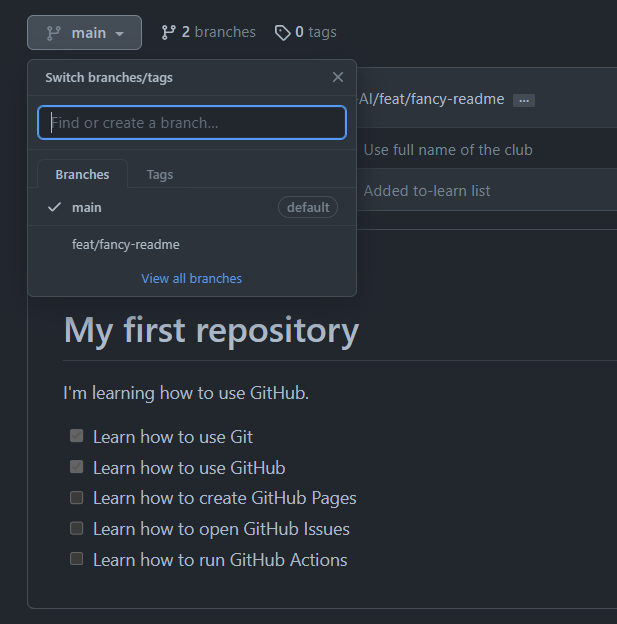
Actually a more common scenario when participating in an open-source project where you don't even have the privilege to create a branch is "forking". To fork a repository, simply click on the icon  located at the top-right corner:

What fork does is to create a new repository under your name (instead of MSU AI Club) with identical content to the original repo. By default, only the main branch is being forked (copied).
Now, you can now edit the same code but on your own forked version of the repo. Follow the good practice of making a branch for every feature or hotfix, and make a pull request back to the original repo when you are done.
"Issues" is a place for users or developers to report bugs, request issues, or even ask questions (if the repo does not offer a "Discussions" section).
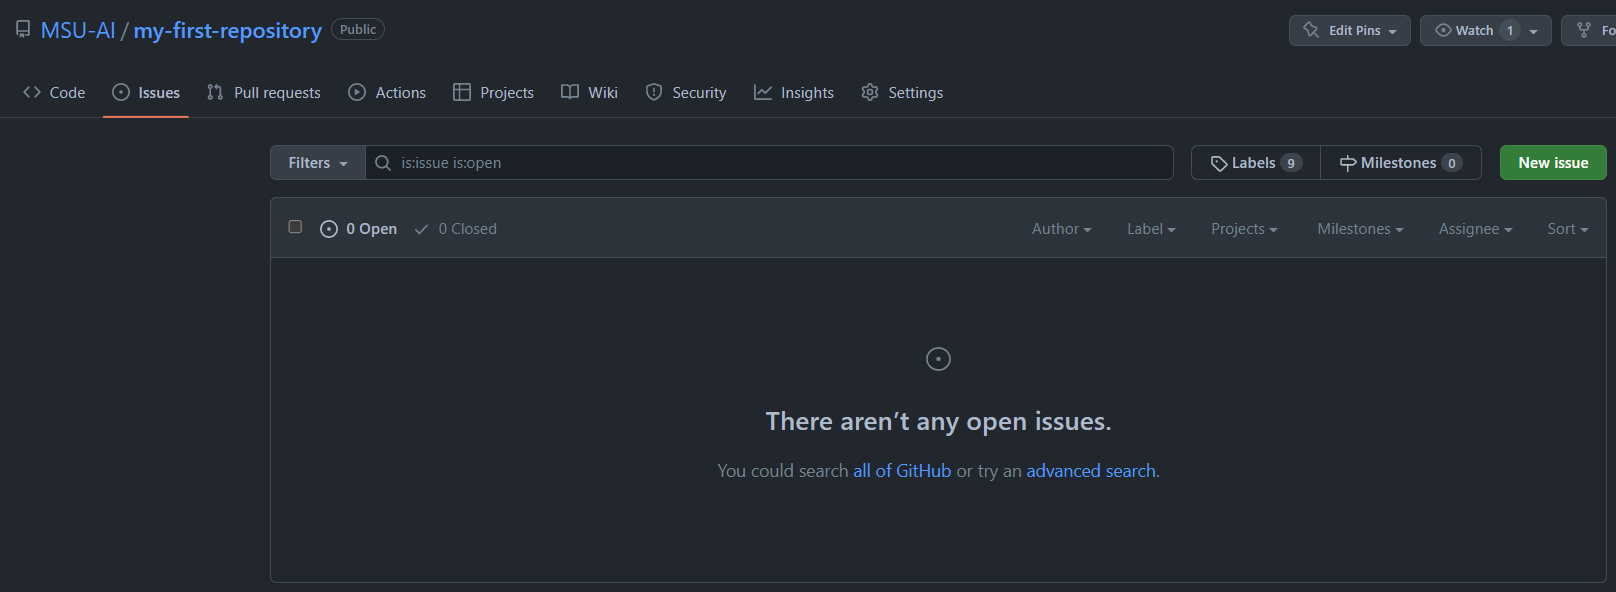
It is very straightforward to open an issue. Some projects might have their own template and guidelines for creating an issue. Please try your best to follow their conventions.
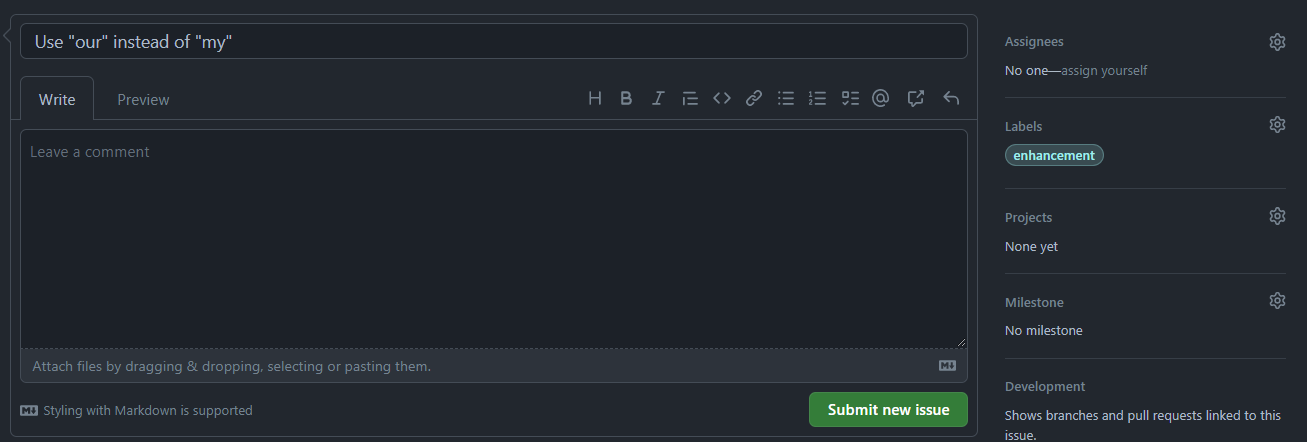
As a developer, one nice thing about GitHub issue is that you can easily link a pull request to an issue, making it easy to track things down (see https://github.com/features/issues).
In fact, some developers even adhere to some principle called issue-driven development.
- Getting started with GitHub: https://docs.github.com/en/get-started
- How to use GitHub on Visual Studio Code: https://code.visualstudio.com/docs/sourcecontrol/overview


