-
Notifications
You must be signed in to change notification settings - Fork 5
Getting Valkyrie Walking With IHMC's Controller
This page gives instructions on how to get Valkyrie up and walking with IHMC's wholebody controller. In doing so, we assume you are running a Valkyrie robot and thus have 2 onboard computers, referred to as Link and Zelda with Link being the realtime computer having IP address [LINK-IP] and zelda being the visualizer computer having IP address [ZELDA-IP]. For more complete, detailed instructions about SCS we refer you to the IHMC Wiki.
- You already have a properly setup IHMC workspace. The instructions for setting this up can be found here
- You are already familiar with the instructions on [this page](Booting Up Valkyrie), which details what is needed to get Valkyrie ready powered on and ready to servo
- Your SCS Workspace is named 'SCS_Workspace'. You can name it anything you want, and if you name it something other than 'SCS_Workspace', you should replace it with 'YOUR_WORKSPACE_NAME' .
- You are using Eclipse to run the robot.
- You MUST know the username and password of the link computer. On this page, I will be referring to these as [VALKYRIE_REALTIME_USERNAME] and [VALKYRIE_REALTIME_PASSWORD]. Replace these with the username and password of the robot you are working with.
When you checkout a clean SCS workspace you will have a 'Run Configuration' script that is setup to publish the necessary information to the robots computers. There are, however, a few things you need to do to let the script know your workspace name as well as the IP of the robots onboard computers.
First, you need to let the script know the name of your workspace. Open up Eclipse, and at the top of Eclipse click the dropdown arrow next to the green play button( ) near the top of Eclipse and select 'RunConfigurations...',

This will bring up a window where you will see a list of run configurations on the left, one of which will be called 'Publish To Valkyrie'

In the Working Directory field, you should put '${workspace_loc:/[YOUR_WORKSPACE_NAME]}'. For example, in the above image, the name of the gradle workspace is 'IHMC_Robotics'; therefore, for the Working Directory field I would put '${workspace_loc:/_IHMC_Robotics}'.
IHMC uses Gradle to compile their controller and network processor and deploy them to Valkyrie's onboard computers. In order to know where to send those files, it looks in Gradle property files and expects certain variables to be defined there. There will be a hidden directory at ~/.gradle on your computer. Use the following command to create this file,
touch ~/.gradle/gradle.propertiesIn this file, put the following lines,
valkyrie_link_ip=[LINK-IP]
valkyrie_zelda_ip=[ZELDA-IP]
valkyrie_realtime_username=[VALKYRIE_REALTIME_USERNAME]
valkyrie_realtime_password=[VALKYRIE_REALTIME_PASSWORD]
Now with any luck when you run 'Publish To Valkyrie', you should see something like the following in the Eclipse console,

and you should now have a new directory at ~/valkyrie(/home/user/valkyrie) which contains files for running IHMC's controller.
Once the controller has been successfully deployed, you will be able to start it from the mission control. With the controller manager running, start the IHMC wholebody controller by clicking the 'Start IHMC Controller' button,

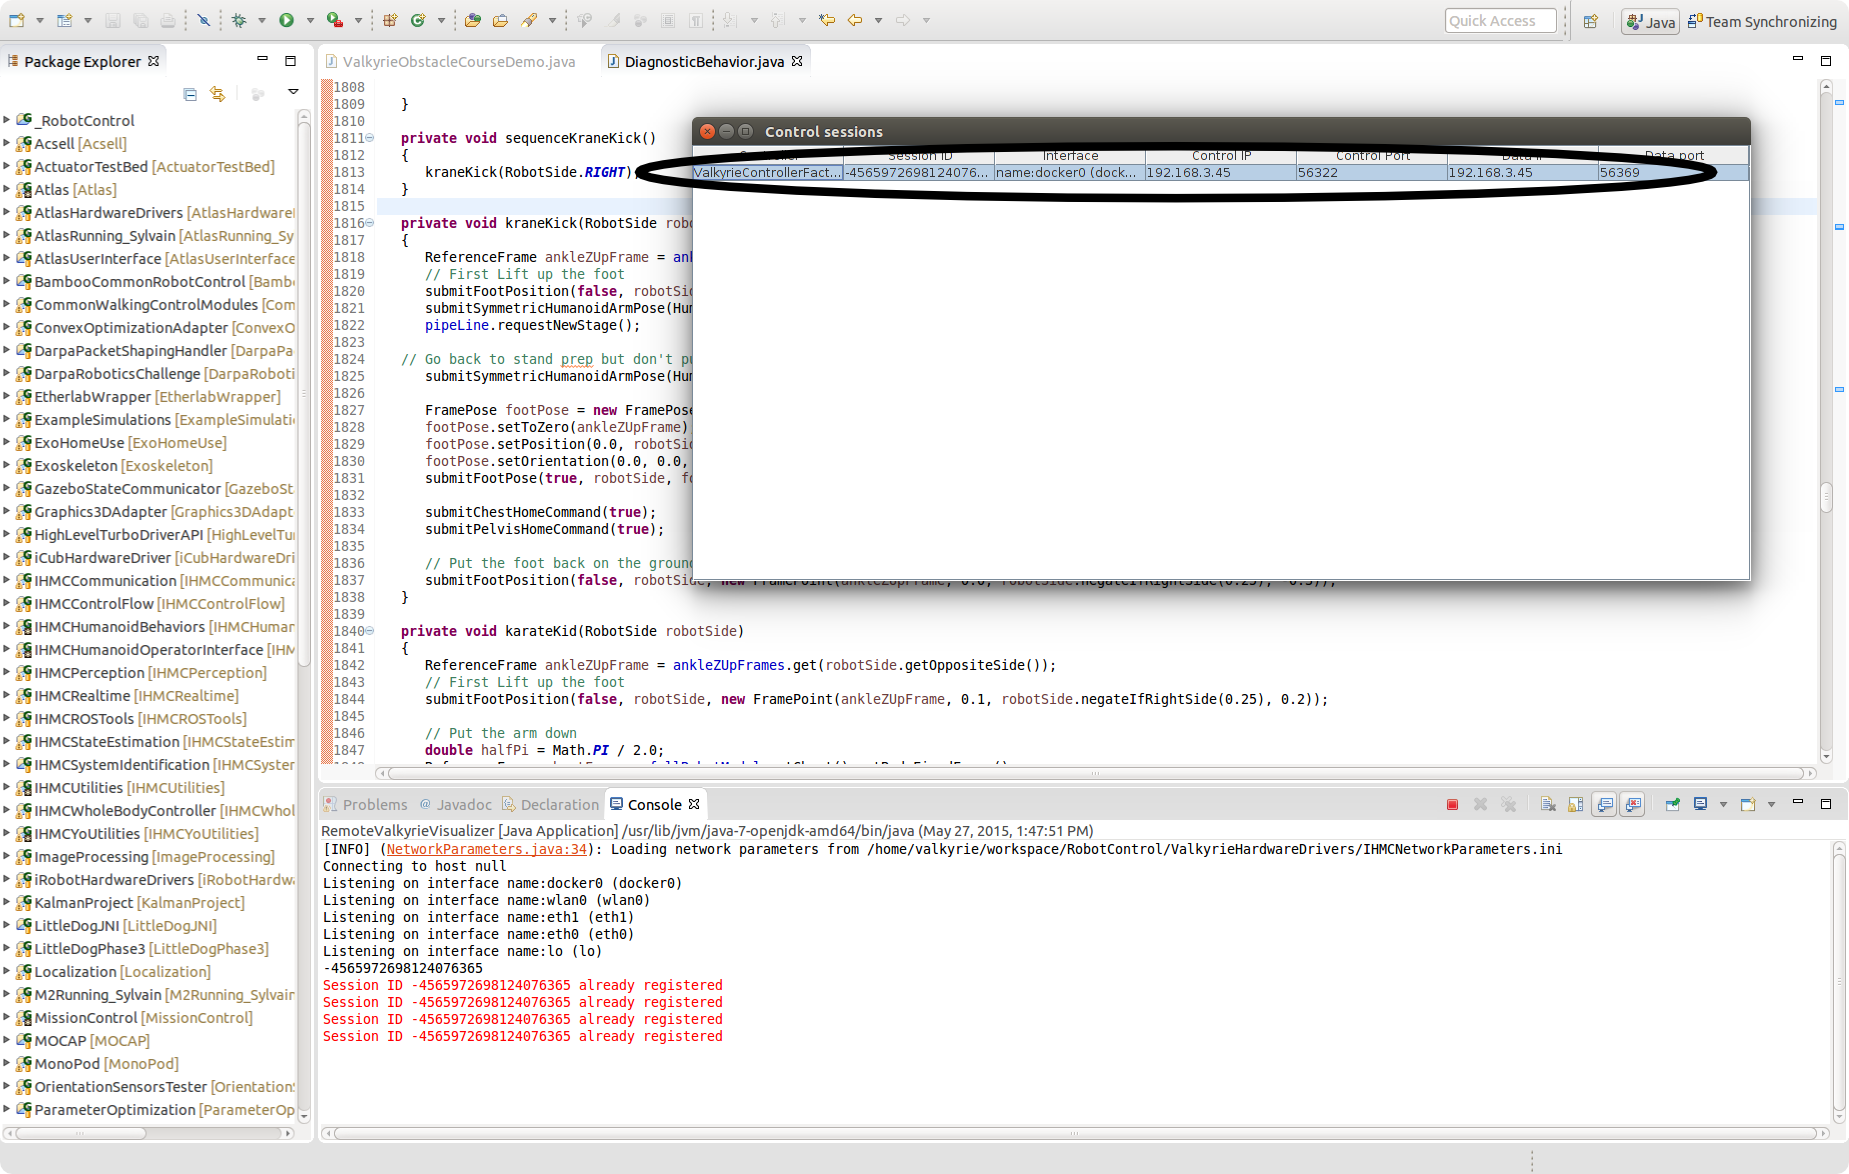
With the IHMC Controller running, you are now ready to open up the remote visualizer. From Eclipse, run RemoteValkyrieVisualizer.java. A small window will pop up that lists the running controllers that you are able to attach a visualizer to. Odds are you only have a single controller running and will only see a single entry. Double click that entry,

After loading for a few seconds, a remote visualizer will come up that should show you a visualization of your robot and should look something like the following(odds are yours will be in a different kinematic configuration),

Now that the controller is running and the SCS Visualizer is up, it's a goood time to servo the robot. At the bottom of the mission control GUI you will see a number of buttons in a 'Servo' box that servo either the entire robot or the individual limbs,

After servoing the robot, it should be in a 'stand prep' state(if you hear any high pitched squealing, it's likely some of the actuator rotors did not get initialized during servo. No worries, this is common. Park the robot and see our [trouble shooting page](Trouble Shooting) for a fix).
With the entire robot servo'd the only things left to do is to tare the 6-axis force/torque sensors before putting the robot on the ground. To do so, in the search box on the left side of the robot visualizer search for the variable 'calibrateFootForceSensors'. It's possible that this variable has already been placed in a tab at the bottom of the visualizer. If it has, you may simply toggle it to 1 there. If it's not there, go ahead and search for it in the box and when you find it, toggle it to 1(it will toggle itself back to 0).

Now your ready to put the robot onto the ground to stand up. Lower Valkyrie until her feet are securely on the ground. Once the feet are firmly down, you need to change the variable 'requestedHighLevelState' to 'Walking'.

To do so, if the variable is not already docked on the bottom of your visualizer, search for it in the search box. Once you have found it, drag and drop it into a tab at the bottom of the visualizer and change it to 'Walking'. It will switch itself back to NULL, this means it has successfully been set. Now you are ready to stand the robot up. The far right slider on your midi-board controls the desired center of mass height of the robot. Slide it to approximately half way up. Now slowly ramp the second slider from the right up. As you do so, the robot will transition into standing.
NASA Johnson Space Center - Valkyrie Team
Contact Us
Top of the Page
