1.1 Create an OData V4 client app in Visual Studio 2012
This section is a tutorial about how to create a client application for the OData V4 service with ODataCpp using Visual Studio 2012. The ODataCpp client libraries currently only supports Visual Studio 2012. We'll add more support soon.
Suppose you already have your ODataCpp client libraries and code generation tools built. If you haven't, please refer to the README file for instructions.
Open Command Prompt (cmd.exe) or PowerShell and type in the following command to navigate to the location:
cd <Home>\odatacpp\output\<Configuration>
<Home> is the path where your odatacpp folder is located and <Configuration> is the build configuration you've chosen to build your library (either "Debug" or "Release"). In this tutorial, we chose "Release" as the build configuration. So the command to type is:
cd <Home>\odatacpp\output\Release
Type in the following command in Command Prompt or PowerShell
.\odata_codegen_tool.vs11.exe <ServiceURL> <ProxyFileName> <Username> <Password>
<ProxyFileName> is the name you want for the .h and .cpp files of the proxy code. <ServiceURL> is the URL of the service document of the target OData service. <Username> and <Password> are the credential for accessing the service in case it requires authentication.
In this tutorial, we want to build a client application for the TripPin service published on www.odata.org and it doesn't require authentication, so we type in the following command:
.\odata_codegen_tool.vs11.exe http://services.odata.org/v4/TripPinServiceRW TripPinService
and we get the following two proxy files:

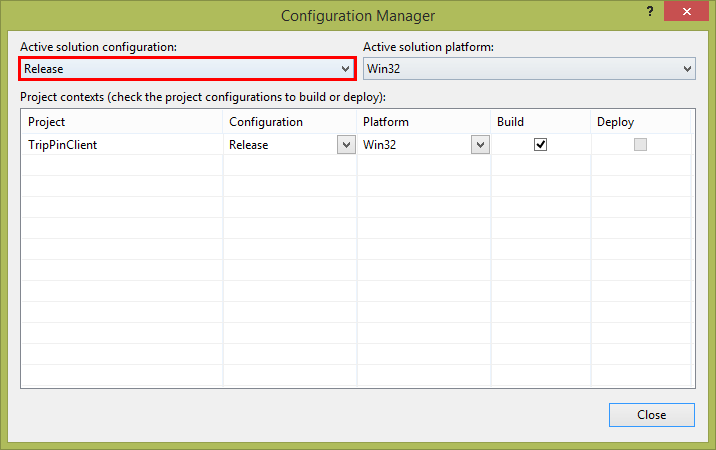
In Visual Studio, from the Build menu, select Configuration Manager. In the Configuration Manager window that shows up, change the value of Active solution configuration to "Release".
In Visual Studio, right click the client project in the Solution Explorer and select Properties from the menu. The Property Pages windows of the project will show up. Follow the steps to set the directories and dependencies:
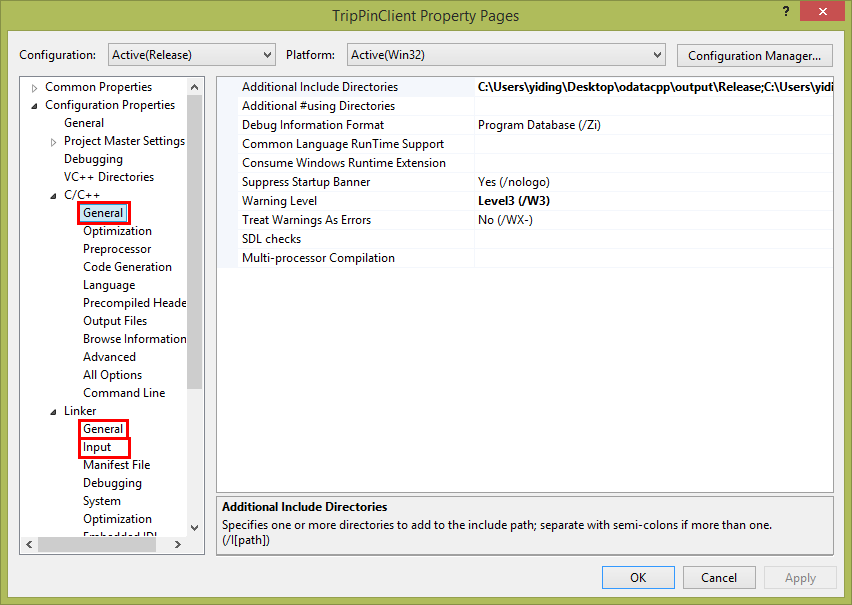
- Select Configuration Properties > C/C++ > General from the left navigation area, and add
<Home>\odatacpp\includeand<Home>\odatacpp\output\Release(because that's where TripPinService.h is) to the value of Additional Include Directories. - Select Configuration Properties > Linker > General from the left navigation area and add
<Home>\odatacpp\output\Releaseto the value of Additional Library Directories. - Select Configuration Properties > Linker > Input from the left navigation area and add
odata_client.vs11.lib,odata_library.vs11.lib, andutilities.vs11.libto the value of Additional Dependencies.
In Visual Studio, from the Tools menu, select NuGet Package Manager > Package Manager Console. In the Package Manager Console window, type:
Install-Package cpprestsdk -Version <Version>
and return, where <Version> is the same version number of the Casablanca library that you used to build your ODataCpp libraries. The library will then be installed.
In the Solution Explorer of Visual Studio, right-click the project and select Add > Existing item and choose the "TripPinService.cpp" formerly generated to add it to the project.
Copy "odata_client.vs11.dll", "odata_library.vs11.dll", and "utilities.vs11.dll" from <Home>\odatacpp\output\Release to <Workspace>\TripPinClient\Release, where <Workspace> is the path where your client project resides.
In the Solution Explorer of Visual Studio, right-click the project and select Add > New item. In the Add New Item window that shows up, select C++ File under the Visual C++ directory, name it "Main.cpp" and click Add.
In the Main.cpp windows, fill in the following code:
#include <iostream>
#include <TripPinService.h>

using namespace std;
using namespace Microsoft_OData_SampleService_Models_TripPin;

const ::utility::string_t trippin_service_root(U("http://services.odata.org/V4/(S(khax213ynjvk4pqdhdgcadvw))/TripPinServiceRW/"));

int main()
{
    auto service_context = make_shared<DefaultContainer>(trippin_service_root);
    auto airlines = service_context->create_airlines_query()->execute_query().get();
    for(auto iter = airlines.cbegin(); iter != airlines.cend(); iter++)
    {
        wcout << (*iter)->get_name() << endl;
    }

    return 0;
}
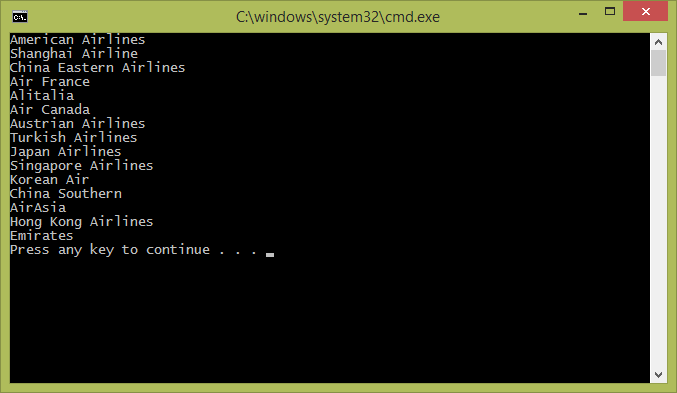
Build and run the project. The follow results will be shown in the console window: