-
Notifications
You must be signed in to change notification settings - Fork 7
Usage
- Installation
- Adding a custom image size
- Floating the featured image
- Types of text to display
- Getting posts from various types of post
Like other WordPress plugins, Posts in Sidebar can be installed via the WordPress dashboard. Look for Posts in sidebar, install it, and activate it.
Once installed, the plugin will add a new widget in the administration panel for widgets, like this:

The widget is very full of options so to let you control almost every aspect of the output. For example, many users asked for help to reduce or simply change the space between every line of the output: while this could be accomplished via editing the CSS file of the theme, some users didn't know this and to avoid new requests of this type I added the options to control the space.
If you take a look at the options in the widget, it should be simple to understand and very self explanatory. Play with this options until you are satisfied with the results!
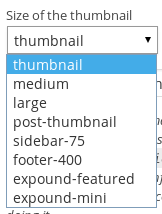
With Posts in Sidebar you can choose which size of the featured image the plugin should show. If none of the standard image size doesn't fit your needs, you can add the size you like editing the functions.php file of your current theme.
Open the file functions.php via the WordPress dashboard, go to the end of the file, and look for this symbol: ?>. If it is there, add the following lines before it; otherwise add these lines just at the end of the file:
function my_featured_image_sizes() {
    add_theme_support( 'post-thumbnails' );
    add_image_size( 'sidebar-75', 75, 75, true );
    add_image_size( 'footer-400', 400, 300, false );
}
add_action( 'after_setup_theme', 'my_featured_image_sizes');
The function add_theme_support adds the support for the featured image and add_image_size adds the new image sizes. The second function has some values and let's explain them here:
- the first value is the name that will show up in the widget panel, so give him a descriptive but short name; use only hyphens and/or underscores instead of spaces;
- the second value controls the width of the image;
- the third value of the image controls the height of the image;
- the fourth value controls if the image should be cropped in a square of 75x75 pixels (filling all the space,
truevalue) or if the image should be fully displayed but inserted in a 400x300 pixels rectangle (the image is resized,falsevalue). More info here and here.
Change the values 75/400/300 and true/false according to your needs.
Save the file. Now go to your widget panel and the new size should be there.
Take note that all the images you already uploaded won't have the newly defined sizes: only the new images you'll upload from now will have. To regenerate all the sizes for all the images, you can use a plugin like Simple Image Sizes. This plugin will help you on regenerate all the images at once or, if you want, one by one.
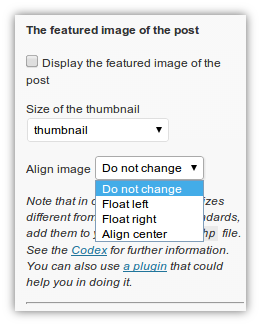
The widget panel has a dropdown menu to make floating the image displayed:
If you select an option different than "Do not change", the widget will add the WordPress standard classes to the image. The class names are:
alignleftalignrightaligncenter
Usually WordPress themes already have these classes; if not, add this code to your CSS file (look for style.css in the root folder of your theme):
.alignleft {
    float: left;
    margin-right: 10px;
}
.alignright {
    float: right;
    margin-left: 10px;
}
.aligncenter {
    display: block;
    margin: 0 auto;
}
Change the margin values according to your needs.
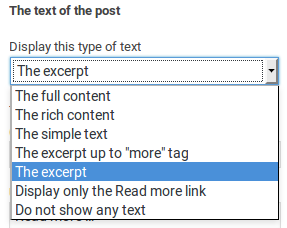
In Posts in Sidebar these are the types of text that the plugin can display:
| Type of text | What will be displayed. |
|---|---|
| The full content | The content of the post as displayed in the page. |
| The rich content | The content with inline images, titles and more (shortcodes will be executed). |
| The simple text | The full text of the content, whitout any ornament (shortcodes will be stripped). |
| The excerpt up to "more" tag | The excerpt up to the point of the "more" tag (inserted by the user, shortcodes will be stripped). |
| The excerpt | The excerpt as defined by the user or generated by WordPress (shortcodes will be stripped). |
| Display only the Read more link | No text, only the "Read more" link. |
| Do not show any text | No text at all. |
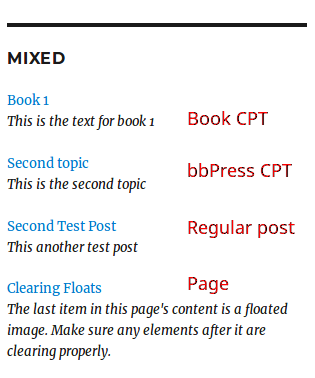
You can get posts from multiple post types or from any types.
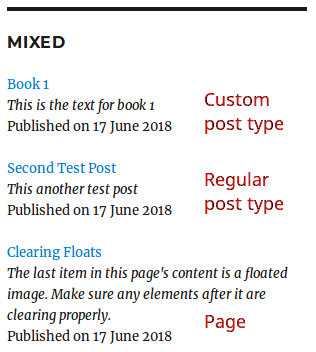
Just set Any in Post type field. This tells Posts in Sidebar to get any type of posts (regular posts, pages, custom post types, etc.), except revisions and custom post types with exclude_from_search set to true.
The result can be something like this:
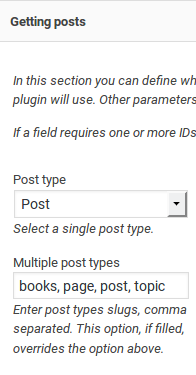
If you want to get posts that have exclude_from_search set to true (for example, bbPress creates its own custom post types with this option activated), define the various custom post types in "Multiple post types" field.
For example, you can get posts from regular posts, pages, "book" custom post type, and "topic" bbPress custom post type:
This is the result:
