Next Spotify is a Spotify clone built using Next.js (Pages Router) and TailwindCSS. Users can log in with their Spotify account and view the playlists, artists, and albums followed by them.
Working demo for the project - Link
Next-Spotify v2 is out in this repository. Check this out if you are interested in Next.js's app dir, server components, client components, and improved UI.
Note : Currently users cannot log in to the demo link. The application would work in the local system.
- Technologies and Libraries used
- Features
- To-do features
- Run locally
- Environment variables
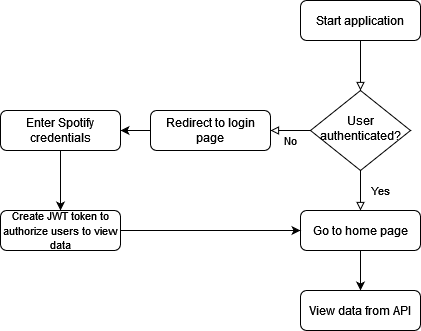
- Data flow
- API Reference
- Screenshots
- Resources
- Next.JS 16 (Pages Router)
- Typescript
- TailwindCSS
- NextAuth.js for Spotify OAuth authentication
- Log-in into the application using Spotify OAuth through the next-auth package
- View all the playlists created or followed by the user
- View liked songs playlist of the user
- View artists and albums followed by the user
- Display all the tracks in a playlist, an album, or of an artist
- Search for any playlist, artist, album, or track
- Show latest releases
Since Spotify's Redirect URIs often require HTTPS for authentication, you must use a tunneling service like ngrok for the login flow to work locally.
Clone the project
git clone https://github.com/ankitk26/next-spotify-pages-router.gitGo to the project directory
cd next-spotify-pages-routerInstall dependencies
  npm install
  # or
bun install- Install ngrok and authenticate it.
- Start your local development server:
npm run dev # or bun run dev - In a separate terminal, create a tunnel for your local server:
ngrok http 3000
- Copy the
ForwardingURL (e.g.,https://your-tunnel-id.ngrok-free.app).
To run this project, you will need to add the following environment variables to your .env file. Replace <YOUR_NGROK_URL> with the URL generated by ngrok.
SPOTIFY_CLIENT_ID=your_spotify_client_id
SPOTIFY_CLIENT_SECRET=your_spotify_client_secret
NEXTAUTH_URL=<YOUR_NGROK_URL>
NEXTAUTH_SECRET=your_generated_secret
-
Step 1: Go to the Spotify's developer dashboard and log in with your Spotify credentials
-
Step 2: Click on CREATE AN APP button on the applications page. Enter the name and description for the application.
-
Step 3: After creating the application, copy the Client ID and Client Secret and paste it into the .env file.
-
Step 4: In the application page itself, click on Edit Settings button. Under the Redirect URIs section, add the redirect URL in the text field provided as follows:
<YOUR_NGROK_URL>/api/auth/callback/spotifyWhen the project is deployed, add another redirect URL as follows:
https://xyz.domain/api/auth/callback/spotify -
Step 5: In the Users and Access page, add the email addresses for the accounts you want to test the application for. Your own account is enabled by default so no there's no need to add your own account's email.
To create a secret key, open your terminal, run the command below and copy the value generated to the .env file.
openssl rand -base64 32Note: Make sure to update NEXTAUTH_URL in your .env file with your ngrok URL before starting the development server.
The API endpoints and their response are listed in https://developer.spotify.com/console/
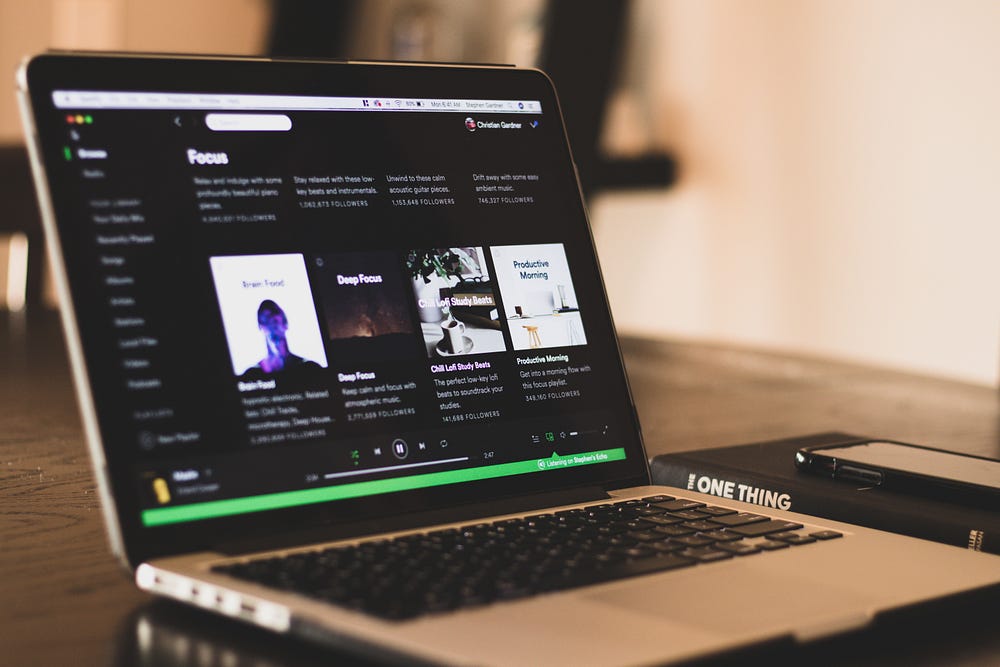
Home page

Browse categories

Search

View Artist

View Album

View Playlist

Music player
