

Authentication and user administration for Shiny apps. polished provides a way to secure your Shiny application behind an authentication layer. It also provides a UI for controlling user access and monitoring user activitiy.
Sign in to a Live Demo Shiny App with the following:
- email: demo@tychobra.com
- password: polished
Check out the introducing polished blog post for a high level overview and video.
Warning: there will be many breaking changes before this package matures to version 1.0.0
To add polished to your Shiny apps you will need to create a new folder for your polished configuration. To keep things organized we recommend the following folder structure:
- <project_name>/
- polished-<project_name>/
- <shiny_app_1>/
- <shiny_app_2>/
- ...
The "polished-<project_name>" folder contains all the polished configuration. "<shiny_app_1>", "<shiny_app_2>", and "..." (other Shiny apps) are the Shiny apps that use the polished configuration set in "polished-<project_name>".
Each user will use the same email/password to authenticate with all of the Shiny apps. Authorization is set at a per Shiny app level. So, as an admin, you can control which users have access to which apps, and your users can use single sign on authentication.
You can have as many Shiny apps in the "<project_name>" folder as you want. At Tychobra, we build Shiny apps for many different companies, so in our work, each client company usually gets their own separate "<project_name>" folder containing one or more Shiny apps.
# R

remotes::install_github("tychobra/tychobratools")
remotes::install_github("tychobra/polished")
-
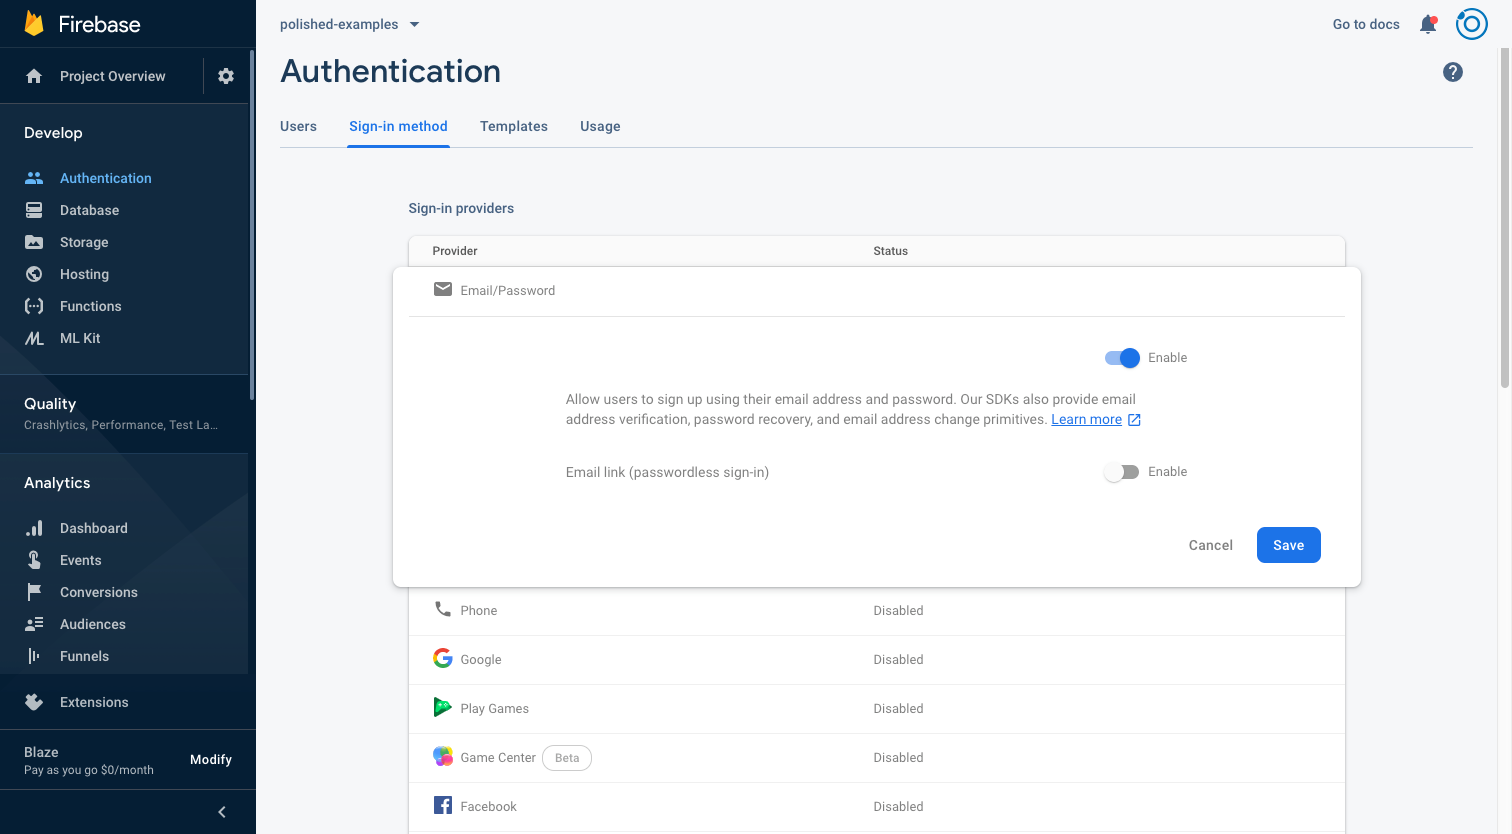
Set up your Firebase project. Go to https://firebase.google.com/ and create a firebase project named "polished-<project_name>". Open your new Firebase project and:
- go to the "Authentication" page "Sign-in method" tab and enable "Email/Password" sign in. See the below screenshot:
- go to the "Authentication" page "Sign-in method" tab and enable "Email/Password" sign in. See the below screenshot:
-
Organize your Shiny app(s) in accordance with the folder structure from the "Getting Started" section
-
Set up the "<project_name>/polished-<project_name>" folder.
# terminal

cd <project_name>

# make polished folder and move to it
mkdir polished-<project_name>
cd polished-<project_name>

# if you don't have `firebase-tools` installed, install it globally
npm install -g firebase-tools

# initialize
firebase init
Enter the following in the command line prompts:
- Which Firebase CLI features do you want...? Functions
- Select a default Firebase project for this directory: choose the Firebase project id from step 1
- What language would you like to use to write Cloud Functions? JavaScript
- Do you want to use ESLint to catch probable bugs and enforce style? N
- Do you want to install dependencies with npm now? Y
Your "polished-<project_name>" folder should now look like this:
- firebase.json
- functions/
Next Install Firebase functions dependencies
# terminal

cd functions
npm install --save firebase-admin firebase-functions
Create and deploy Firebase Functions
# R
polished::write_firebase_functions()
# terminal
firebase deploy --only functions
Set up PostgreSQL "polished" schema. This schema stores your users, apps, and information about which users are authorized to access which apps. To create this schema you must have a PostgreSQL database that you can connect to.
# R

# connect to your PostgreSQL database
db_conn <- DBI::db_connect(
  RPostgres::Postgres(),
  <your db connection credentials>
)

# create the "polished" schema.
# Warning: if you already have a polished schema this function will overwrite your existing schema with empty tables.
polished::create_schema(db_conn)

# add the first user to your first app
# I always add myself first using this function, and then I add other additional users via
# the "Polished Admin > User Access" page
polished::create_app_user(db_conn, app_name = "<your app name>", email = "<your email>", is_admin = TRUE)
You have now completed setting up the "<project_name>/polished-<project_name>" folder.
- Secure Your Shiny App
To secure your Shiny app you pass your Shiny ui to secure_ui() and your Shiny server to secure_server(). See the the documentation of secure_ui() and secure_server() for details.
# R
?
?secure_ui
?secure_server
Additionally you need to pass the firebase functions url and the app name to global_sessions_config() in your "global.R" file.
You can find a full working example in the "inst/examples/" directory in this package.
Companies often want to add their logos and branding to the sign in and register pages. With polished, you can easily customize these pages. Just pass your custom UI to the sign_in_page_ui argument of secure_ui().
Sign in to a Live Example with the following:
- email: demo@tychobra.com
- password: polished
The code for the above example is available in the "inst/examples/custom_sign_in/" directory. To get this example working, you will need to update the "config.yml" with your Firebase credentials.
You can add custom tabs to the admin dashboard by passing the ui and server code to the secure_ui() and secure_server() functions. Example coming soon.
Create a Shiny dashboard of your Shiny dashboards/apps. Example coming soon.