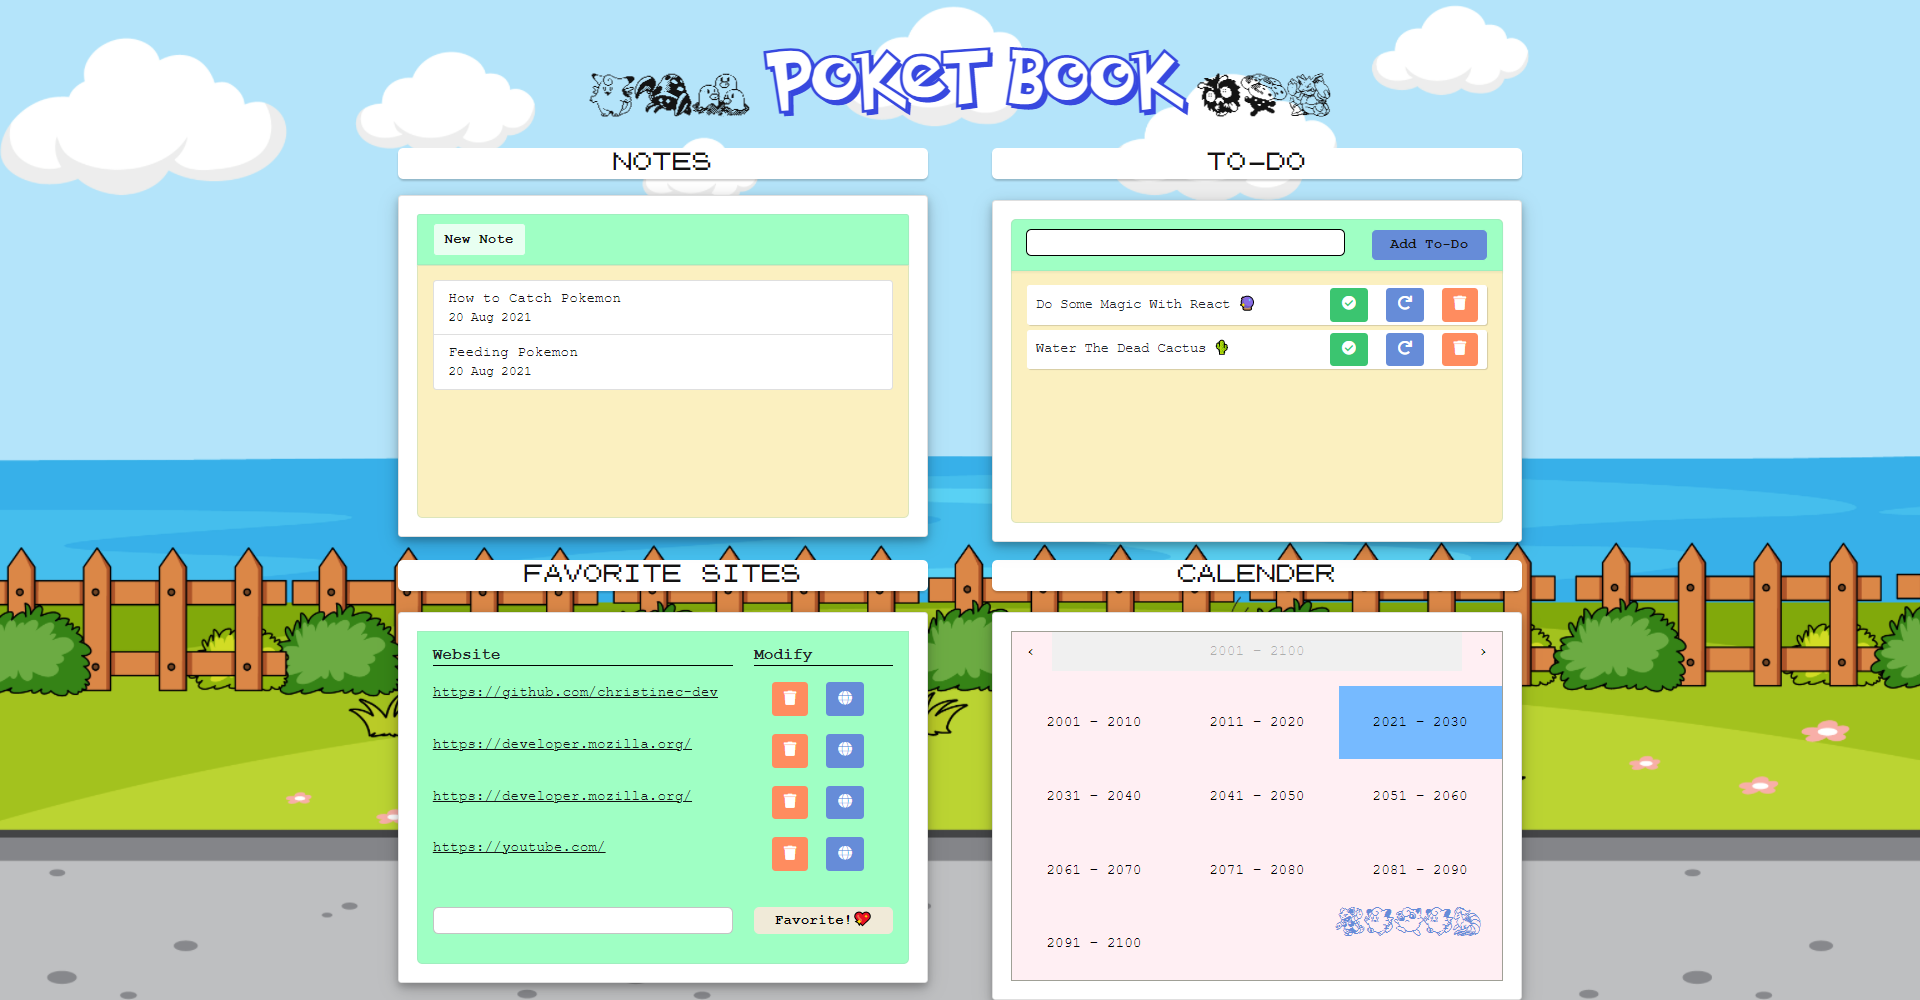
Who doesn't need a good note taking app, especially if it is Pokémon Themed! This cute little Poket Book allows you to add/delete/edit/view notes, to-do list items, your favorite links, and you can check your calender.
In this project, instead of doing all the coding for the game on a singular app.js or index.js page, I broke my source code up into their respective component and layout files. I now have pretty solid understanding of how to seperate and intergrate my component files with and from each other using Local Storage, and I now know how to correctly use more NPM Packages (such as moment, react-calender, react-newline-to-break, font-awesome etc). This application is fully functional. You can add, view, edit, delete most of the notes, links and to-do's, just note that there are hard coded values already added for testing that can be removed.
A special thanks to the creators of the PokemonGB-font, PocketMonkFont, PokemonPixels Font, and the background image. Credit links are down below.
Day three (3) of trying to code in React on my own was a success. I completed it with the following: React, JavaScript, HTML5, CSS3, SCSS and Bootstrap.
**Please note that if the app does not load or gives an error, just reload the page and Heroku will work again. Sorry for any inconveniece :)
Later on, when I have more time and understanding, I want to modify the calender so that you can store important dates or notes on it.
Recording.2.mp4
Credit Links: https://www.fontspace.com/search?q=pokemon https://www.freepik.com/free-vector/empty-park-landscape-scene-with-river_13753820.htm?query=cartoon%20background
This project was bootstrapped with Create React App.
In the project directory, you can run:
Runs the app in the development mode.
Open http://localhost:3000 to view it in the browser.
The page will reload if you make edits.
You will also see any lint errors in the console.
Launches the test runner in the interactive watch mode.
See the section about running tests for more information.
Builds the app for production to the build folder.
It correctly bundles React in production mode and optimizes the build for the best performance.
The build is minified and the filenames include the hashes.
Your app is ready to be deployed!
See the section about deployment for more information.
Note: this is a one-way operation. Once you eject, you can’t go back!
If you aren’t satisfied with the build tool and configuration choices, you can eject at any time. This command will remove the single build dependency from your project.
Instead, it will copy all the configuration files and the transitive dependencies (webpack, Babel, ESLint, etc) right into your project so you have full control over them. All of the commands except eject will still work, but they will point to the copied scripts so you can tweak them. At this point you’re on your own.
You don’t have to ever use eject. The curated feature set is suitable for small and middle deployments, and you shouldn’t feel obligated to use this feature. However we understand that this tool wouldn’t be useful if you couldn’t customize it when you are ready for it.
You can learn more in the Create React App documentation.
To learn React, check out the React documentation.
This section has moved here: https://facebook.github.io/create-react-app/docs/code-splitting
This section has moved here: https://facebook.github.io/create-react-app/docs/analyzing-the-bundle-size
This section has moved here: https://facebook.github.io/create-react-app/docs/making-a-progressive-web-app
This section has moved here: https://facebook.github.io/create-react-app/docs/advanced-configuration
This section has moved here: https://facebook.github.io/create-react-app/docs/deployment
This section has moved here: https://facebook.github.io/create-react-app/docs/troubleshooting#npm-run-build-fails-to-minify "# poket-book"


