Check out the live demo first to see what to expect!
User-Controlled Wallets Sample App showcases the integration of Circle's Web3 Services products (Web SDK, Smart Contract Accounts (SCA) user-controlled wallets, gasless transactions). You can download and easily run and configure for your own projects. The use case it will be supporting is integrating user-controlled wallets into an existing web application, so that you can provide wallets to your end users.
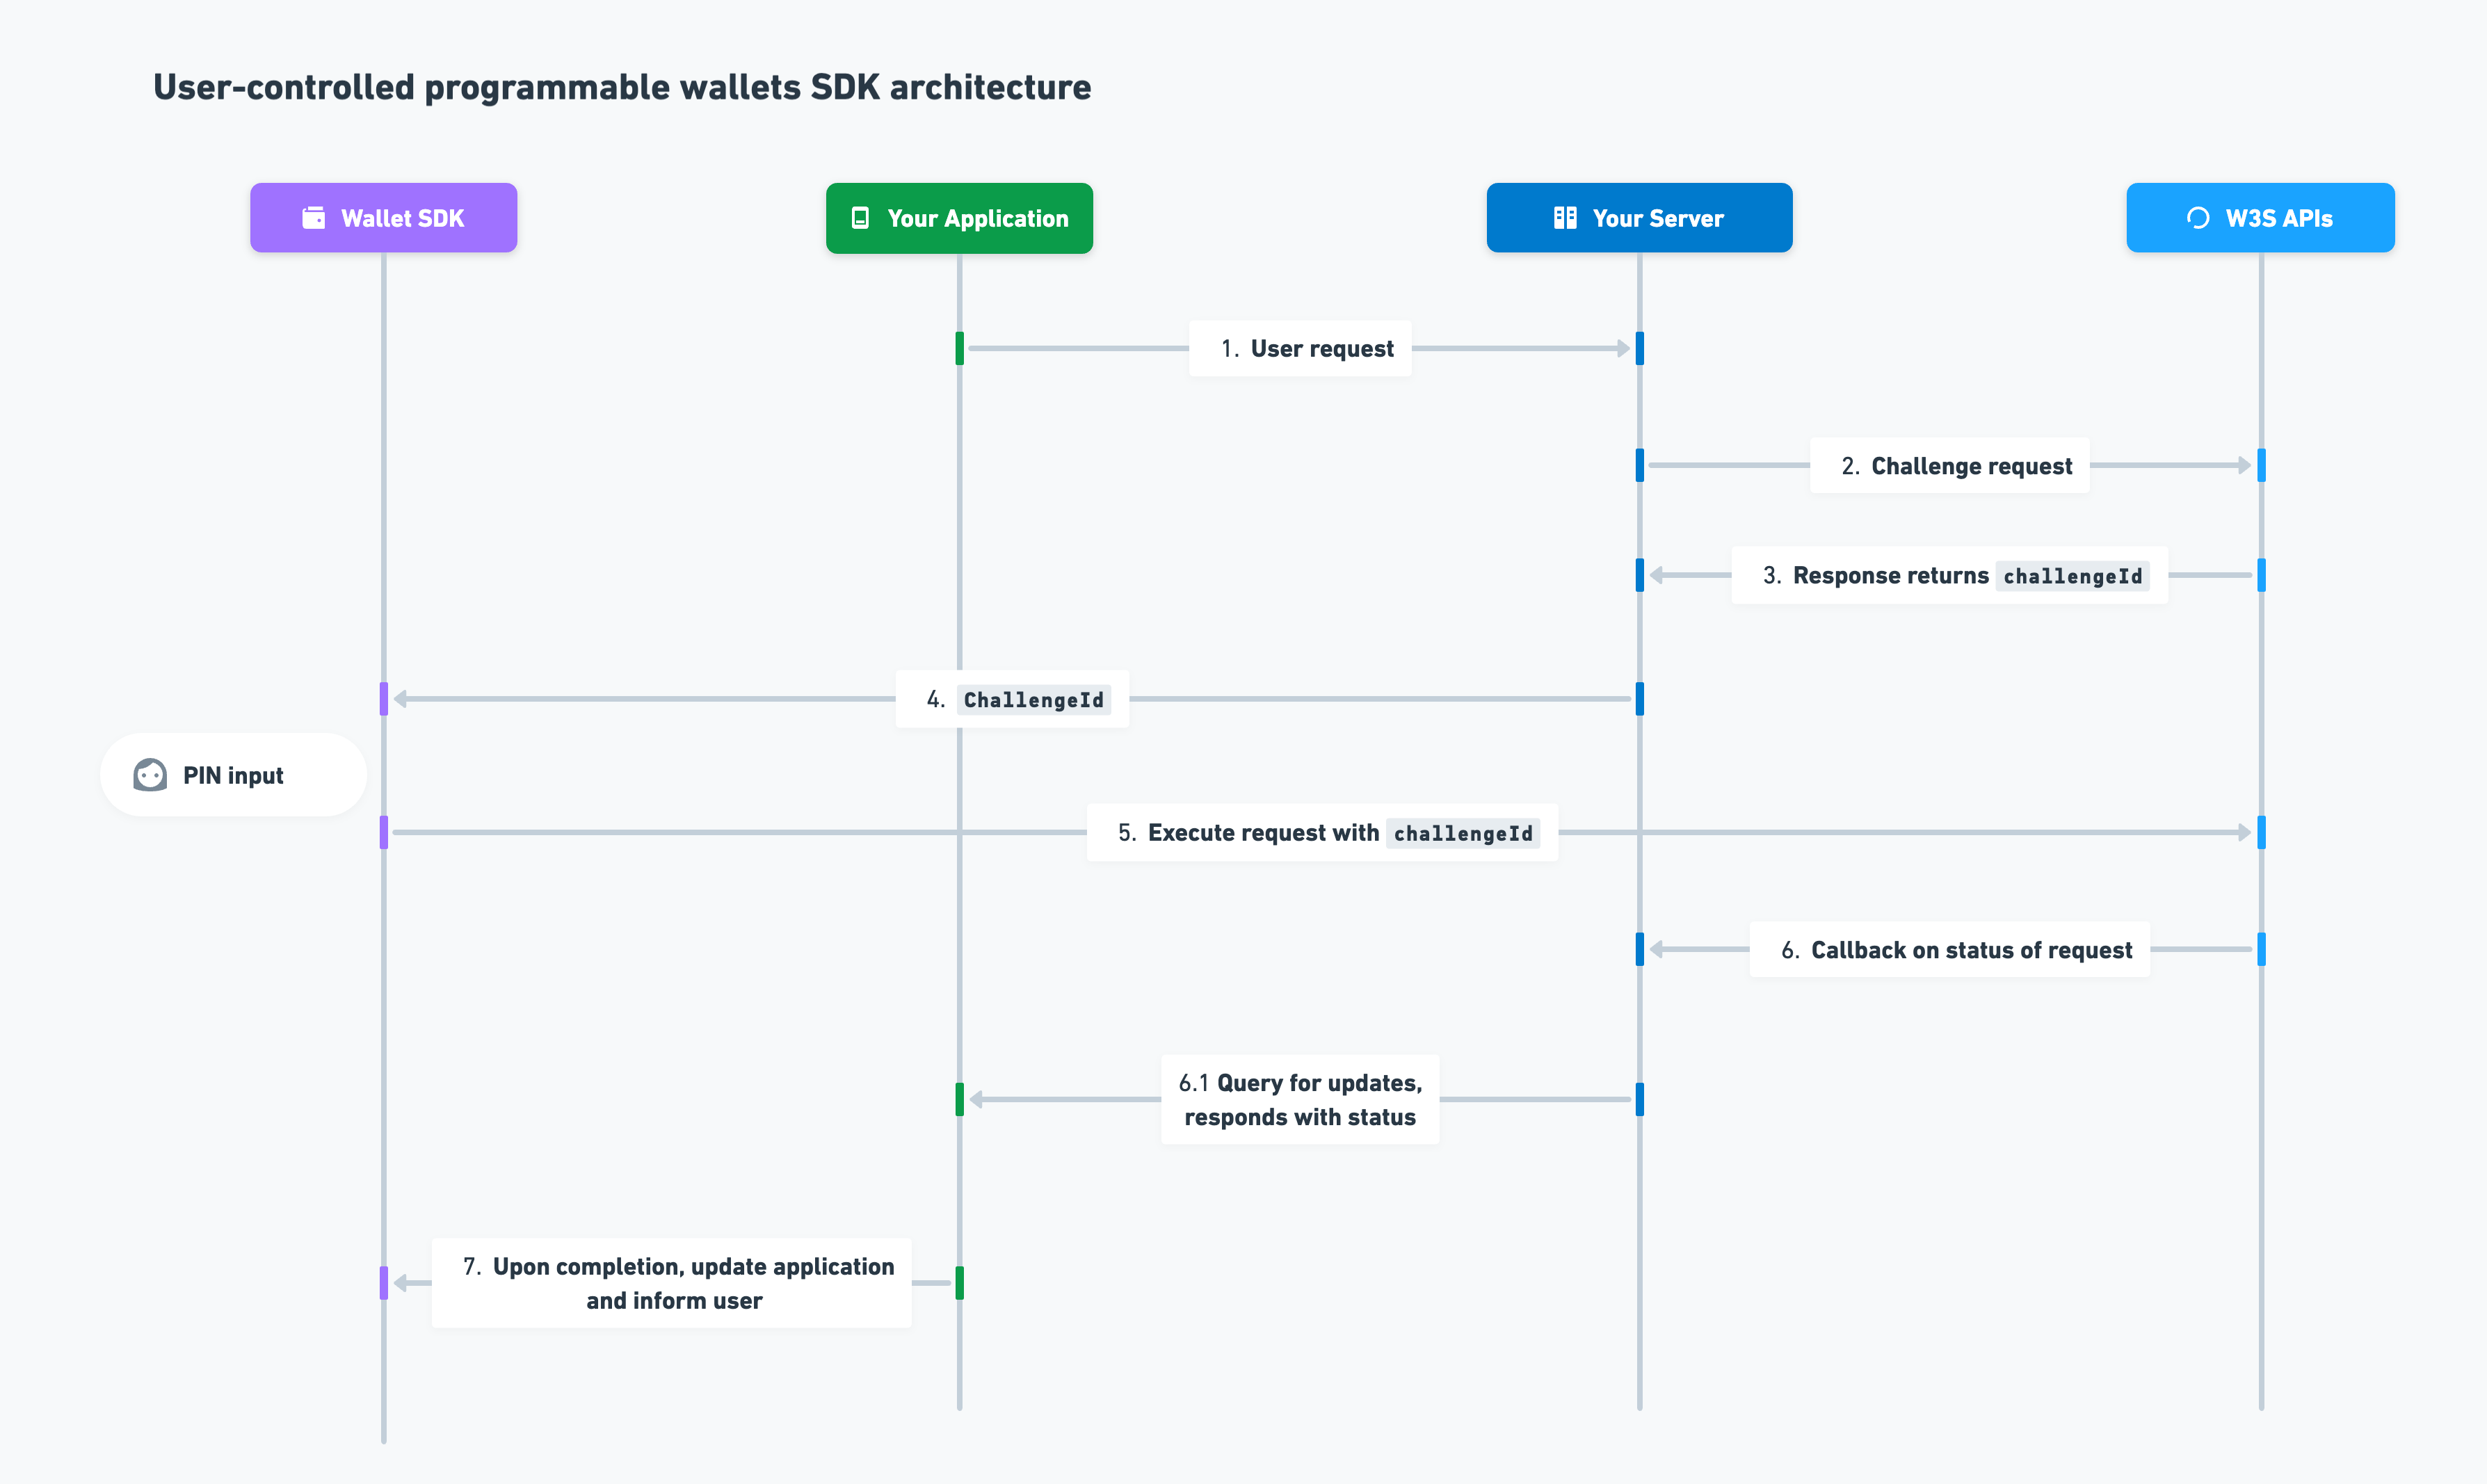
This is a sample frontend UI that plays a part in the larger Sample App project. We use Circle Web3 Services Web SDK to protect users' sensitive data like PINs or security answers, which will be used to interact with Circle APIs for User-Controlled Wallets.
-
Sign up for Circle's Dev Console to obtain an App ID. Side Bar Navigation: Programmable Wallets / User Controlled / Configurator
-
Install nvm, openssl, and yarn, these are required development tools.
-
Important: Set up the Sample Server as well to get the end-to-end experience. Please be aware that the SDK user token will expire after 60 minutes.
- Run
yarn env:config, and you will see a.envfile generated in the root directory - Paste your App ID with
[APP_ID goes here]in the.envfile.
Run the following commands to start the UI at localhost:3000:
nvm use
yarn install
yarn dev
nvm use: set node version.yarn install: install dependencies.yarn dev: run the server, hot reload is supported.
The frontend UI will play the role as Your Application, see details.
We use Next.js as React framework and Joy UI as React component library.
-
The main logic to interact with the Circle Web3 Services Web SDK is going to be in our client side component in
app/components:-
providers/W3sProvider.tsx: holds the value to setup and instantiate a SDK instance. Part of the setup is authorizing with the App ID,webClient?.setAppSettings({ appId, });
setting up the forgot pin callback,
  webClient?.setOnForgotPin(async () => {
    const response = await axios.post<{ challengeId: string }>(
      "/users/pin/restore",
    );
    if (response.data) {
      webClient.execute(response.data.challengeId);
    }
  });
and authenticating with the user token + encryption key.
  client.setAuthentication({
      userToken: currUser.userToken,
      encryptionKey: currUser.encryptionKey,
    });
-
Authentication/AuthenticationForm.tsxhas an example of executing a challenge ID and cutomizing behavior based off a successful execution.client.execute(session.user.challengeId, (error, result) => { if (error) { setFormMessage("An error occurred on PIN Setup. Please try again."); } else if (result) { router.push("/wallets"); } });
-
-
app/(pages)contains all the server side pages of this Next.js application. Any directory wrapped in()is a route grouping.(authorized)/: all server side pages that can only be viewed if the user has a valid session. Check out(authorized)/layout.tsto see session validation.
-
The above are the most important files to get an understanding of this application. All other files are specific to this application and not crucial to using Circle Web3 Services Web SDK.
Happy Coding!
- Circle Web3 Services Web SDK supports UI customization, check more examples.
- Need help: customer-support@circle.com
- Join our Discord community: https://discord.com/invite/buildoncircle