Complete Troops and Logistics Deployment for DCS World
This script has been created by Ciribob (contact him on Discord) and is now maintained by Zip (contact him on Discord) and the VEAF Team.
It's open-source and free as in free beer (you don't have to pay to use it), and as in free of use (you can use it, modify it and publish a fork if you want, even make a commercial profit). Credit is appreciated where it's due.
We're always looking for help, please reach out to Zip on Discord if you want to participate in maintenance or development.
This script is a rewrite of some of the functionality of the original Complete Combat Troop Transport Script (CTTS) by Geloxo (http://forums.eagle.ru/showthread.php?t=108523), as well as adding new features.
- Contents
- Features
- Setup in Mission Editor
- Script Setup
- Script Configuration
- Internationalization (multiple languages for text)
- Pickup and Dropoff Zones Setup
- Waypoint Zones Setup
- Transport Unit Setup
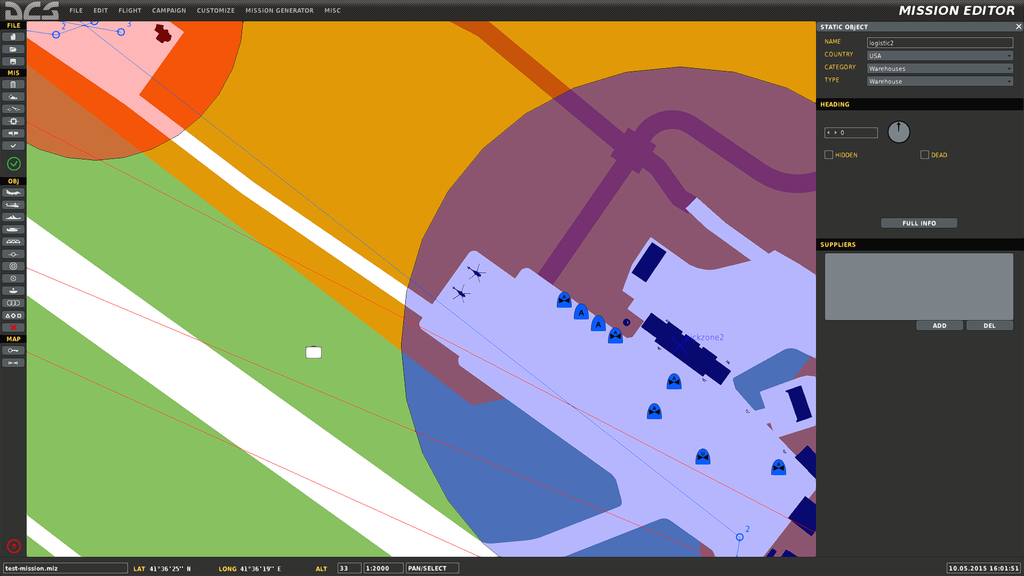
- Logistic Setup
- Mission Editor Script Functions
- Preload Troops into Transport
- Create Extractable Groups without Pickup Zone
- Spawn Extractable Groups without Pickup Zone at a Trigger Zone
- Spawn Extractable Groups without Pickup Zone at a Point
- Activate / Deactivate Pickup Zone
- Change Remaining Groups For a Pickup Zone
- Activate / Deactivate Waypoint Zone
- Unload Transport
- Load Transport
- Auto Unload Transport in Proximity to Enemies
- Create Radio Beacon at Zone
- Create / Remove Extract Zone
- Count Extractable UNITS in zone
- Count Extractable GROUPS in zone
- Create Crate Drop Zone
- Spawn Sling loadable crate at a Zone
- Spawn Sling loadable crate at a Point
- JTAC Automatic Targeting and Laser
- In Game
- Troop Loading and Unloading
- Cargo Spawning and Sling Loading
- Crate Unpacking
- Forward Operating Base (FOB) Construction
- Radio Beacon Deployment
- Advanced Scripting
The script supports:
- Troop Loading / Unloading via Radio Menu
- AI Units can also load and unload troops automatically
- Troops can spawn with RPGs and Stingers / Iglas if enabled.
- Different troop groups can be loaded. The groups can easily be modifed by editing CTLD. By Default the groups are:
- AT Group
- AA Group
- Mortar Group
- Standard Group
- Vehicle Loading / Unloading via Radio Menu for C-130 / IL-76 (Other large aircraft can easily be added) (https://www.digitalcombatsimulator.com/en/files/668878/?sphrase_id=1196134)
- You will need to download the modded version of the C-130 from here (JSGME Ready) that fixes the Radio Menu
- Coloured Smoke Marker Drops
- Extractable Soldier Spawn at a trigger zone
- Extractable soldier groups added via mission editor
- Unit construction using crates spawned at a logistics area and dropped via Simulated Cargo Sling or Real Cargo Sling
- HAWK AA System requires 3 separate and correct crates to build
- HAWK system can also be rearmed after construction by dropping another Hawk Launcher nearby and unpacking. Separate repair crate can also be used.
- BUK AA System requires 2 separate and correct crates to build
- BUK system can also be rearmed after construction by dropping another BUK Launcher nearby and unpacking. Separate repair crate can also be used.
- KUB AA System requires 2 separate and correct crates to build
- KUB system can also be rearmed after construction by dropping another KUB Launcher nearby and unpacking. Separate repair crate can also be used.
- HMMWV TOW
- HMMWV MG
- HMMWV JTAC - Will Auto Lase and mark targets with smoke if enabled
- SKP-11 JTAC - Will Auto Lase and mark targets with smoke if enabled
- Mortar
- Stinger MANPAD
- Igla MANPAD
- BTR-D
- BRMD-2
- HAWK AA System requires 3 separate and correct crates to build
- FOB Building
- Homing using FM Radio Beacon
- Easy Beacon Creation using Mission Editor plus Beacon Naming
- Radio Beacon Deployment
- Ability to deploy a homing beacon that the A10C, Ka-50, Mi-8 and Huey can home on
- Pre loading of units into AI vehicles via a DO SCRIPT
- Spawning of sling loadable crates at a specified zone or Point
- Mission Editor Trigger functions - They store the numbers in flags for use by triggers
- Count Crates in Zone
- Works for both crates added by the Mission Editor and Crates spawned by Transports
- Count soldiers extracted to a zone (the soldiers disappear)
- Count Crates in Zone
- Waypoint triggers to force dropped groups to head to a location
- Advanced Scripting Callback system
A complete test mission is included.
You can also edit the CTLD.lua file to change some configuration options. Make sure you re-add the lua file to the mission after editing by deleting the trigger that loads the file, then readding the trigger and the DO SCRIPT FILE action.
You can use the test-mission.miz mission as a demonstration on how to use the CTLD script in a DCS mission.
This mission includes the CTLD script, a proper configuration, demonstration for some of the main features (including the "JTAC talk over the radio via SRS" functionality).
Note to developers: it's quite easy to set the loading of the CTLD script to dynamic, so you can make changes to the script, save it and simply reload the mission (left-shift + R) in the game to test the edits you made.
To do this, simply change the "Define loading mode" trigger (1) so that the condition reads "FLAG IS FALSE" (2), and edit the "DO SCRIPT" action (3) to replace the path with the path to the CTLD.lua file on your PC.
Optionaly, you can disable the STTS (text to speech over SRS) feature (4).
This script requires MIST version 4.0.57 or above: https://github.com/mrSkortch/MissionScriptingTools
First make sure MIST is loaded, either as an Initialization Script for the mission or the first DO SCRIPT with a "TIME MORE" of 1. "TIME MORE" means run the actions after X seconds into the mission.
If you want to make use of translations (internationalization features, a.k.a. "i18n"), you need to load the CTLD-i18n.lua script before CTLD. Do this by adding a second trigger with a "TIME MORE" and a DO SCRIPT of CTLD-i18n.lua.
Load CTLD using a second (or third) trigger with a "TIME MORE" and a DO SCRIPT of CTLD.lua.
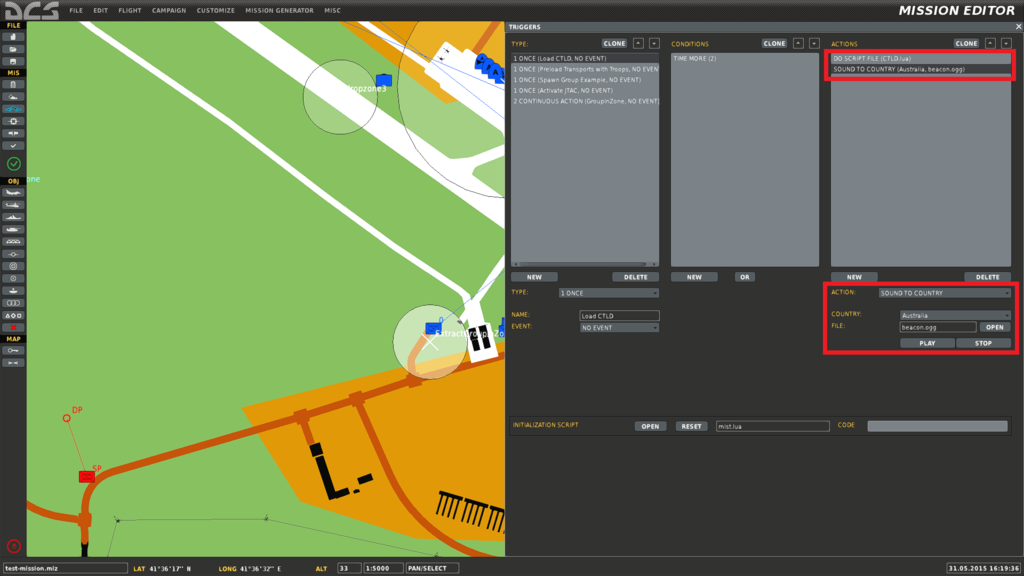
You will also need to load in both the beacon.ogg sound file and the beaconsilent.ogg for Radio beacon homing. This can be done by adding a two Sound To Country actions. Pick an unused country, like Australia so no one actually hears the audio when joining at the start of the mission. If you don't add the two Audio files, radio beacons will not work. Make sure not to rename the file as well.
An error will be shown if MIST isn't loaded first.
An example is shown below:
The script has lots of configuration options that can be used to further customise the behaviour.
I have now changed the default behaviour of the script to use Simulated Cargo Sling instead of the Real Cargo Sling due to DCS Bugs causing crashing
To use the real cargo sling behaviour, set the ctld.slingLoad option to true.
-- ************************************************************************
-- *********************  USER CONFIGURATION ******************************
-- ************************************************************************
ctld.staticBugFix = true --  When statics are destroyed, DCS Crashes. Set this to FALSE when this bug is fixed or if you want to use REAL sling loads :)

ctld.disableAllSmoke = false -- if true, all smoke is disabled at pickup and drop off zones regardless of settings below. Leave false to respect settings below

ctld.hoverPickup = true --  if set to false you can load crates with the F10 menu instead of hovering...!

ctld.loadCrateFromMenu = false -- if set to true, you can load crates with the F10 menu OR hovering, in case of using choppers and planes for example.

ctld.enableCrates = true -- if false, Helis will not be able to spawn or unpack crates so will be normal CTTS
ctld.slingLoad = false -- if false, crates can be used WITHOUT slingloading, by hovering above the crate, simulating slingloading but not the weight...
-- There are some bug with Sling-loading that can cause crashes, if these occur set slingLoad to false
-- to use the other method.
-- Set staticBugFix  to FALSE if use set ctld.slingLoad to TRUE

ctld.enableSmokeDrop = true -- if false, helis and c-130 will not be able to drop smoke

ctld.maxExtractDistance = 125 -- max distance from vehicle to troops to allow a group extraction
ctld.maximumDistanceLogistic = 200 -- max distance from vehicle to logistics to allow a loading or spawning operation
ctld.maximumSearchDistance = 4000 -- max distance for troops to search for enemy
ctld.maximumMoveDistance = 2000 -- max distance for troops to move from drop point if no enemy is nearby

ctld.numberOfTroops = 10 -- default number of troops to load on a transport heli or C-130
ctld.enableFastRopeInsertion = true -- allows you to drop troops by fast rope
ctld.fastRopeMaximumHeight = 18.28 -- in meters which is 60 ft max fast rope (not rappell) safe height

ctld.vehiclesForTransportRED = { "BRDM-2", "BTR_D" } -- vehicles to load onto Il-76 - Alternatives {"Strela-1 9P31","BMP-1"}
ctld.vehiclesForTransportBLUE = { "M1045 HMMWV TOW", "M1043 HMMWV Armament" } -- vehicles to load onto c130 - Alternatives {"M1128 Stryker MGS","M1097 Avenger"}

ctld.aaLaunchers = 3 -- controls how many launchers to add to the kub/buk when its spawned.
ctld.hawkLaunchers = 5 -- controls how many launchers to add to the hawk when its spawned.

ctld.spawnRPGWithCoalition = true --spawns a friendly RPG unit with Coalition forces
ctld.spawnStinger = false -- spawns a stinger / igla soldier with a group of 6 or more soldiers!

ctld.enabledFOBBuilding = true -- if true, you can load a crate INTO a C-130 than when unpacked creates a Forward Operating Base (FOB) which is a new place to spawn (crates) and carry crates from
-- In future i'd like it to be a FARP but so far that seems impossible...
-- You can also enable troop Pickup at FOBS

ctld.cratesRequiredForFOB = 3 -- The amount of crates required to build a FOB. Once built, helis can spawn crates at this outpost to be carried and deployed in another area.
-- The large crates can only be loaded and dropped by large aircraft, like the C-130 and listed in ctld.vehicleTransportEnabled
-- Small FOB crates can be moved by helicopter. The FOB will require ctld.cratesRequiredForFOB larges crates and small crates are 1/3 of a large fob crate
-- To build the FOB entirely out of small crates you will need ctld.cratesRequiredForFOB * 3

ctld.troopPickupAtFOB = true -- if true, troops can also be picked up at a created FOB

ctld.buildTimeFOB = 120 --time in seconds for the FOB to be built

ctld.radioSound = "beacon.ogg" -- the name of the sound file to use for the FOB radio beacons. If this isnt added to the mission BEACONS WONT WORK!
ctld.radioSoundFC3 = "beaconsilent.ogg" -- name of the second silent radio file, used so FC3 aircraft dont hear ALL the beacon noises... :)

ctld.deployedBeaconBattery = 30 -- the battery on deployed beacons will last for this number minutes before needing to be re-deployed

ctld.enabledRadioBeaconDrop = true -- if its set to false then beacons cannot be dropped by units

ctld.allowRandomAiTeamPickups = false -- Allows the AI to randomize the loading of infantry teams (specified below) at pickup zones

-- Simulated Sling load configuration

ctld.minimumHoverHeight = 7.5 -- Lowest allowable height for crate hover
ctld.maximumHoverHeight = 12.0 -- Highest allowable height for crate hover
ctld.maxDistanceFromCrate = 5.5 -- Maximum distance from from crate for hover
ctld.hoverTime = 10 -- Time to hold hover above a crate for loading in seconds

-- end of Simulated Sling load configuration

-- AA SYSTEM CONFIG --
-- Sets a limit on the number of active AA systems that can be built for RED.
-- A system is counted as Active if its fully functional and has all parts
-- If a system is partially destroyed, it no longer counts towards the total
-- When this limit is hit, a player will still be able to get crates for an AA system, just unable
-- to unpack them

ctld.AASystemLimitRED = 20 -- Red side limit

ctld.AASystemLimitBLUE = 20 -- Blue side limit

--END AA SYSTEM CONFIG --
To change what units can be dropped from crates modify the spawnable crates section. An extra parameter, cratesRequired = NUMBER can be added so you need more than one crate to build a unit. This parameter cannot be used for the HAWK, BUK or KUB system as that is already broken into 3 crates. You can also specify the coalition side so RED and BLUE have different crates to drop. If the parameter is missing the crate will appear for both sides.
-- in lua means ignore this line :)
-- ************** SPAWNABLE CRATES ******************
-- Weights must be unique as we use the weight to change the cargo to the correct unit
-- when we unpack
--
ctld.spawnableCrates = {
    -- name of the sub menu on F10 for spawning crates
    ["Ground Forces"] = {
        --crates you can spawn
        -- weight in KG
        -- Desc is the description on the F10 MENU
        -- unit is the model name of the unit to spawn
        -- cratesRequired - if set requires that many crates of the same type within 100m of each other in order build the unit
        -- side is optional but 2 is BLUE and 1 is RED
        -- dont use that option with the HAWK Crates
        { weight = 1400, desc = "HMMWV - TOW", unit = "M1045 HMMWV TOW", side = 2 },
        { weight = 1200, desc = "HMMWV - MG", unit = "M1043 HMMWV Armament", side = 2 },

        { weight = 1700, desc = "BTR-D", unit = "BTR_D", side = 1 },
        { weight = 1900, desc = "BRDM-2", unit = "BRDM-2", side = 1 },

        { weight = 1100, desc = "HMMWV - JTAC", unit = "Hummer", side = 2, }, -- used as jtac and unarmed, not on the crate list if JTAC is disabled
        { weight = 1500, desc = "SKP-11 - JTAC", unit = "SKP-11", side = 1, }, -- used as jtac and unarmed, not on the crate list if JTAC is disabled

        { weight = 200, desc = "2B11 Mortar", unit = "2B11 mortar" },

        { weight = 500, desc = "SPH 2S19 Msta", unit = "SAU Msta", side = 1, cratesRequired = 3 },
        { weight = 501, desc = "M-109", unit = "M-109", side = 2, cratesRequired = 3 },
    },
    ["AA Crates"] = {
        { weight = 210, desc = "Stinger", unit = "Stinger manpad", side = 2 },
        { weight = 215, desc = "Igla", unit = "SA-18 Igla manpad", side = 1 },

        -- HAWK System
          { weight = 1000, desc = "HAWK Launcher", unit = "Hawk ln", side = 2},
          { weight = 1010, desc = "HAWK Search Radar", unit = "Hawk sr", side = 2 },
          { weight = 1020, desc = "HAWK Track Radar", unit = "Hawk tr", side = 2 },
          { weight = 1021, desc = "HAWK Repair", unit = "HAWK Repair" , side = 2 },
        -- End of HAWK

        -- KUB SYSTEM
        { weight = 1026, desc = "KUB Launcher", unit = "Kub 2P25 ln", side = 1},
        { weight = 1027, desc = "KUB Radar", unit = "Kub 1S91 str", side = 1 },
        { weight = 1025, desc = "KUB Repair", unit = "KUB Repair", side = 1},
        -- End of KUB

        -- BUK System
        --        { weight = 1022, desc = "BUK Launcher", unit = "SA-11 Buk LN 9A310M1"},
        --        { weight = 1023, desc = "BUK Search Radar", unit = "SA-11 Buk SR 9S18M1"},
        --        { weight = 1024, desc = "BUK CC Radar", unit = "SA-11 Buk CC 9S470M1"},
        --        { weight = 1025, desc = "BUK Repair", unit = "BUK Repair"},
        -- END of BUK

        { weight = 505, desc = "Strela-1 9P31", unit = "Strela-1 9P31", side = 1, cratesRequired = 3 },
        { weight = 506, desc = "M1097 Avenger", unit = "M1097 Avenger", side = 2, cratesRequired = 3 },
    },
}
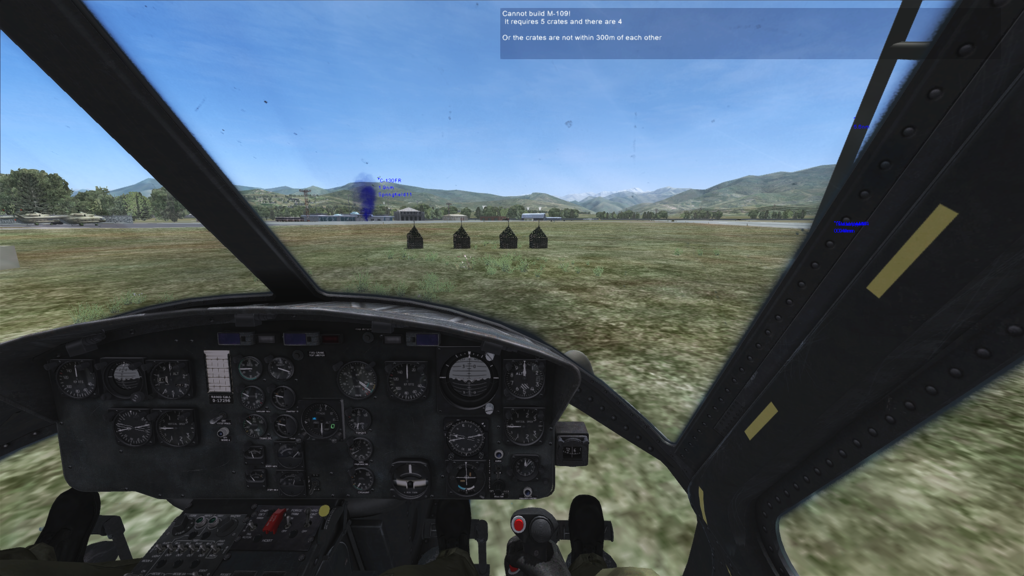
Example showing what happens if you dont have enough crates:
**Make sure that after making any changes to the script you remove and re-add the script to the mission. **
CTLD supports multiple languages (English being the base and the reference).
This is done via the ctld.i18n table that can be found at the beginning of the CTLD-i18n.lua script.
You can easily switch the language you want CTLD to display its messages and name its radio menus, by changing the ctld.i18n_lang parameter to a supported language.
Supported languages are all listed near the parameter in the code, so it's easy to uncomment the line you wish to use.
Example, to set it to French: ctld.i18n_lang = "fr"
Translations are referenced by the english text, and can contain numbered parameters that will be replaced (in the calling code) by values.
This allows for different languages placing words at different places in a sentence.
To add a translation, edit the CTLD-i18n.lua script, simply copy the complete ctld.i18n["en"] table to a new one, and replace the language ("en") with the one you want to add ("de" for example).
Then, replace all the = nil statements with the translation; for example, ctld.i18n["de"]["Standard Group"] = "Standard-Kampfgruppe".
Finally, switch the CTLD language to the new one you defined (example: ctld.i18n_lang = "de") and test.
Please share your work with the community, contact Zip on Github or on Discord.
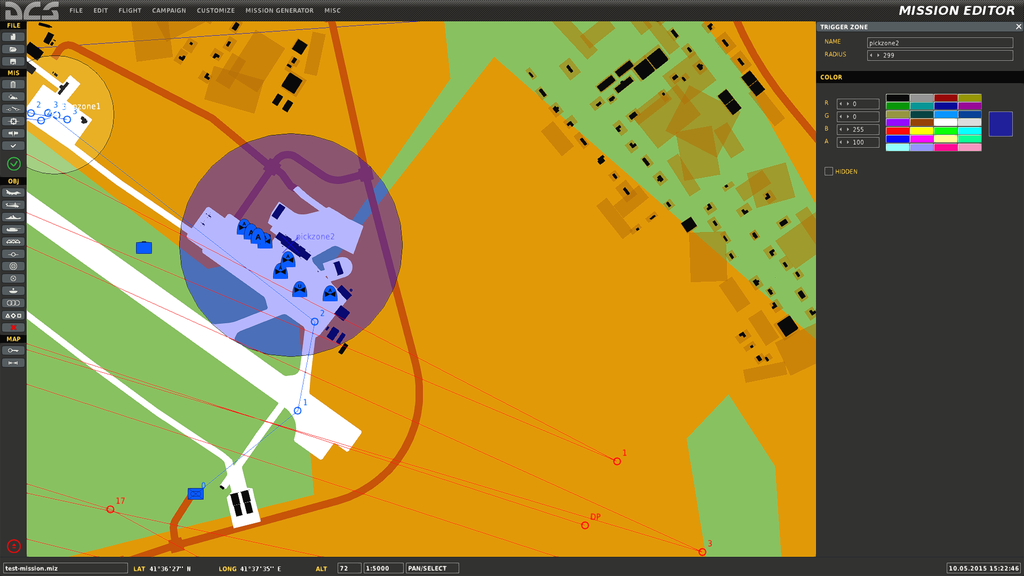
Pickup zones are used by transport aircraft and helicopters to load troops and vehicles. A transport unit must be inside of the radius of the trigger and the right side (RED or BLUE or BOTH) in order to load troops and vehicles.
The pickup zone needs to be named the same as one of the pickup zones in the ctld.pickupZones list or the list can be edited to match the name in the mission editor.
Pickup Zones can be configured to limit the number of vehicle or troop groups that can be loaded. To add a limit, edit the 3rd parameter to be any number greater than 0 as shown below.
You can also list the UNIT NAME of ship instead of a trigger zone to allow the loading/unloading of troops from a ship. You will not be able to fast rope troops onto the deck so you must land to drop the troops off.
If your pickup zone isn't working, make sure you've set the 5th parameter, the coalition side, correctly and that the zone is active.
--pickupZones = { "Zone name or Ship Unit Name", "smoke color", "limit (-1 unlimited)", "ACTIVE (yes/no)", "side (0 = Both sides / 1 = Red / 2 = Blue )", flag number (optional) }
ctld.pickupZones = {
    { "pickzone1", "blue", -1, "yes", 0 },
    { "pickzone2", "red", -1, "yes", 0 },
    { "pickzone3", "none", -1, "yes", 0 },
    { "pickzone4", "none", -1, "yes", 0 },
    { "pickzone5", "none", -1, "yes", 0 },
    { "pickzone6", "none", -1, "yes", 0 },
    { "pickzone7", "none", -1, "yes", 0 },
    { "pickzone8", "none", -1, "yes", 0 },
    { "pickzone9", "none", 5, "yes", 1 }, -- limits pickup zone 9 to 5 groups of soldiers or vehicles, only red can pick up
    { "pickzone10", "none", 10, "yes", 2 },  -- limits pickup zone 10 to 10 groups of soldiers or vehicles, only blue can pick up

    { "pickzone11", "blue", 20, "no", 2 },  -- limits pickup zone 11 to 20 groups of soldiers or vehicles, only blue can pick up. Zone starts inactive!
    { "pickzone12", "red", 20, "no", 1 },  -- limits pickup zone 11 to 20 groups of soldiers or vehicles, only blue can pick up. Zone starts inactive!
    { "pickzone13", "none", -1, "yes", 0 },
    { "pickzone14", "none", -1, "yes", 0 },
    { "pickzone15", "none", -1, "yes", 0 },
    { "pickzone16", "none", -1, "yes", 0 },
    { "pickzone17", "none", -1, "yes", 0 },
    { "pickzone18", "none", -1, "yes", 0 },
    { "pickzone19", "none", 5, "yes", 0 },
    { "pickzone20", "none", 10, "yes", 0, 1000 }, -- optional extra flag number to store the current number of groups available in

    { "USA Carrier", "blue", 10, "yes", 0, 1001 }, -- instead of a Zone Name you can also use the UNIT NAME of a ship
}
AI transport units will automatically load troops and vehicles when entering a pickup zone as long as they stay in the zone for a few seconds. They do not need to stop to load troops but Aircraft will need to be on the ground in order to load troops.
The number of troops that can be loaded from a pickup zone can be configured by changing ctld.numberOfTroops which by default is 10. You can also enable troop groups to have RPGs and Stingers / Iglas by ctld.spawnRPGWithCoalition and ctld.spawnStinger.
If ctld.numberOfTroops is 6 or more than the soldier group will consist of:
- 2 MG Soldiers with M249s or Paratroopers with AKS-74
- 2 RPG Soldiers (only on the RED side if
ctld.spawnRPGWithCoalitionisfalse - 1 Igla / Stinger
- The rest will be standard soldiers
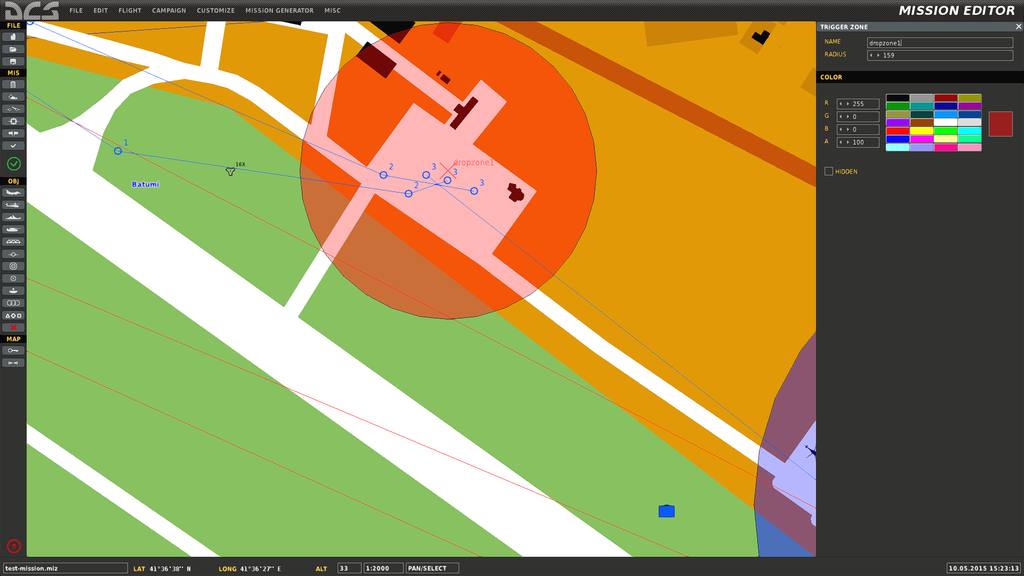
Dropoff zones are used by AI units to automatically unload any loaded troops or vehicles. This will occur as long as the AI unit has some units onboard and stays in the radius of the zone for a few seconds and the zone is named in the ctld.dropoffZones list. Again units do not need to stop but aircraft need to be on the ground in order to unload the troops.
If your dropoff zone isn't working, make sure the 3rd parameter, the coalition side, is set correctly.
-- dropOffZones = {"name","smoke colour",0,side 1 = Red or 2 = Blue or 0 = Both sides}
ctld.dropOffZones = {
    { "dropzone1", "green", 2 },
    { "dropzone2", "blue", 2 },
    { "dropzone3", "orange", 2 },
    { "dropzone4", "none", 2 },
    { "dropzone5", "none", 1 },
    { "dropzone6", "none", 1 },
    { "dropzone7", "none", 1 },
    { "dropzone8", "none", 1 },
    { "dropzone9", "none", 1 },
    { "dropzone10", "none", 1 },
}
Smoke can be enabled or disabled individually for pickup or dropoff zones by editing the second column in the list.
Available colours are:
"green""red""white""orange""blue""none"
Smoke can be disabled for all zones regardless of the settings above using the option ctld.disableAllSmoke = true in the User Configuration part of the script.
Waypoint zones can be used to make dropped or spawned troops automatically head to the center of a zone. The troops will head to the center of the zone if the coalition matches (or the coalition is set to 0) and if the zone is currently active.
If your Waypoint zone isn't working, make sure the 3rd parameter, the coalition side, is set correctly and the zone is set to active.
--wpZones = { "Zone name", "smoke color",  "ACTIVE (yes/no)", "side (0 = Both sides / 1 = Red / 2 = Blue )", }
ctld.wpZones = {
    { "wpzone1", "green","yes", 2 },
    { "wpzone2", "blue","yes", 2 },
    { "wpzone3", "orange","yes", 2 },
    { "wpzone4", "none","yes", 2 },
    { "wpzone5", "none","yes", 1 },
    { "wpzone6", "none","yes", 1 },
    { "wpzone7", "none","yes", 1 },
    { "wpzone8", "none","yes", 1 },
    { "wpzone9", "none","yes", 1 },
    { "wpzone10", "none","no", 1 },
}
Smoke can be enabled or disabled individually for waypoiny zones exactly the same as Pickup and Dropoff zones by editing the second column in the list.
The available colours are:
"green""red""white""orange""blue""none"
Smoke can be disabled for all zones regardless of the settings above using the option ctld.disableAllSmoke = true in the User Configuration part of the script.
Since the December 2024 release, it's now possible to have transport pilots automatically registered with CTLD (no need to use ctld.transportPilotNames anymore). We use the DCS events to dynamically add the CTLD features and radio menu to human players embarking in a CTLD-enabled aircraft.
If you want to use this feature, there are two steps:
- enable
ctld.addPlayerAircraftByType(set it totrue) - (optional) edit the aircraft types list
ctld.aircraftTypeTableto add the DCS aircrafts you want to auto-register
Any unit that you want to be able to transport troops needs to have the "Pilot Name" in the ctld.transportPilotNames list. Player controlled transport units should be in a group of their own and be the only unit in the group, otherwise other players may have radio commands they shouldn't. The group name isn't important and can be set to whatever you like. A snippet of the list is shown below.
If the unit is player controlled, troops have to be manually loaded when in a pickup zone, AI units will auto load troops in a pickup zone.
ctld.transportPilotNames = {
"helicargo1",
"helicargo2",
"helicargo3",
"helicargo4",
"helicargo5",
"helicargo6",
"helicargo7",
"helicargo8",
"helicargo9",
"helicargo10",
}
`
Example for C-130:

Example for Huey:

Example for AI APC:

### Logistic Setup
Logistic crates can also be spawned by Player-controlled Transport Helicopters, as long as they are near a friendly logistic unit listed in `ctld.logisticUnits`. The distance that the heli's can spawn crates at can be configured at the top of the script. Any static object can be used for Logistics.
```lua
ctld.logisticUnits = {
"logistic1",
"logistic2",
"logistic3",
"logistic4",
"logistic5",
"logistic6",
"logistic7",
"logistic8",
"logistic9",
"logistic10",
}
Example:
You can also preload troops into AI transports once the CTLD script has been loaded, instead of having the AI enter a pickup zone, using the code below where the parameters are:
- Pilot name of the unit
- number of troops / vehicles to load
- true means load with troops, false means load with vehicles
If you try to load vehicles into anything other than a unit listed in ctld.vehicleTransportEnabled, they won't be able to deploy them.
ctld.preLoadTransport("helicargo1", 10,true)You can also make existing mission editor groups extractable by adding their group name to the ctld.extractableGroups list
You can also spawn extractable infantry groups at a specified trigger zone using the code below.
The parameters are:
- group side (red or blue)
- number of troops to spawn OR Group Description
- the name of the trigger to spawn the extractable troops at
- the distance the troops should search for enemies on spawning in meters
ctld.spawnGroupAtTrigger("red", 10, "spawnTrigger", 1000)or
ctld.spawnGroupAtTrigger("blue", 5, "spawnTrigger2", 2000)or
ctld.spawnGroupAtTrigger("blue", {mg=1,at=2,aa=3,inf=4,mortar=5}, "spawnTrigger2", 2000)
-- Spawns 1 machine gun, 2 anti tank, 3 anti air, 4 standard soldiers and 5 mortarsYou spawn extractable infantry groups at a specified Vec3 point {x=1,y=2,z=3} using the code below.
The parameters are:
- group side (red or blue)
- number of troops to spawn OR Group Description
- Vec3 point
{x=1,y=2,z=3} - the distance the troops should search for enemies on spawning in meters
ctld.spawnGroupAtPoint("red", 10, {x=1,y=2,z=3}, 1000)or
ctld.spawnGroupAtPoint("blue", 5, {x=1,y=2,z=3}, 2000)or
ctld.spawnGroupAtPoint("blue", {mg=1,at=2,aa=3,inf=4,mortar=5}, {x=1,y=2,z=3}, 2000)
-- Spawns 1 machine gun, 2 anti tank, 3 anti air, 4 standard soldiers and 5 mortarsYou can activate and deactivate a pickup zone as shown below. When a zone is active, troops can be loaded from it as long as there are troops remaining and you are the same side as the pickup zone.
ctld.activatePickupZone("pickzone3")or
ctld.deactivatePickupZone("pickzone3")In the configuration of a pickup zone / pickup ship you can limit the number of groups that can be loaded.
Call the function below to add or remove groups from the remaining groups at a zone.
ctld.changeRemainingGroupsForPickupZone("pickup1", 5) -- adds 5 groups for zone or ship pickup1
ctld.changeRemainingGroupsForPickupZone("pickup1", -3) -- remove 3 groups for zone or ship pickup1You can activate and deactivate a waypoint zone as shown below. When a waypoint zone is active, and the right coalition of troops is dropped inside, the troops will attempt to head to the center of the zone.
ctld.activateWaypointZone("wpzone1")or
ctld.deactivateWaypointZone("wpzone1")You can force a unit to unload its units (as long as its on the ground) by calling this function.
ctld.unloadTransport("helicargo1")You can force a unit to load its units (as long as its on the ground) by calling this function.
ctld.loadTransport("helicargo1")If you add the below as a DO SCRIPT for a CONTINOUS TRIGGER, an AI unit will automatically drop its troops if its landed and there are enemies within the specificed distance (in meters)
ctld.unloadInProximityToEnemy("helicargo1",500) --distance is 500A radio beacon can be spawned at any zone by adding a Trigger Once with a Time More set to any time after the CTLD script has been loaded and a DO SCRIPT action of ctld.createRadioBeaconAtZone("beaconZone","red", 1440,"Waypoint 1")
Where "beaconZone" is the name of a Trigger Zone added using the mission editor, "red" is the side to add the beacon for and 1440 the time in minutes for the beacon to broadcast for. An optional parameter can be added at the end which can be used to name the beacon and the name will appear in the beacon list.
ctld.createRadioBeaconAtZone("beaconZoneBlue","blue", 20) will create a beacon at trigger zone named "beaconZoneBlue" for the Blue coalition that will last 20 minutes and have an auto generated name.
Spawned beacons will broadcast on HF/FM, UHF and VHF until their battery runs out and can be used by most aircraft for ADF. The frequencies used on each frequency will be random.
Again, beacons will not work if beacon.ogg and beaconsilent.ogg are not in the mission!
An extact zone is a zone where troops (not vehicles) can be dropped by transports and used to trigger another action based on the number of troops dropped. The radius of the zone sets how big the extract zone will be.
When troops are dropped, the troops disappear and the number of troops dropped added to the flag number configured by the function. This means you can make a trigger such that 10 troops have to be rescued and dropped at the extract zone, and when this happens you can trigger another action.
An Extraction zone can be created by adding a Trigger Once with a Time More set to any time after the CTLD script has been loaded and a DO SCRIPT action of ctld.createExtractZone("extractzone1", 2, -1)
Where "extractzone1" is the name of a Trigger Zone added using the mission editor, 2 is the flag where we want the total number of troops dropped in a zone added and -1 the smoke colour.
The settings for smoke are: Green = 0 , Red = 1, White = 2, Orange = 3, Blue = 4, NO SMOKE = -1
An extract zone can be removed by using DO SCRIPT action of ctld.removeExtractZone("extractzone1", 2). Where again "extractzone1" is the name of a Trigger Zone added using the mission editor, 2 is the flag
The smoke for the extract zone will take up to 5 minutes to disappate.
You can count the number of extractable UNITS in a zone using: ctld.countDroppedUnitsInZone(_zone, _blueFlag, _redFlag) as a DO SCRIPT of a CONTINUOUS TRIGGER.
Where _zone is the zone name, _blueFlag is the flag to store the count of Blue units in and _redFlag is the flag to store the count of red units in
You can count the number of extractable GROUPS in a zone using: ctld.countDroppedGroupsInZone(_zone, _blueFlag, _redFlag) as a DO SCRIPT of a CONTINUOUS TRIGGER.
Where _zone is the zone name, _blueFlag is the flag to store the count of Blue groups in and _redFlag is the flag to store the count of red groups in
A crate drop zone is a zone where the number of crates in a zone in counted every 5 seconds and the current amount stored in a flag specified by the script.
The flag number can be used to trigger other actions added using the mission editor, i.e only activate vehicles once a certain number of crates have been dropped in a zone. The radius of the zone in the mission editor sets how big the crate drop zone will be.
**The script doesnt differentiate between crates, any crate spawned by the CTLD script can be dropped there and it will count as 1 but if a crate is unpacked in a zone it will no longer count! **
Crates added by the Mission Editor can now be used as well!
A crate drop zone can be added to any zone by adding a Trigger Once with a Time More set to any time after the CTLD script has been loaded and a DO SCRIPT action of ctld.cratesInZone("crateZone",1)
Where "crateZone" is the name of a Trigger Zone added using the mission editor, and 1 is the number of the flag where the current number of crates in the zone will be stored.
You can spawn a sling loadable crate at a specified trigger zone using the code below:
The parameters are:
- group side ("red" or "blue")
- weight of the crate - Determines what the crate contains. Weights are on the ctld.spawnableCrates list.
- the name of the trigger to spawn the crate at
ctld.spawnCrateAtZone("blue", 500, "crateSpawnTrigger") -- spawns a BLUE coalition HMMWV at the trigger zone "crateSpawnTrigger"or
ctld.spawnCrateAtZone("red", 500, "crateSpawnTrigger") -- spawns a RED coalition HMMWV at the trigger zone "crateSpawnTrigger"You can spawn a sling loadable crate at a specified point using the code below:
The parameters are:
- group side ("red" or "blue")
- weight of the crate - Determines what the crate contains. Weights are on the ctld.spawnableCrates list.
- Point (x,y,z) of where to spawn the crate
The point of a unit can be obtained by Unit.getByName("PilotName"):getPoint().
ctld.spawnCrateAtPoint("blue",500, {x=20, y=10,z=20}) -- spawns a RED coalition HMMWV at the specified pointThis script has been merged with https://github.com/ciribob/DCS-JTACAutoLaze . JTACs can either be deployed by Helicopters and configured with the options in the script or pre added to the mission. By default each side can drop 5 JTACs.
The JTAC Script configuration is shown below and can easily be disabled using the ctld.JTAC_dropEnabled option.
-- ***************** JTAC CONFIGURATION *****************
ctld.JTAC_LIMIT_RED = 10 -- max number of JTAC Crates for the RED Side
ctld.JTAC_LIMIT_BLUE = 10 -- max number of JTAC Crates for the BLUE Side

ctld.JTAC_dropEnabled = true -- allow JTAC Crate spawn from F10 menu

ctld.JTAC_maxDistance = 10000 -- How far a JTAC can "see" in meters (with Line of Sight)

ctld.JTAC_smokeOn_RED = true -- enables automatic marking of target with smoke for RED forces
ctld.JTAC_smokeOn_BLUE = true -- enables automatic marking of target with smoke for BLUE forces

ctld.JTAC_smokeColour_RED = 4 -- RED side smoke colour -- Green = 0 , Red = 1, White = 2, Orange = 3, Blue = 4
ctld.JTAC_smokeColour_BLUE = 1 -- BLUE side smoke colour -- Green = 0 , Red = 1, White = 2, Orange = 3, Blue = 4

ctld.JTAC_smokeOffset_x = 0.0 -- distance in the X direction from target to smoke (meters)
ctld.JTAC_smokeOffset_y = 2.0 -- distance in the Y direction from target to smoke (meters)
ctld.JTAC_smokeOffset_z = 0.0 -- distance in the z direction from target to smoke (meters)

ctld.JTAC_jtacStatusF10 = true -- enables F10 JTAC Status menu

ctld.JTAC_location = true -- shows location of target in JTAC message
ctld.location_DMS = false -- shows coordinates as Degrees Minutes Seconds instead of Degrees Decimal minutes

ctld.JTAC_lock = "all" -- "vehicle" OR "troop" OR "all" forces JTAC to only lock vehicles or troops or all ground units

ctld.JTAC_allowStandbyMode = true -- Allow players to toggle lasing on/off
ctld.JTAC_laseSpotCorrections = true -- Allow players to toggle on/off the JTAC leading it's target, taking into account current wind conditions and the speed of the target (particularily useful against moving heavy armor)
ctld.JTAC_allowSmokeRequest = true -- Allow players to request a smoke on target (temporary)
ctld.JTAC_allow9Line = true -- Allow players to ask for a 9Line (individual) for a specific JTAC's target
To make a unit deployed from a crate into a JTAC unit, add the type to the ctld.jtacUnitTypes list.
The script allows a JTAC to mark and hold an IR and Laser point on a target allowing TGP's to lock onto the lase and ease of target location using NV Goggles.
The JTAC will automatically switch targets when a target is destroyed or goes out of Line of Sight. Alternatively, a target list is available to chose from for each JTAC.
The JTACs can be configured globally to target only vehicles or troops or all ground targets.
JTACs can also be asked to put smoke on target, give out 9-Lines, to toggle lasing on/off and compensate the laser spot position for target movement and local wind.
*** NOTE: LOS doesn't include buildings or tree's... Sorry! ***
The script can also be useful in daylight by enabling the JTAC to automatically mark enemy positions with Smoke. The JTAC will only move the smoke to the target every 5 minutes (to stop a huge trail of smoke markers) unless the target is destroyed, in which case the new target will be marked straight away with smoke. There is also an F10 menu to get the status of all JTACs, access the target lists and options for each JTAC (such as toggling lasing on/off or requesting a smoke manually). Do note that if a JTAC is down it won't report in or have it's own menu for targets and options. JTACs also do not overlap each other so the target lists do not include already lased targets.
The automatic smokes will be offset from the target by the distances declared in the ctld.JTAC_smokeOffset_* constants. Requested smokes will be put close but not on target.
In practice, this is what the F10 radio menu for JTACs looks like :
You can see the "JTAC Status" command and the Selection Lists for each JTAC. Those look like :
Each target type within LOS of the JTAC and not already being lased (by any JTAC) is listed. Quantity is indicated. There is also the Action menu which looks like :
This will allow you to act on the behavior of the JTAC or make requests. These items get updated every minute or so to reflect current configuration, same for the target list.
*** NOTE: Please be patient with the JTAC menu, wait at least 10 seconds between commands. If a spurious command is triggered, wait the same 10 seconds and try again. Sorry for this inconvenience. ***
To add JTACs or AFACs to the mission using the editor place a JTAC/AFAC unit on the map putting each JTAC/AFAC in it's own group containing only itself and no other units. Name the group something easy to remember e.g. JTAC1 and make sure the JTAC units have a unique name which must not be the same as the group name. The editor should do this for you but be careful if you copy and paste.
Run the code below as a DO SCRIPT at the start of the mission, or after a delay if you prefer to activate a mission JTAC or AFAC.
JTAC units deployed by unpacking a crate will automatically activate and begin searching for targets immediately.
ctld.JTACAutoLase('JTAC1', 1688)Where JTAC1 is the Group name of the JTAC Group with one and only one JTAC unit and the 1688 is the Laser code.
You can also override global settings set in the script like so:
ctld.JTACAutoLase('JTAC1', 1688, false,"all") This means no smoke marks for this JTAC and it will target all ground troops
ctld.JTACAutoLase('JTAC1', 1688, true,"vehicle")This smoke marks for this JTAC and it will target ONLY ground vehicles
ctld.JTACAutoLase('JTAC1', 1688, true,"troop")This means smoke marks are enabled for this JTAC and it will target ONLY ground troops
ctld.JTACAutoLase('JTAC1', 1688, true,"troop",1)This means smoke marks are enabled for this JTAC and it will target ONLY ground troops AND smoke colour will be Red
ctld.JTACAutoLase('JTAC1', 1688, true,"troop",0)This means smoke marks are enabled for this JTAC and it will target ONLY ground troops AND smoke colour will be Green
ctld.JTACAutoLase('JTAC1', 1688, true,"all", 4) This means no smoke marks for this JTAC and it will target all ground troops AND mark with Blue smoke
Smoke colours are: Green = 0 , Red = 1, White = 2, Orange = 3, Blue = 4
The script doesn't care if the unit isn't activated when run, as it'll automatically activate when the JTAC is activated in the mission but there can be a delay of up to 30 seconds after activation for the JTAC to start searching for targets.
You can also change the name of a unit* (unit, not group) to include "hpriority" to make it high priority for the JTAC, or "priority" to set it to be medium priority. JTAC's will prioritize targets within view by first marking hpriority targets, then priority targets, and finally all others. This works seemlessly with the all/vehicle/troop functionality as well. In this way you can have them lase SAMS, then AAA, then armor, or any other order you decide is preferable.
If the DCS-SimpleTextToSpeech.lua script is loaded (you'll find it here), and configured (i.e. the STTS.DIRECTORY, STTS.SRS_PORT and optionaly the STTS.GOOGLE_CREDENTIALS variables are set), the JTAC can talk over SRS.
To do this, you can specify the _radio parameter when calling ctld.JTACAutoLase like in this example :
ctld.JTACAutoLase('JTAC1', 1688, true,"all", 4, { freq = "251.50", mod = "AM", name = "JTAC one" }) If you don't use the _radio parameter, CTLD will compute a FM frequency based on the laser designator code : 30Mhz + [second figure of the code] + [last two figures of the code] * 0.05. For example, if the laser code is 1688, the frequency will be 40.40Mhz.
JTAC frequency is available through the "JTAC Status" radio menu
Troops can be loaded and unloaded using the F10 Menu. Troops can only be loaded in a pickup zone or from a FOB (if enabled) but can be dropped anywhere you like. Troops dropped by transports can also be extracted by any transport unit using the radio menu, as long as you are close enough.
AI transports will display a message when they Auto load and deploy troops in the field. AI units won't pickup already deployed troops so as not to interfere with players.
The C130 / IL-76 gets an extra radio option for loading and deploying vehicles. By default the C-130 can pickup and deploy a HMMWV TOW and HMMWV MG. This can be changed by editing ctld.vehiclesForTransportBLUE for BLUE coalition forces or ctld.vehiclesForTransportRED for RED coalition forces.
The C-130 / IL-76 can also load and unload FOB crates from a Logistics area, see FOB Construction for more details.
Different Troop Groups can be loaded from a pickup zone. The ctld.loadableGroups list can be modified if you want to change the loadable groups.
-- ************** INFANTRY GROUPS FOR PICKUP ******************
-- Unit Types
-- inf is normal infantry
-- mg is M249
-- at is RPG-16
-- aa is Stinger or Igla
-- mortar is a 2B11 mortar unit
-- jtac is a JTAC soldier, which will use JTACAutoLase
-- You must add a name to the group for it to work
-- You can also add an optional coalition side to limit the group to one side
-- for the side - 2 is BLUE and 1 is RED
ctld.loadableGroups = {
    {name = "Standard Group", inf = 6, mg = 2, at = 2 }, -- will make a loadable group with 5 infantry, 2 MGs and 2 anti-tank for both coalitions
    {name = "Anti Air", inf = 2, aa = 3  },
    {name = "Anti Tank", inf = 2, at = 6  },
    {name = "Mortar Squad", mortar = 6 },
    -- {name = "Mortar Squad Red", inf = 2, mortar = 5, side =1 }, --would make a group loadable by RED only
}
The infantry groups have a weight, too. It is calculated based on the soldiers' roles, and the weight of their kit
- Every soldier weights between 90% and 120% of ctld.SOLDIER_WEIGHT, and they all carry a backpack and their helmet (ctld.KIT_WEIGHT)
- Standard grunts have a rifle and ammo (ctld.RIFLE_WEIGHT)
- AA soldiers have a MANPAD tube (ctld.MANPAD_WEIGHT)
- Anti-tank soldiers have a RPG and a rocket (ctld.RPG_WEIGHT)
- Machine gunners have the squad MG and 200 bullets (ctld.MG_WEIGHT)
- JTAC have the laser sight, radio and binoculars (ctld.JTAC_WEIGHT)
- Mortar servants carry their tube and a few rounds (ctld.MORTAR_WEIGHT)
ctld.SOLDIER_WEIGHT = 80 -- kg, will be randomized between 90% and 120%
ctld.KIT_WEIGHT = 20 -- kg
ctld.RIFLE_WEIGHT = 5 -- kg
ctld.MANPAD_WEIGHT = 18 -- kg
ctld.RPG_WEIGHT = 7.6 -- kg
ctld.MG_WEIGHT = 10 -- kg
ctld.MORTAR_WEIGHT = 26 -- kg
ctld.JTAC_WEIGHT = 15 -- kg
Cargo can be spawned by transport helicopters if they are close enough to a friendly logistics unit using the F10 menu. Crates are always spawned off the nose of the unit that requested them.
Since the December 2024 release, it's now possible to configure CTLD to allow all the loading modes simultaneously:
- conventional (DCS) if using an aircraft listed in
ctld.dynamicCargoUnits, - sling loading (DCS) if
ctld.slingLoadis set totrue, - simulated sling loading (CTLD) if
ctld.hoverPickupis set totrue, - simplified loading (CTLD) if
ctld.loadCrateFromMenuis set totrue
If ctld.slingLoad = false then Simulated Sling Loading will be used. This option is now the default due to DCS crashes caused by Sling Loading on multiplayer. Simulated sling loads will not add and weight to your helicopter when loaded.
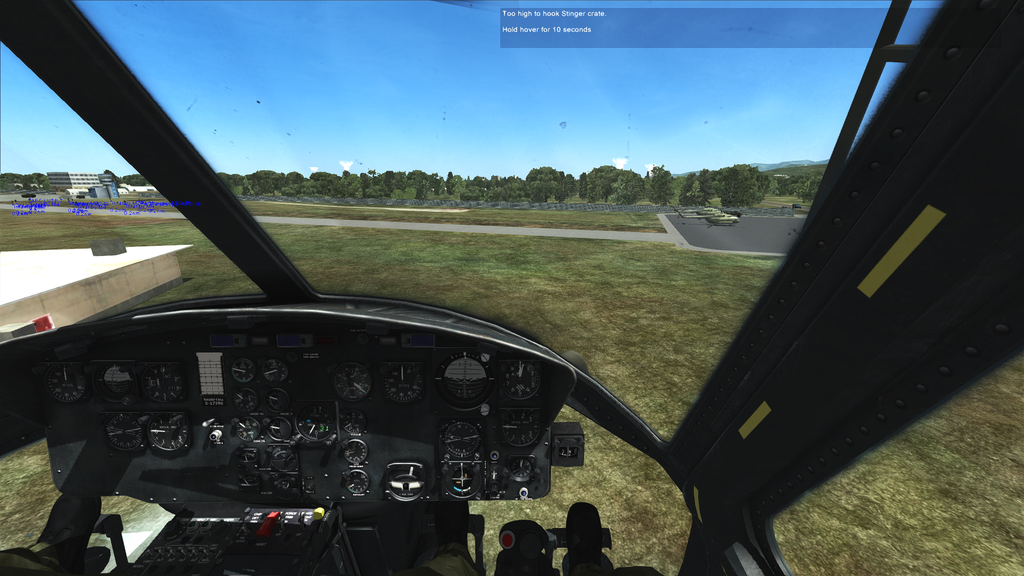
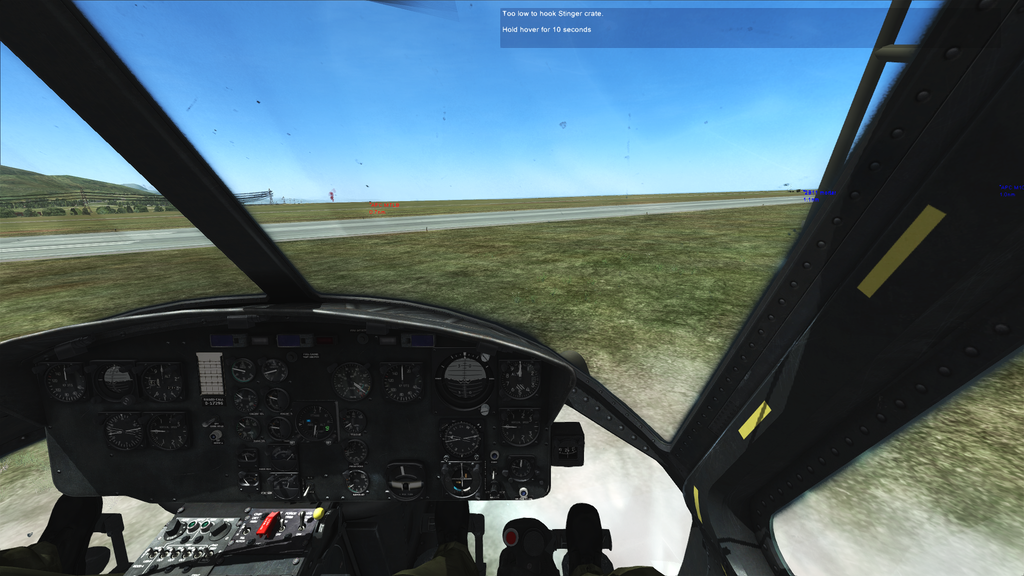
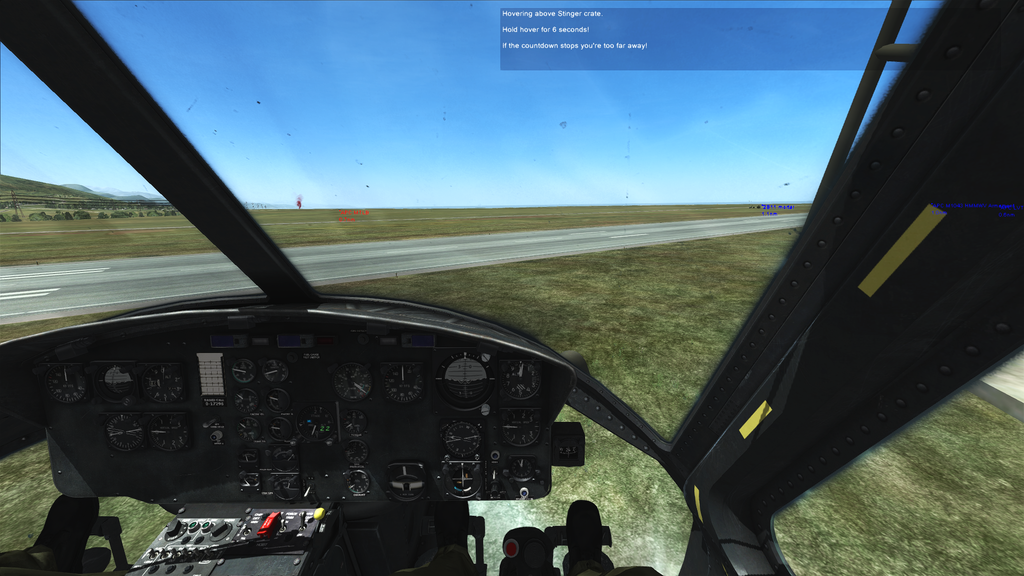
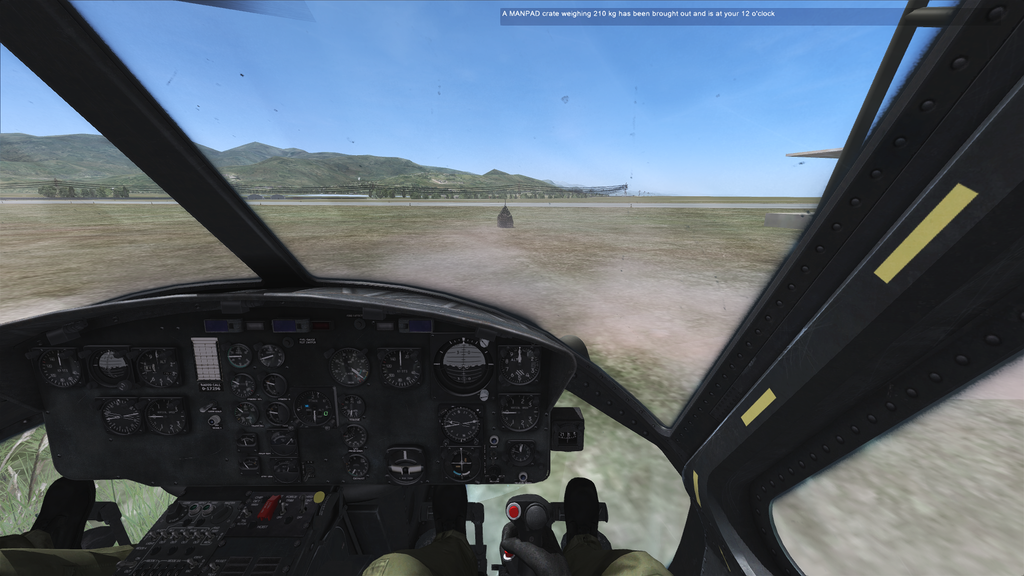
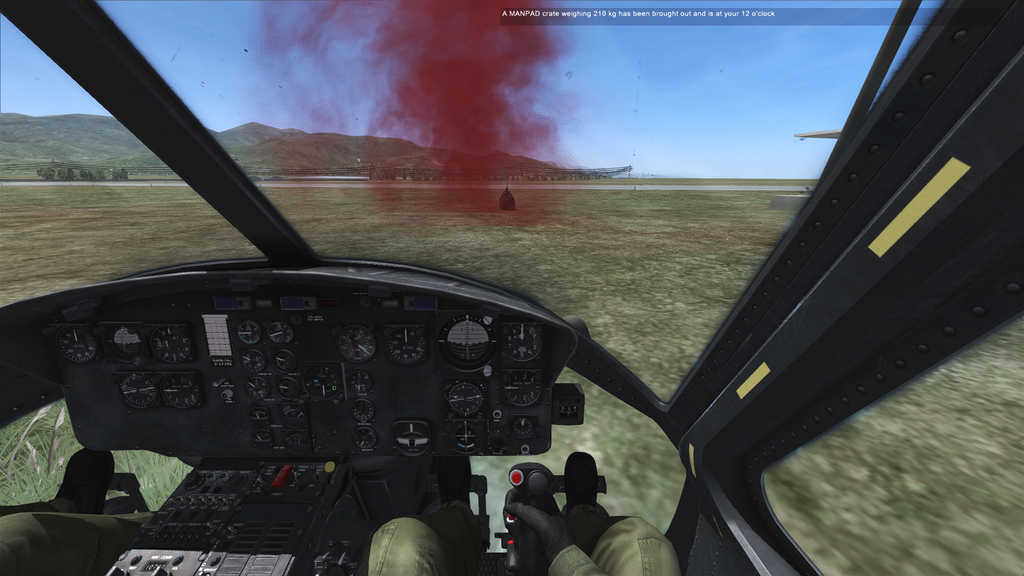
To pickup a Sling Load, spawn the cargo you want and hover above the crate for 10 seconds. There is no need to select which crate you want to pickup. Status messages will tell you if you are too high or too low. If the countdown stops, it means you are no longer hovering in the correct position and the timer will reset.
Too high:
Too Low:
Correct height and the countdown is working:
Crate Loaded:
Once you've loaded the crate, fly to where you want to drop it and drop using the Radio Menu CTLD->CTLD Commands->Drop Crate. If you are hovering the crate will be dropped below you and if you're on the ground it will appear off you're nose.
Once on the ground unpack as normal using the CTLD Commands Menu - CTLD->CTLD Commands->Unpack Crate
Note: You can also set ctld.hoverPickup = false so you can load crates using the F10 menu instead of Hovering; or keep ctld.hoverPickup = true and set ctld.loadCrateFromMenu = true so you can load the crates by hovering OR from the F10 menu
This uses the inbuilt DCS Sling cargo system and crates. Sling cargo weight differs drastically depending on what you are sling loading. The Huey will need to have 20% fuel and no armaments in order to be able to lift a HMMWV TOW crate! The Mi-8 has a higher max lifting weight than a Huey.
Once spawning the crate, to slingload the F6 menu needs to be used to select a cargo of the correct weight. If you've selected the right cargo RED smoke will appear and you can now sling load by hovering over the crate at a height of 15-30 feet or so.
- Huey rough max sling weight = 4000 lb / 1814.37 kg
- Mi-8 rough max sling weight = 6614 lb / 3000 kg
After selecting the right crate:
You can also list nearby crates that have yet to be unpacked using the F10 CTLD Commands Menu and also unpack nearby crates using the same menu.
Crate damage in the script is currently not implemented so as long as the crate isn't destroyed, you should always be able to unpack.
If you experience crashes with Sling-loading, such as a game crash when shotdown, you can use the simulated sling-load behaviour instead to work around the DCS Bugs.
To use the simulated behaviour, set the ctld.slingLoad option to false.
The simulated Sling Loading will use a Generator static object instead of a crate and you just hover above it for 10 seconds to load it. No Need to use the F6 menu to first select the crate.
The crate can then be dropped using the CTLD Commands section of the Radio menu. Make sure you're not too high when the crate is dropped or it will be destroyed!
Unfortunately there is no way to simulate the added weight of the Simulated Sling Load.
For aircrafts capable of this feature (CH-47 only for now, see ctld.dynamicCargoUnits), pilots can load and unload crates in their hold via the conventional DCS "rearm and refuel" dialog.
Once you have sling loaded and successfully dropped your crate, you can land and list nearby crates that have yet to be unpacked using the F10 Crate Commands Menu, as well as unpack nearby crates using the same menu. Crates cannot be unpacked near a logistics unit.
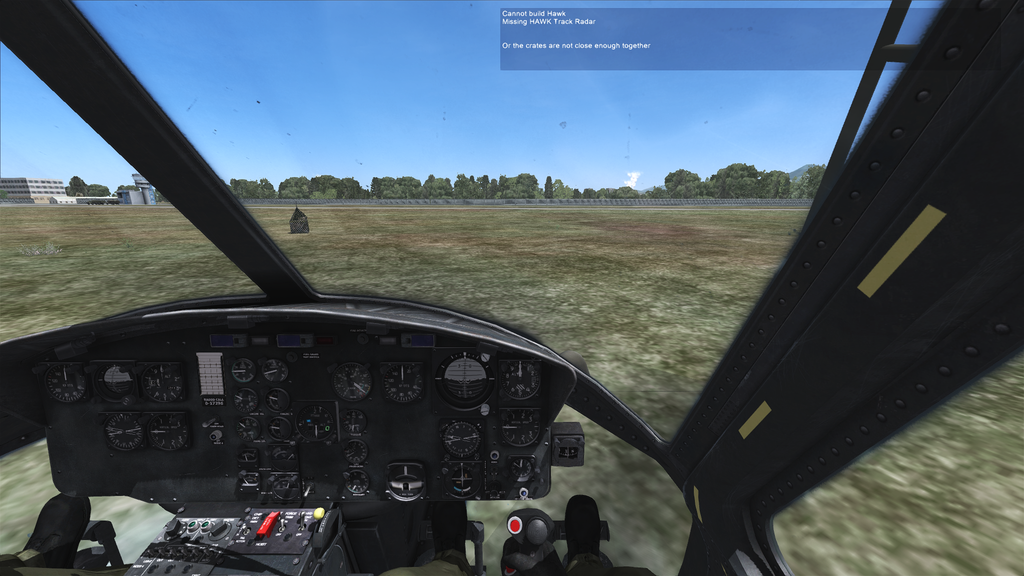
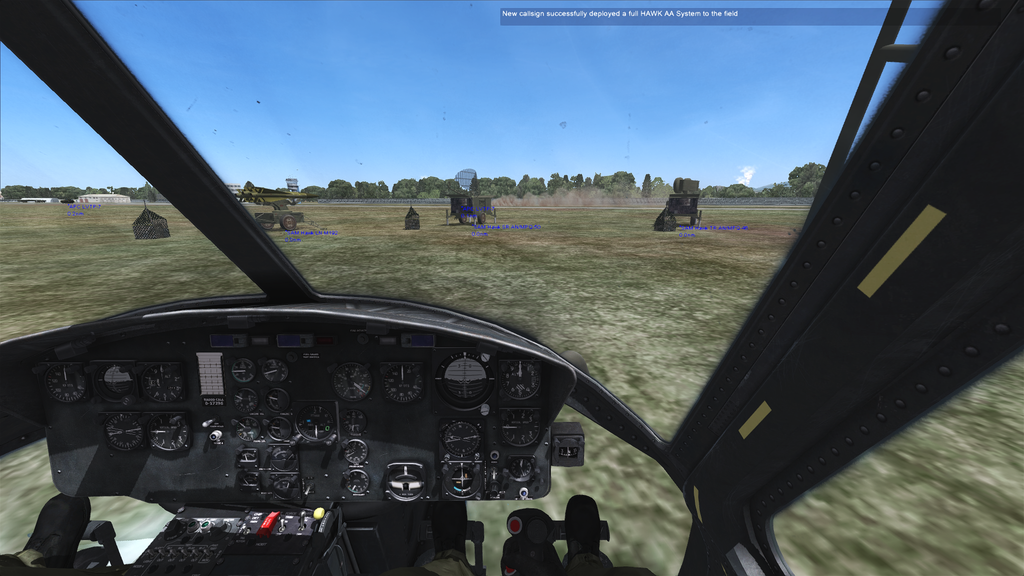
To build a HAWK or BUK AA system you will need to slingload all 3 parts - Launcher, Track Radar and Search Radar - and drop the crates within 100m of each other. The KUB only requries 2 parts. If you try to build the system without all the parts, a message will list which parts are missing. The air defence system by default will spawn with 3 launchers as it usually fires off 3 missiles at one target at a time. If you want to change the amount of launchers it has, edit the ctld.hawkLaunchers option in the user configuration at the top of the CTLD.lua file.
Example of Deployed HAWK System:
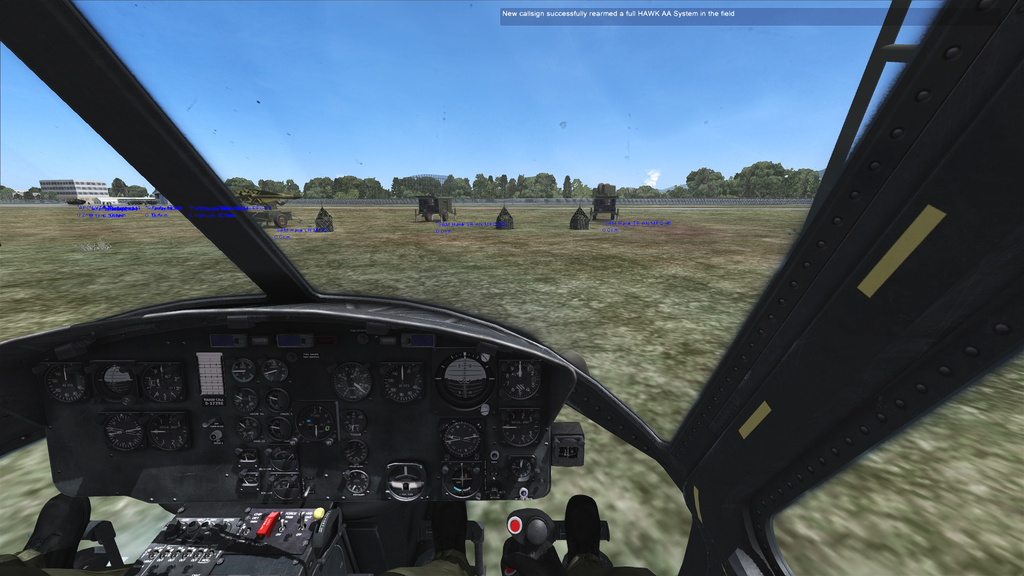
You can also rearm a fully deployed HAWK system by dropping another Launcher crate next to the completed system and unpacking it.
**Note: Once unpacked a crate will not disappear from the field or the F6 Menu, but will disappear from the F10 Nearby Crates list. There is currently no way to remove crates due to a DCS Bug AFAIK. This can make picking the right crate tricky, but by using the F10 List crates option, you can keep readjusting your position until you are close to the crate that you want and then it's trial and error, using the F6 menu to pick the right crate for sling loading. **
You can also repair a partially destroyed HAWK / BUK or KUB system by dropping a repair crate next to it and unpacking. A repair crate will also re-arm the system.
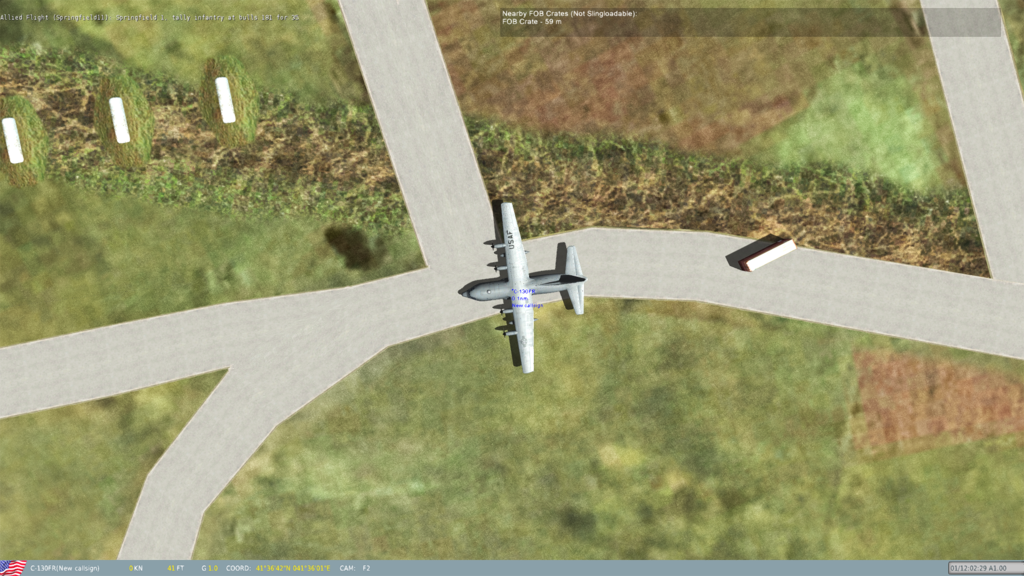
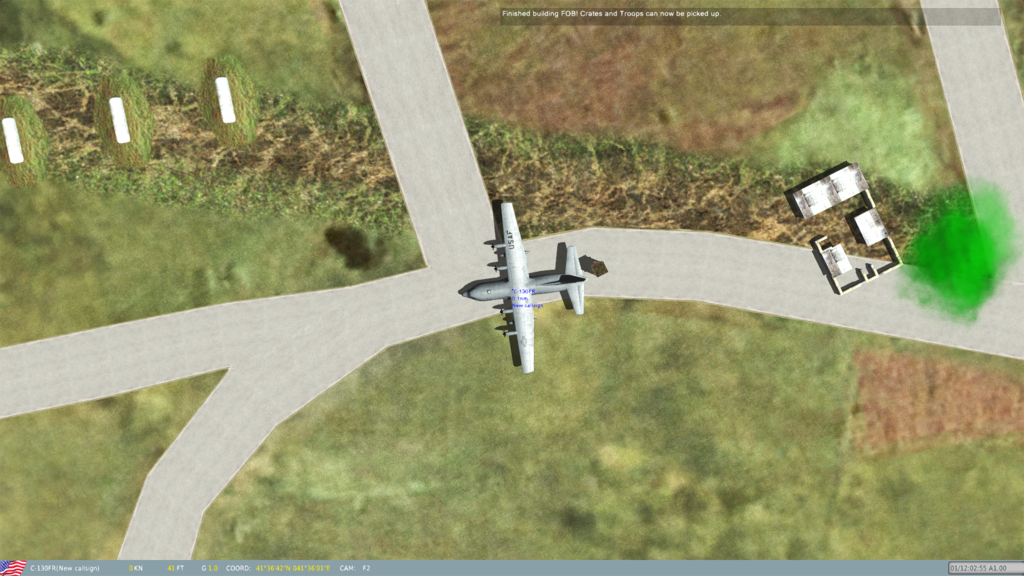
FOBs can be built by loading special FOB crates from a Logistics unit into a C-130 or other large aircraft configured in the script. To load the crate use the F10 - Troop Commands Menu. The idea behind FOBs is to make player vs player missions even more dynamic as these can be deployed in most locations. Once destroyed the FOB can no longer be used.
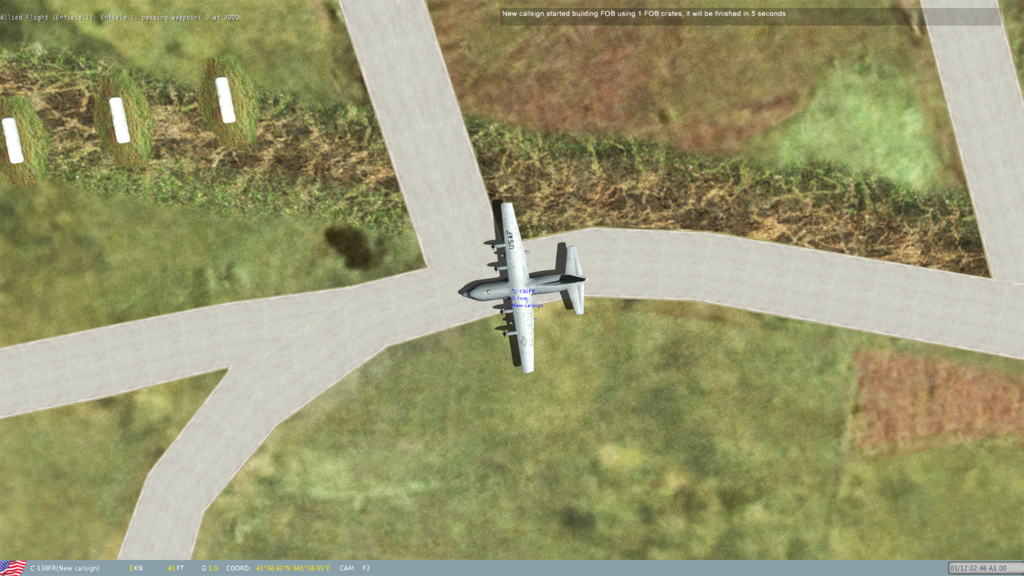
The amount of FOB crates required and the time to build can be configured at the top of the CTLD script. By default the FOB required 3 crates to build.
FOB crates cannot be moved by sling-load but can be built using the F10 - CTLD Commands menu by ether aircraft or helicopters. They can be repeatedly dropped and picked up by transport aircraft if they need to be moved. The FOB will build between all the dropped crates.
Once built, units can load troops and spawn crates from the FOB. Troop loading from the FOB can be configured at the top fo the script. AI units can also auto load troops from the FOB.
Once built, FOBs can be located using the F10 CTLD Commands menu -> List FOBS.
You will get a position as well as a UHF / VHF frequency that the Huey / Mi-8 (VHF) and Ka-50 / A10-C (UHF) can use to find the FOB. How to configure the radios is shown in the section below
Radio beacons can be dropped by any transport unit and there is no enforced limit on the number of beacons that can be dropped. There is however a finite limit of available frequencies so don't drop too many or you won't be able to distinguise the beacons from one another.
By default a beacon will disappear after 15 minutes, when it's battery runs out. FOB beacons will never run out power. You can give the beacon more time by editing the ctld.deployedBeaconBattery setting.
To deploy a beacon you must be on the ground and then use the F10 radio menu. The beacons are under the Radio Beacons section in CTLD. Once a beacon has been dropped, the frequencies can also be listed using the CTLD - > Radio Beacons -> List Radio Beacons command.
The guides below are not necessarily the best or only way to set up the ADF in each aircraft but it works :)
To configure ADF on the UHF Radio you must
- Put the UHF Radio in ADF Mode using the mode select knob (rightmost setting)
- Enter the MHz frequency using the clickable knobs below the digital display
- That's it!
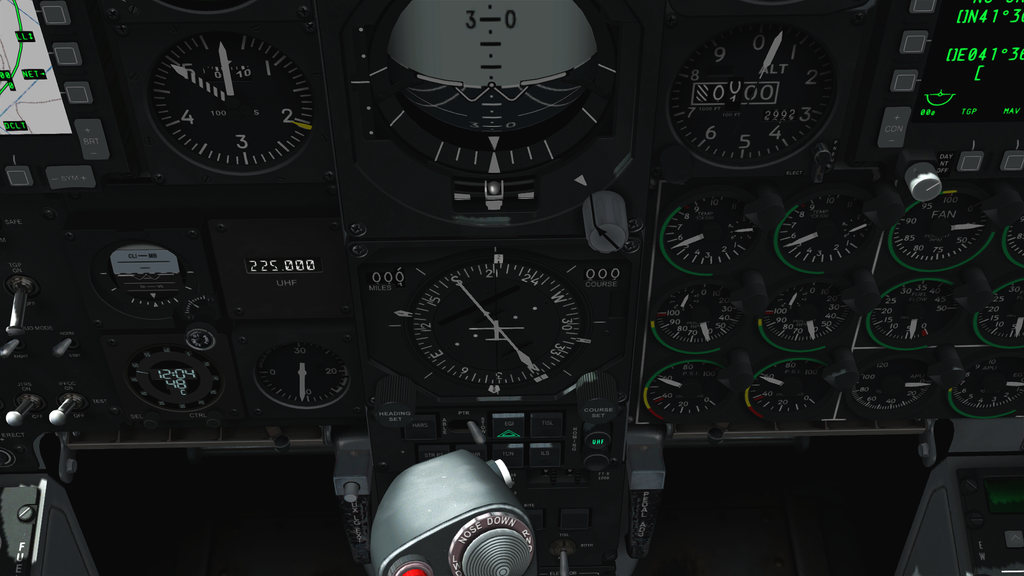
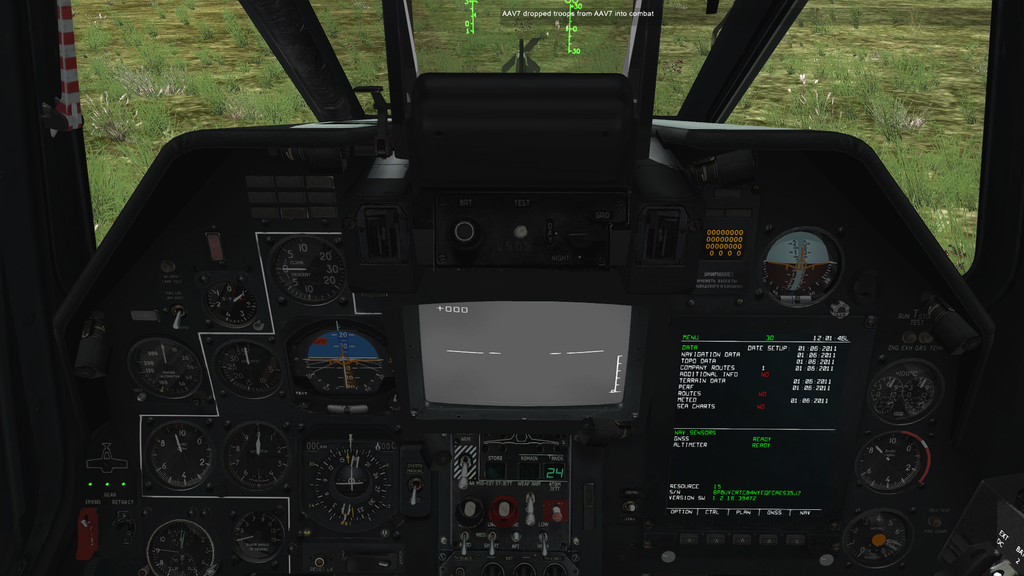
Once you've got the right frequency, you should see an arrow on the compass pointing in the right direction as well as the UHF light lit up under the Homing section below the compass but it may take up to a minute to pick up the signal not work while on the ground. You will not hear any sound.
Make sure the right knob is set to MNL or your frequency setting will be ignored.
UHF Radio Configured: - Bottom left of Picture:
Pointer towards Radio Signal at 9 o'clock:
To configure ADF on the UHF Radio you must
- Put the UHF Radio in ADF Mode using the single ADF switch on the second row of switches on the Radio
- Enter the MHz frequency using the clickable orange wheels below the display
- That's it!
Once you've got the right frequency, you should see a gold arrow on the compass pointing in the right direction. It may take up to a minute to pick up the signal and not work while on the ground. You will not hear any sound!
Radio configured to the correct frequency for a beacon:
Gold pointer pointing to beacon on the compass:
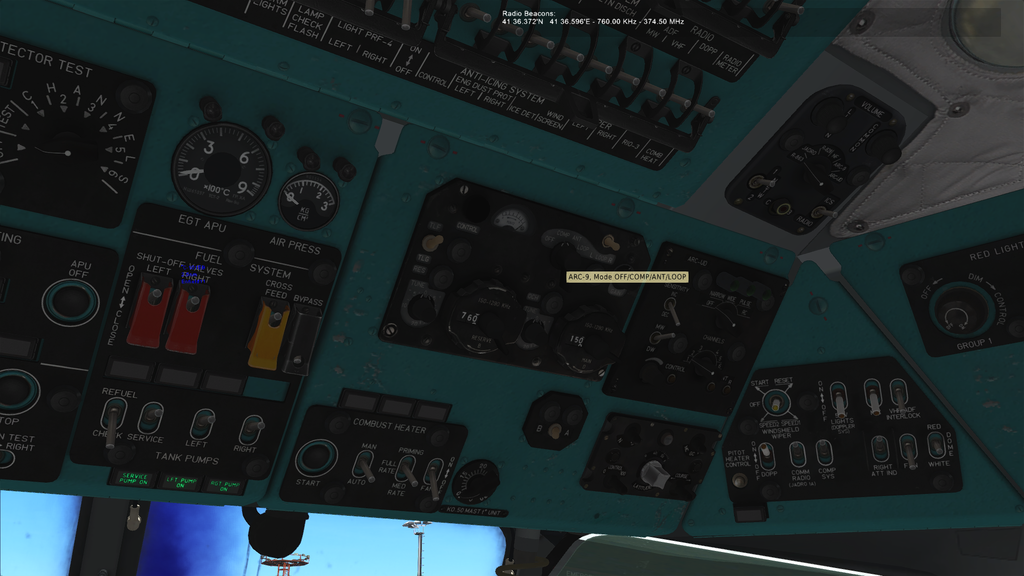
To configure ADF on the VHF Radio you must
- Switch to the engineer or co-pilot seat
- Put the VHF Radio in ADF Mode using the switch at the top of the radio to the COMP setting by clicking once.
- Enter the KHz frequency using the clickable switch and wheel on the left Reserve B radio
- Tune +/- 5 KHz using the bottom left tune knob on the ARC-9
- Switch to the pilot seat
Once you've got the right frequency, you should see a white arrow on the compass pointing in the right direction. It may take up to a minute to pick up the signal and not work while on the ground. You may hear morse code when on the right frequency and occasionally receive text the radio which will be displayed at the top of the screen. You can also use the power meter on the radio to work out if you're on the right frequency.
Radio configured to the correct frequency for a beacon:
White pointer pointing to beacon on the compass:
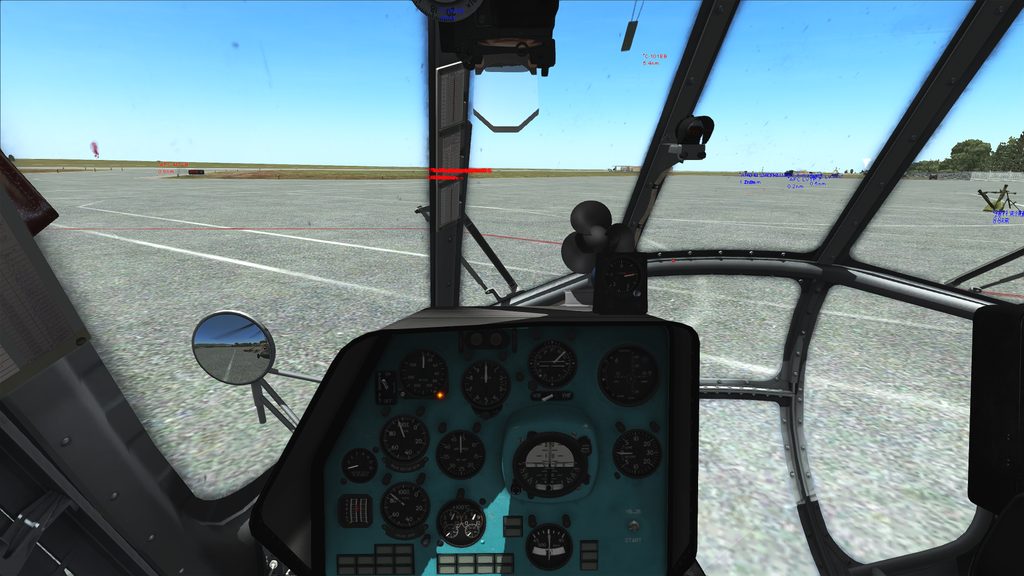
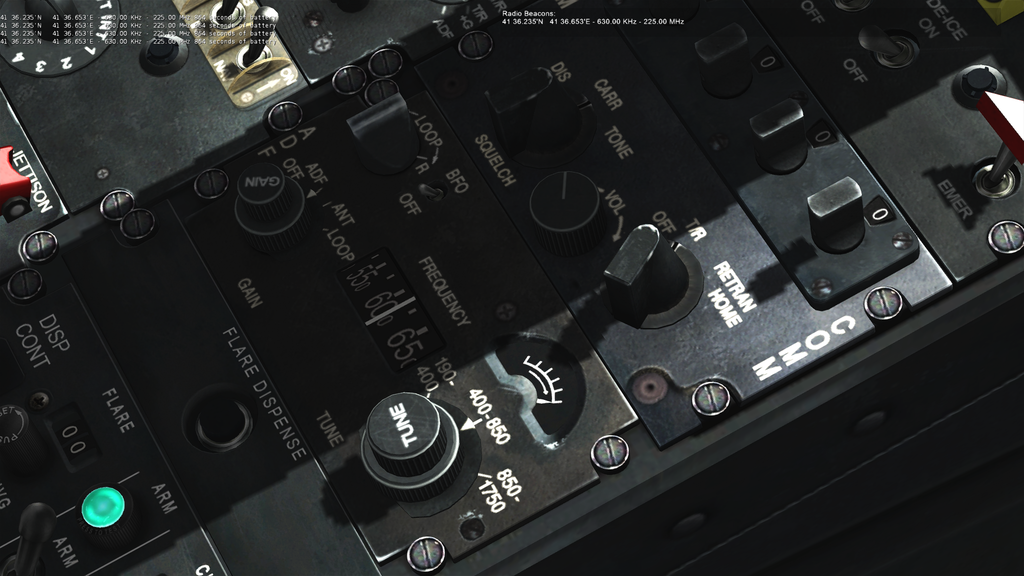
To configure the VHF ADF:
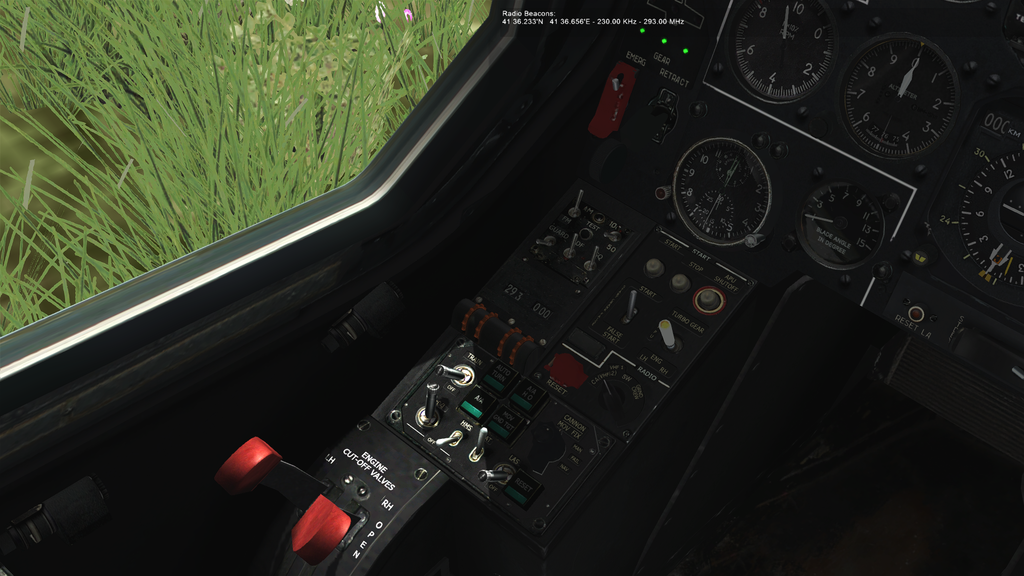
- Look down at the center console of the Huey
- Put the VHF Radio in ADF Mode using the switch at the top of the radio to the COMP setting by clicking once.
- Enter the KHz frequency using the clickable switch and wheel on the left Reserve B radio
- Tune +/- 5 KHz using the bottom left tune knob on the ARC-9
- Switch to the pilot seat
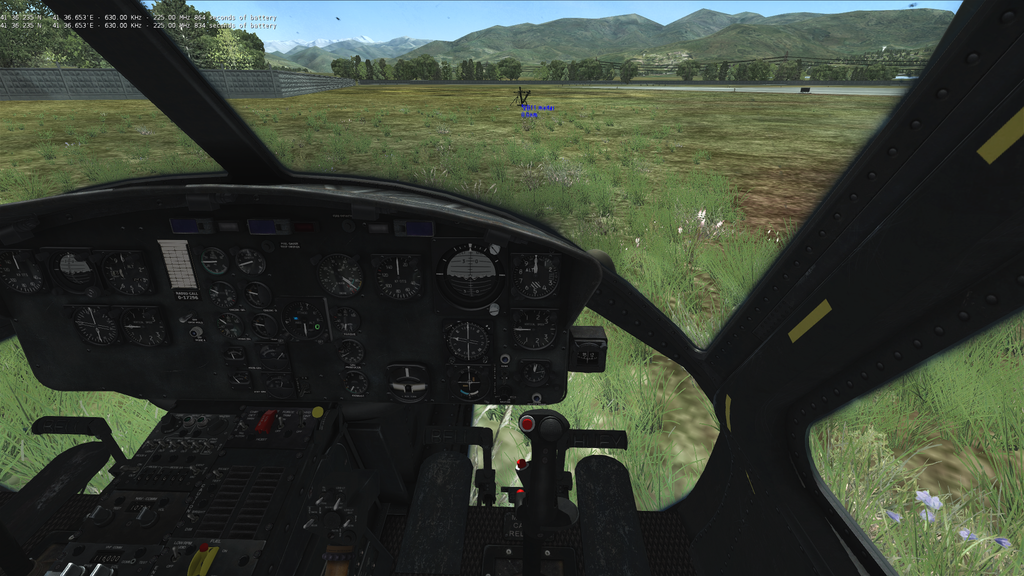
Once you've got the right frequency, you should see a white arrow on the compass pointing in the right direction. It may take up to a minute to pick up the signal and not work while on the ground. You may hear morse code when on the right frequency and occasionally receive text the radio which will be displayed at the top of the screen. You can also use the power meter on the radio to work out if you're on the right frequency.
The Huey ADF can be a dodgy and occasionaly points the wrong direction but it should eventually settle on the correct direction.
Radio configured to the correct frequency for a beacon:
White pointer pointing to beacon on the compass:
CTLD has an optional callback API that can be used to trigger actions in code
The example below as a DO SCRIPT will output the callback "action" type for every action:
ctld.addCallback(function(_args)

    trigger.action.outText(_args.action,10)

end)
Below is a complete list of all the "actions" plus the data that is sent through. For more information its best to check the CTLD Code to see more details of the arguments.
{unit = "Unit that did the action", unloaded = "DCS Troops Group", action = "dropped_troops"}{unit = "Unit that did the action", unloaded = "DCS Vehicles Group", action = "dropped_vehicles"}{unit = "Unit that did the action", unloaded = "List of picked up vehicles", action = "load_vehicles"}{unit = "Unit that did the action", unloaded = "List of picked up troops", action = "load_troops"}{unit = "Unit that did the action", unloaded = "List of dropped troops", action = "unload_troops_zone"}{unit = "Unit that did the action", unloaded = "List of dropped vehicles", action = "unload_vehicles_zone"}{unit = "Unit that did the action", extracted = "DCS Troops Group", action = "extract_troops"}{unit = "Unit that did the action", extracted = "DCS Vehicles Group", action = "extract_vehicles"}{unit = "Unit that did the action",position = "Point of FOB", action = "fob" }{unit = "Unit that did the action",crate = "Crate Details", spawnedGroup = "Group rearmed by crate", action = "rearm"}{unit = "Unit that did the action",crate = "Crate Details", spawnedGroup = "Group spawned by crate", action = "unpack"}{unit = "Unit that did the action",crate = "Crate Details", spawnedGroup = "Group repaired by crate", action = "repair"}

