Maxwell CC2 Node Setup
- Overview
- Hardware requests
-
Crust Account
3.1 Create Stash Account
3.2 Create Controller Account
3.3 Bond Controller with Stash -
Software Requests
4.1 BIOS Settings
4.2 Download Crust-node Installation Package
4.3 Install Crust Service - Configurations
- Start Crust Service
- Join GPoS
-
Join Storage Market (Optional)
8.1 Fixed public Network Requirements (Optional)
8.2 FastDFS Settings
8.3 Modify Software Configurations
8.4 Karst Starting
8.5 Pledge, Register, Order Picking - Node Restart
In this tutorial, we will introduce how you can become a Validator/Candidate or a Merchant to get corresponding revenues in Crust network. We will specifically cover such aspects as the selection of hardware equipment, operating system settings, as well as the startup and use of related Apps to help you join Crust Maxwell CC2 testnet. It should be noted that some Linux pre-knowledge is expected of you by this tutorial, and please do follow our guideline steps and do not skip any of them. If you have any questions, please contact the Crust official.
| Recommended Configuration | |
|---|---|
| Node Service | Intel Core i5-9600KF processor (supporting SGX; Visit Intel official website to find out whether your chips support SGX or not); If SGX only supports "software enabled", please go to https://github.com/intel/sgx-software-enable; Western Digital 512G SSD (as a system disk to store node data);8G RAM or above;Seagate (SEAGATE) Hard Disk 8*8TB SkyHawk 7200 rpm 256M (as storage disk, storage service data); |
| OS | Ubuntu 16.04/18.04 |
| Bandwidth | 100M,stable |
Note: detect whether CPU supports SGX
Script detection: https://github.com/crustio/crust/wiki/Check-TEE-supportive
Official website detection: https://www.intel.com/content/www/us/en/search.html
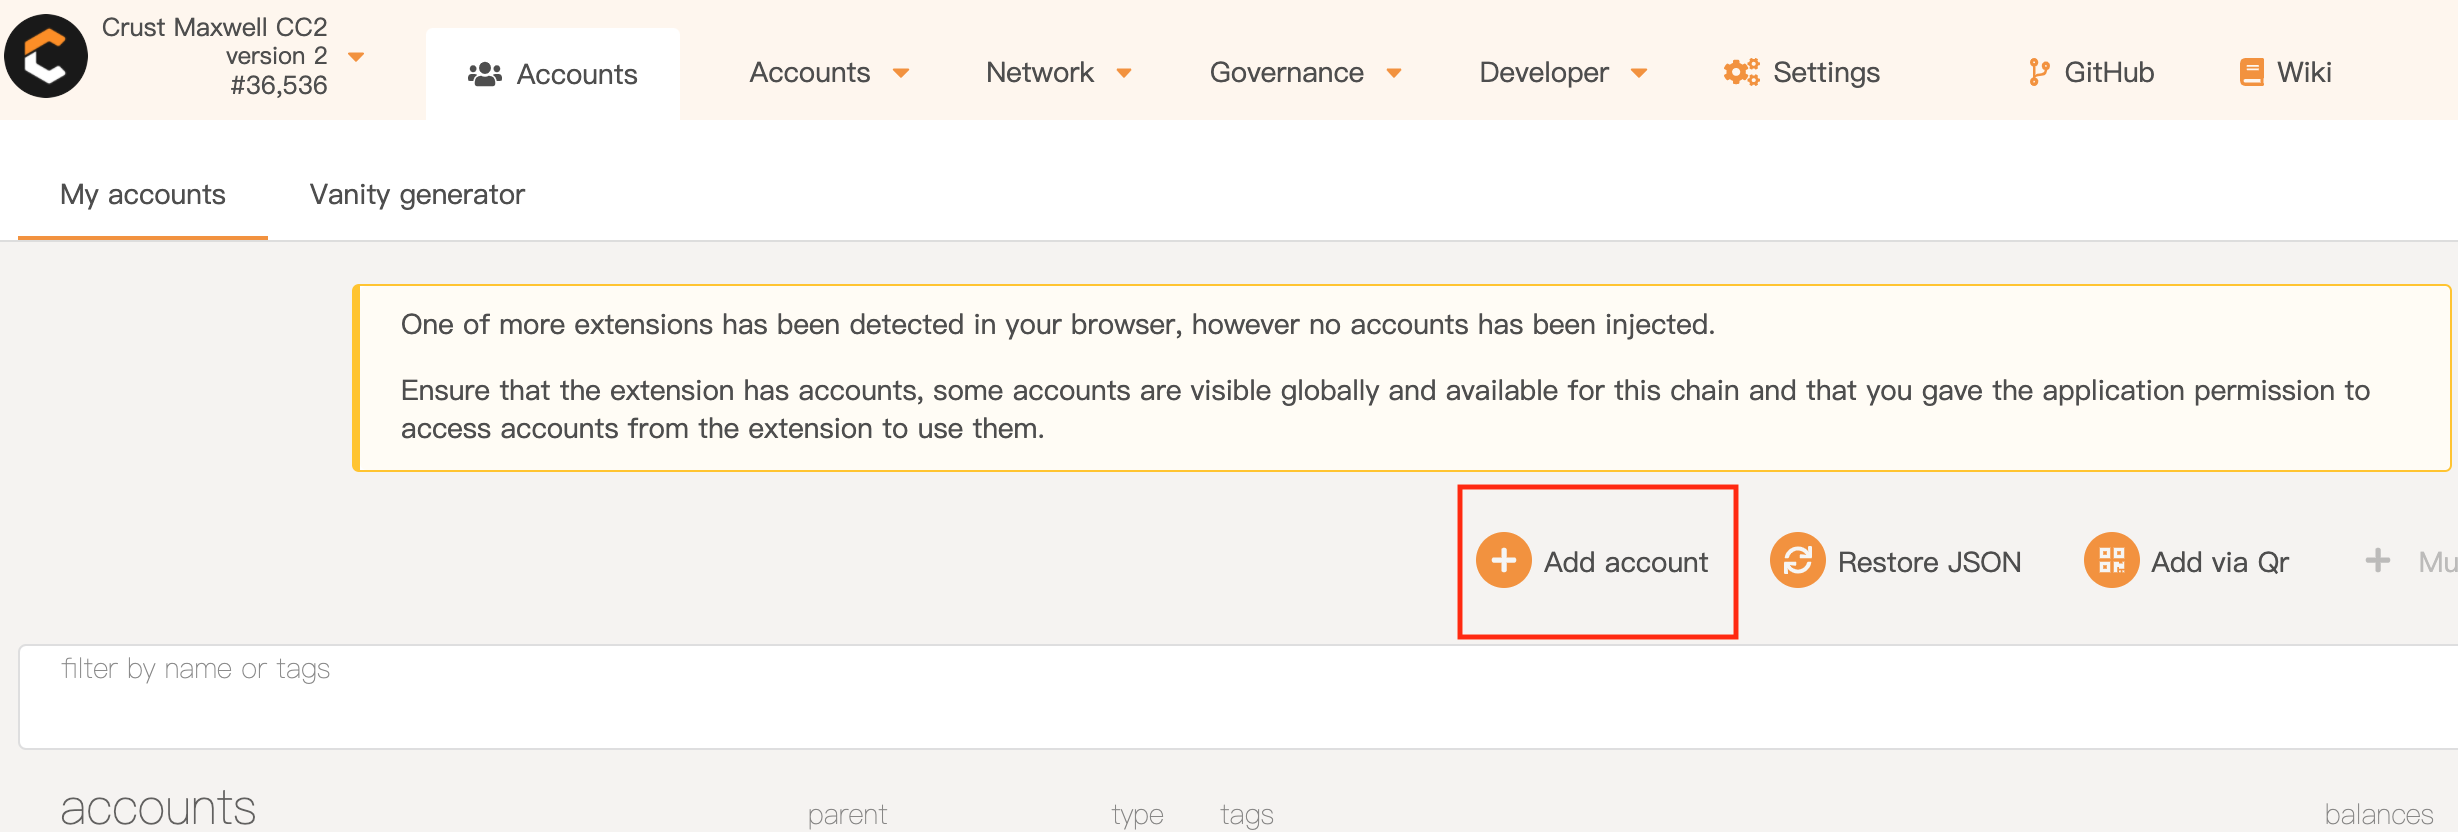
Account is your on-chain identity. As a node, you need an account to bond to the node to obtain block rewards. As a bi-account model (Controller/Stash), Crust requires specific account bonding operations in Crust Apps, this section will explain how to create accounts and bond them.
Click "Accounts" from the "Accounts" column in navigation bar at the top of the page, and click "Add account", as demonstrated below.
Enter account name and password twice, and click "Save", and the account will be backed up on your device by default.

We will use the first created account as a Stash account. Stash account is a user's asset account, which is often used to manage the user's assets. Besides, a certain number of CRUs are required of the Stash account for subsequent actions such as transactions and asset staking.
Repeat the above steps to create another account. (Controller account)
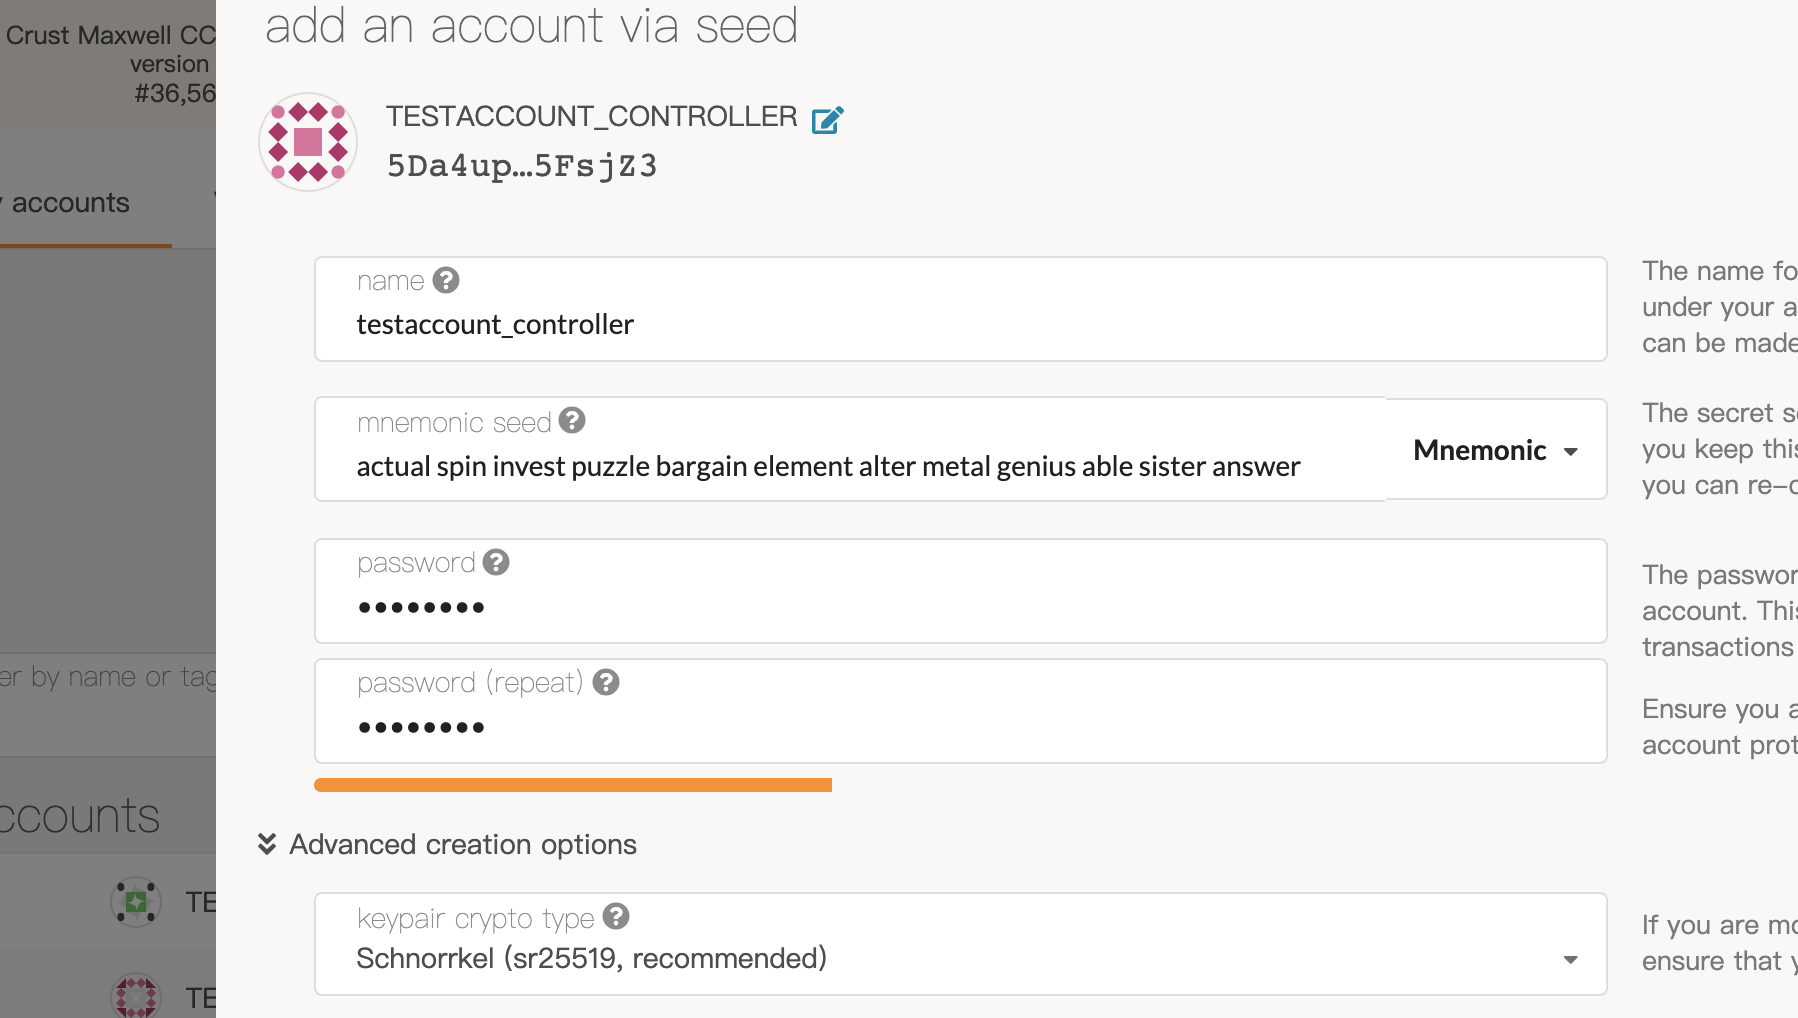
We name this new account CONTROLLER as a mark that this account will be used as a controller to control assets. Also, a certain number of CRUs are required of the account to pay transaction fees.
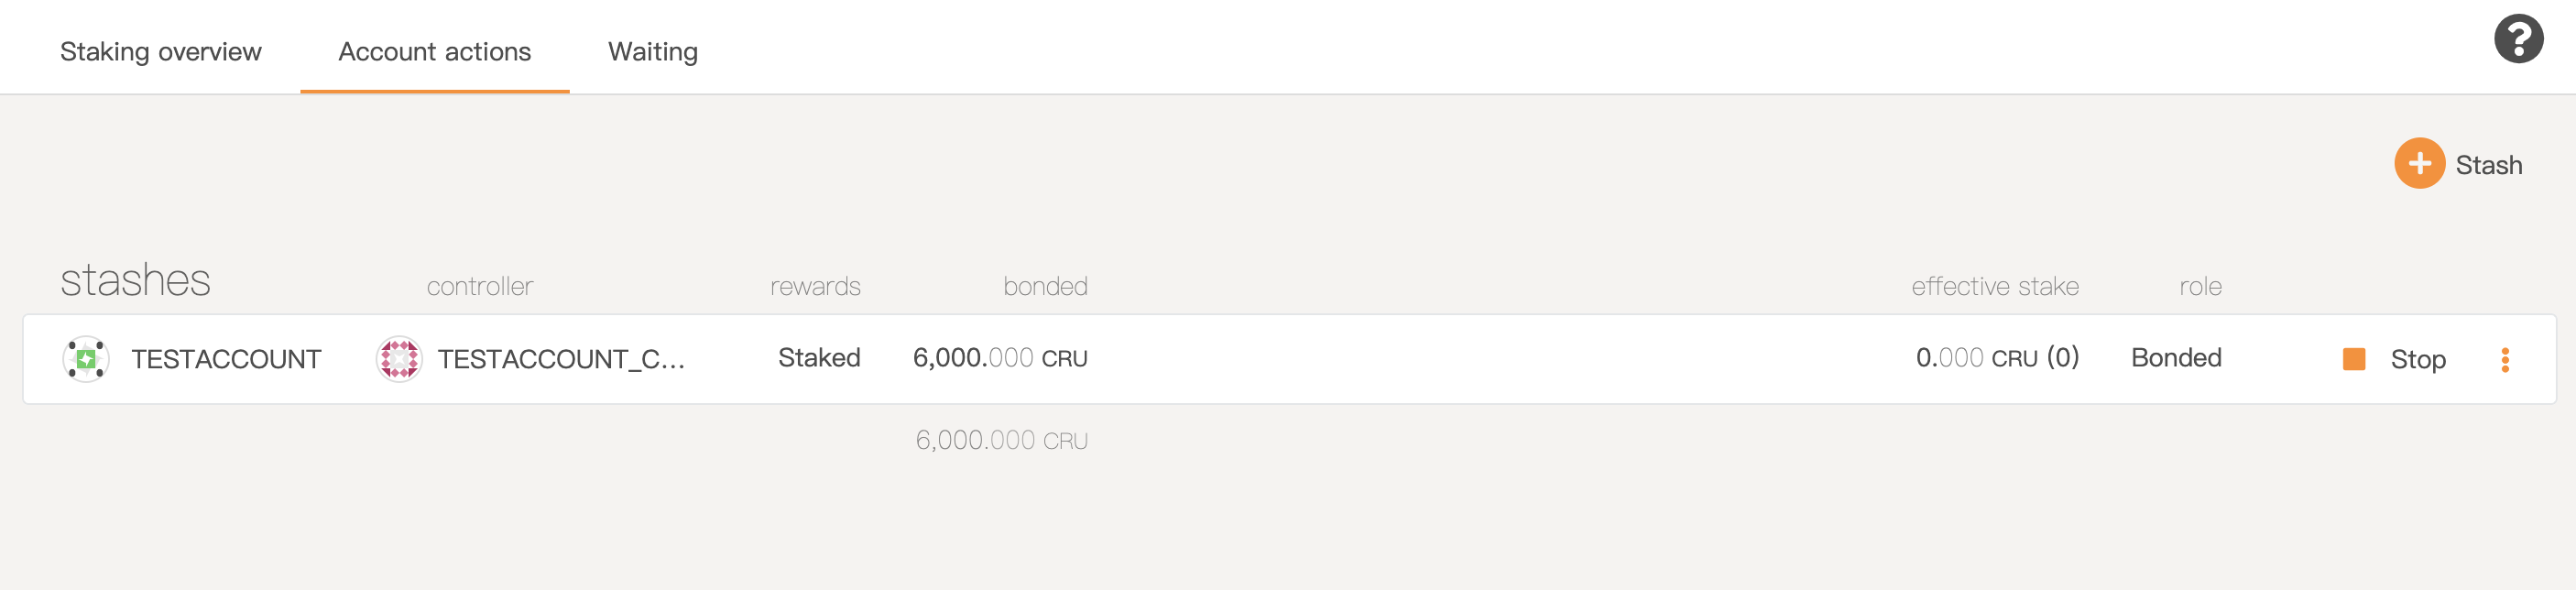
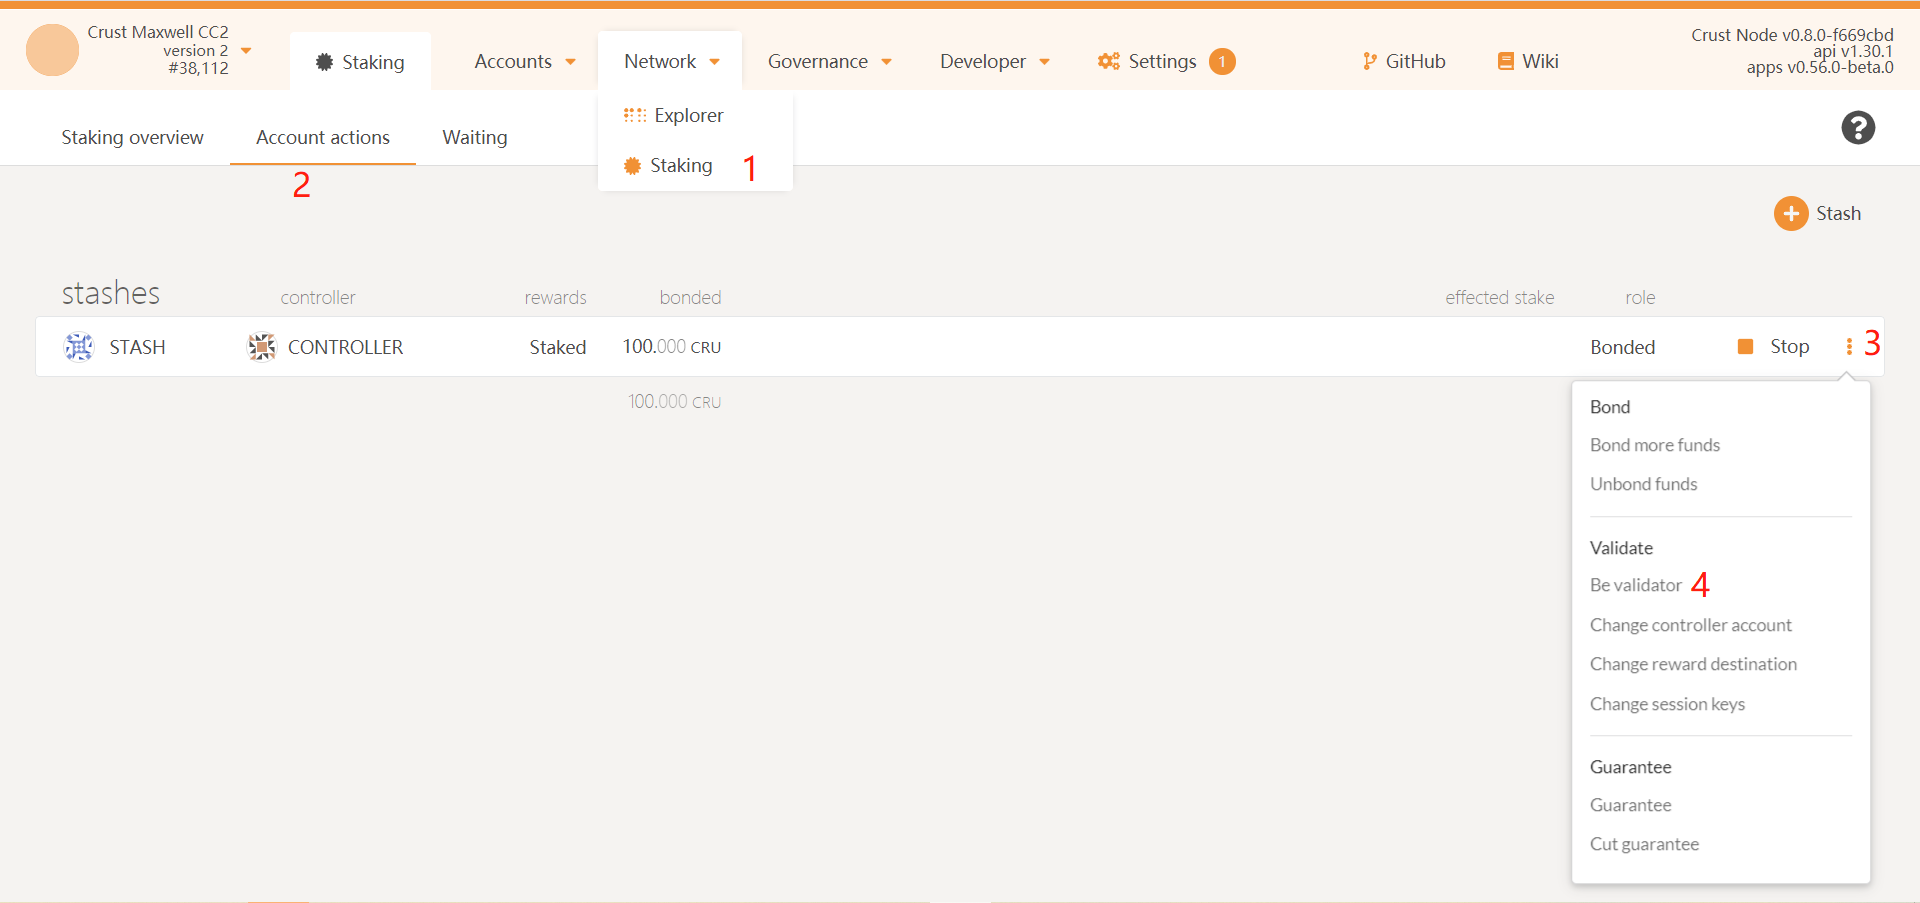
Click "Staking" column in the navigation bar, and select "Account actions".
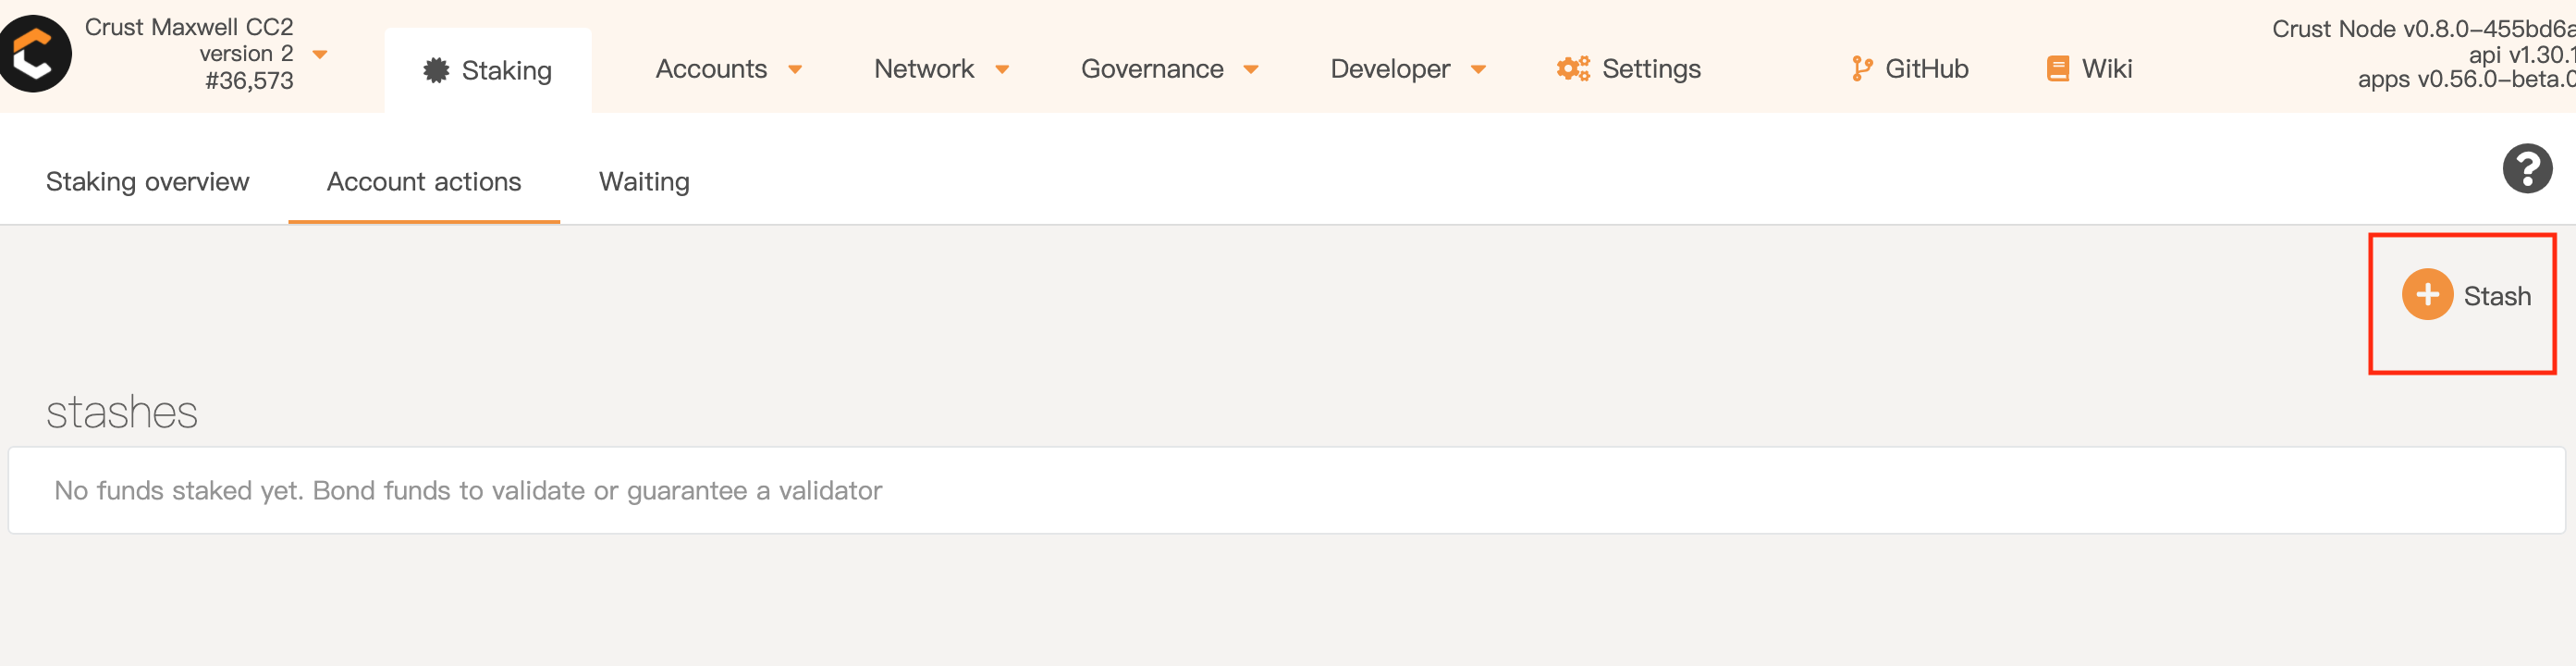
Click "Stash" in the upper right corner, select the right Stash and Controller account in the pop-up page, enter the amount of CRUs to be Bonded (the "amount" here represents the number of CRUs allowed to be controlled by the controller account), and then click "Bond".
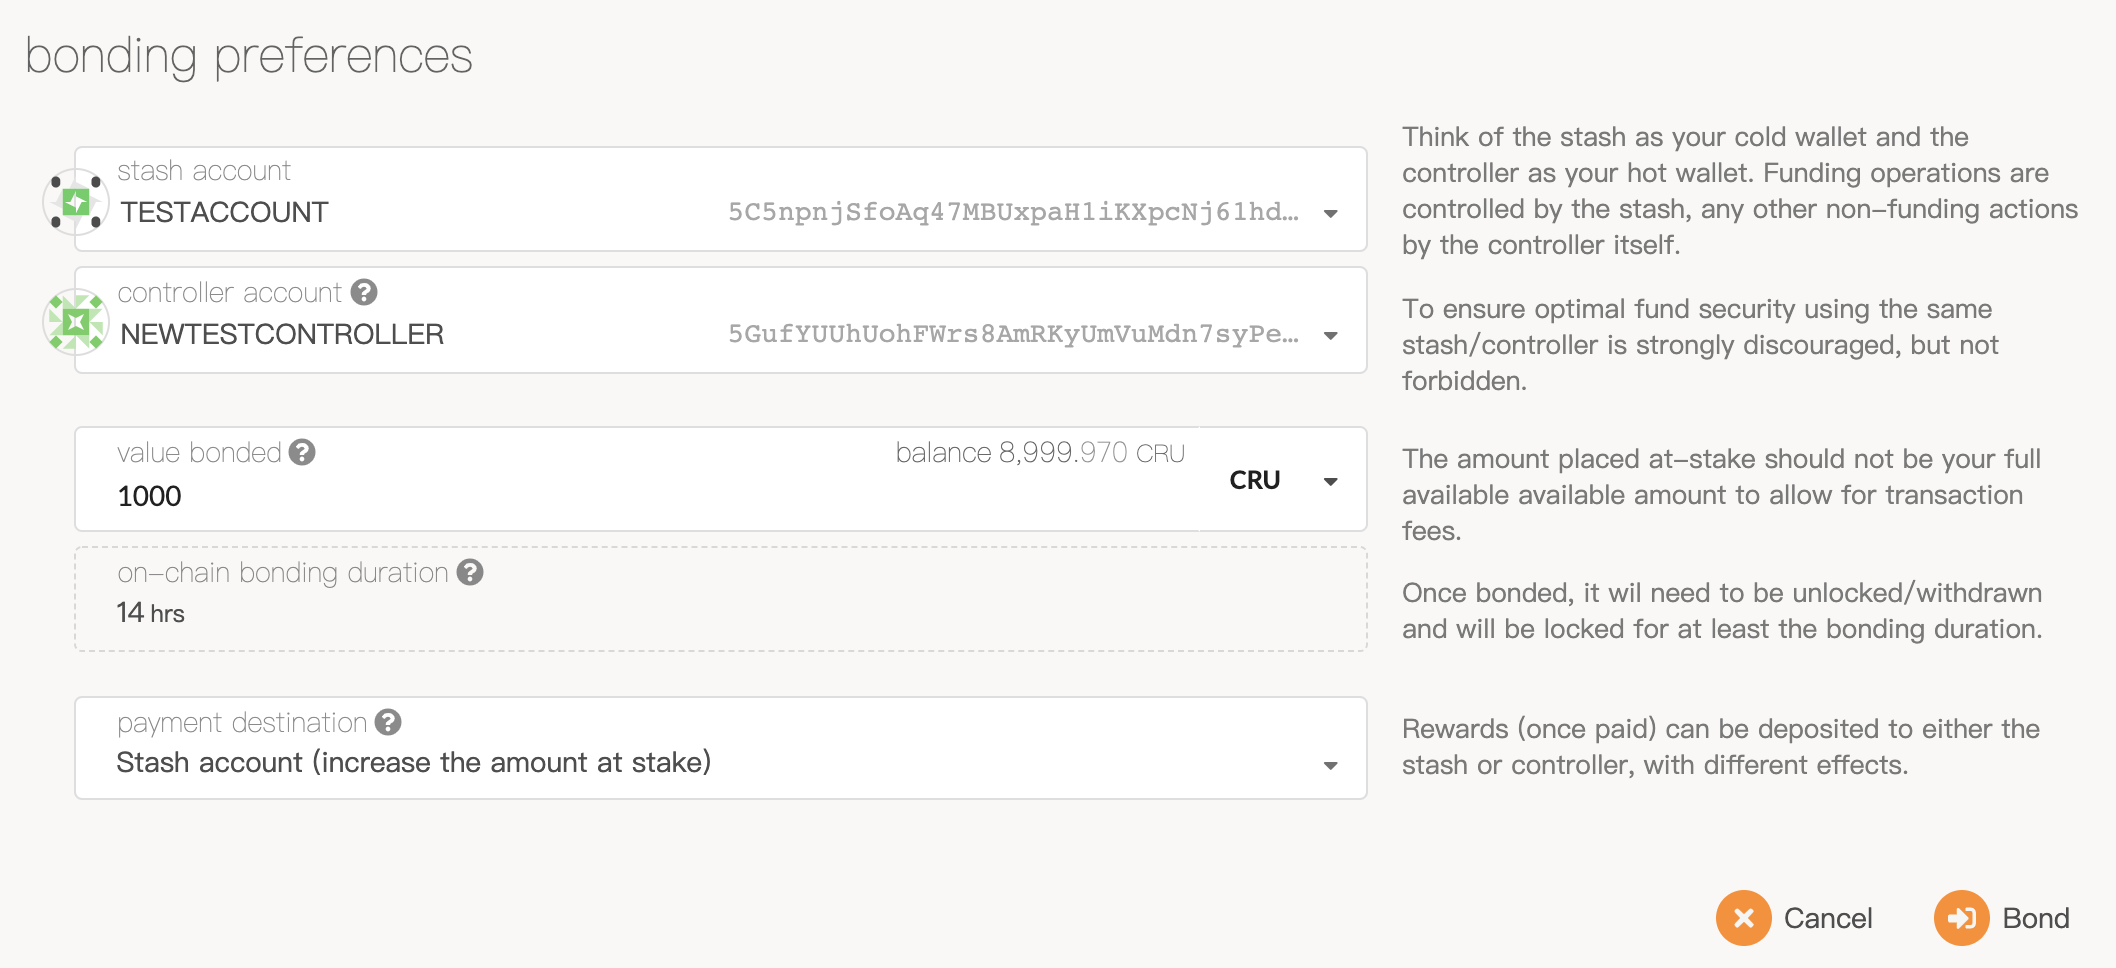
Bond involves on-chain operations, so it is necessary to unlock the Stash account and consume the tx fee.
After bond operation, you can see that a Bond relationship has been added to the page.
In most cases, the SGX module of a device is turned off by default, and we need to do some settings on it in BIOS. First, we switch the BIOS SGX to "enable", and turn off Secure Boot (some motherboards may do not have such an option).
- Download:
wget https://github.com/crustio/crust-node/archive/v0.6.0.tar.gz- Unzip
tar -xvf v0.6.0.tar.gz- Enter installation directory:
cd crust-node-0.6.0Execute the following command to install crust services. This process involves downloading related dependencies and docker images, which may be a little time-consuming and may even fail due to some unexpected network problems. If this does occur, please repeat installation actions until they are 100% complete.
sudo ./install.shNote: If the port used in the configuration file is not occupied, you can adopt the default configuration.
-
Edit config
sudo vim /opt/crust/crust-node/config.yaml
-
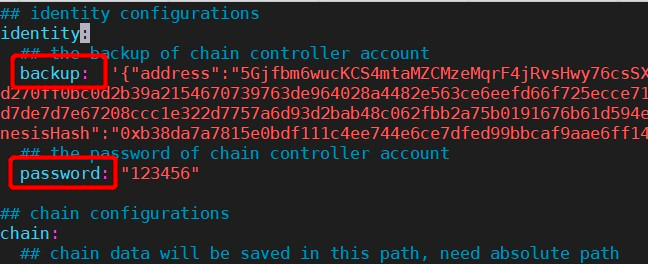
Change the value of "backup" and "password" in
config.yamlbackup is the backup file for the controller account,while password is the password.
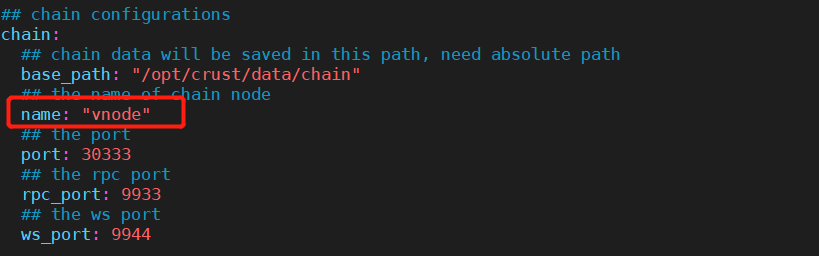
-
Modify the name of the node in Crust chain in config.yaml
-
Modify the path and capacity of SRD (Sealed random data)
Here is a brief introduction to SRD. The program generates files through SGX's internal random algorithm and temporarily fill the hard disk space under srd_paths, and this space will be reported to Crust network as Over-Provisioning (OP). This will determine the upper limit of your effective staking, and also the amount of orders you can pick. The format is as follows (An absolute path is needed here):
These two lines of configurations represent:
- The program will perform SRD actions in two directories: /harddisk1 and /harddisk2 (you may learn by yourself how to configure directories under different hard disks and how to mount hard disks). For example, when two hard disks (A and B) were respectively mounted to /harddisk1 and /harddisk 2, you should configure directories as did in the above illustration.
- srd_init_capacity refers to a total of 2000G SRD files.

a. Start command:
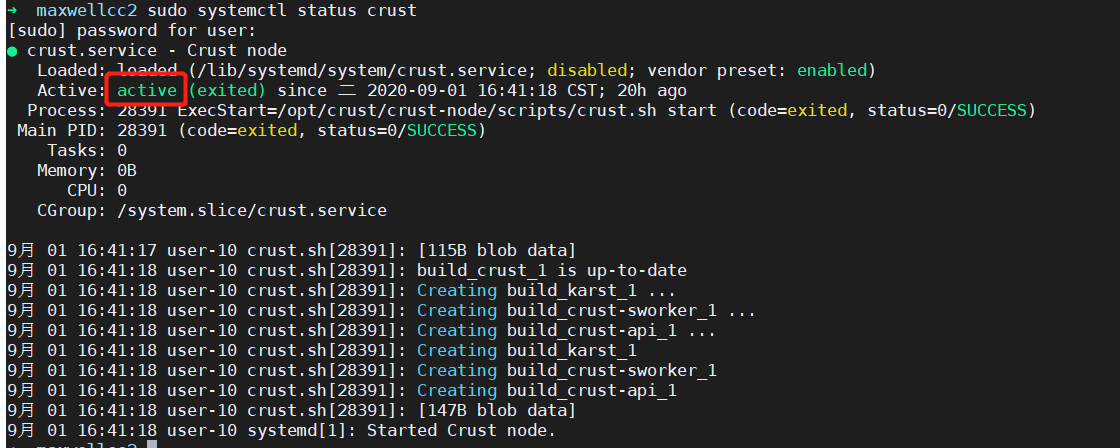
sudo systemctl start crustb. Detect the startup status of the Crust service:
sudo systemctl status crustCrust service successfully started when you see the following page:
c. Monitoring
Monitoring command:
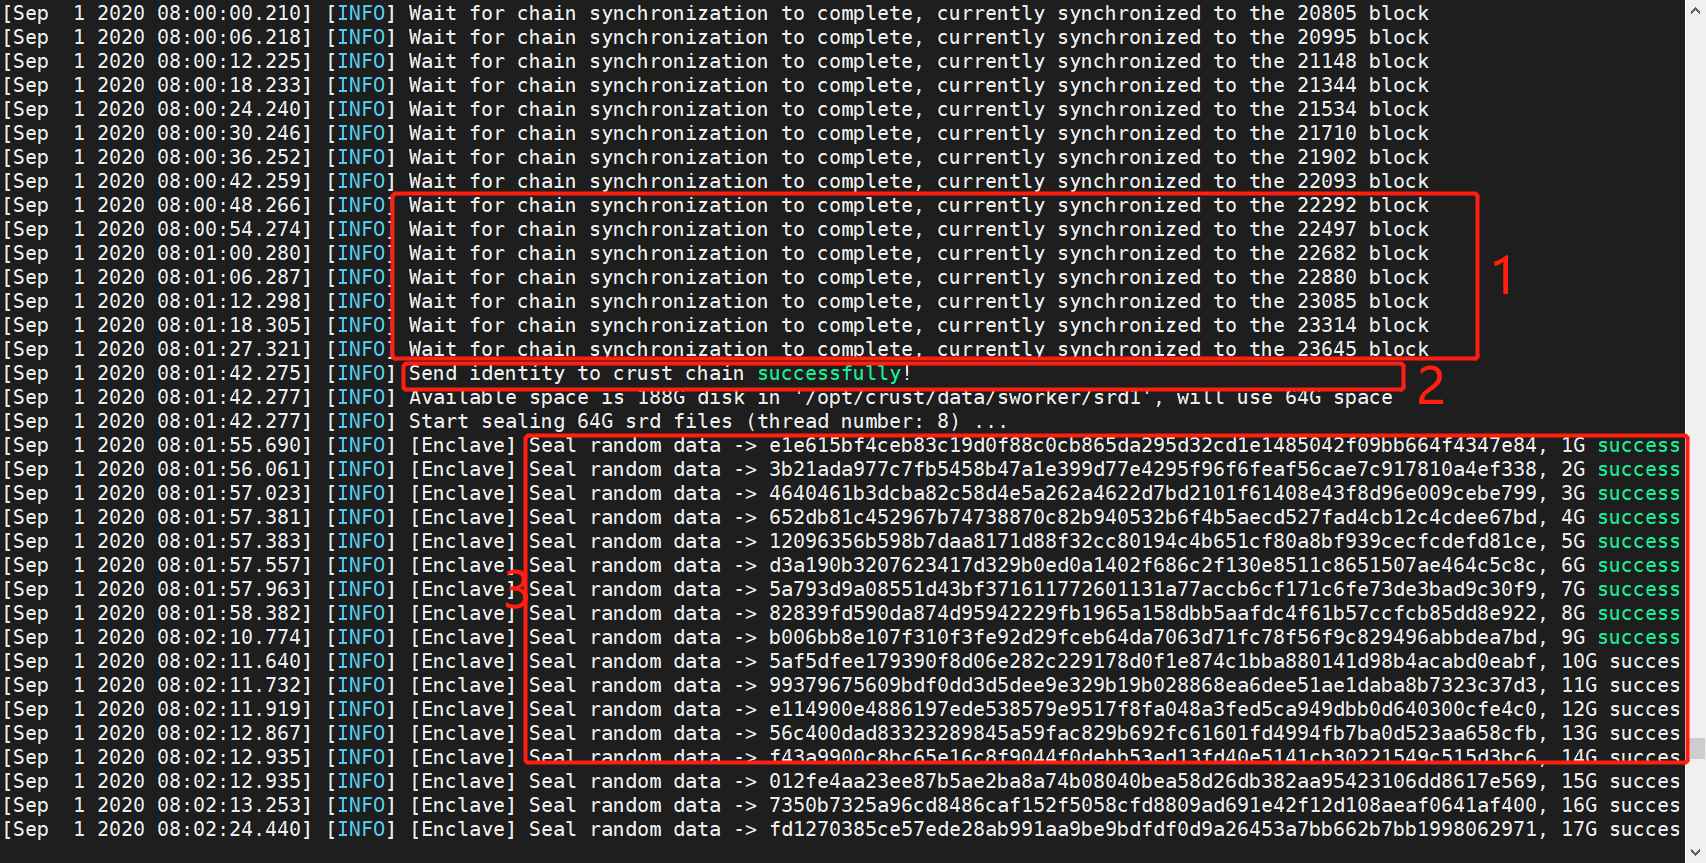
sudo docker logs build_crust-sworker_1 -fMonitoring logs are as follows:
-
Indicating that the block is being synchronized;
-
Successfully registering sWorker identity on the chain;
Note: If
[ERROR] {"action":"identity","status":"error","message":"1010":Invalid Transaction:Transaction has a bad signature"}appears in the monitoring log, it signals that the registration has failed. In that case, you will need to execute the commandsudo systemctl reload crustby hand to restart the service. -
sWoker is performing srd actions;
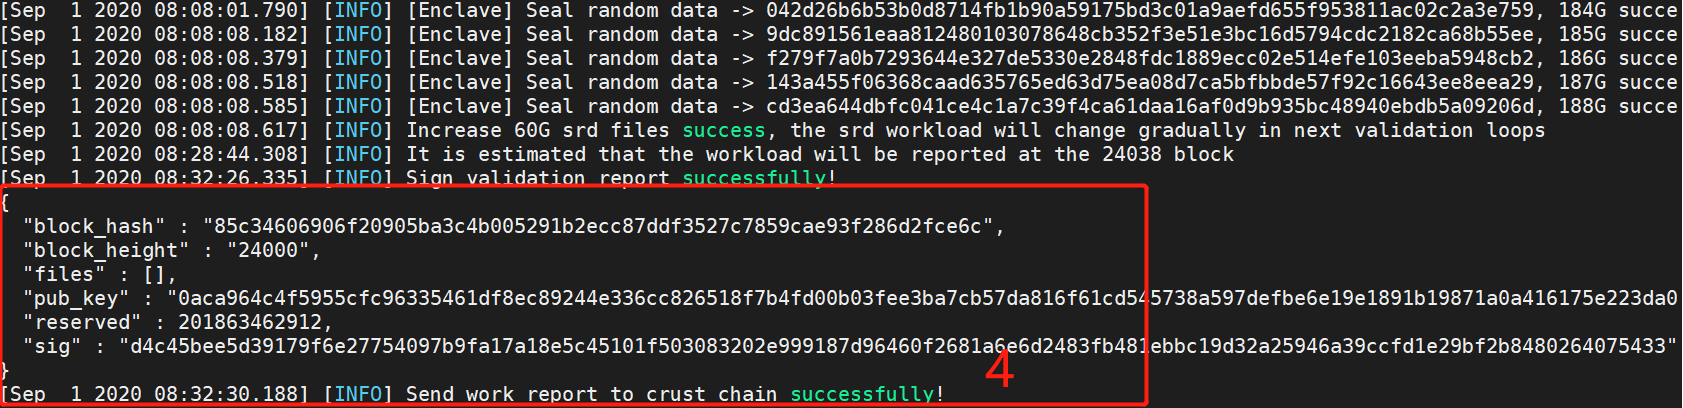
-
Indicating that the workreport has been successfully reported.
d. Obtain session key:
curl -H "Content-Type: application/json" -d '{"id":1, "jsonrpc":"2.0", "method": "author_rotateKeys", "params":[]}' http://localhost:9933Below is the result, and inside the red box is the obtained session key:

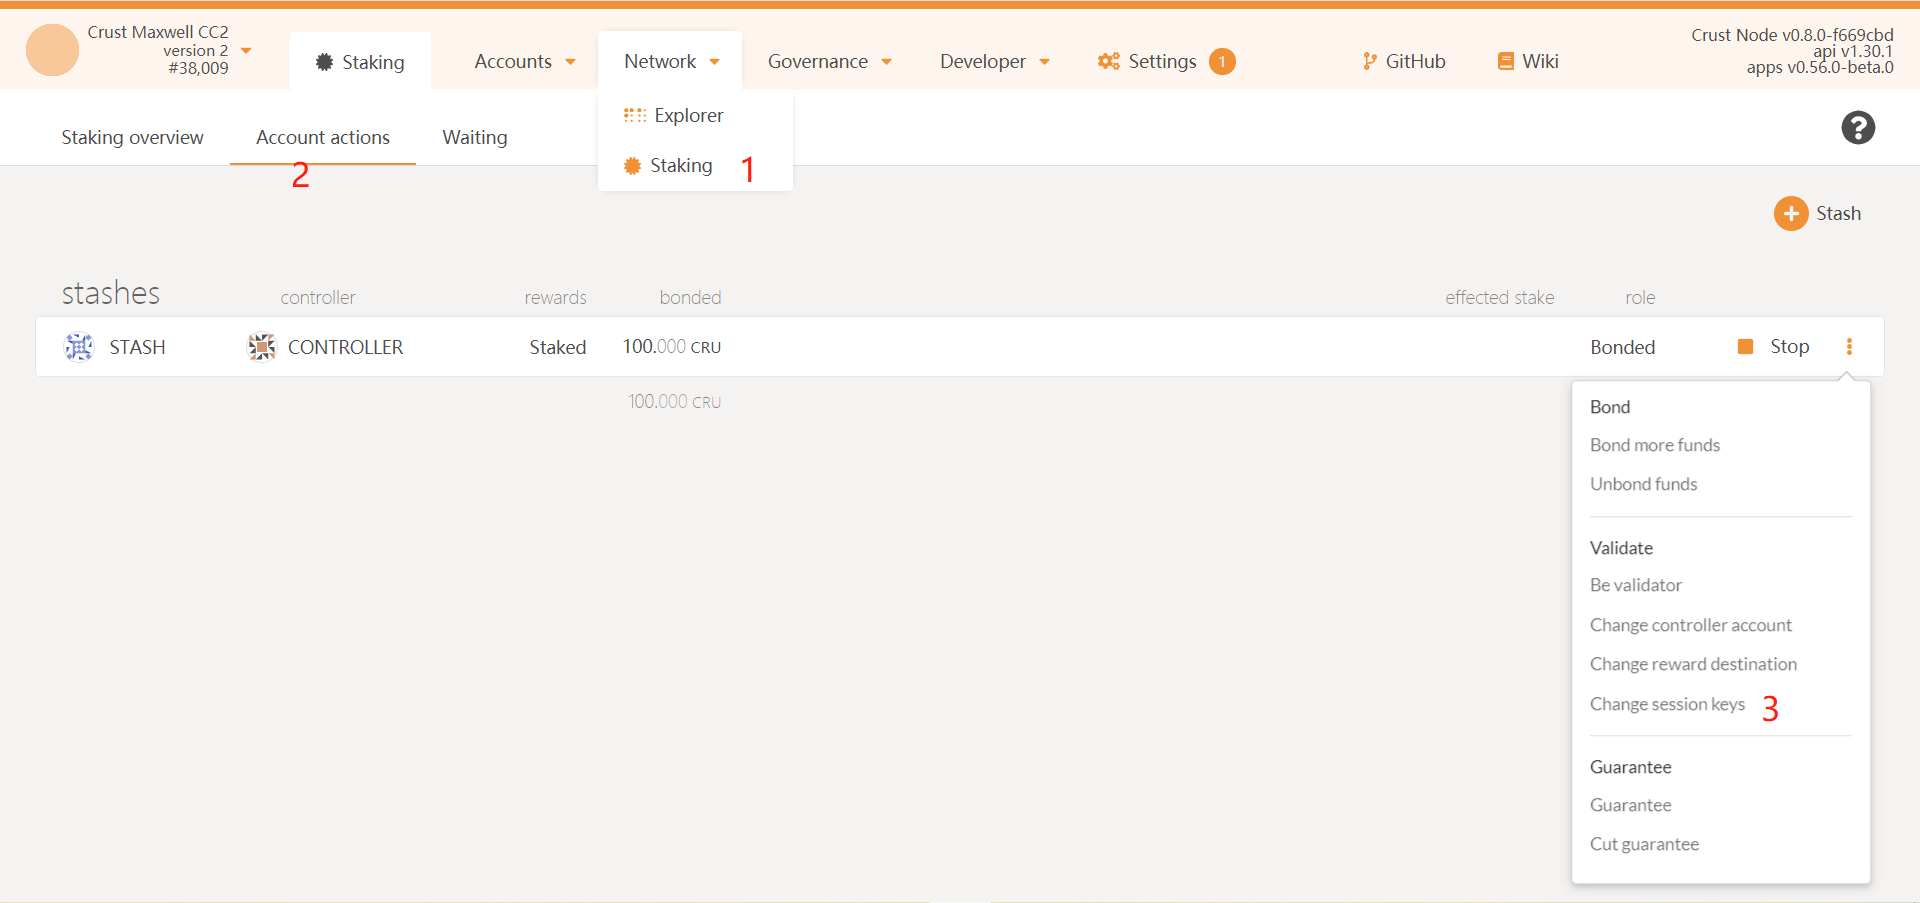
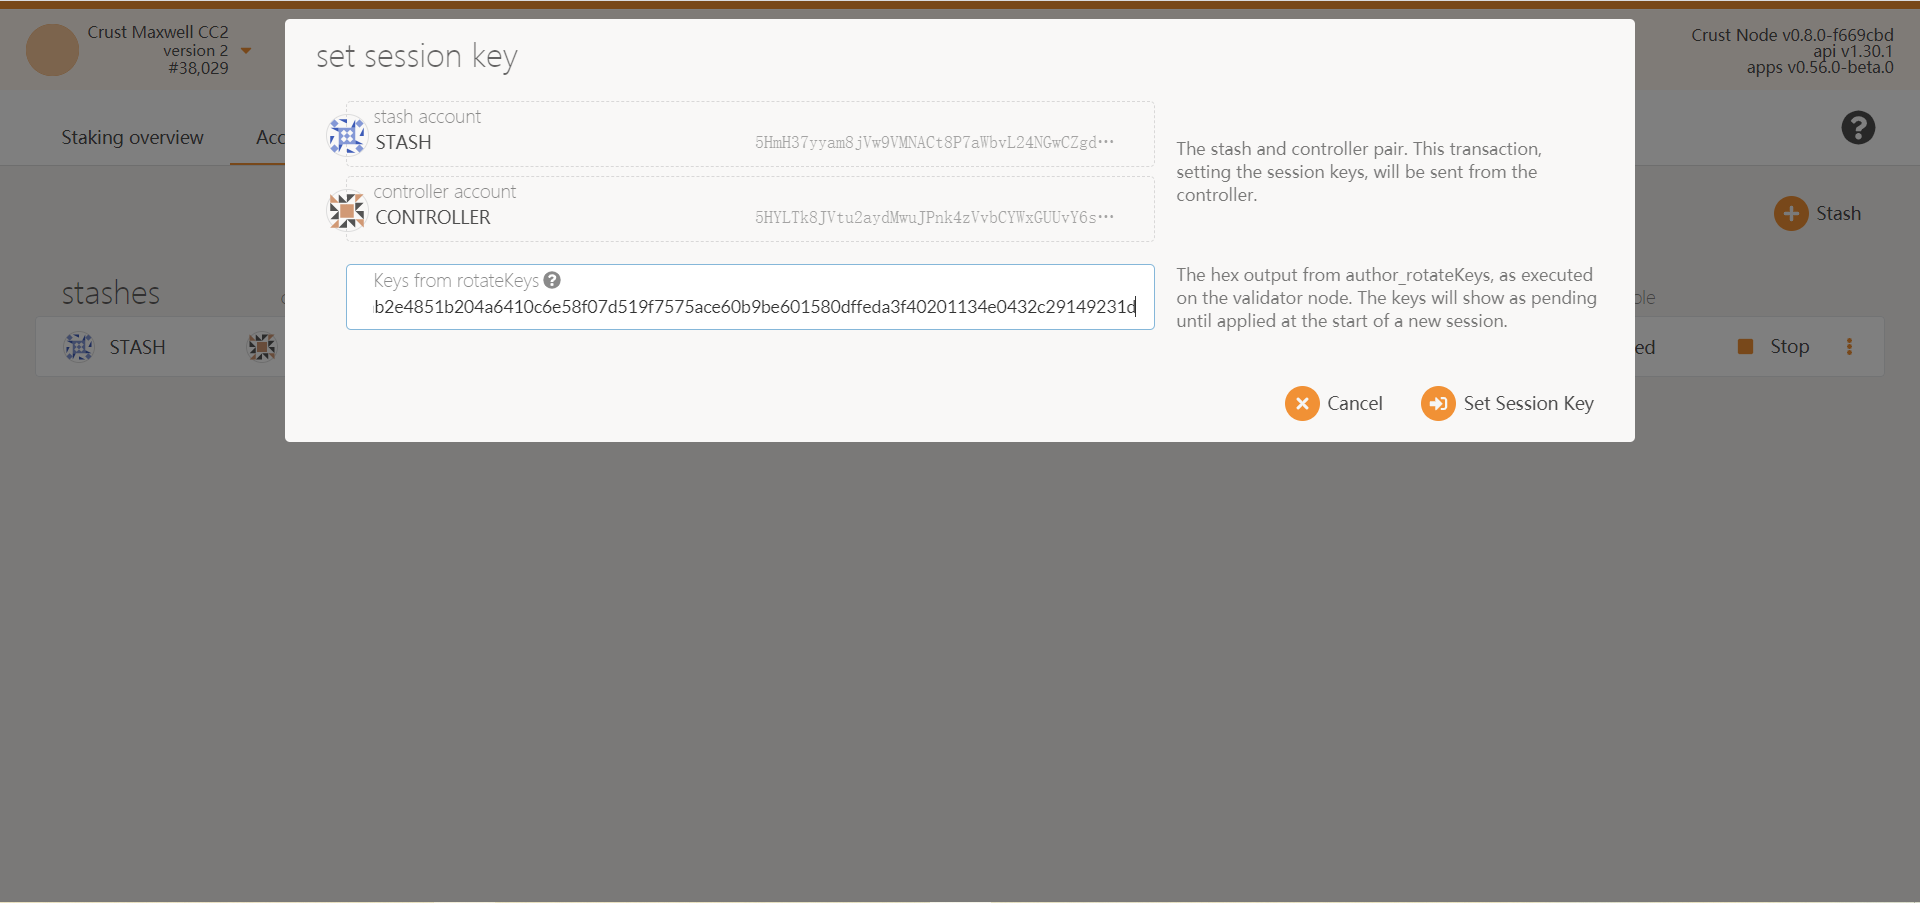
Enter Crust Apps, select "Staking" from "Network" in the navigation bar, click "Account actions", select "Change session keys", click "setKeys" on the right, fill in the sessionkey obtained from above, and send the transaction.
e. Open chain port:
sudo ufw allow 30333Perform the "Be validator" action.
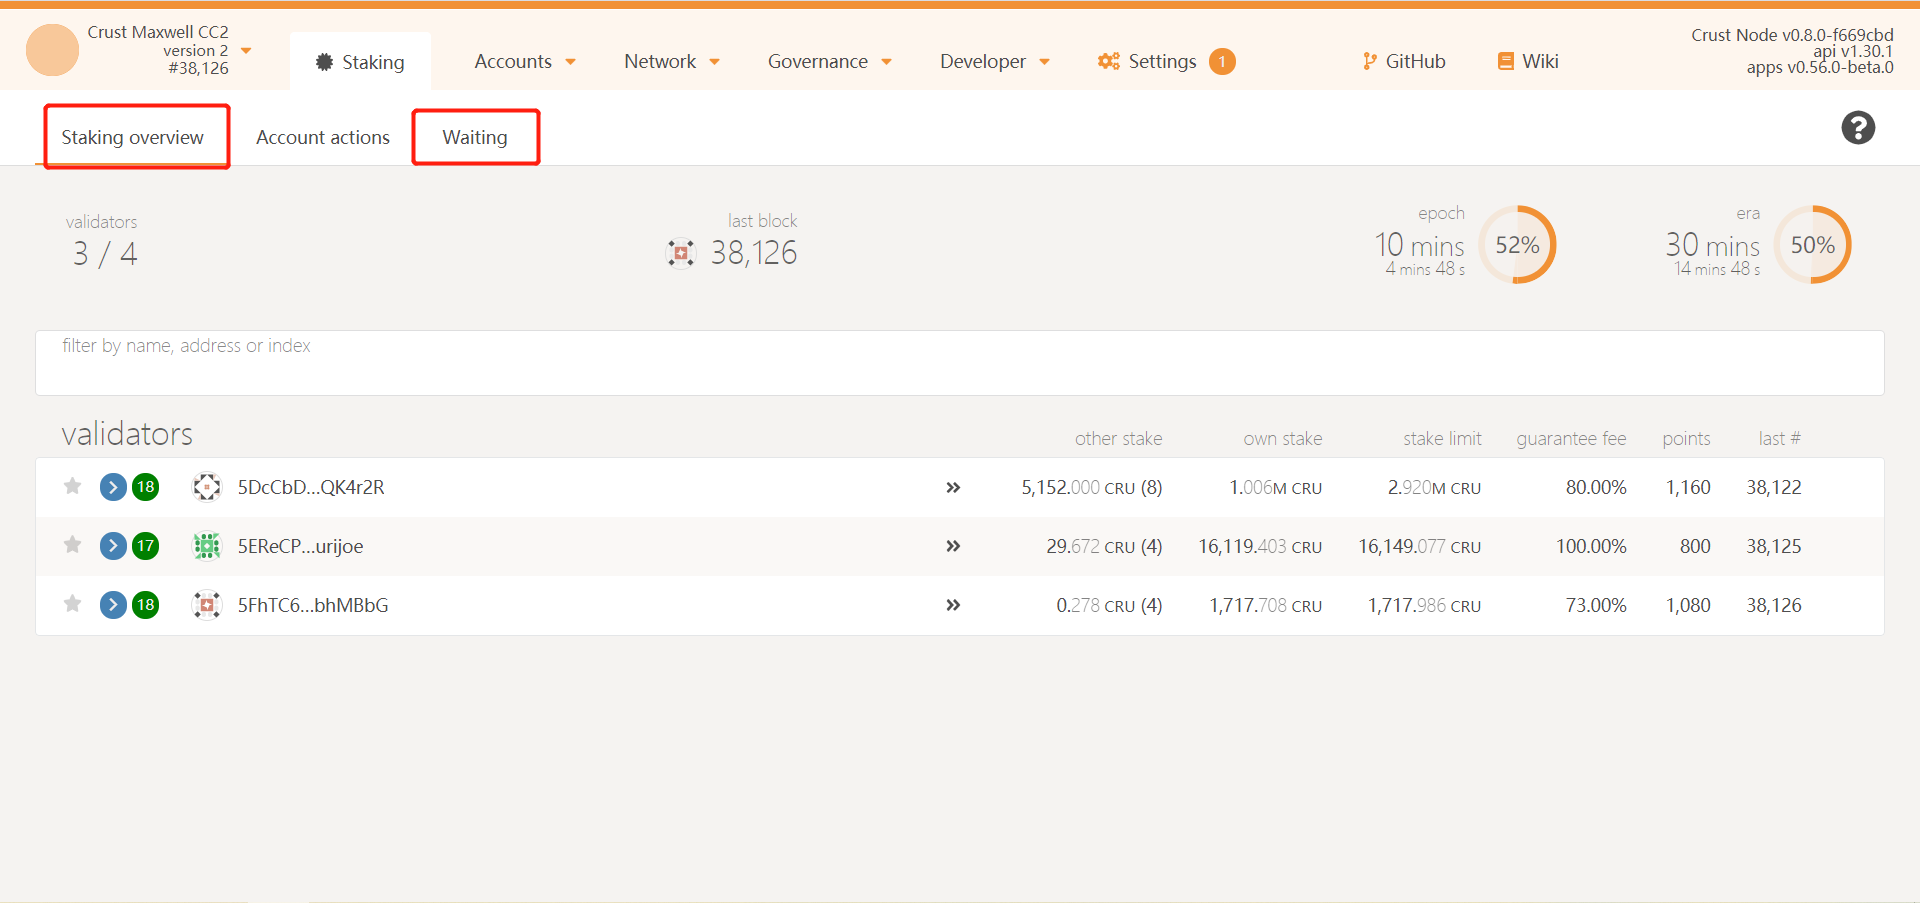
By the next era, when you can find it (them) in the "Staking overview" or in the "Waiting" list, the action is successfully performed.
A fixed public IP address will be recommended if you want to provide storage services for users across the network and receive more storage orders. But if you don't have a fixed public IP, you can come to the essay on FRP for some guidelines and inspirations.
Please make sure FastDFS has been started locally, and note that the storage path of FastDFS storage needs to correspond to the SRD path configured by sWorker. You may refer to this link to install FastDFS. Suppose that the configured FastDFS tracker port is 22122 and the storage port is 23000. Execute the opening-port command:
sudo ufw allow 22122sudo ufw allow 23000Open the configuration:
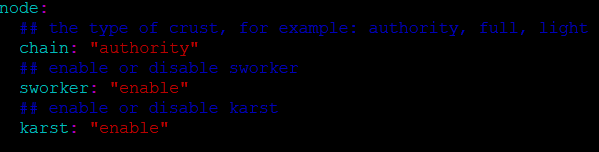
sudo vim /opt/crust/crust-node/config.yamlConfiguration file is successfully generated if you see the following log page.
Modify the status of node.karst into "enable", and modify "tracker_addrs" into the address of "fdfs tracker".

Run again to generate configuration file script:
sudo /opt/crust/crust-node/scripts/gen_config.shConfiguration file is successfully generated if you see the following log.

Enter the build directory again:
cd /opt/crust/crust-node/buildStart karst:
sudo docker-compose up -d karsta. Pledge setting
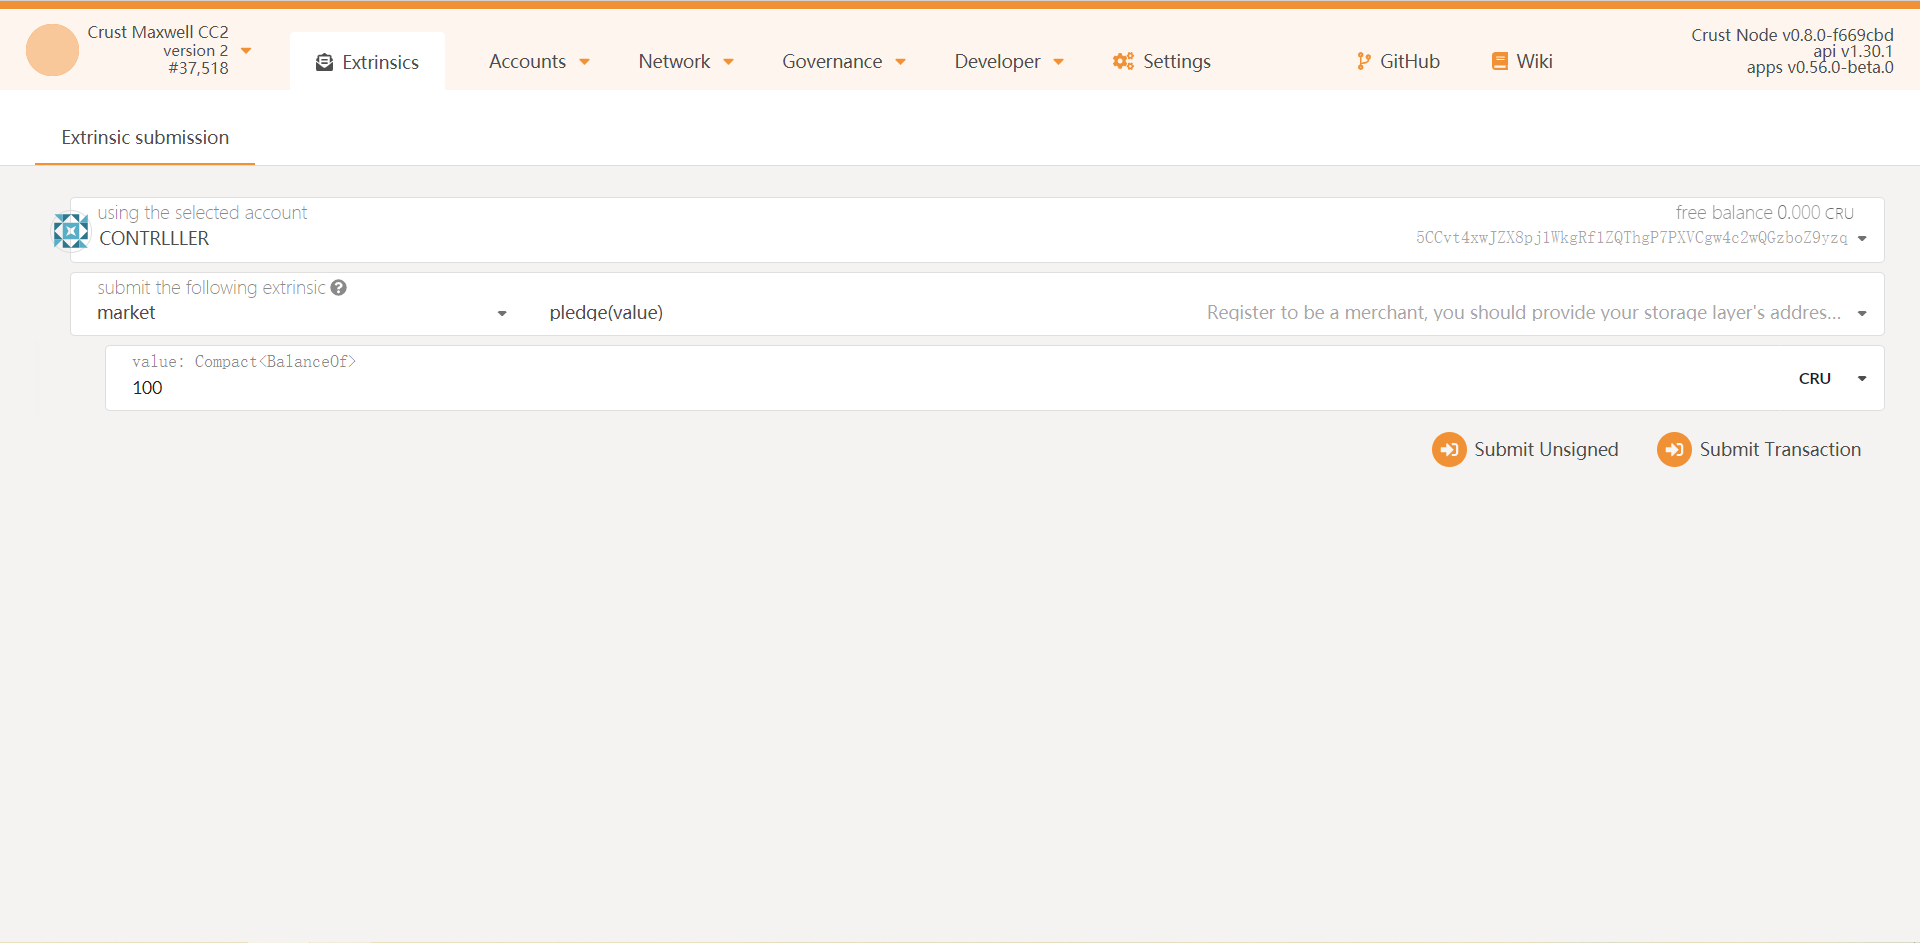
Enter Crust Apps, select "Extrinsic" in the "Developer" column in the menu bar, select Controller account from the first box, select market on the left side of the second box, select pledge on the right side of the same box, enter the number of CRUs that you want to pledge in the third box, and then click "Submit Transactions" in the lower right corner to send the transaction:
b. Address registering
Note: The "Address registring" here is only a short-term solution. A decentralized method will be used to achieve address discovery in the future.
Condition 1: Corresponding accounts have work reports (Controller account)
Condition 2: Controller accounts have pledges (the pledge size determines the capability of order picking)
sudo docker exec -it build_karst_1 /bin/bash -c 'karst register ws://162.168.50.7:17000 100'The above command parameters indicate:
- "ws://162.168.50.7:17000" is a karst’s public address, so please modify and replace it with your own local external IP address;
- The unit of the "100" value is pico (1 CRU = 10^12 pico), which stands for the number of CRUs charged for storing a 1MB file for 1 minute. The amount of CRUs should be set by yourself, and the minimum is 40 pico.
c. Open the port and get ready for picking up orders:
sudo ufw allow 17000If you need to restart your host machine or Crust node programs for any reason, please refer to the following steps. Please note: This section only includes the startup steps of Crust node programs. Hardware/Software system settings and checks such as disk mounting, frp NAT penetration and FastDFS installation are not discussed here. Please perform the following action with a software and hardware system normally operating.
sudo systemctl reload crust