Home
- Provide a link to your user story formatted in the wiki of your Github repository
- The wiki uses a combination of description text and (latest) screenshots to explain how your application works for your expected types of users
- Add a section for describing how to install / deploy your application
- The rest of the sections should describe how they can use the app (steps augmented with pictures)
- Aim to enable your TA to follow your description in running and using your application.
Musaic is a website that allows one to generate custom playlists that align with certain moods for users. The main functionality our users are able to exercise are the following:
- Generate custom playlists through a questionnaire - the playlists will be different per user because the playlist generation process takes into consideration each user's listening history.
- While creating the aforementioned custom playlists, one is able to also create custom moods that can generate custom playlists for various users.
be/master acts as the master branch for backend. Please check this branch out before following along.
Please note that our app is not meant to be built locally by a user. For the best experience with our app, please visit our frontend website.
If you still want to build our backend app locally, read on.
A pre-requisite for our app is Python3 (>=3.6).
You must set some required environment variables, as so:
export ALLOW_ORIGINS='*'
export DATABASE_URL=<DATABASE_URL>
export FRONT_END_URI='https://test-fe-130.herokuapp.com'
export JWT_SECRET='psst...idontlikeshawnmendez...sshhh'
export SPOTIFY_REDIRECT_URI='https://musaic-13018.herokuapp.com/login/callback'
You can find a database URL to use is our test.sh file in the backend project root.
You'll also need to install dependencies via pip install -r requirements.txt from the project root directory. We recommend using Python's venv module to containerize your Python environment.
Finally, you can run gunicorn main:app which will launch our backend application.
Note that the backend app will not work when run locally like this. For one, certain sensitive information stored in environment variables is only available on our Heroku dynos. It is not good practice to disclose such information (client IDs and secrets for Spotify, for example). Therefore, we have not exposed this data anywhere on our repo.
To trigger the test suite, run:
./test.sh
from the project root directory (after having be/master checked out). This performs many of the steps outlined above. Any installed dependencies are also deleted to reduce clutter.
Testing is performed via pytest.
Triggering a test is a safe operation. It can be done locally by anyone. Any changes to the app state are only made to the staging database, and so production remains unaffected. The tests do not cover API endpoints that require Spotify authentication. Obtaining a Spotify access token requires manually logging in to Spotify. We have decided, therefore, to cover this aspect of our codebase through manual integration tests instead of automated unit tests.
Deployment is done via Travis CI. As mentioned before, builds are not meant to be done manually (in a local environment). Travis CI creates a build and tests it whenever a commit is pushed onto any backend branch. See the Travis build script for more information on the specification of the test job (under the jobs action).
Whenever a commit is pushed onto be/master (and the testing job succeeds without error) the build is deployed to our Heroku staging dyno. Whenever a tagged commit is pushed to the repo (need not be just be/master) that commit is built and deployed to production. So, care must be taken to only tag commits on be/master, to prevent unstaged, untested code from being deployed to production. See the Travis build script for more information on deployment (under the deploy action).
fe/master acts as the master branch for frontend. Please check this branch out before following along.
To run the app locally, first make sure Node.js and npm are installed. Run npm install to install all the dependencies.
Then run the development server:
npm run dev
# or
yarn dev
Open http://localhost:3000 with your browser to see the result. Pages auto-update as you edit the files.
To view Musaic Front-End Documentation, refer to the following:
- Front-End Documentation - learn more about Musaic's API
- To generate Front-End Documentation yourself after git cloning from branch fe/master, run
npm run docs
The Musaic User Manual is accessible here
To learn more about Next.js, take a look at the following resources:
- Next.js Documentation - learn about Next.js features and API.
- Learn Next.js - an interactive Next.js tutorial.
Musaic is automatically deployed to https://test-fe-130.herokuapp.com every time a commit is pushed to the branch fe/master that builds successfully and passes our automated tests. Any push to GitHub will trigger the Travis CI script, found in .travis.yml, which builds the production version of the app and runs all Jest tests.
To manually trigger a build of the production version locally, you can use npm run build. To manually run the tests, use
npm run test. Please do so with fe/master checked out.
You can manually trigger a build of the production frontend app and run our unit tests by visiting https://travis-ci.com/github/cs130-w21/18, selecting the most recent build of the branch fe/master, and clicking "Restart build."
Don't feel like deploying our code yourself? That's okay, dear reader - you can check out the final version of Musaic at this link!
As a reminder, there are several key pieces of functionality our website offers (all of which contribute to why we're amazing and you should definitely use our product).
- You can create custom playlists tuned to your current mood!
- You can create moods that capture certain emotional states or whatnot that others can then use to generate their own custom playlists based on your mood!
- You can create custom playlists based on others' moods!
This section of the documentation will go over the various steps the user can take to explore all of Musaic's marvelous capabilities.
One must log in with their Spotify account before being able to do any of our functionality. This is necessary so that we can customize the playlists we generated based on what you like. Don't worry; we don't believe in selling data. (Plus, Google already knows everything about you so why would they pay us money to affirm what they're already aware of?)
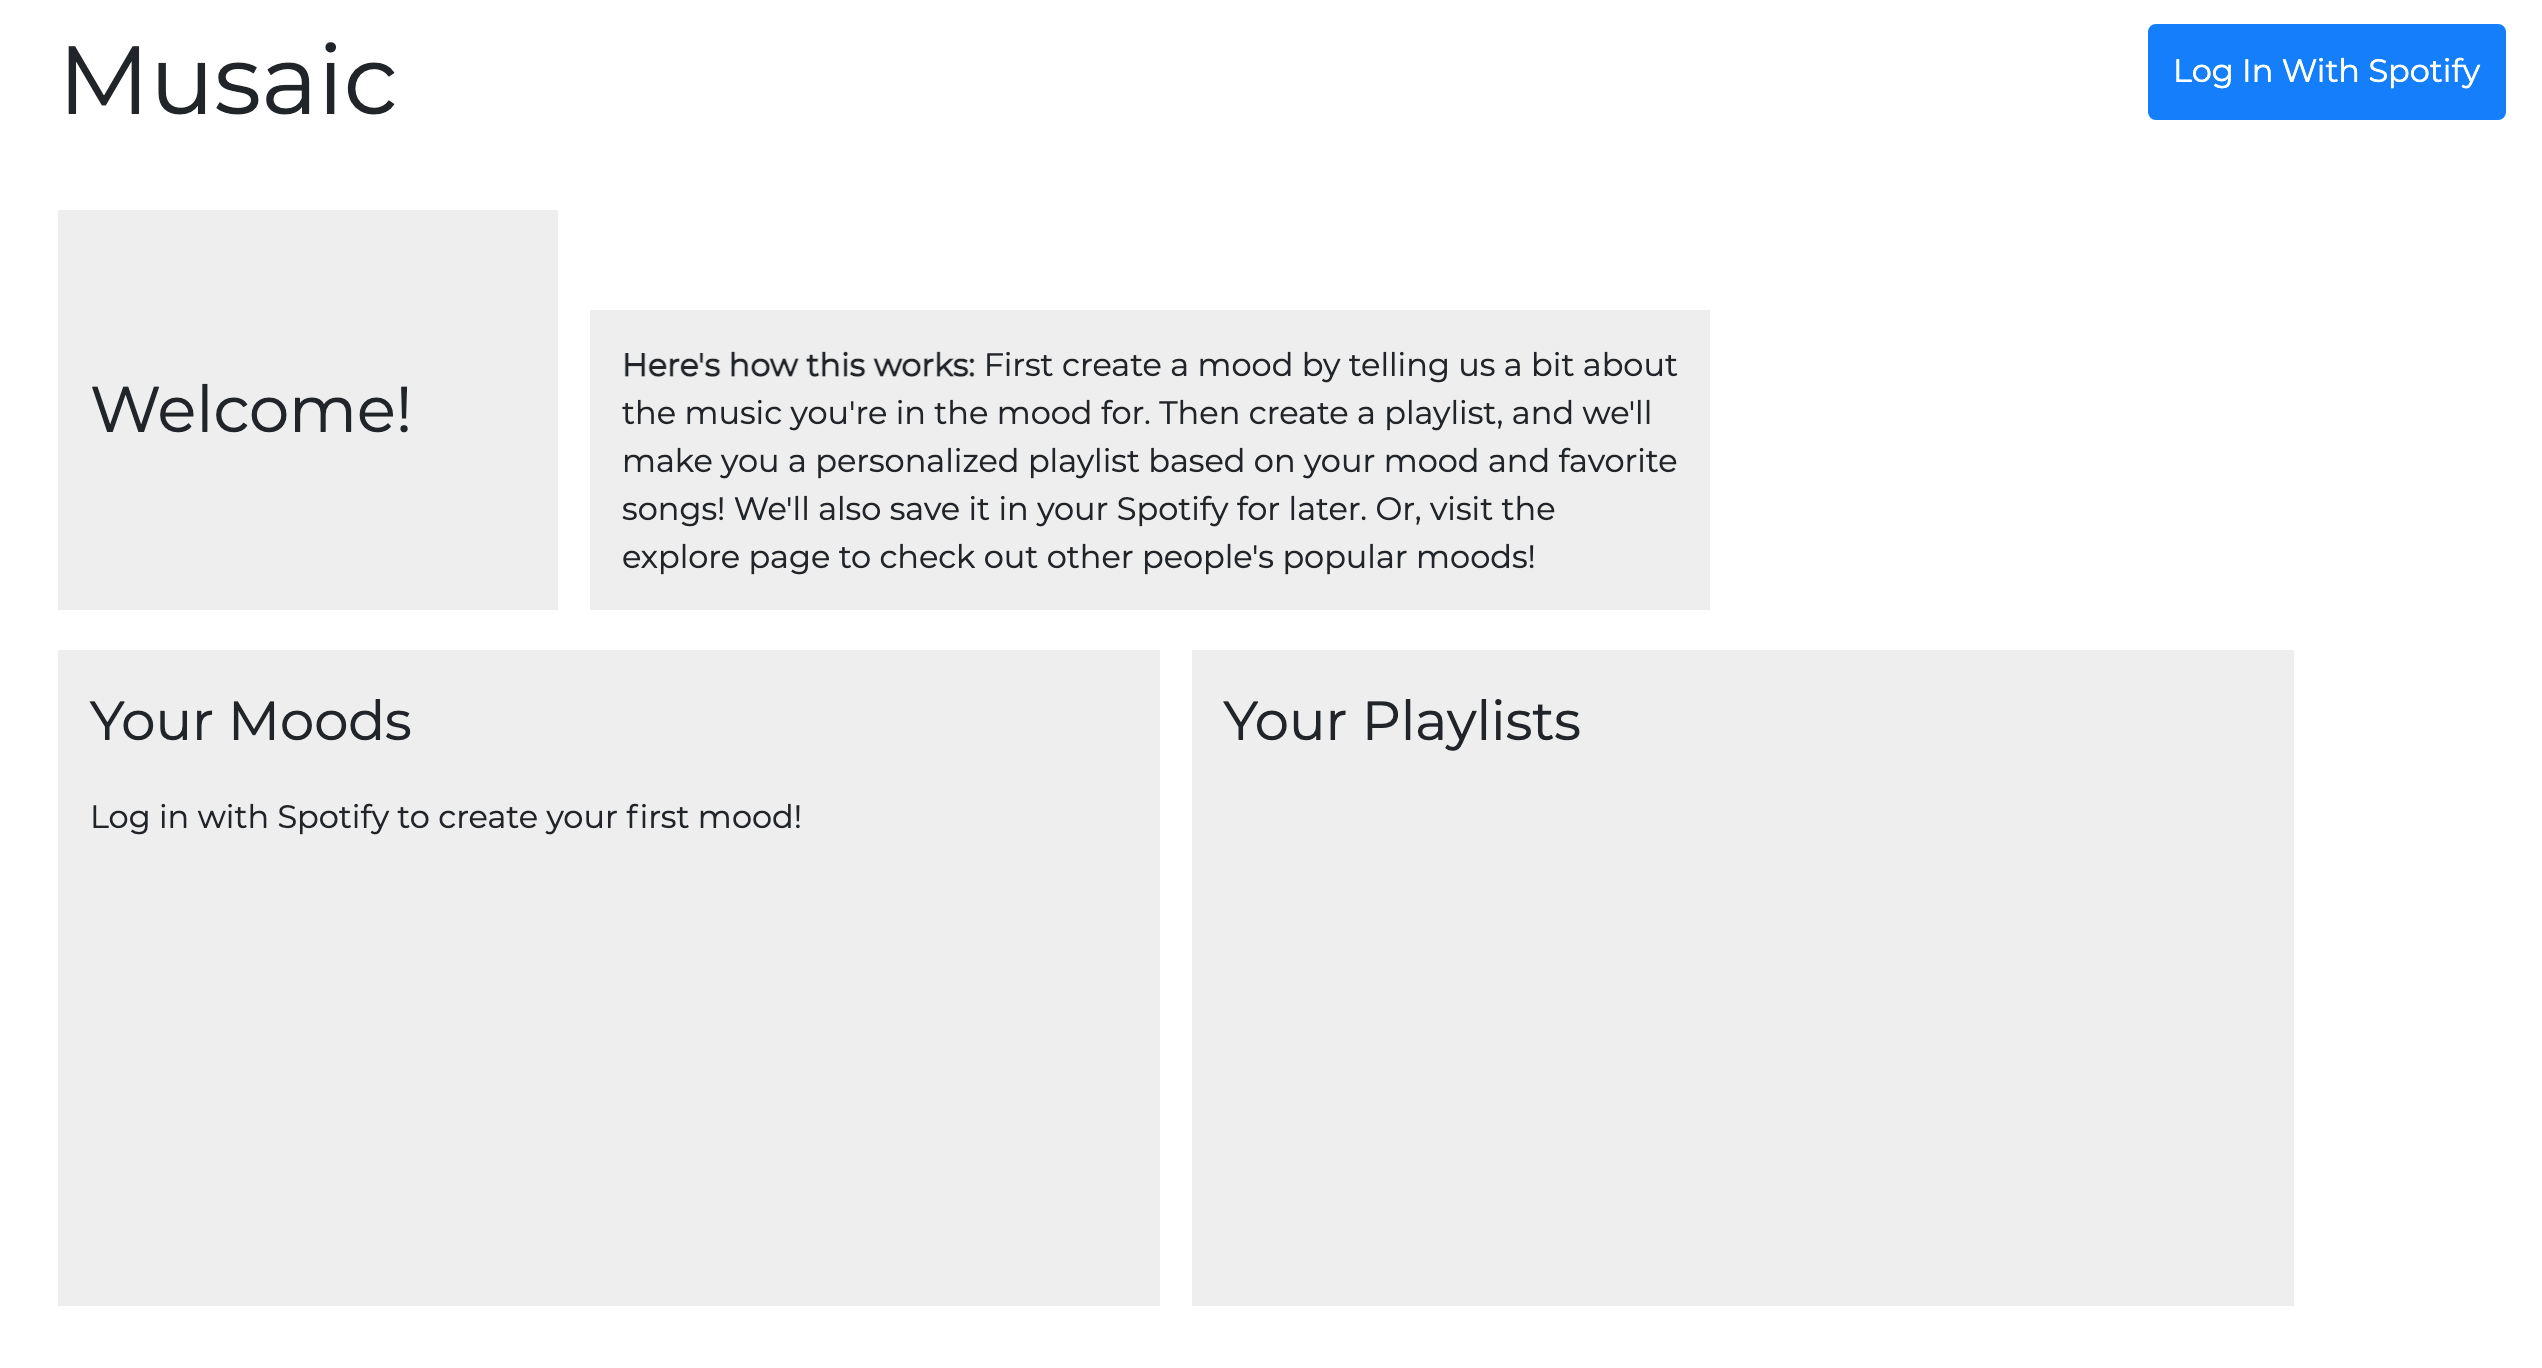
When one accesses our website for the first time (or from a logged out state in general), the screen will look as below; an empty template of what logged in users can see is viewable to the user (see below).

To log in, click the "Log In With Spotify" button in the top right. Note that this action may take up to several actions in order to cause the UI to update - please be patient with us!
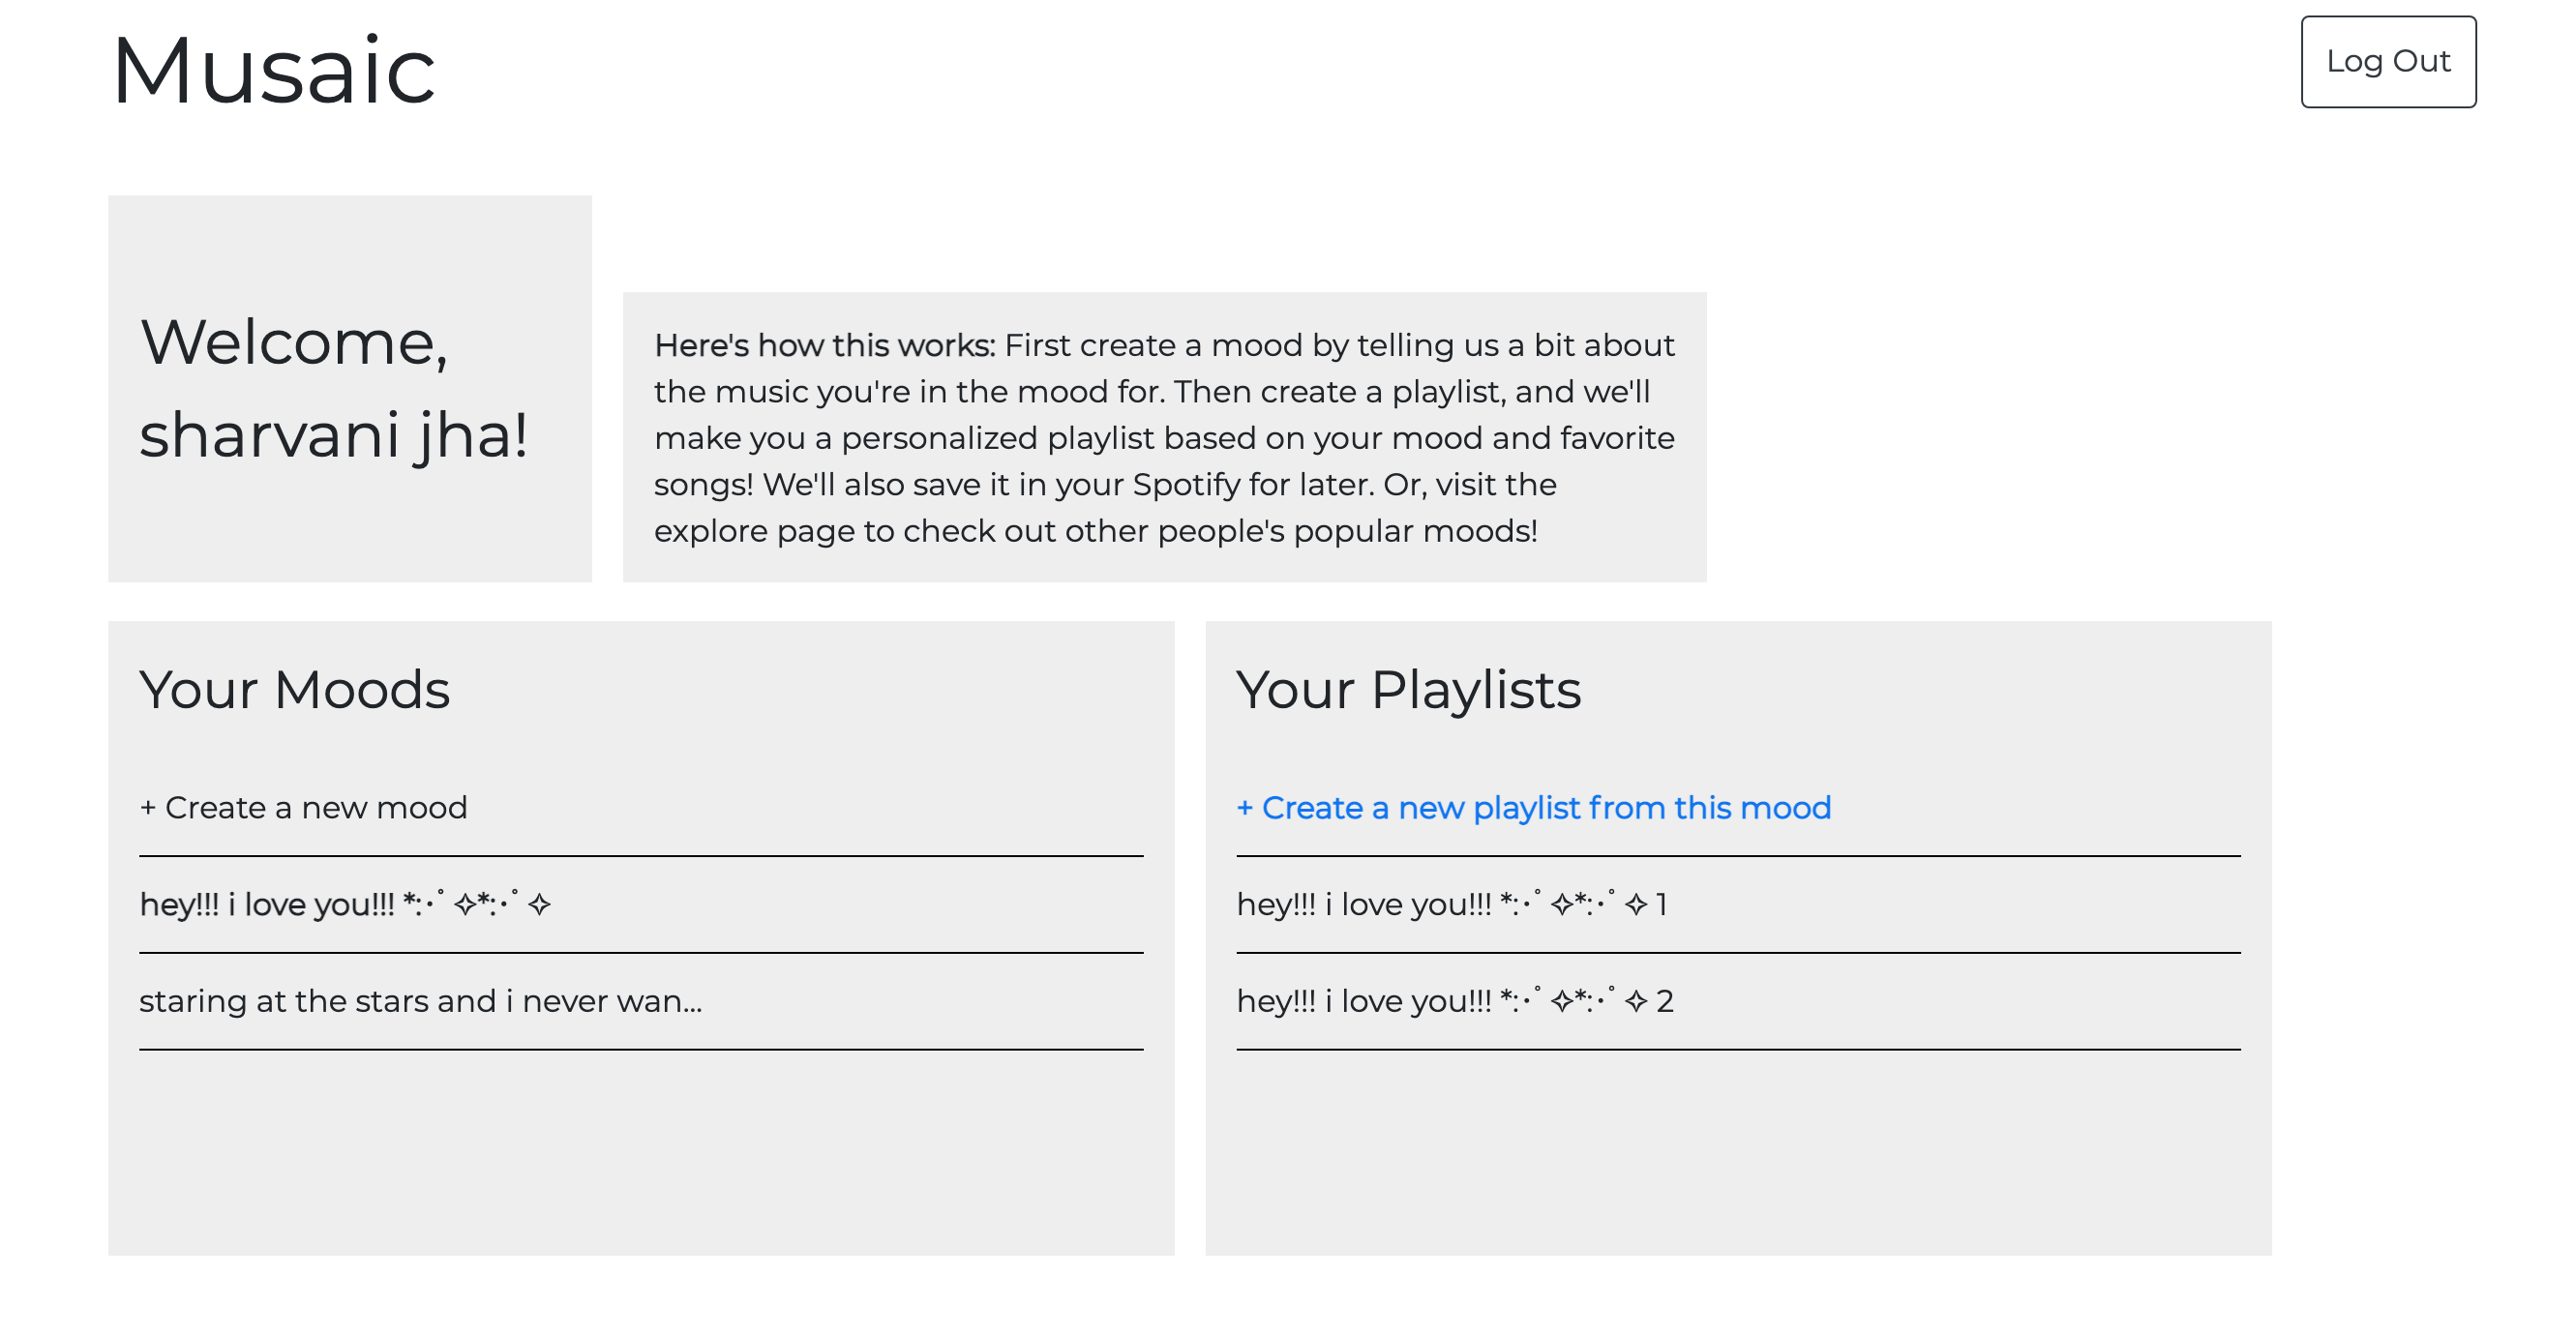
Once logged in, you are now able to navigate your home page - this is where you can view your previously created playlists and your personal as well as saved moods.
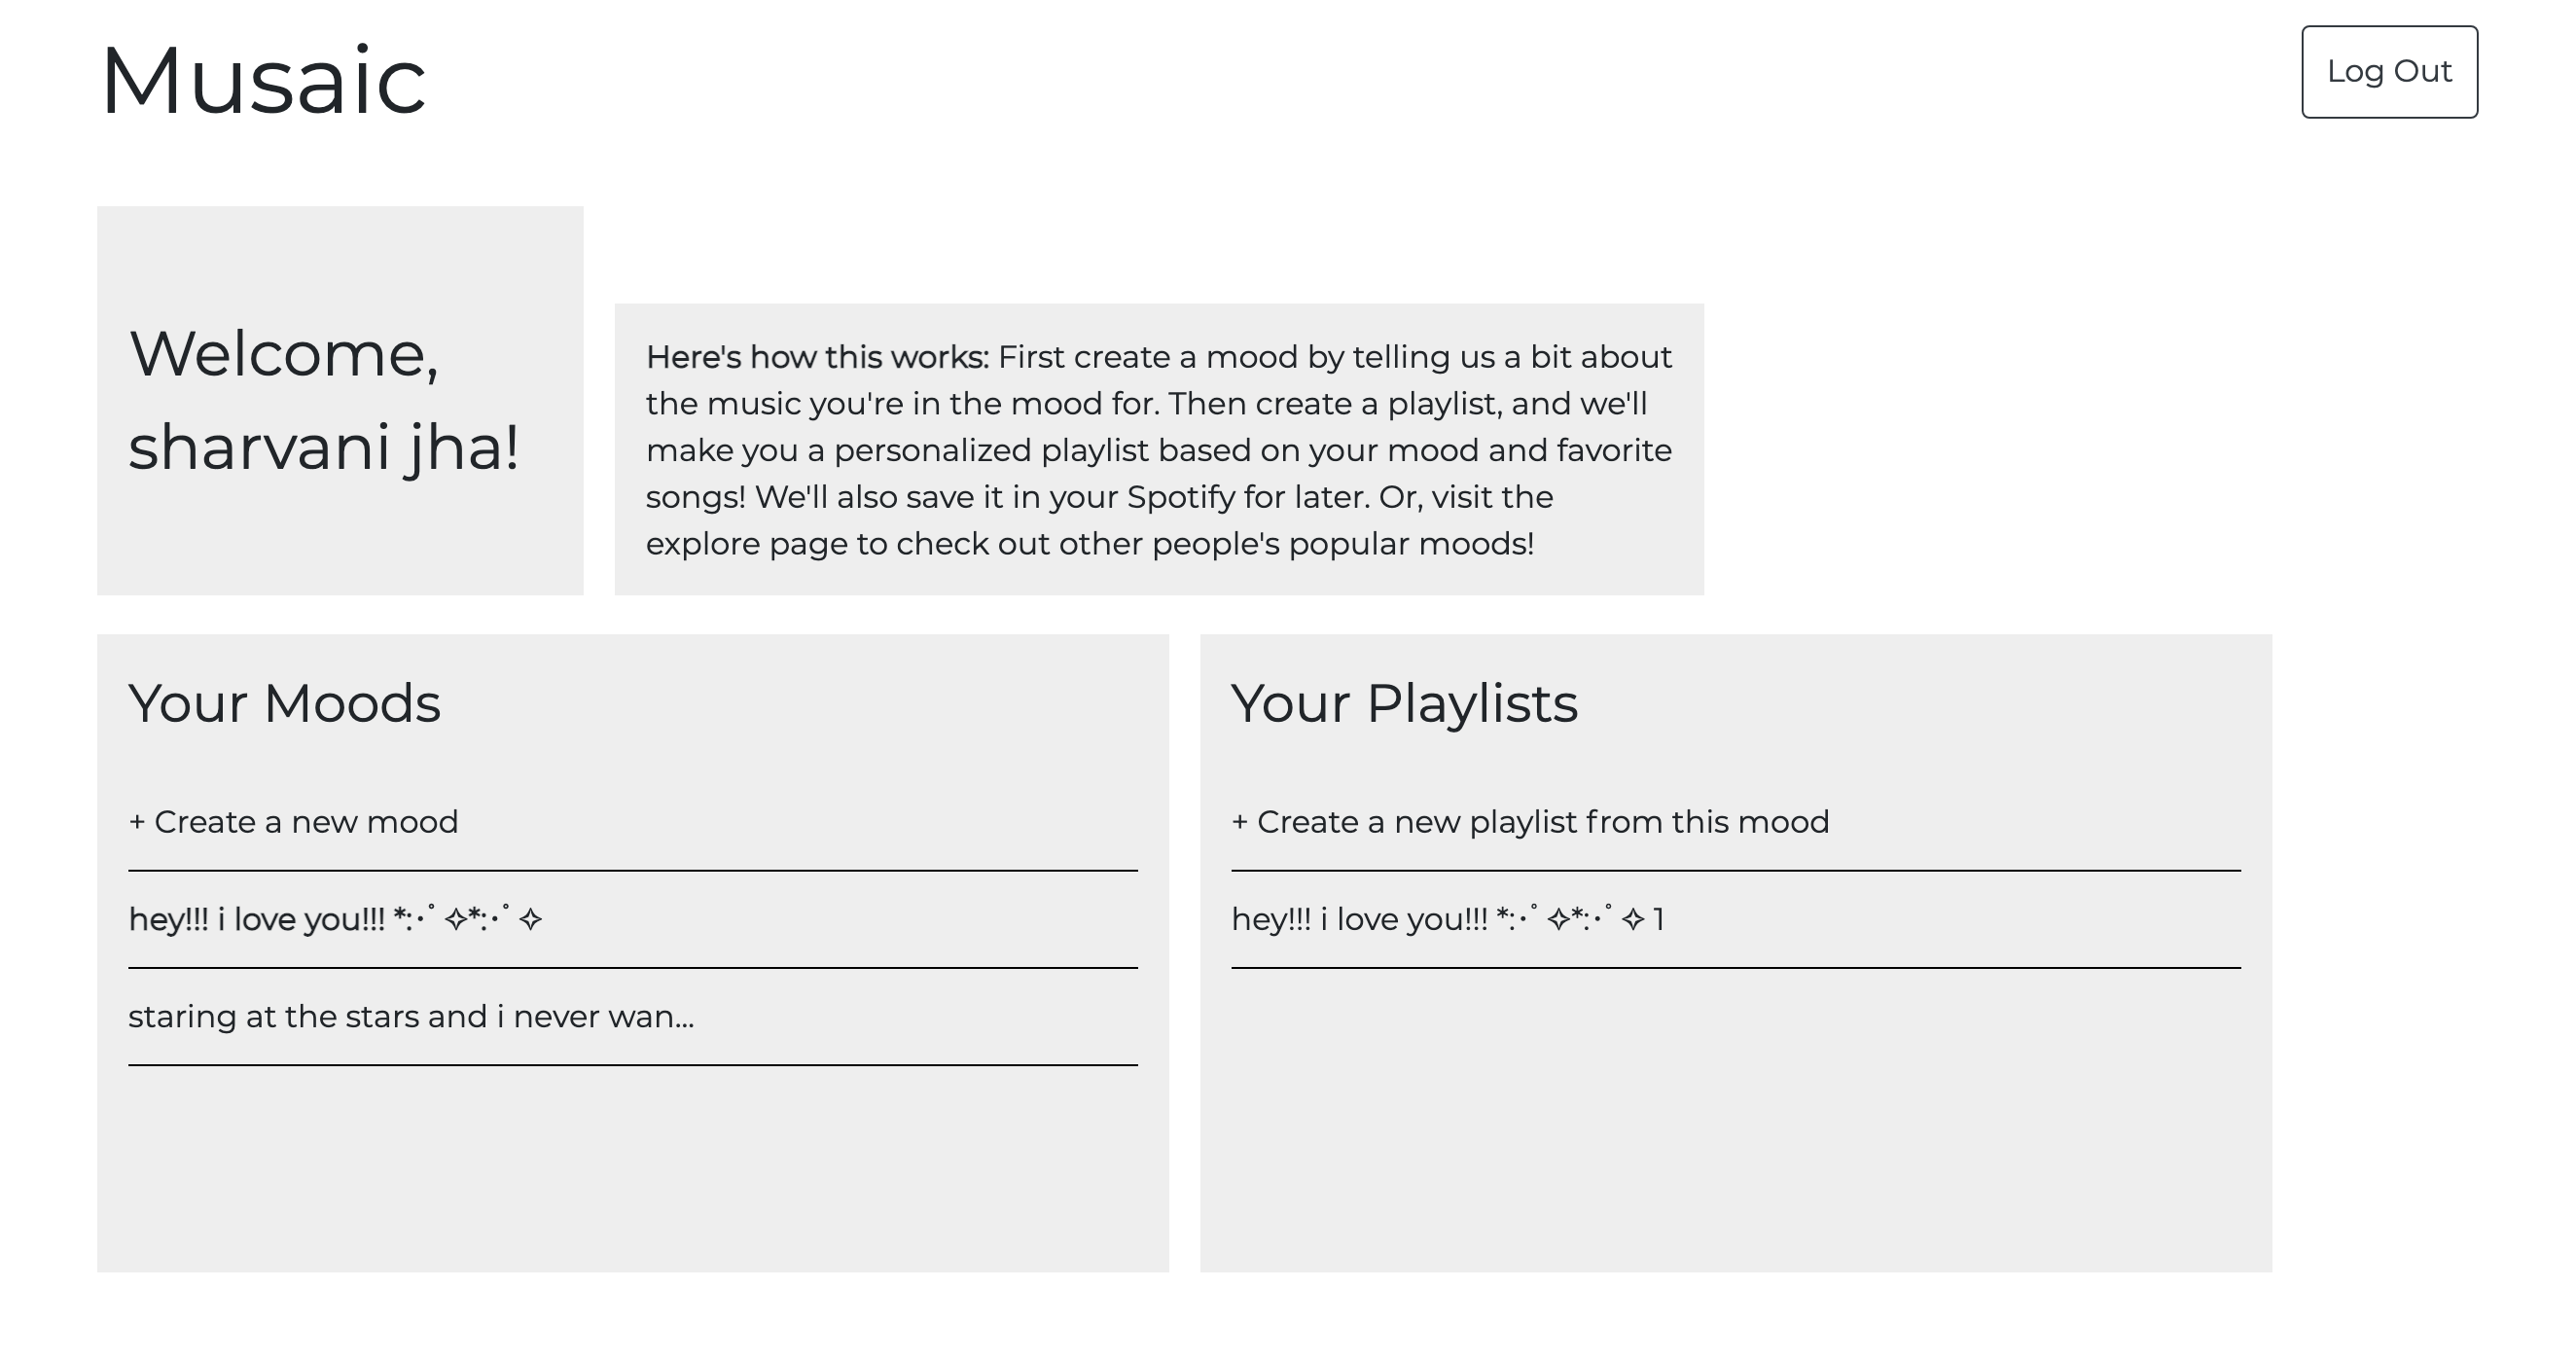
On the left you can view your moods. A mood is a name that is associated with a series of song parameters (e.g. danceability, energy) that classifies a general type / category of music. Users are able to create their own moods (you can name them anything you'd like!) and generate playlists based on these moods. Plyalists are an object inherent to Spotify (they consist of a playlist title, cover, and list of songs). Users can generate playlists based on moods - the song parameters are used to narrow the scope of what's included in the playlist, and then the personal listening history of the user is used to customize the songs recommended in the playlist that is created.
On the right you can view all the playlists our algorithm has created for you.
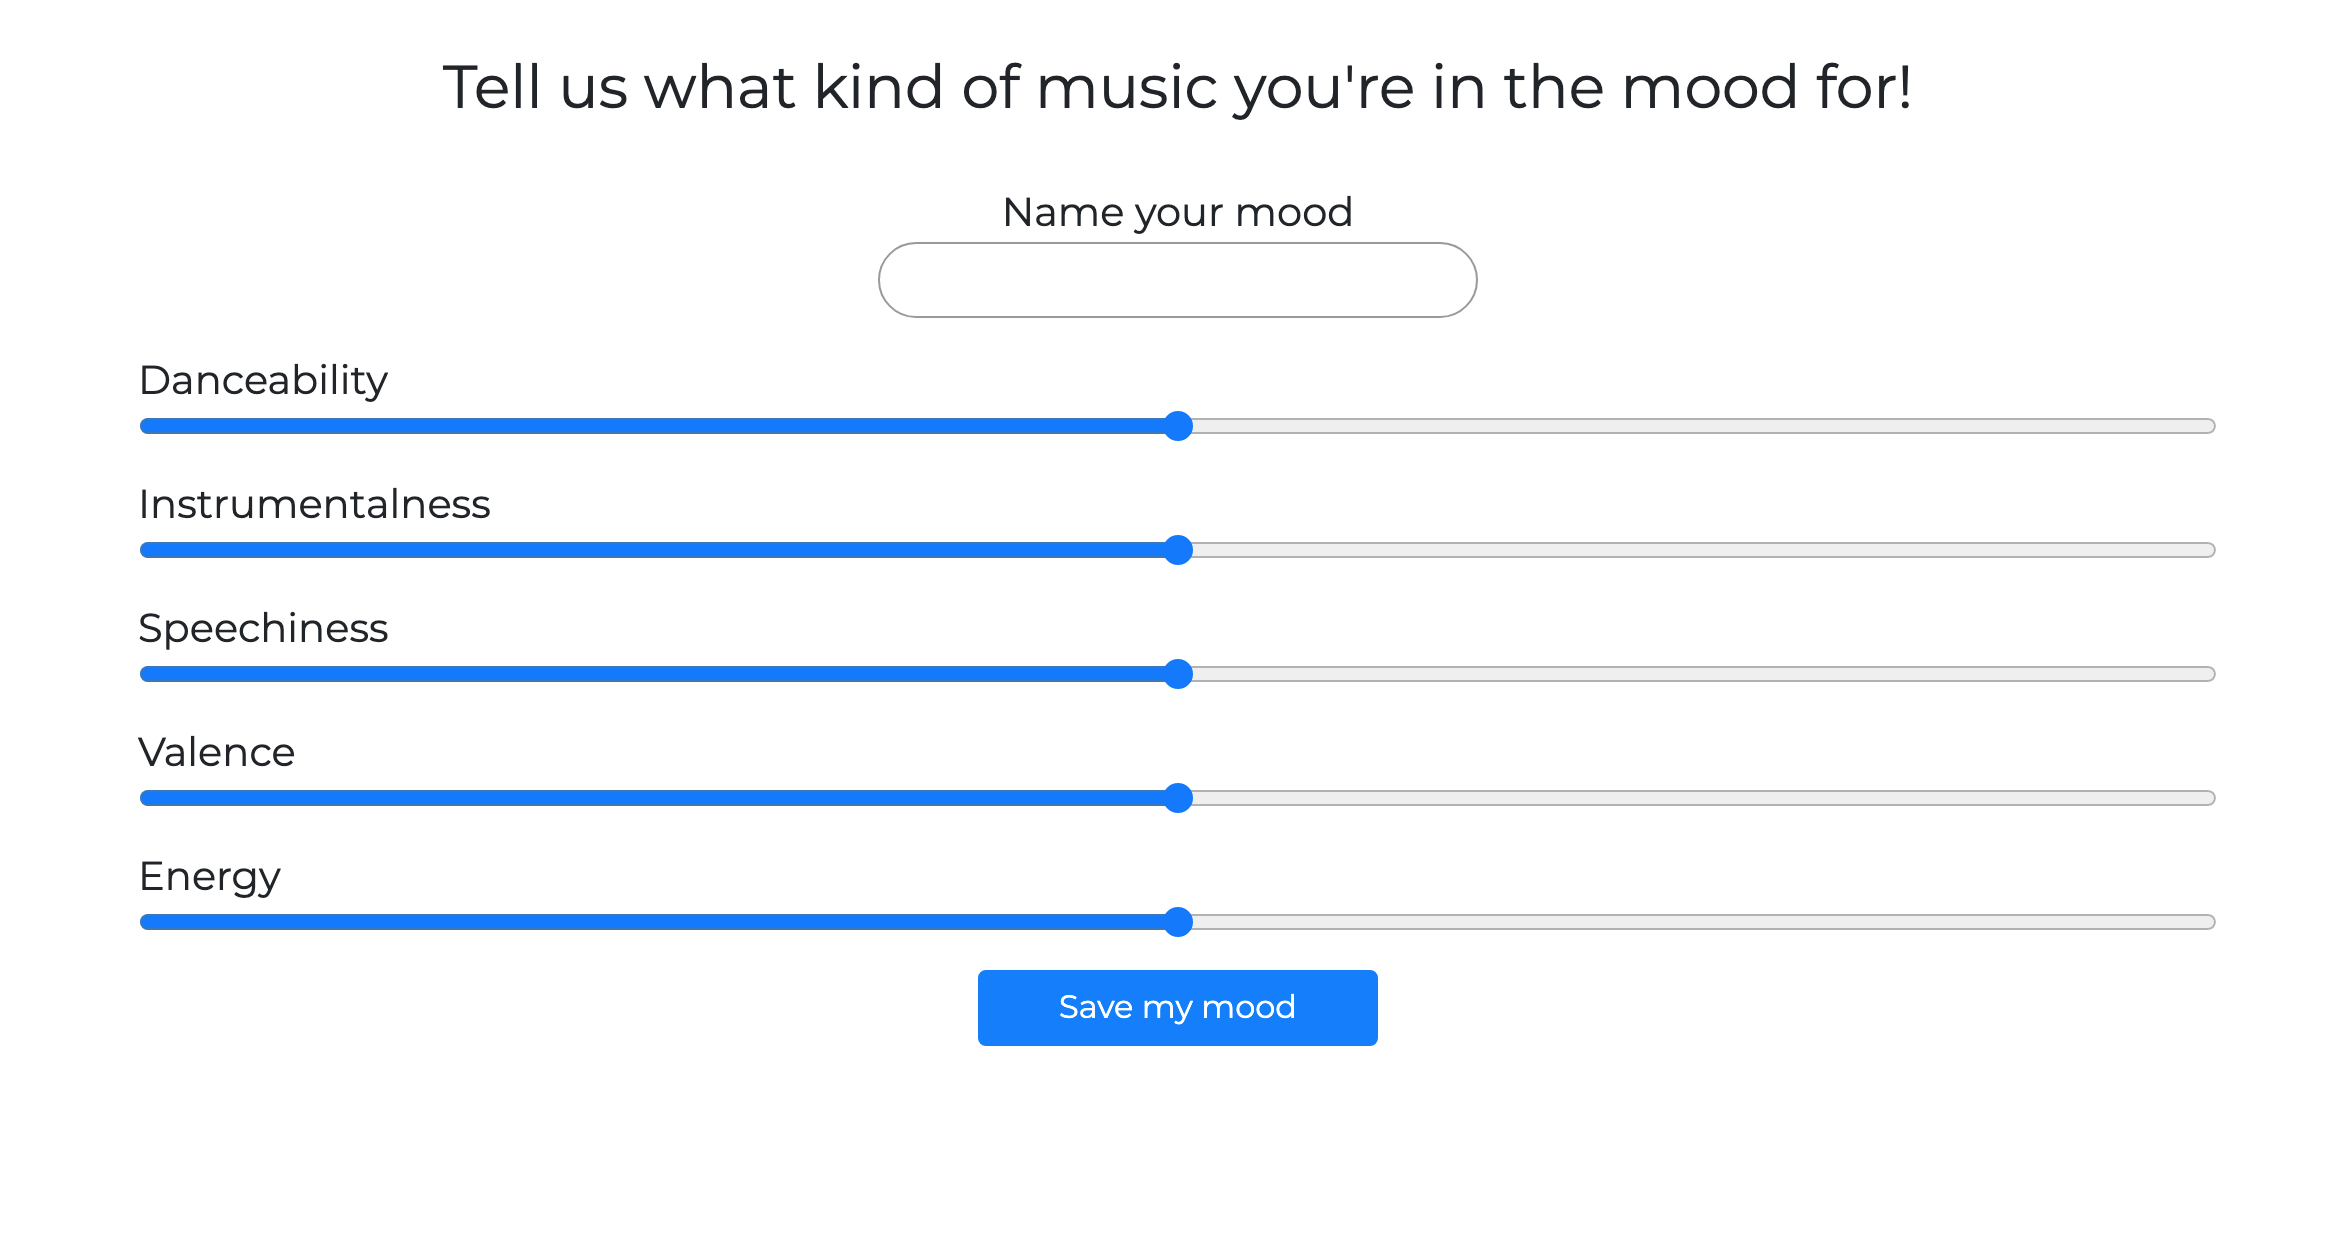
On the left hand side of the home page under the "Your Moods" section, there is a button before your list of moods that says "+ Create a New Mood". This button takes you to our mood creation page (see below), where you are able to specify the name of your mood as well as the song parameter values you want for this mood. The parameter values are taken in a slider format for ease of use. Click the "Save my Mood" playlist to create this mood and have it saved as one of your moods. To escape the mood creation process, hit the "Back" button for your browser.
Playlists can be generated from moods (either your own or ones others have created). On the left, one can select a mood from "Your Moods" in order and on the right side all playlists the user has generated from this mood previously will be displayed. To create a new playlist from this mood, you can select the mood of interest on the left hand side and click the "+ Create a new playlist from this mood" playlist on the right hand side.