Đồ án các công nghệ xây dựng hệ thống thông tin, trường đại học Bách Khoa Hà Nội


- Clone repo theo đướng dẫn https://gitlab.com/is_soict/it4434_20192/7_trinhvt.git
cd /tmp
sudo apt install curl -y
curl -O https://repo.anaconda.com/archive/Anaconda3-2020.02-Linux-x86_64.sh
chmod +x Anaconda3-2020.02-Linux-x86_64.sh
./Anaconda3-2020.02-Linux-x86_64.sh- In order to continue the installation process, please review the license agreement. Enter
- Do you approve the license terms? [yes|no] yes
- Anaconda3 will now be installed into this location: Enter
- Do you wish the installer to prepend the Anaconda3 install location to PATH in your /home/{your user}/.bashrc ? [yes|no] yes
source ~/.bashrc
conda create --n backend python=3.7
conda activate backendsudo apt install build-essential libreadline-dev libxml2-dev libxslt1-dev \
libcurl4-openssl-dev libmysqlclient-dev
sudo apt install mysql-server -y- Nếu gặp lỗi
access denied for user 'root'@'localhosthoặccannot connect to mysql through socketthì đặt lại mật khẩu cho mysql như sau
sudo service mysql stop
sudo mkdir -p /var/run/mysqld
sudo chown mysql:mysql /var/run/mysqld
sudo /usr/sbin/mysqld --skip-grant-tables --skip-networking &
mysql -u root- Đặt lại mật khẩu root
USE mysql;
UPDATE user SET authentication_string=PASSWORD("12345678") WHERE User='root';
-- "12345678" la mat khau root
UPDATE user SET plugin="mysql_native_password" WHERE User='root';
quit- Khởi động lại tiến trình mysql
sudo pkill mysqld
sudo service mysql start
Tạo database
mysql -uroot -p12345678
-- "12345678" là mật khẩu root
CREATE DATABASE project CHARACTER SET utf8 DEFAULT COLLATE utf8_general_ci;- Đăng ký tài khoản SendGrid tại https://app.sendgrid.com/
- Trong phần Settings vào mục API Keys sau đó nhấn vào nút Create API Key phía trên bên phải
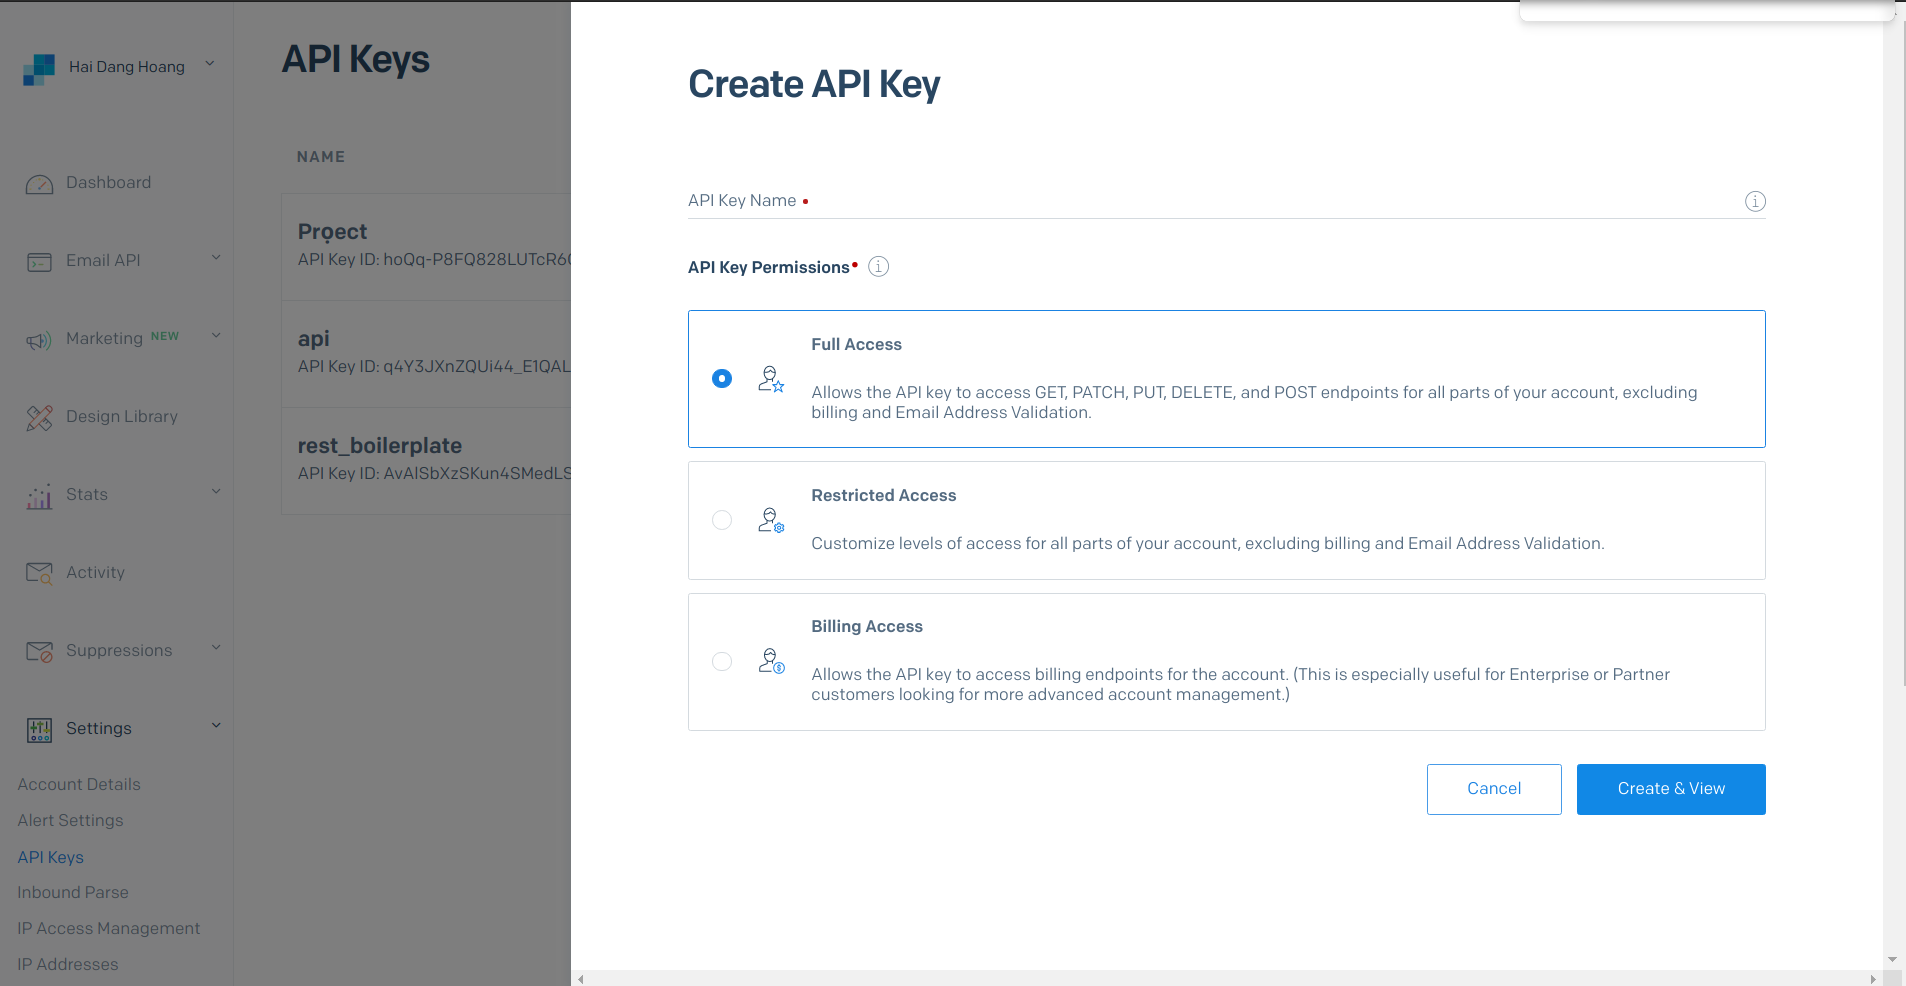
- Điền đây đủ thông thông tin sau đó chọn Create & View
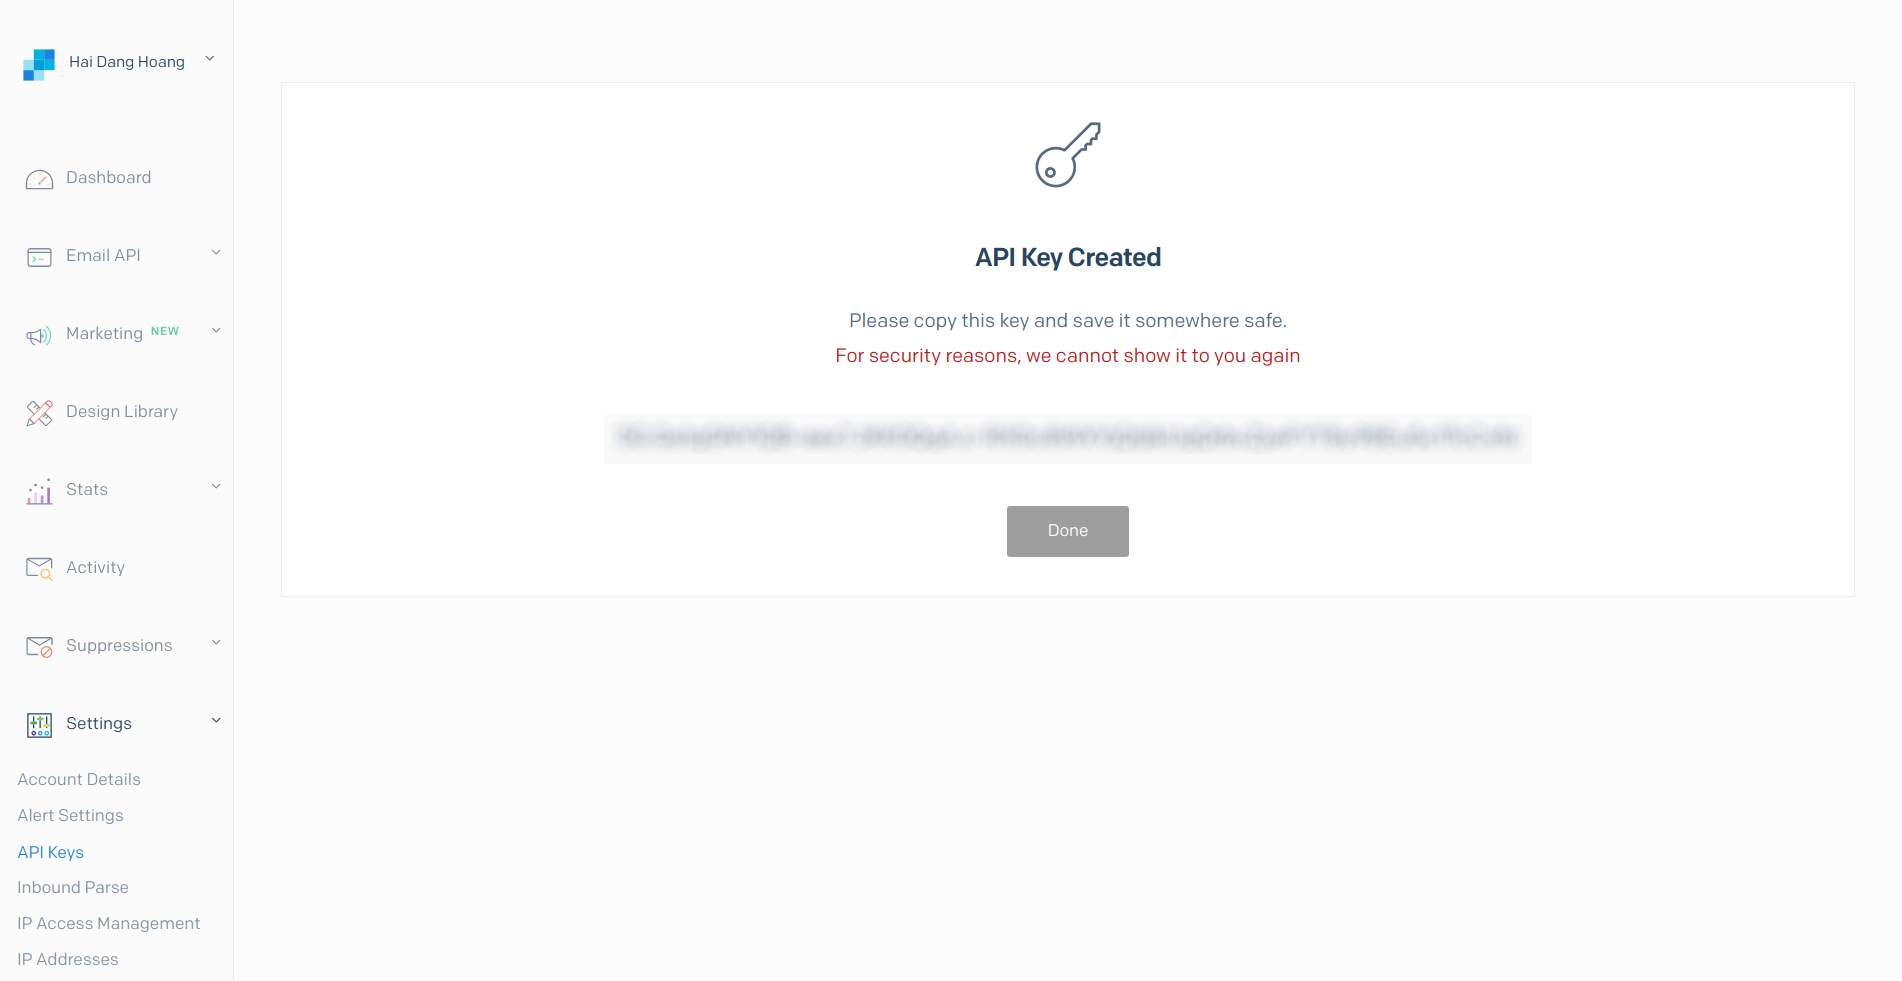
- Lưu lại API Key sau đó chọn Done
- Di chuyển vào thư mục đã clone code
cd 7_trinhvt/backend- Tạo file .env với nội dung như sau
DB_HOST=127.0.0.1
DB_USER=root
DB_PASSWORD=12345678
DB_NAME=project
TOKEN_EXPIRED_AFTER_SECONDS=86400
DEFAULT_FROM_EMAIL=example@gmail.com
SENDGRID_API_KEY=send_grid_api- Chạy server backend
echo "export DJANGO_ENV=development" >> ~/.bashrc
source ~/.bashrc
pip install -r requirements.txt
python manage.py migrate
python manage.py runserver- Mặc định server chạy ở localhost:8000
- Tải script và cài đặt nvm
curl -o- https://raw.githubusercontent.com/nvm-sh/nvm/v0.35.3/install.sh | bash- Cấu hình nvm chạy khi bật terminal
echo 'export NVM_DIR="$([ -z "${XDG_CONFIG_HOME-}" ] && printf %s "${HOME}/.nvm" || printf %s "${XDG_CONFIG_HOME}/nvm")"
[ -s "$NVM_DIR/nvm.sh" ] && \. "$NVM_DIR/nvm.sh"' >> ~/.bashrc- Cài đặt node
nvm install 12.16.1cd 7_trinhvt/frontend
npm install
npm run serve- Mặc định frontend chạy ở localhost:8080
- Mở trình duyệt, truy cập localhost:8080
- Fork repo hoặc clone
- Hack away!
- Tạo pull request
- [ Hoàng Hải Đăng ] : https://github.com/danghh-1998
- [ Nguyễn Ngọc Hải ] : https://gitlab.com/ngoc_hai_nguyen
- [ Trần Thị Đỗ Hải ] : https://gitlab.com/dohai
- [ Bành Lê Đức ] : https://gitlab.com/20081998