-
Notifications
You must be signed in to change notification settings - Fork 1
piDS
The aim of this Data Source is to push data into an ABBYY Timeline repository.
Note: Please note that this Data Source is only available on writing mode (it cannot get the metrics values yet for example)
Before using pipelite to load data into the ABBYY Timeline repository you must configure an entry point from the Timeline console (in the repository in the Details/Data SOurces menu). To do that you must have enough rights to create that new DATA SOURCE into the Repository. This configurations provides a token that will be necessary to use the ABBYY Timeline API and to get access to the Repository in a writhe mode.
These are the steps to follow in this order:
- After logging to ABBYY Timeline, click on the Repository button (on the left pane):

- Into the ABBYY Timeline repository navigate and select the DATA SOURCES (menu on the top):

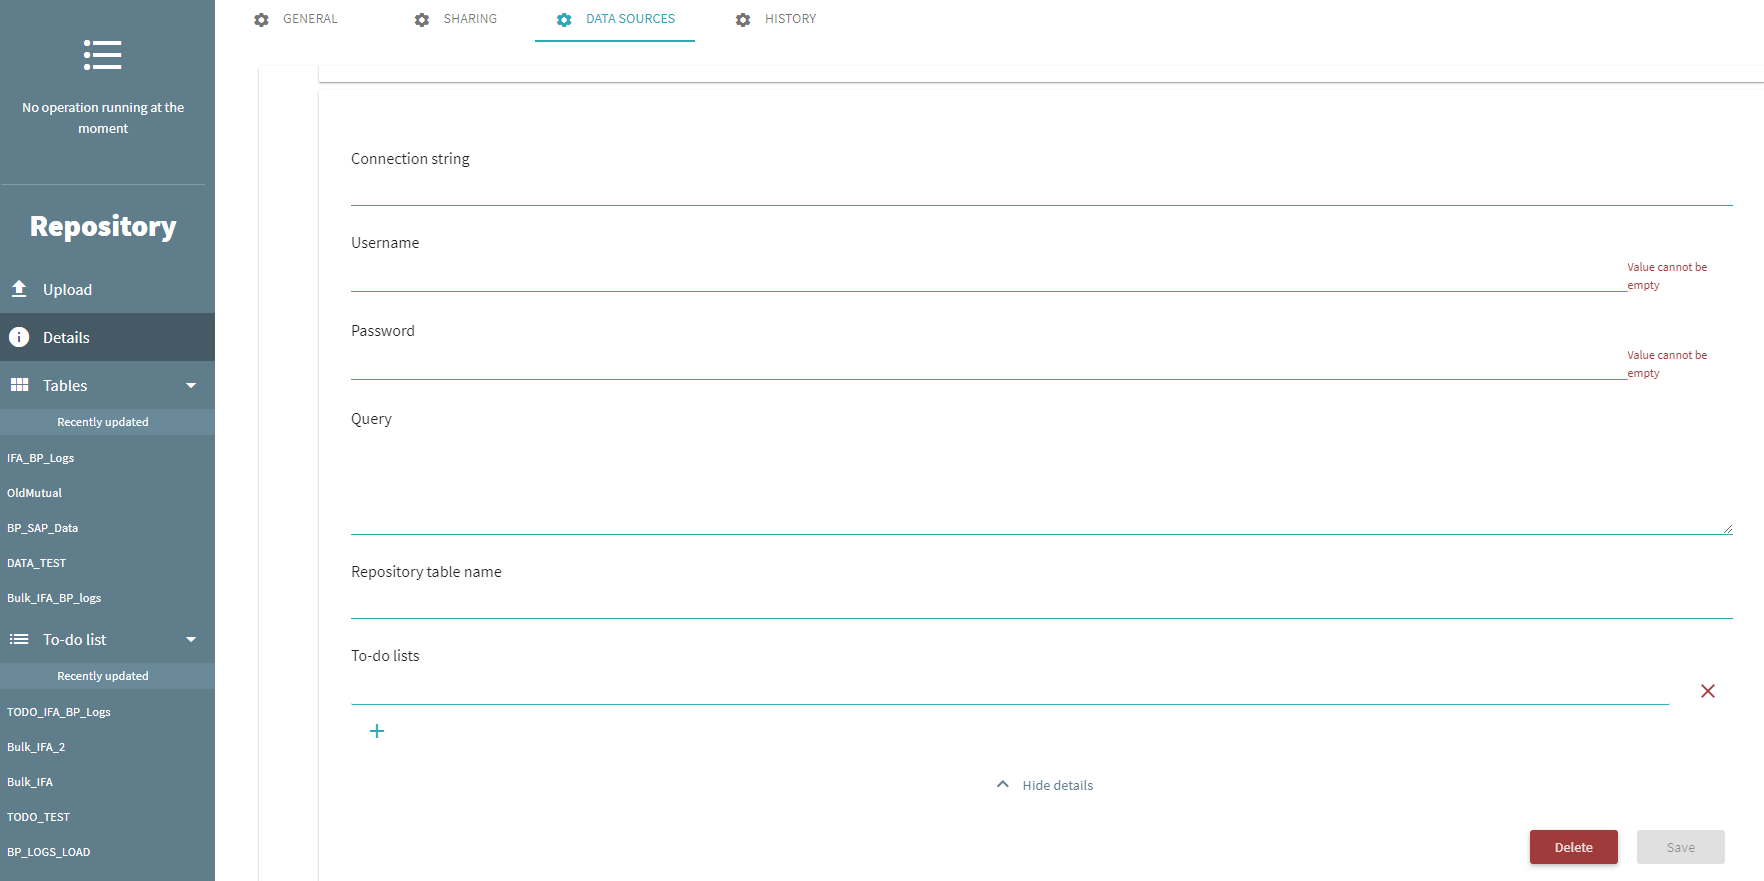
- Then create a ne Data Source by clicking on the [Add database configuration]. This button is at the bottom, below all the datasources already created:

- A new form is displayed :

- Give a unique name (internal) of this Data Source connection
- All the informations are not used. Some of them are mandatory fields (like username, password, etc.) but not used, so just put something in those fields like Dummy string. Don't worry about these configuration they will be filled out later (in the configuration file)
- Click on save
- A token must have been created, you can copy it for the pipelite configuration:

The specific configuration (as a Datasource) in the configuration file section parameters includes the following parameters:
- server: Put here the complete URL of your ABBYY Server Timeline
- token: place here the token you've created in the ABBYY Timeline Repository interface
- table: Put here the name of the table you want to fill out in the ABBYY Timeline Repository
- todos: Put here the list of To Do you want to launch automatically after loading or refreshing the table in the repository.
Configuration example:
    "loaders" : [ {
        "id": "ABBYY Timeline Table",
        "classname": "pipelite.datasources.piDS",
        "parameters": {
            "server": "https://xxx.timelinepi.com",
            "token": "[THE TOKEN YOU CREATED BEFOREHAND]",
            "table": "pipelite_table",
            "todos": [ "MyTODO" ]
        }
    } ],
    ... ] ...
These are the differents steps when loading data into the ABBYY Timeline Repository:
graph TD;
    Access-to-the-data-source-->Read-the-data;
    Read-the-data-->Prepare-data;
    Prepare-data-->Connect-to-Timeline;
    Connect-to-Timeline-->Load-data-in-a-Repository-Table;
    Load-data-in-a-Repository-Table-->Execute-To-Do
    Execute-To-Do-->Execute-To-Do
Note: the last step is optional.
- The first two steps are specifics to the Data source
- Pipelite gathers the data from the data source and then manage to do some transformations (filtering, format change, etc.)
- The connection to ABBYY Timeline is done via the Native API interface
- The data are loaded into a ABBYY Timeline Repository table
- (Optional) One or several ABBYY Timeline To Do are executed. For example to make some transformations and load the Repository table directly into a ABBYY Timeline Project
In the example below, the ABBYY Timeline "To Do" executes different ABBYY Timeline Data operations before loading the result into a ABBYY Timeline Project:

🏠 Home
🔑 Main concepts
💻 Installation
🔨 Configuration
🚀 Running
Supported Data Sources
📄 CSV File
📑 XES File
📃 Excel File
📤 ODBC
🏢 SAP
🎢 ABBYY Timeline
Supported Transformations
🔀 Pass Through
📶 Dataset Profiling
🔂 Concat 2 Data sources
🆖 SubString
🆒 Column Transformation
🔃 Join data sources
🔃 Lookup
🔤 Rename Column Name
Extending pipelite
✅ how to
✅ Adding new Data sources
✅ Adding new Transformers
✅ Adding new Pipelines