-
Notifications
You must be signed in to change notification settings - Fork 2
Setup in IDE
While E-gAT is perfectly capable of being run entirely via command line, some may be interested in using E-gAT in the comfort of an IDE. If that is the case for you, you have come to the right place.
This is a tutorial about how to setup the E-gAT Example Project within a particular IDE, PyCharm, but this setup process should loosely lend itself to most any IDE.
NOTE: Before beginning this tutorial, be sure to first go through the steps outlined on the Getting Started page.
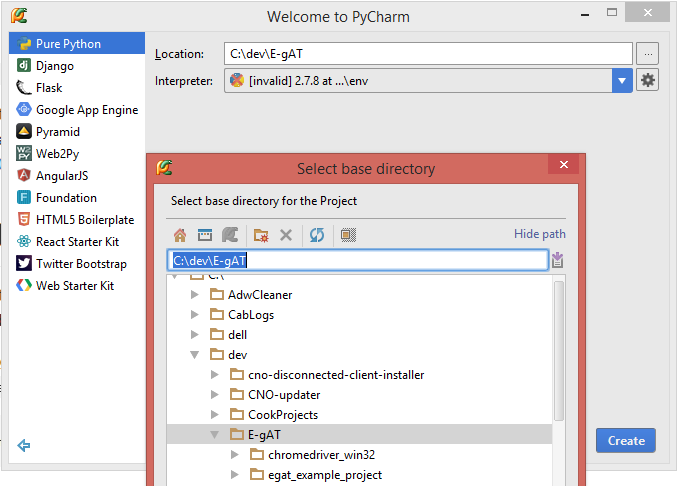
Download PyCharm, and create a new project in PyCharm.

Select the parent directory of the egat_example_project directory as the base directory.

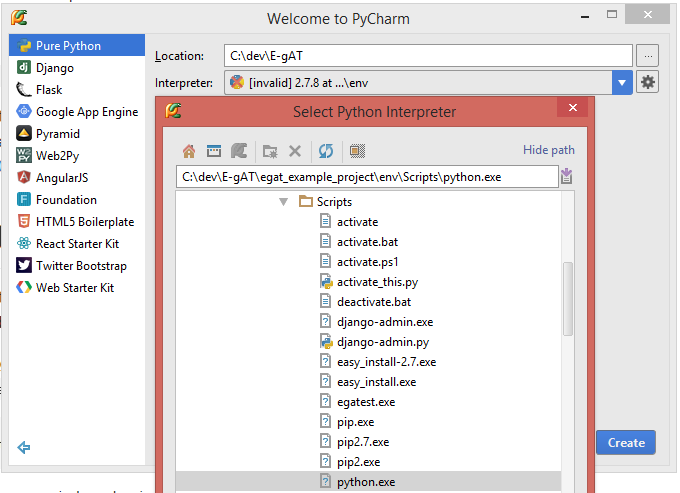
Click the 'gear button' to add a local python interpretor.

Select the python.exe interpretor inside the virtual environment, "env", created in an earlier step:


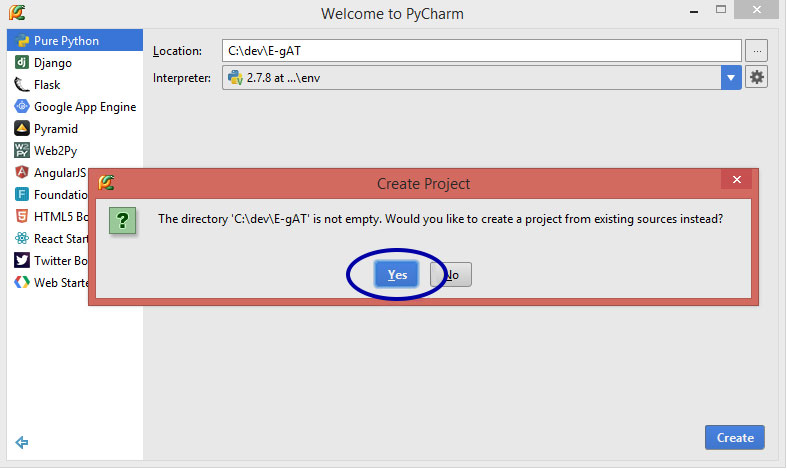
PyCharm will notice that the directory you selected is not empty and will ask if you would like the project you are creating to use the contents of that directory. Select 'Yes'.

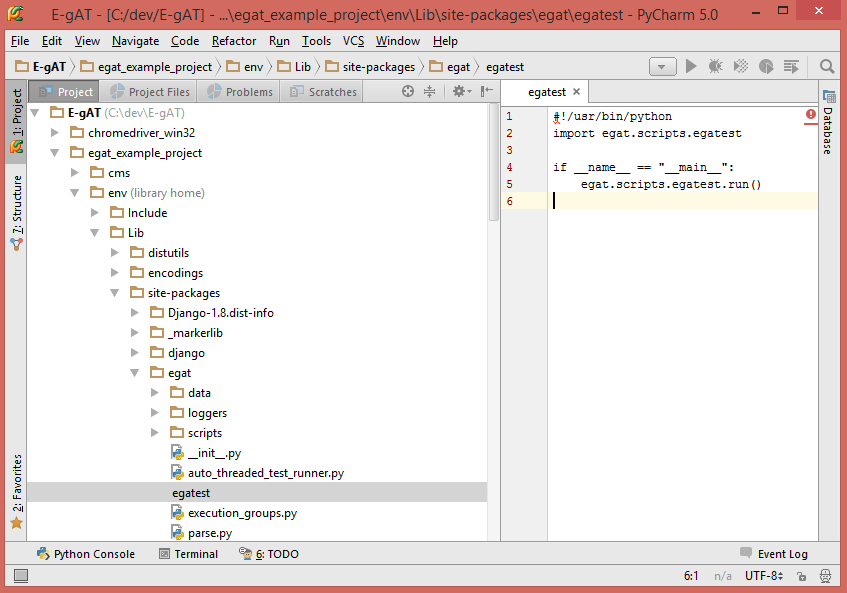
Create a new file in the egat_example_project/env/Lib/site-packages/egat/ directory called egatest (with no extension):


Paste the following code into the new file:
import egat.scripts.egatest

if __name__ == "__main__":
	egat.scripts.egatest.run()

Click the button with a downward arrow (toward the top-right corner of the editor) to edit the project's runtime configuration.

Click the "+" button to create a new Python configuration, fill in the configuration as follows (modify the paths to point to the same items on your machine), and click "OK".

Click the button below or (SHIFT + F10) to run the tests.

You will see instances of Firefox and Chrome begin to popup as the tests begin to run.
When the tests finish running, you will see the message "Process finished with exit code 0", and the results of the run will appear in the test_results folder as seen below. Open results.html in a browser to see the results of the run.

Table of Contents