This repository has been archived by the owner on Dec 22, 2022. It is now read-only.
-
Notifications
You must be signed in to change notification settings - Fork 2
Setup : if using ReactNative less than 0.60
fan-w-suzuki edited this page Nov 6, 2019
·
1 revision
- Android Studio: 3.3
- Xcode: 10.2.1
- react: 16.8.3
- react-native: 0.59.8
- react-native-cli: 2.0.1
- cd
path/to/your/react-native-project npm i react-native-nend-bridgerreact-native link react-native-nend-bridger
- Add maven url
'http://fan-adn.github.io/nendSDK-Android-lib/library'to your project-levelbuild.gradle.allprojects { repositories { mavenLocal() google() jcenter() maven { // All of React Native (JS, Obj-C sources, Android binaries) is installed from npm url "$rootDir/../node_modules/react-native/android" } maven { // nendSDK url 'http://fan-adn.github.io/nendSDK-Android-lib/library' } } } - Add
NendAdPackageinto yourReactPackageList. It's already defined maybe intoMainApplicationclass extendsApplication, implementsReactApplicationthat is created whenreact-native init YOUR_PROJECT.
e.g. ↓↓↓public class MainApplication extends Application implements ReactApplication { ・・・・・ @Override protected List<ReactPackage> getPackages() { return Arrays.asList( new MainReactPackage(), new NendAdPackage() // <- It's necessary to using our nend-bridgings ); }
- cd
path/to/your/react-native-project/ios - Add
pod 'NendSDK_iOS'to yourPodfile pod install --repo-update- Open
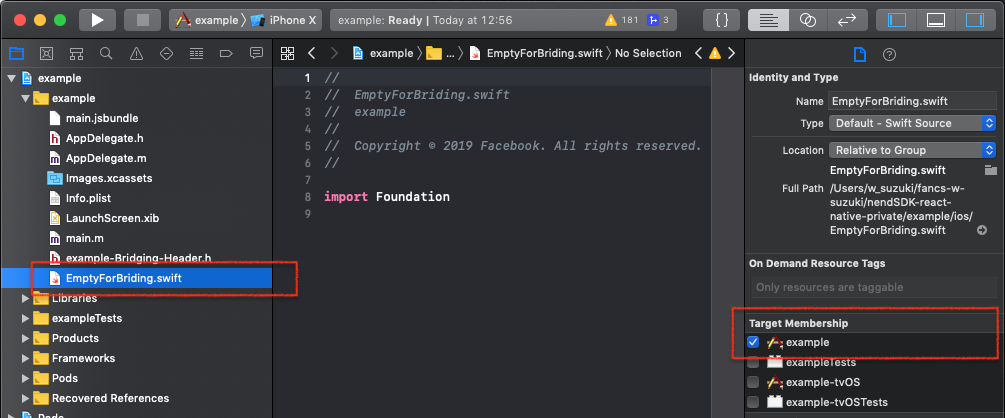
YOUR_PROJECT.xcworkspace - Add new
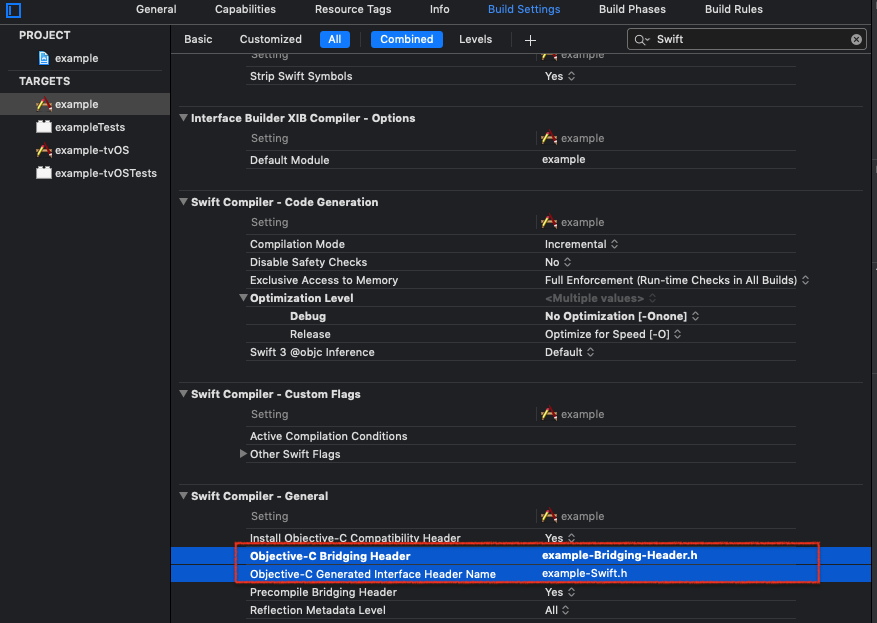
Swiftfile into your main build target for auto creationSwift-Bridging-HeaderandObjective-C generated interface Header
