A quick example showing how to use the Core NFC API in iOS and Swift.
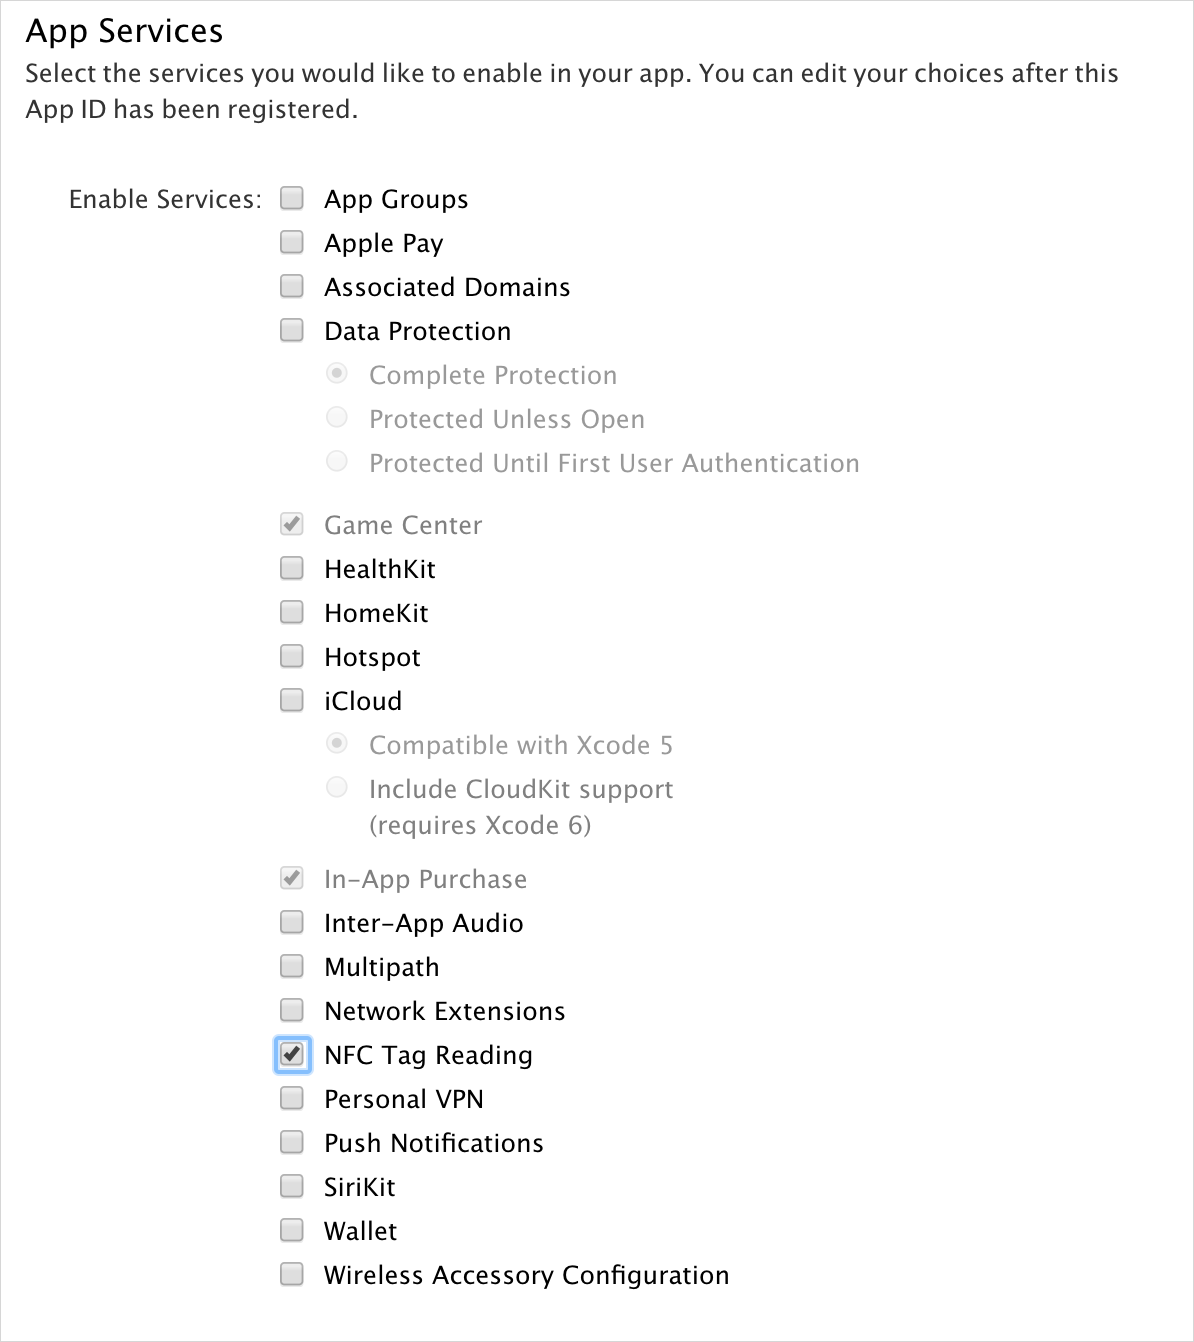
- NFC-permissions added to your Info.plist:
<key>NFCReaderUsageDescription</key>
<string>YOUR_PRIVACY_DESCRIPTION</string>- Xcode capability "
Near Field Communication Tag Reading" enabled OR - NFC capability-key added to your project's
.entitlementsfile:
<key>com.apple.developer.nfc.readersession.formats</key>
<array>
  <string>NDEF</string>
</array>- Provisioning Profile entitled with the
NFC Tag Readingcapability:
In order to work with NFC-tags, it is fundamental to understand the NDEF (NFC Data Exchange Format) specification.
Whenever CoreNFC discovers a new tag, the didDetectNDEFs delegate method will provide an array of NDEF messages
([NFCNDEFMessage]). Usually, there is only one NDEF message included, but the specification keeps it flexible to provide
multiple messages at the same time.
Every NFCNDEFMessage includes an array of payload-records ([NFCNDEFPayload]) that hold the actual information
the developer is interested in. There are currently four (undocumented) properties in the CoreNFC framework to access those:
typeNameFormat: The type name format (TNF) describes the data-structure of the related record. There are seven types that can be used via the enumerationNFCTypeNameFormat:.empty: There record is empty and does not contain any information.nfcWellKnown: The payload is known and defined by the Record Type Definition (RTD), for example RTD Text / URI..media: The payload includes a final / intermediate chunk of data defined by the mime-type (RFC2046).absoluteURI: The record contains an absolute URI resource (RFC3986).nfcExternal: The record contains a value that uses an external RTD name specifiction.unknown: The record type is unknown, the type length has to be set to0..unchanged: The record payload is the intermediate or even final chunk of data. This can be used when there is a large number of data that is splitted into multiple chunks of data.
type: The Record Type Definition (RTD) of the record. iOS describes it as aDatatype, Android has constants (likeRTD_TEXT)identifier: A unique identifier of the record.payload: The actual payload of the record. Accessing it depends on the specifiedtypeNameFormatas described above.
First, import the CoreNFC framework.
import CoreNFCNext, create 2 properties: Your session and an array of discovered tag-messages:
// Reference the NFC session
private var nfcSession: NFCNDEFReaderSession!

// Reference the found NFC messages
private var nfcMessages: [[NFCNDEFMessage]] = []
After that, assign and start your nfcSession:
// Create the NFC Reader Session when the app starts
self.nfcSession = NFCNDEFReaderSession(delegate: self, queue: nil, invalidateAfterFirstRead: false)

// A custom description that helps users understand how they can use NFC reader mode in your app.
self.nfcSession.alertMessage = "You can hold you NFC-tag to the back-top of your iPhone"

// Begin scanning
self.nfcSession.begin()
Finally, listen for NFC-related events by writing an extension that implements the NFCNDEFReaderSessionDelegate:
extension NFCTableViewController : NFCNDEFReaderSessionDelegate {

    // Called when the reader-session expired, you invalidated the dialog or accessed an invalidated session
    func readerSession(_ session: NFCNDEFReaderSession, didInvalidateWithError error: Error) {
        print("Error reading NFC: \(error.localizedDescription)")
    }

    // Called when a new set of NDEF messages is found
    func readerSession(_ session: NFCNDEFReaderSession, didDetectNDEFs messages: [NFCNDEFMessage]) {
        print("New NFC Tag detected:")

        for message in messages {
            for record in message.records {
                print("Type name format: \(record.typeNameFormat)")
                print("Payload: \(record.payload)")
                print("Type: \(record.type)")
                print("Identifier: \(record.identifier)")
            }
        }

        // Add the new messages to our found messages
        self.nfcMessages.append(messages)

        // Reload our table-view on the main-thread to display the new data-set
        DispatchQueue.main.async {
            self.tableView.reloadData()
        }
    }
}
Optionally, since we use a UITableView to display the discovered messages, prepare your table-view delegates:
extension NFCTableViewController {

    override func numberOfSections(in tableView: UITableView) -> Int {
        return self.nfcMessages.count
    }

    override func tableView(_ tableView: UITableView, numberOfRowsInSection section: Int) -> Int {
        return self.nfcMessages[section].count
    }

    override func tableView(_ tableView: UITableView, titleForHeaderInSection section: Int) -> String? {
        let numberOfMessages = self.nfcMessages[section].count
        let headerTitle = numberOfMessages == 1 ? "One Message" : "\(numberOfMessages) Messages"

        return headerTitle
    }

    override func tableView(_ tableView: UITableView, cellForRowAt indexPath: IndexPath) -> UITableViewCell {
        let cell = tableView.dequeueReusableCell(withIdentifier: "NFCTableCell", for: indexPath) as! NFCTableViewCell
        let nfcTag = self.nfcMessages[indexPath.section][indexPath.row]

        cell.textLabel?.text = "\(nfcTag.records.count) Records"

        return cell
    }
}
That's it! Run the app on your device and scan your NFC NDEF-Tag.
New NFC Messages (1) detected:
 - 2 Records:
   - TNF (TypeNameFormat): NFC Well Known
   - Payload: google.com
   - Type: 1 bytes
   - Identifier: 0 bytes

   - TNF (TypeNameFormat): NFC Well Known
   - Payload: enTest
   - Type: 1 bytes
   - Identifier: 0 bytes
Initial tests of another user (thanks @tinue) shown these following results:
- Scanning an NDEF-tag usually works once directly after rebooting the iPhone. From then on, it may or may not work, usually it doesn't work and another reboot is required.
- If the RFID-tag is fresh (empty), or does not contain an NDEF-tag (e.g. a credit-card), the reader times out (error 201).
- If the RFID-tag contains encrypted sectors, the reader throws error 200 (
readerSessionInvalidationErrorUserCanceled).
In this example, we used the NFCNDEFReaderSession to handle NDEF NFC-chips. There actually is another class inside
CoreNFC, called NFCISO15693ReaderSession. ISO15693 is the specification
for RFID-tags, and it comes along with own delegates and a class describing an RFID-tag (NFCISO15693Tag).
I have played around with that API as well and added the RFID button to the current implementation, so you can switch
between NFC- and RFID-detection. You can even send custom commands to the RFID-chip as demonstrated in the
readerSession:didDetectTags: delegate and the NFCISO15693CustomCommandConfiguration class.
I used the following resources to get started with NDEF NFC-tags:
- https://flomio.com/2012/05/ndef-basics/
- https://learn.adafruit.com/adafruit-pn532-rfid-nfc/ndef
- https://developer.android.com/reference/android/nfc/NdefRecord.html
- https://gototags.com/nfc/ndef/
If you are using a cross-platform solution for your application, Appcelerator Titanium has an open source NFC module for both Android and iOS.
Hans Knöchel (@hansemannnn)
