


![IMPORTANT]
2.4.x버전부터 AI NAVER API에서 제공되던 지도 API가 아닌 새롭게 출시된 Maps 단독 상품이 지원됩니다.
Support Table
| React Native Naver Map | React Native | Note |
|---|---|---|
≥2.1.0 |
≥ 0.74 |
Drop Bridge Support & 0.74 required |
≥2.x |
New Architecture Only | Drop Old Architecture Support, You should turn off bridgeless if want to render http web image marker |
<2.x |
Old Architecture + New Architecture |
Important
2.x버전부턴 New Architecture에서만 동작합니다. Fabric을 활성화하지 않은 프로젝트에서는 1.x 버전을 사용하시면 됩니다. 자잘한 기능 말고 차이나는 부분은 없고 1.x버전에서도 충분히 필요한 기능들로 지도앱을 구축할 수 있습니다.
거의 모든 타입이 설명되어 있는 API Docs를 구성했습니다.
최대한 가독성을 살렸으며 component 쪽에서 원하는 컴포넌트의 타입과 Prop및 Ref로 사용법을 확인 가능합니다.
expo config plugin을 사용해 Expo환경에서도 손쉽게 아키텍쳐에 상관없이 빌드할 수 있습니다.
Expo Go, Snack에선 사용하지 못하지만 development build, production 환경에서 손쉽게 사용할 수 있습니다.
Important
[iOS, Android] x [new arch, old arch] x [debug, release]
총 8가지 조건에서 모두 정상적으로 렌더링 되는 것을 테스트했습니다.
- 네이버 맵 제공 기본 심볼 (
symbol) - React Native프로젝트의 로컬 이미지 리소스
- 성능 최적화를 위한 네이티브 프로젝트의 로컬 이미지 리소스 - Android(Drawable), iOS(Bundle Asset)
- HTTP 네트워크 웹이미지
children으로 전달하는 React Native Custom View
최신 버전의 SDK를 지원하며 Props와 Command들로 Naver Map의 최신 기능을 조작할 수 있습니다.
# npm
npm install --save @mj-studio/react-native-naver-map

# yarn
yarn add @mj-studio/react-native-naver-map

# expo
npx expo install @mj-studio/react-native-naver-map
For ios, you should install pods
더 자세한 설정은 공식 문서를 참고해주세요.
Import Naver SDK Maven Repository to android/build.gradle.
allprojects {
    repositories {
        maven {
            url "https://repository.map.naver.com/archive/maven"
        }
    }
}<manifest>
<application>
<meta-data
android:name="com.naver.maps.map.NCP_KEY_ID"
android:value="YOUR_CLIENT_ID_HERE" />
<!-- (legacy) 4월 17일 이전에 AI NAVER API를 사용하던 지도 API 고객 전용 -->
<!-- https://www.ncloud.com/support/notice/all/1930?searchKeyword=map&page=1 -->
<meta-data
android:name="com.naver.maps.map.CLIENT_ID"
android:value="YOUR_CLIENT_ID_HERE" />
</application>
</manifest>Currently, this package will request location permission for showing user's current location.
<manifest>
  <uses-permission android:name="android.permission.ACCESS_FINE_LOCATION" />
  <uses-permission android:name="android.permission.ACCESS_COARSE_LOCATION" />
  # optional for background location
  <uses-permission android:name="android.permission.ACCESS_BACKGROUND_LOCATION" />
</manifest>
자세한 권한에 관련된 내용은 아래에 기재되어있습니다.
더 자세한 설정은 공식 문서를 참고해주세요.
<?xml version="1.0" encoding="UTF-8"?>
<!DOCTYPE plist PUBLIC "-//Apple//DTD PLIST 1.0//EN" "http://www.apple.com/DTDs/PropertyList-1.0.dtd">
<plist version="1.0">
<dict>
  <key>NMFNcpKeyId</key>
  <string>YOUR_CLIENT_ID_HERE</string>
  <!-- (legacy) 2025.04.17 이전에 AI NAVER API를 사용하던 지도 API 고객 전용 -->
  <!-- https://www.ncloud.com/support/notice/all/1930?searchKeyword=map&page=1 -->
  <key>NMFClientId</key>
  <string>YOUR_CLIENT_ID_HERE</string>
<dict>
<plist>Currently, this package will request location permission for showing user's current location.
<plist version="1.0">
<dict>
  <key>NSLocationAlwaysAndWhenInUseUsageDescription</key>
  <string>{{usage description}}</string>
  <key>NSLocationTemporaryUsageDescriptionDictionary</key>
  <dict>
    <key>{{your purpose key}}</key>
    <string>{{usage description}}</string>
  </dict>
  <key>NSLocationWhenInUseUsageDescription</key>
  <string>{{usage description}}</string>
</dict>
</plist>
자세한 권한에 관련된 내용은 아래에 기재되어있습니다.
This is for inject naver maven repository.
npx expo install expo-build-properties{
...
"plugins": [
[
"@mj-studio/react-native-naver-map",
{
"client_id": "{{Naver Map Client Key}}",
// (optional, you can set with expo-location instead of this package)
"android": {
"ACCESS_FINE_LOCATION": true,
"ACCESS_COARSE_LOCATION": true,
"ACCESS_BACKGROUND_LOCATION": true
},
// (optional, you can set with expo-location instead of this package)
"ios": {
"NSLocationAlwaysAndWhenInUseUsageDescription": "{{ your location usage description }}",
"NSLocationWhenInUseUsageDescription": "{{ your location usage description }}",
"NSLocationTemporaryUsageDescriptionDictionary": {
"purposeKey": "{{ your purpose key }}",
"usageDescription": "{{ your location usage description }}"
}
}
}
],
[
"expo-build-properties",
{
"android": {
"extraMavenRepos": ["https://repository.map.naver.com/archive/maven"]
}
}
],
...
]
}Expo는 위에서 설명된 Android, iOS의 설정법이 필요하지 않습니다.
자세한 권한에 관련된 내용은 아래에 기재되어있습니다.
const jejuRegion: Region = {
  latitude: 33.20530773,
  longitude: 126.14656715029,
  latitudeDelta: 0.38,
  longitudeDelta: 0.8,
};
...

<NaverMapView
  ref={ref}
  style={{ flex: 1 }}
  mapType={mapType}
  layerGroups={{
    BUILDING: true,
    BICYCLE: false,
    CADASTRAL: false,
    MOUNTAIN: false,
    TRAFFIC: false,
    TRANSIT: false,
  }}
  initialRegion={jejuRegion}
  isIndoorEnabled={indoor}
  symbolScale={symbolScale}
  lightness={lightness}
  isNightModeEnabled={nightMode}
  isShowCompass={compass}
  isShowIndoorLevelPicker={indoorLevelPicker}
  isShowScaleBar={scaleBar}
  isShowZoomControls={zoomControls}
  isShowLocationButton={myLocation}
  isExtentBoundedInKorea
  logoAlign={'TopRight'}
  locale={'ja'}
  onInitialized={() => console.log('initialized!')}
  onOptionChanged={() => console.log('Option Changed!')}
  onCameraChanged={(args) => console.log(`Camera Changed: ${formatJson(args)}`)}
  onTapMap={(args) => console.log(`Map Tapped: ${formatJson(args)}`)}
>
  <NaverMapMarkerOverlay
    latitude={33.3565607356}
    longitude={126.48599018}
    onTap={() => console.log(1)}
    anchor={{ x: 0.5, y: 1 }}
    caption={{
      key: '1',
      text: 'hello',
    }}
    subCaption={{
      key: '1234',
      text: '123',
    }}
    width={100}
    height={100}
  />
  {/* Not Working in iOS Old Architecture Yet */}
  <NaverMapMarkerOverlay*
    latitude={33.4165607356}
    longitude={126.48599018}
    onTap={() => console.log(1)}
    anchor={{ x: 0.5, y: 1 }}
    caption={{
      key: '1',
      text: 'hello',
    }}
    subCaption={{
      key: '1234',
      text: '123',
    }}
    width={100}
    height={100}
  >
    <View style={{ width: 100, height: 100, backgroundColor: 'red' }} />
  </NaverMapMarkerOverlay>
  <NaverMapMarkerOverlay
    latitude={33.2565607356}
    longitude={127.8599018}
    onTap={() => console.log(1)}
    anchor={{ x: 0.5, y: 1 }}
    caption={{
      key: '1',
      text: 'hello',
    }}
    subCaption={{
      key: '1234',
      text: '123',
    }}
    width={100}
    height={100}
    image={{ uri: 'https://picsum.photos/100/100' }}
  />
  <NaverMapCircleOverlay
    latitude={33.17827398}
    longitude={126.349895729}
    radius={50000}
    color={'#f2f1'}
    outlineColor={'#aaa'}
    outlineWidth={2}
    onTap={() => console.log('hi')}
  />
  <NaverMapPolygonOverlay
    outlineWidth={5}
    outlineColor={'#f2f2'}
    color={'#0068'}
    coords={[
      { latitude: 33.2249594, longitude: 126.54180047 },
      { latitude: 33.25683311547, longitude: 126.18193 },
      { latitude: 33.3332807, longitude: 126.838389399 },
    ]}
  />
  <NaverMapPathOverlay
    coords={[
      { latitude: 33.5249594, longitude: 126.24180047 },
      { latitude: 33.25683311547, longitude: 126.18193 },
      { latitude: 33.3332807, longitude: 126.838389399 },
    ]}
    width={8}
    color={'red'}
    progress={-0.6}
    passedColor={'green'}
  />
</NaverMapView>모든 코드엔 JSDoc으로 주석이 삽입되어있으므로 Documentation없이도 개발을 시작할 수 있습니다.
하지만 정확히 어떤 타입들이 있고 어떤 속성을 의미하는지 웹사이트에서 확인하시려면 Documentation를 참고해주세요.
기본적으로 앱에서 권한은 직접 관리가 되어야 합니다.
이를 관리하기 위해 react-native-permissions라이브러리를 사용하는 예시를 알아보겠습니다.
Tip
Expo 사용자라면 expo-location를 참고해서 권한을 사용할 예정이다 라고 명시할 수 있습니다. 따라서 아래 내용들 중 대부분은 필요하지 않고, 필요한 권한이 무엇인지, 어떻게 명시해야 하는지를 살펴보신 다음 expo-location에서의 사용법을 따르셔야 합니다.
우선 패키지를 설치하고 설정합니다.
yarn add react-native-permissionsreact-native-permission의 각 플랫폼별 설정 방법은 사용법을 직접 참고해
Podfile(iOS), AndroidManifest.xml(Android) 를 적절히 변경해주시길 바랍니다.
iOS는 다음과 같은 세 가지의 권한이 연관되어있습니다.
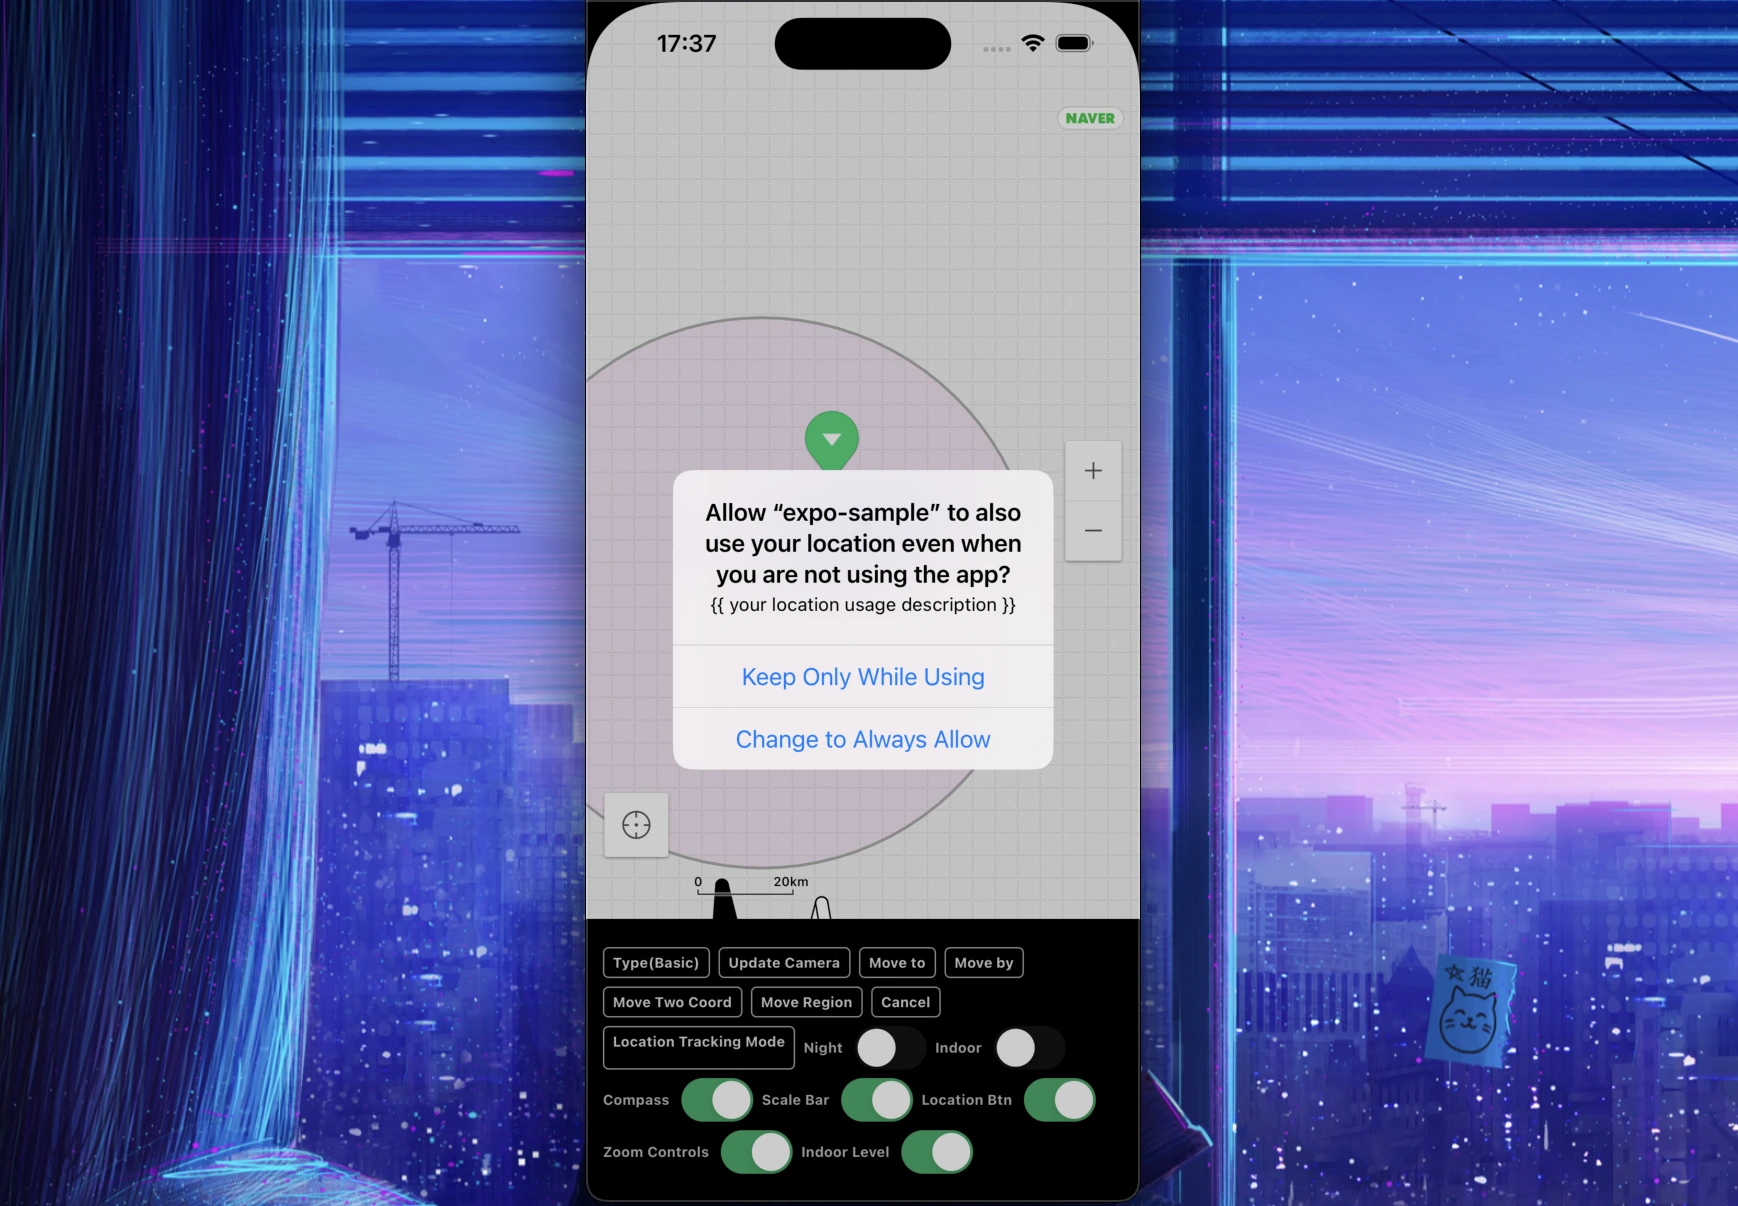
NSLocationAlwaysAndWhenInUseUsageDescription(>= iOS 11)- 앱이 foreground와 background 모두에서 위치 정보에 액세스하는 것을 허용합니다.
- iOS 11 이상에서는 NSLocationAlwaysUsageDescription 대신 이 키를 사용해야 합니다.
NSLocationWhenInUseUsageDescription- 앱이 foreground에 있을 때 (즉, 사용자가 actively하게 앱을 사용 중일 때) 위치 정보에 액세스하는 것을 허용합니다.
NSLocationTemporaryUsageDescriptionDictionary(>= iOS 14)- 앱이 임시로 정확한 위치 정보에 액세스할 수 있도록 허용합니다. 이는 앱이 특정 작업을 수행하는 동안에만 정확한 위치가 필요한 경우 사용됩니다.
Tip
앱이 iOS 11미만의 기기를 지원하고 있지 않다면 NSLocationAlwaysUsageDescription을 기재하지 않아도 됩니다.
만약 지원한다면 같이 설정해주셔야 합니다.
그럼 Podfile에서 다음과 같은 세 가지의 권한을 허용해줍니다.
setup_permissions([
'LocationAccuracy',
'LocationAlways',
'LocationWhenInUse',
...
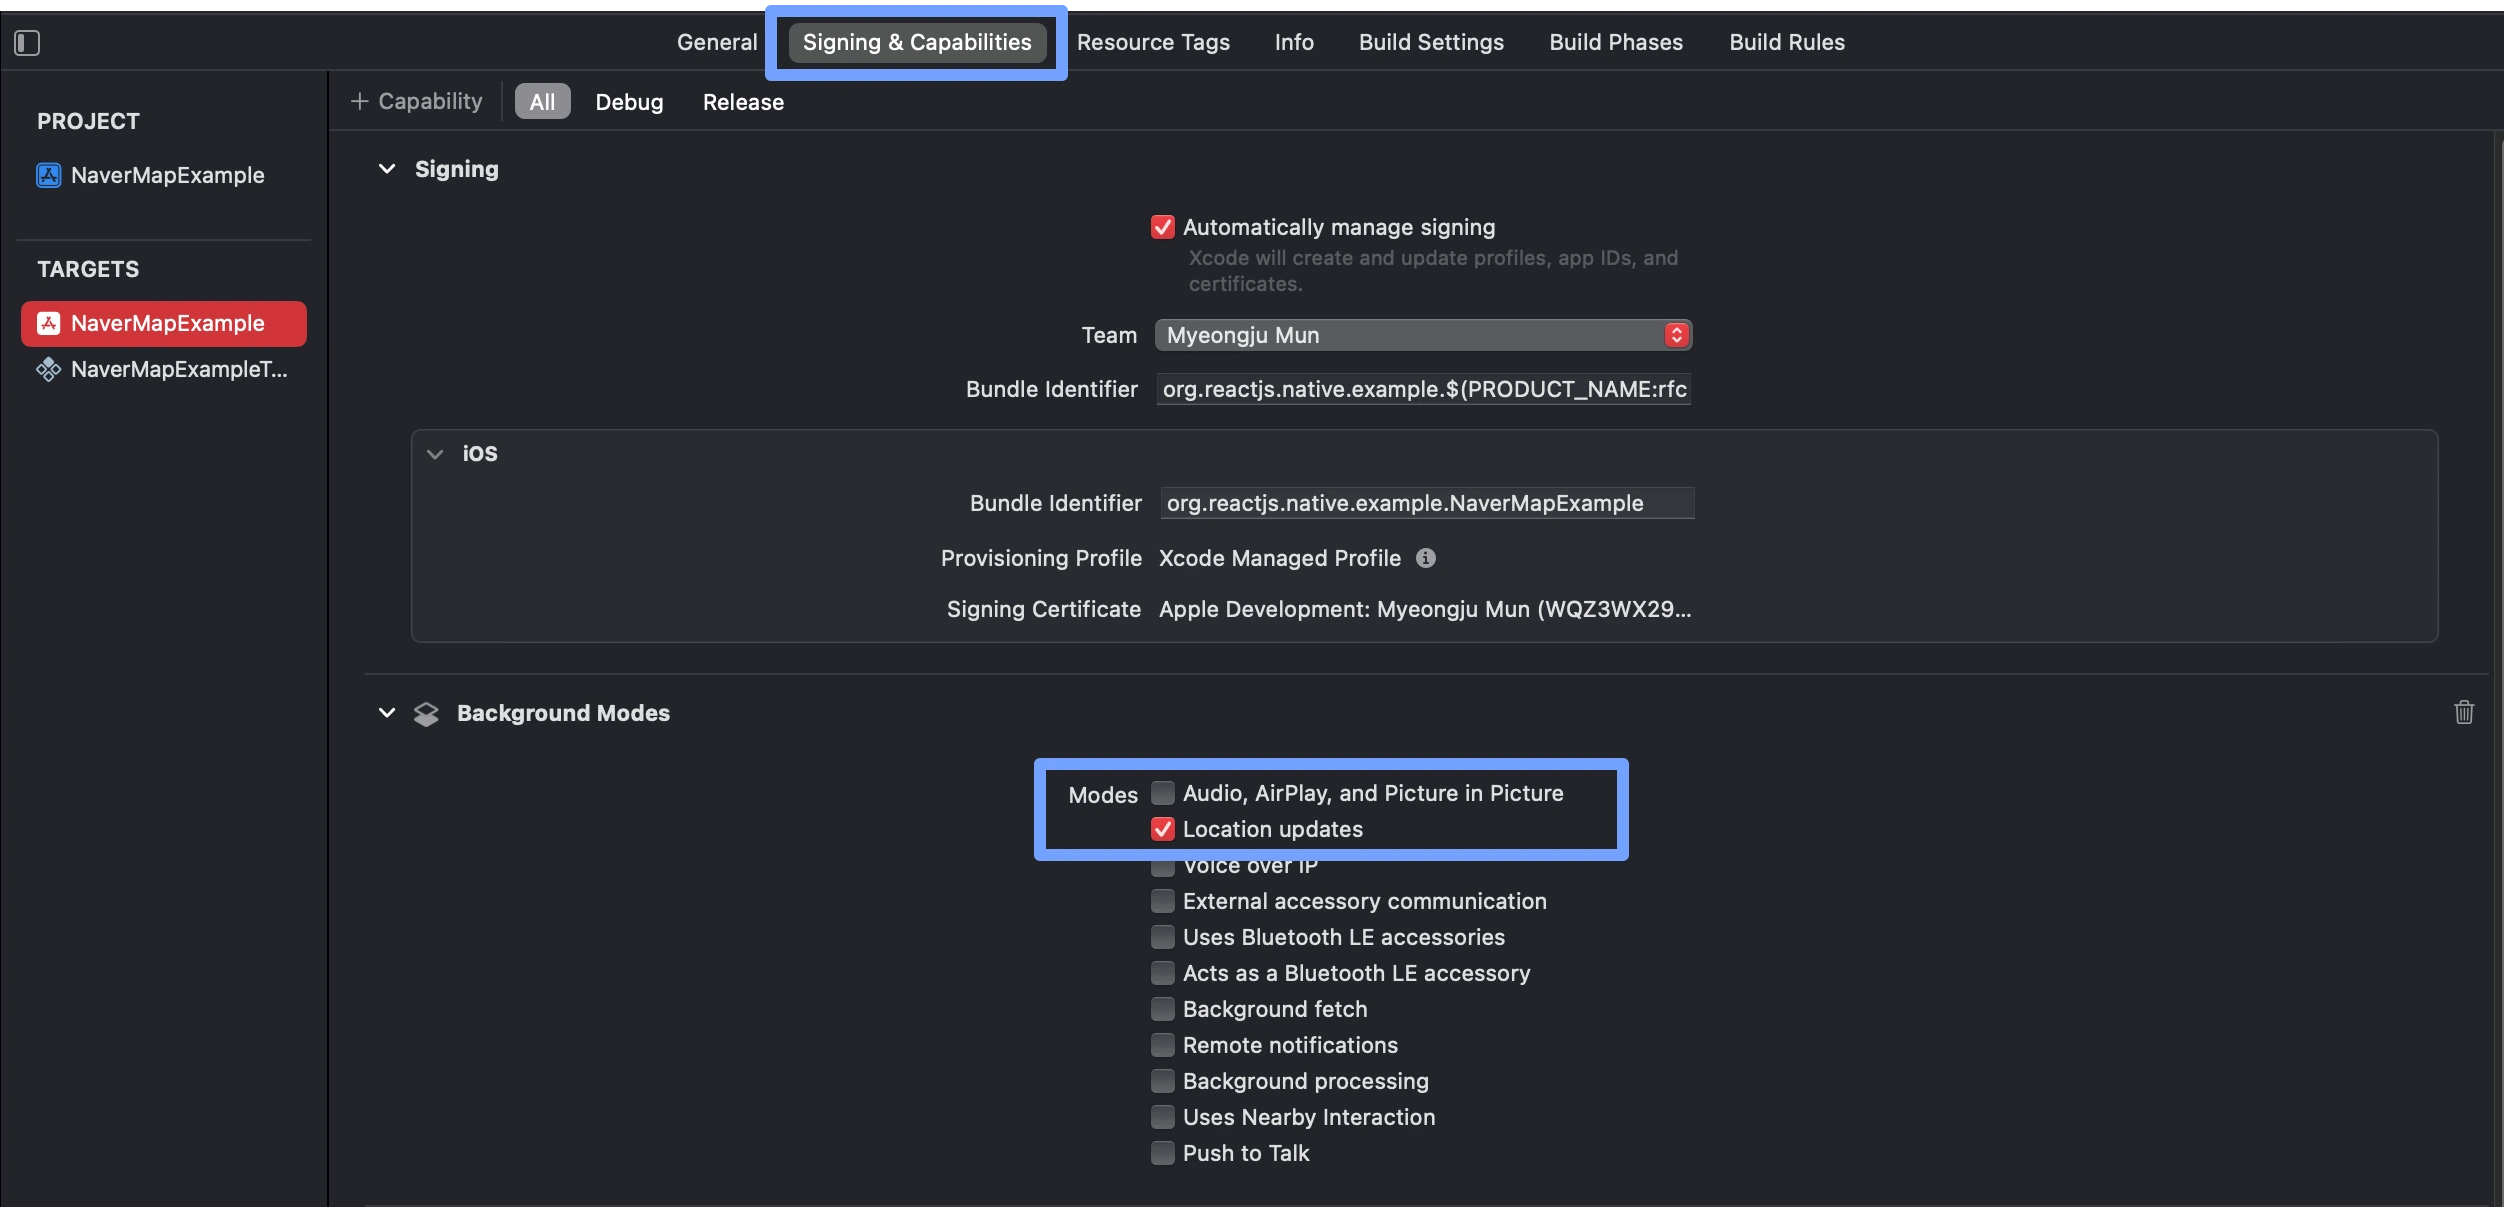
])Xcode에서 앱 타겟의 Signing & Capabilities 탭에서 Background Modes를 활성화하고 Location updates옵션을 선택합니다.
이는 백그라운드에서 위치를 받아오기 위해 필요하므로 필요없다면 설정하지 않아도 됩니다.
Naver Map SDK에서 내부적으로 이용하는 FusedLocationSource는 사용자가 isShowLocationButton prop을
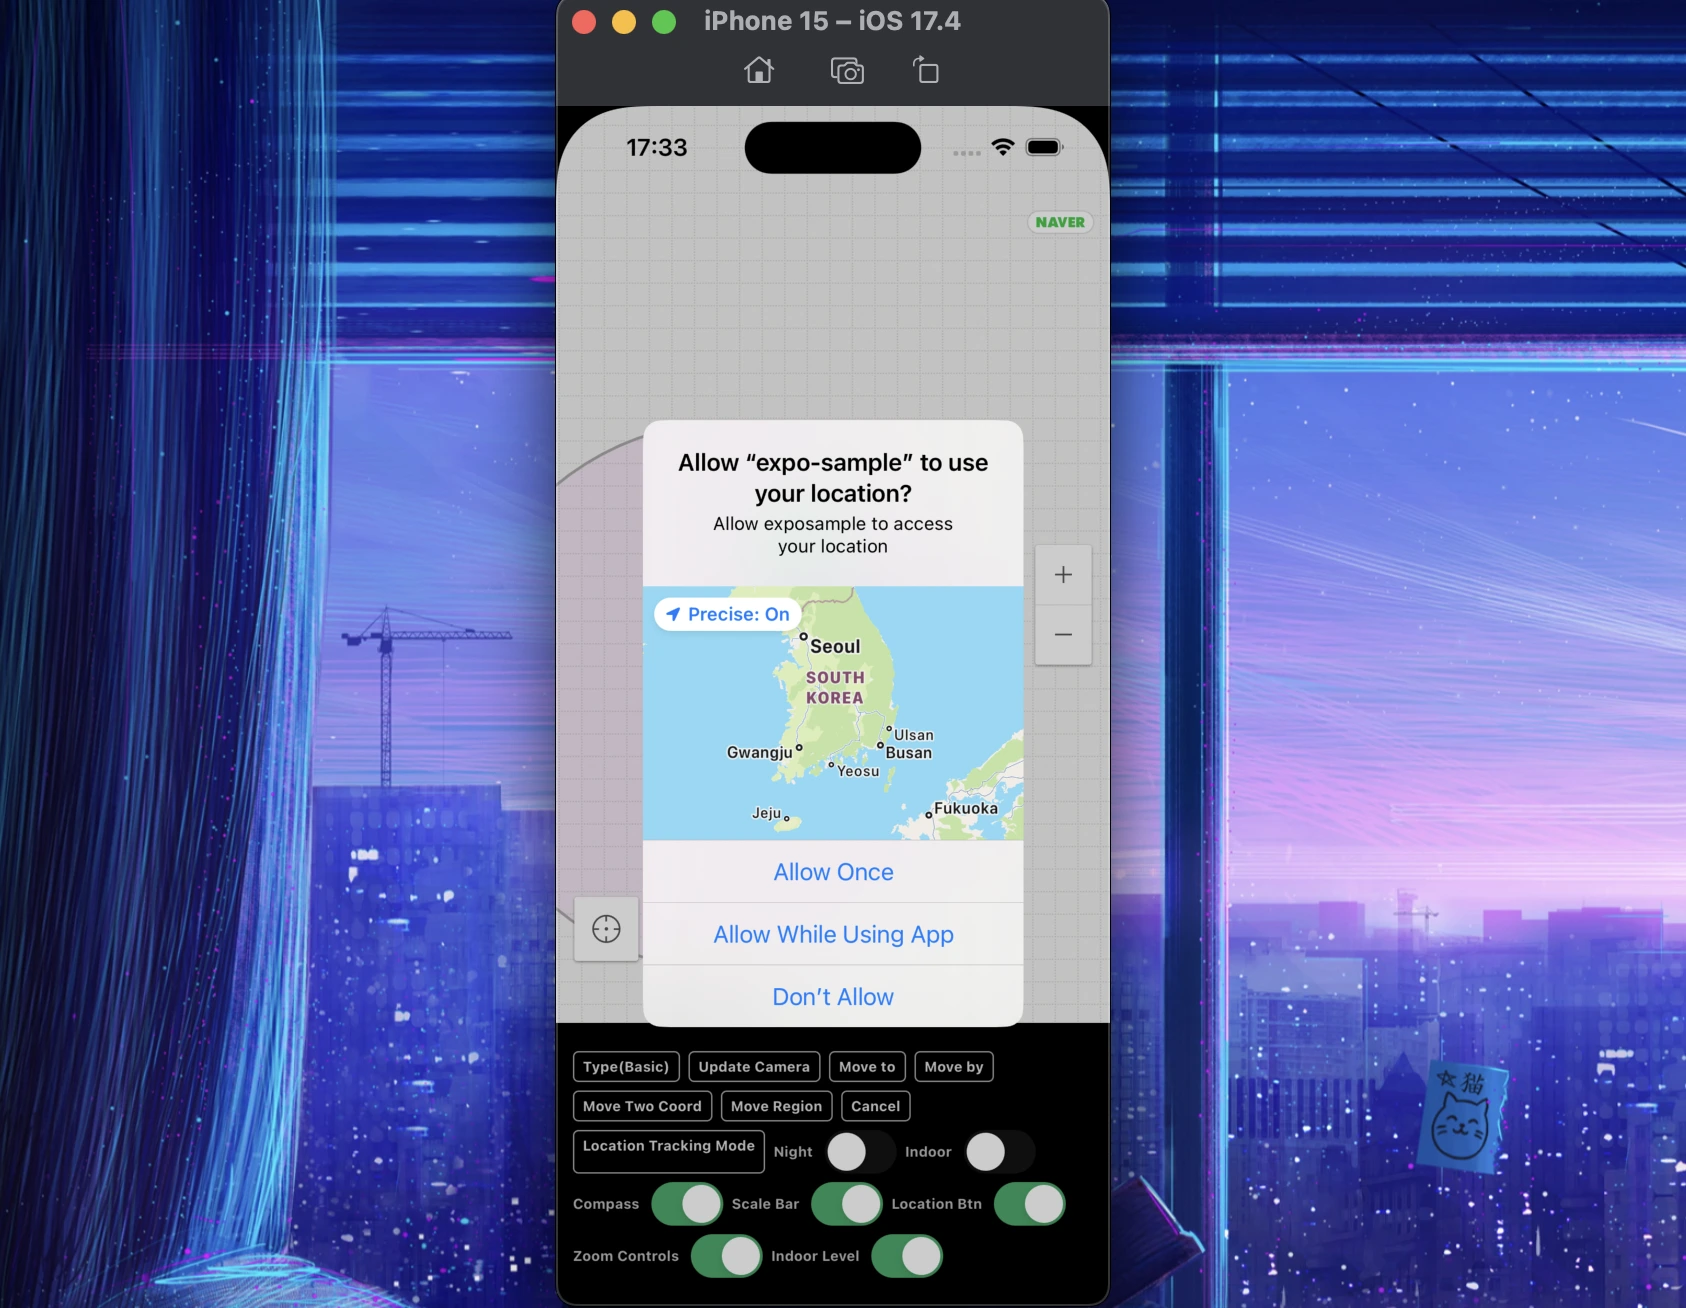
true로 설정하는 순간 자동으로 권한 요청을 시행합니다.
Android는 비교적 간단하게 권한을 구현할 수 있습니다.
아래 권한들만 AndroidManifest.xml에 사용한다고 명시하면 됩니다.
android.permission.ACCESS_FINE_LOCATION- 정확한 위치 정보 권한
android.permission.ACCESS_COARSE_LOCATION- 대략적인 위치 정보 권한
android.permission.ACCESS_BACKGROUND_LOCATION- 백그라운드 상태에서 위치 정보 권한
여기까지의 설정이 끝났다면 지도가 필요한 화면에서 다음과 같이 코드로 권한을 요청할 수 있습니다.
For Bare RN Project or ejected Expo (react-native-permissions)
// useEffect는 단순히 컴포넌트가 mount될 때 호출해주기 위해서 사용되었습니다.
useEffect(() => {
  if (Platform.OS === 'ios') {
    request(PERMISSIONS.IOS.LOCATION_ALWAYS).then((status) => {
      console.log(`Location request status: ${status}`);
      if (status === 'granted') {
        requestLocationAccuracy({
          purposeKey: 'common-purpose', // replace your purposeKey of Info.plist
        })
          .then((accuracy) => {
            console.log(`Location accuracy is: ${accuracy}`);
          })
          .catch((e) => {
            console.error(`Location accuracy request has been failed: ${e}`);
          });
      }
    });
  }
  if (Platform.OS === 'android') {
    requestMultiple([
      PERMISSIONS.ANDROID.ACCESS_FINE_LOCATION,
      PERMISSIONS.ANDROID.ACCESS_BACKGROUND_LOCATION,
    ])
      .then((status) => {
        console.log(`Location request status: ${status}`);
      })
      .catch((e) => {
        console.error(`Location request has been failed: ${e}`);
      });
  }
}, []);
For Expo (expo-location)
import * as Location from 'expo-location'

...
useEffect(() => {
  (async () => {
    try {
      const {granted} = await Location.requestForegroundPermissionsAsync();
      /**
       * Note: Foreground permissions should be granted before asking for the background permissions
       * (your app can't obtain background permission without foreground permission).
       */
      if(granted) {
        await Location.requestBackgroundPermissionsAsync();
      }
    } catch(e) {
      console.error(`Location request has been failed: ${e}`);
    }
  })();
}, []);
Note
대부분의 Type들과 Prop들의 설명은 코드의 주석에도 적혀있고 이 프로젝트는 TypeScript를 지원하니 코드에서만 확인해도 사용에 무리가 없을 것입니다.
- ✅ Fully Supported
⚠️ Developing, lack of features yet- 📦 Planned
| Component | iOS | Android | Description |
|---|---|---|---|
| NaverMapView | ✅ | ✅ | 지도 |
| NaverMapMarkerOverlay | ✅ | ✅ | 마커 오버레이 |
| Info Window | 📦 | 📦 | 오버레이의 콜오버, 툴팁 |
| NaverMapCircleOverlay | ✅ | ✅ | 원 오버레이 |
| NaverMapPolylineOverlay | ✅ | ✅ | 폴리라인 오버레이 |
| NaverMapPolygonOverlay | ✅ | ✅ | 폴리곤 |
| NaverMapGroundOverlay | ✅ | ✅ | 지상 오버레이 |
| NaverMapPathOverlay | ✅ | ✅ | 경로 오버레이 |
| NaverMapMultipartPathOverlay | 📦 | 📦 | 여러개의 경로 오버레이 |
| NaverMapArrowPathOverlay | ✅ | ✅ | 화살표 경로 오버레이 |
마커의 종류는 총 5가지입니다.
Important
[iOS, Android] x [new arch, old arch] x [debug, release]
총 8가지 조건에서 모두 정상적으로 렌더링 되는 것을 테스트했습니다.
Tip
reuseIdentifier는 전달하지 않아도 모두 자동으로 캐싱이 됩니다.
되도록이면 마커는 모두 width, height prop을 사용해야합니다. 2번 타입의 경우 현재 debug/release 빌드의 크기가 width, height없이 다르게 나오는 현상이 있습니다.
release에서는 제대로 나옵니다.
- Naver Map Basic Symbol (green, red, gray, ...) (caching ✅)
image={{symbol: 'green'}}- Local Resource (
requirereact native image file) (caching ✅)
image={require('./marker.png')}- Local Native Resource
image={{assetName: 'asset_image'}}- iOS: main bundle의 image asset 이름
- Android: resources의 drawable 이름
- Network Image (caching ✅)
image={{httpUri: 'https://example.com/image.png'}}Warning
현재 header같은 속성은 지원되지 않습니다.
- Custom React View (caching ❌)
iOS(new arch)에선 현재 View들에 collapsable=false를 설정해야 동작합니다.
Tip
마커의 생김새를 바꿔야 한다면 그것에 대한 의존성들을 제일 상위 자식의 key로 전달해야합니다.
<NaverMapMarkerOverlay width={width} height={height} ...>
  <View key={`${text}/${width}/${height}`} collapsable={false} style={{width, height}}>
    <Text>{text}</Text>
  </View>
</NaverMapMarkerOverlay>
Important
이 타입은 많이 생성될 시 성능에 굉장히 영향을 미칠 수 있습니다. 아직은 단순하게만 사용하시거나 되도록이면 이미지를 사용하는 것을 추천드립니다.
현재 이 타입은 Android에선 react-native-map의 구현체를 비슷하게 가져와 React Native의 Shadow Node를 조금 커스텀해서 자식의 위치를
추적한다음 실제 Android의 View를 삽입해줍니다.
iOS에선 단순히 UIView를 UIImage로 캔버스에 그려 표시해줍니다.
두 방법 모두가 이미지 캐싱이 아직 지원되지 않고(추후에 reuseableIdentifier같은 속성으로 지원이 가능할 것으로 보입니다), 마커 하나당 많은 리소스를 차지하게 됩니다.
- ✅ Done
- 📦 Planned
- ❓ Maybe Planned
- ❌ Not Planned
| Prop | iOS | Android |
|---|---|---|
| isLogoInteractionEnabled | ❌ | ❌ |
| gestureFrictions | 📦 | 📦 |
| Event | iOS | Android |
|---|---|---|
| onTapSymbol | 📦 | 📦 |
| onAuthFailed | ❌ | ❌ |
| onLocationChange | 📦 | 📦 |
| iOS | Android | |
|---|---|---|
| onLongTap | ❌ | 📦 |
| Prop | iOS | Android |
|---|---|---|
| caption-fontFamily | ❓ | ❓ |
| subcaption-fontFamily | ❓ | ❓ |
- Project Started (23.04.01)
- Project Setup & Component Structure (23.04.03)
- General Props & Commands (23.04.05)
- Camera, Region, Commands, Events (23.04.07)
- Implement Basic Overlays (23.04.10)
- Location Service (23.04.10)
- Support Paper(Old Arch) (23.04.11)
- Release (23.04.11)
- Support Expo with config plugin (23.04.12)
- Docs
- Implement Clustering (23.04.24)
- Implement ArrowheadPath Overlay (23.05.01)
- Implement Ground Overlay (23.05.01)
- Implement Location Overlay Commands <- 🔥
- Implement MutlPath Overlay <- 🔥
See the contributing guide to learn how to contribute to the repository and the development workflow.
MIT