-
Notifications
You must be signed in to change notification settings - Fork 18
Data Portal installation on macOS High Sierra
Tested with CKAN 2.8.3 on macOS 10.13.6
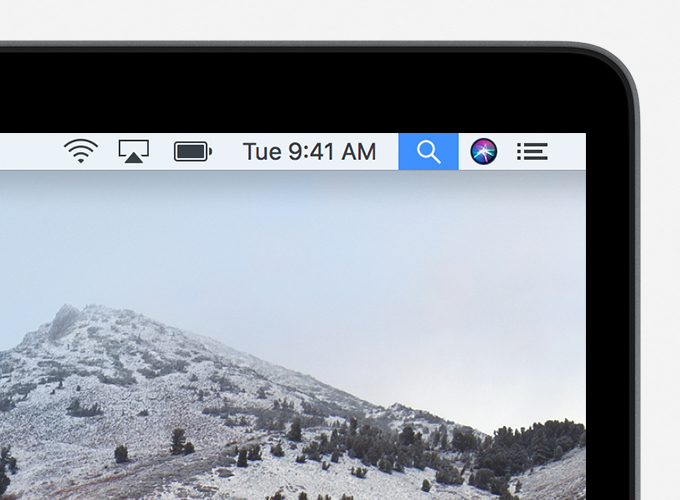
- Click the magnifying glass in the upper-right corner of the menu bar, or press Command-Space bar. (Spotlight Search)
- Type "Terminal" into the search field
- When the selection says "Terminal.app", press Enter
- In your terminal, type the following command:
xcode-select --install- In your terminal, type the following command:
/usr/bin/ruby -e "$(curl -fsSL https://raw.githubusercontent.com/Homebrew/install/master/install)"- The script will explain what changes it will make and prompt you before the installation begins.
Now you will update your PATH environment variable so your system has access to the Homebrew commands
- Ensure you have
~/.profilefile by typing the following command in your terminal:
touch ~/.profile- Add the Homebrew directory to your
PATHby typing the following command in your terminal
echo "export PATH=\"/usr/local/bin:/usr/local/sbin:$PATH\"" >> ~/.profile- Install Python 2.7
brew install python@2- Add the
python@2directory to yourPATHso your system has access to the Python commands
echo "export PATH=\"/usr/local/opt/python@2/libexec/bin:$PATH\"" >> ~/.profile- Install
virtualenvto manage your Python environments
pip install virtualenv- install Git
brew install git- Set your name (replace
Your Namewith your first and last name, e.g.,Reuben Cummings)
git config --global user.name "Your Name"- Set your commit email address (replace
your@email.addresswith your email address, e.g.,reubano@gmail.com).
Note: This should be the same email address you used to signup for your GitHub account
git config --global user.email "your@email.address"- Check that both configurations have been set correctly
git config --global --list- install
brew install postgresql@10- install libmagic
brew install libmagic- In the top-right corner of the repo page, click Fork.
-
On GitHub, navigate to your fork of the data-portal repository, e.g.,
https://github.com/yourusername/data-portal -
Under the repository name, click Clone or download
- In the Clone with HTTPs section, click the clipboard icon to copy the clone URL for the repository.
- Create a directory to hold the cloned project
mkdir -p ~/Documents/Projects
cd ~/Documents/Projects-
Type
git clone, and then paste the URL you copied in step 3 above. It will look likegit clone https://github.com/YOUR-USERNAME/data-portal, but with your GitHub username instead ofYOUR-USERNAME -
Press Enter. Your local clone will be created.
- Create and activate a virtual environment
cd data-portal
virtualenv --no-site-packages --python=python2.7 venv
source venv/bin/activate- Install required Python libraries
pip install -r requirements.txt -r dev-requirements.txt - start the server
sudo pg_ctl -D /usr/local/var/postgres start- Create a PostgreSQL user
sudo createuser -U postgres ckan_default- Create a PostgreSQL database
sudo createdb -U postgres -O ckan_default ckan_default -E utf-8- Open the
development.inifile and edit line 47
sqlalchemy.url = postgresql://ckan_default:password@localhost/ckan_default
to remove :password so that it looks like this
sqlalchemy.url = postgresql://ckan_default@localhost/ckan_default
Note: if you created a database password, replace password with your password.
open development.ini- Create database tables
paster --plugin=ckan db init -c development.iniYou should see Initialising DB: SUCCESS
- Start ckan
paster --plugin=ckan serve development.iniYou should see serving on http://127.0.0.1:5000
-
Open http://127.0.0.1:5000, and you should see the CKAN front page.
-
If you get an error similar to the following:
In the browser: Internal Server Error
In the terminal: OSError: [Errno 13] Permission denied: '/tmp/default/session...'
You need to modify the directory permissions:
cd /tmp/default
sudo chmod -R 755 session
Reference:


