Note
This repository serves as an issue tracker. The readme is mirrored from, and the source code is at monorepo/inlang/packages/sherlock. Make pull requests to the monorepo.


Visualize, edit, and lint translated strings effortlessly using Inline Decorations & Hover Support. Extract new strings with a simple click, making localization tasks more intuitive and efficient.
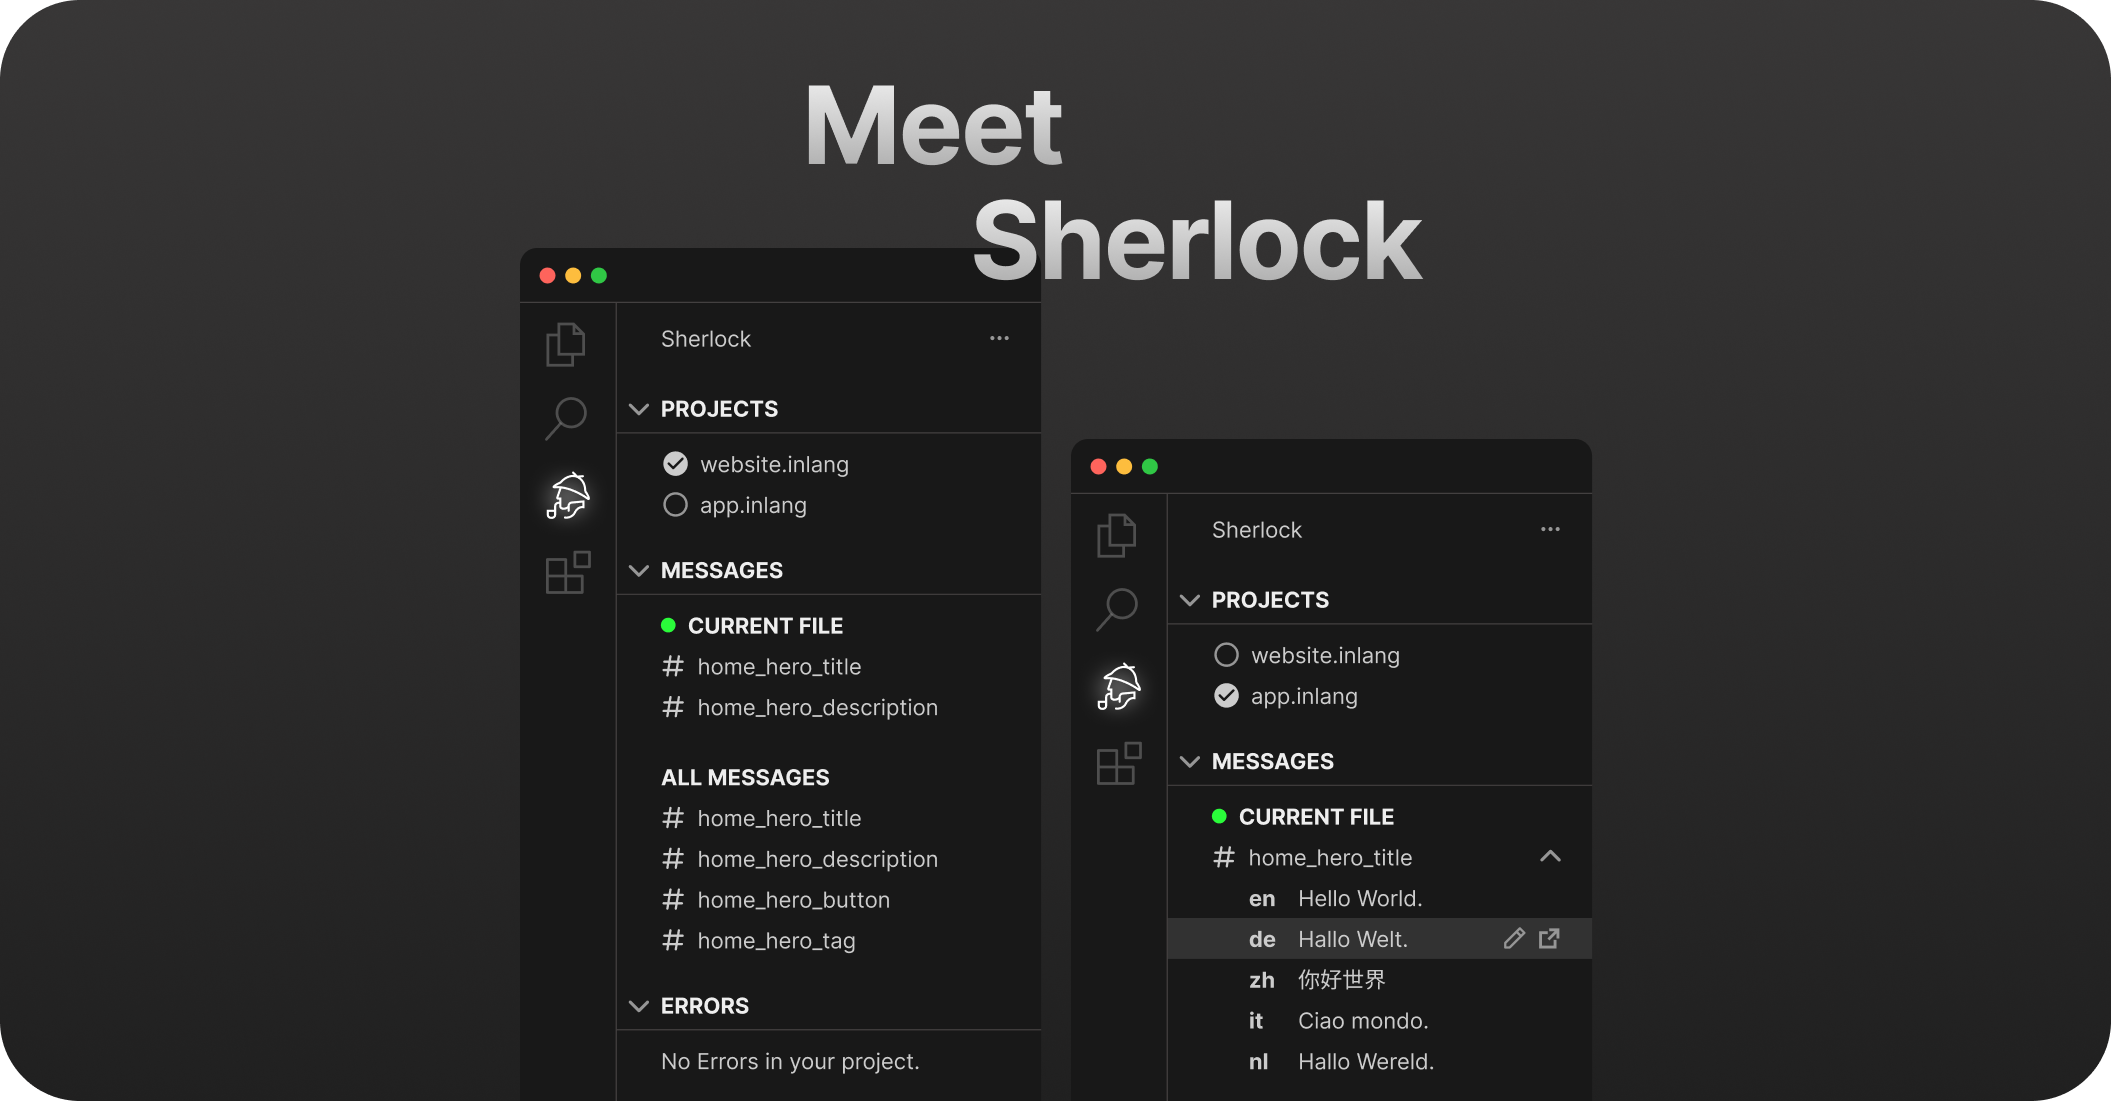
✅ Streamline the i18n translation process.
✅ Visualize, edit, and lint translations.
✅ Extract new translations with a simple click.
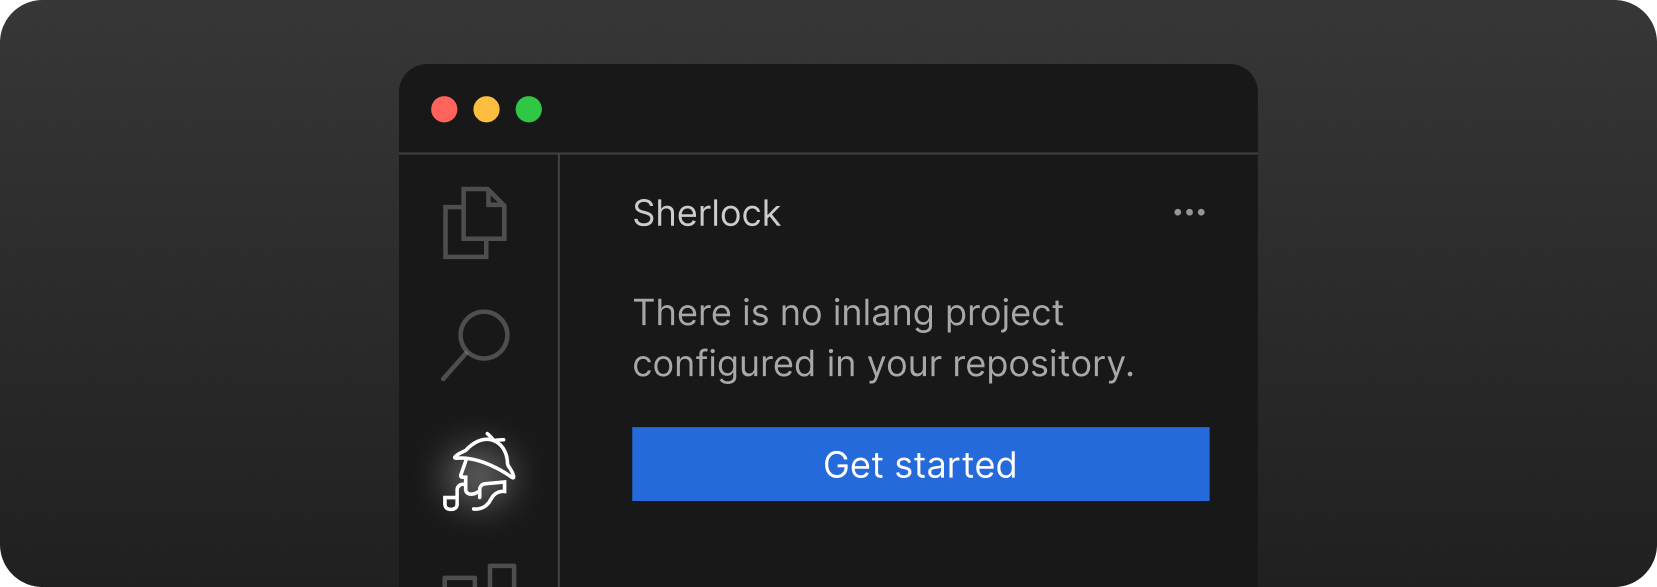
Install the extension and click Getting Started in the Sherlock Tab.
You need a git repository to use the Sherlock extension, as it leverages git functionality (the inlang ecosystem is built on git).
You can use the following template when using JSON files as translation files. If not, please look for other supported resource file types:
{
	// official schema ensures that your project file is valid
	"$schema": "https://inlang.com/schema/project-settings",
	// the "source" language tag that is used in your project
	"baseLocale": "en",
	// all the language tags you want to support in your project
	"locales": ["en", "de"],
	"modules": ["https://cdn.jsdelivr.net/npm/@inlang/plugin-json@4/dist/index.js"], // or use another storage module: https://inlang.com/c/plugins (i18next, json, inlang message format)
	"settings": {}
}
You might need another module if you are using a different resource file type. You can find all available modules here.
You should continue with installing a syntax matcher. There are multiple syntax matcher available:
- m function matcher: https://inlang.com/m/632iow21/plugin-inlang-mFunctionMatcher
- t function matcher: https://inlang.com/m/698iow33/plugin-inlang-tFunctionMatcher
- if you are using the i18next module, everything is already built-in
- if you are using next-intl, you need https://inlang.com/m/193hsyds/plugin-inlang-nextIntl
If you want to add lint rules to your experience, you can add them from https://inlang.com/c/lint-rules
- VS Code version 1.84.0 or higher.
- Node.js version v18 or higher.
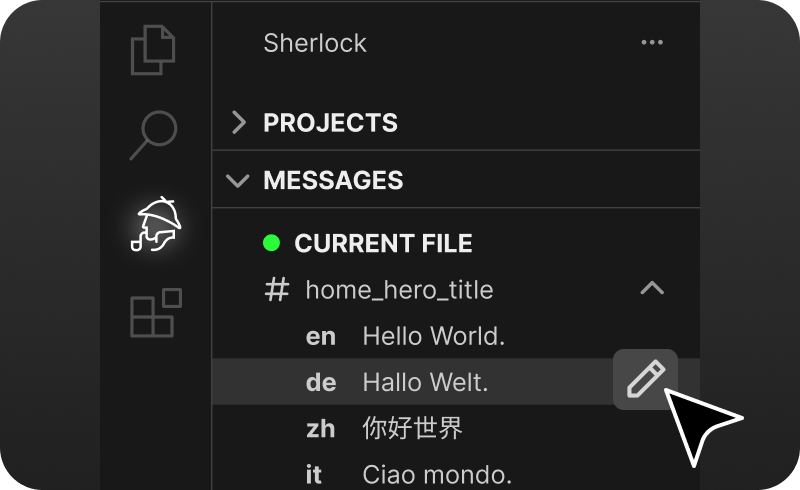
See translations and edit them directly in your code. No more back-and-forth looking into the translation files themselves.
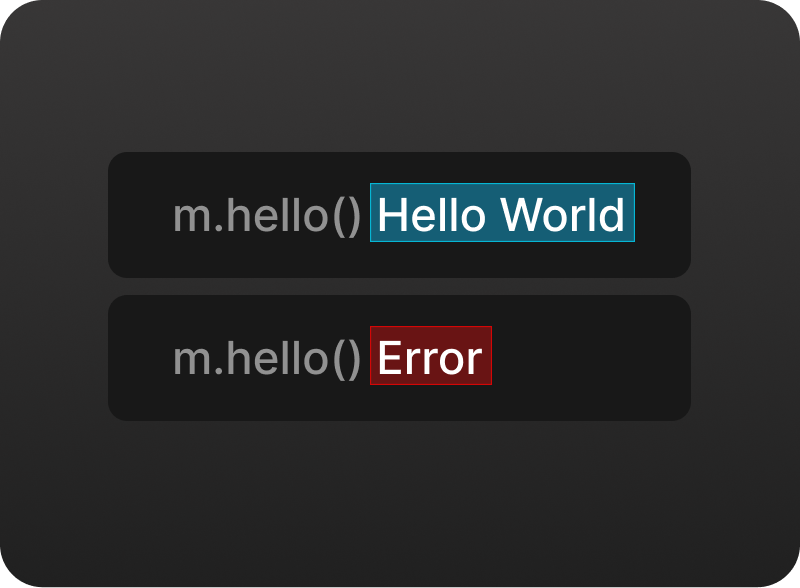
🔎 Inline Annotations
See translations directly in your code. No more back-and-forth looking into the translation files themselves.
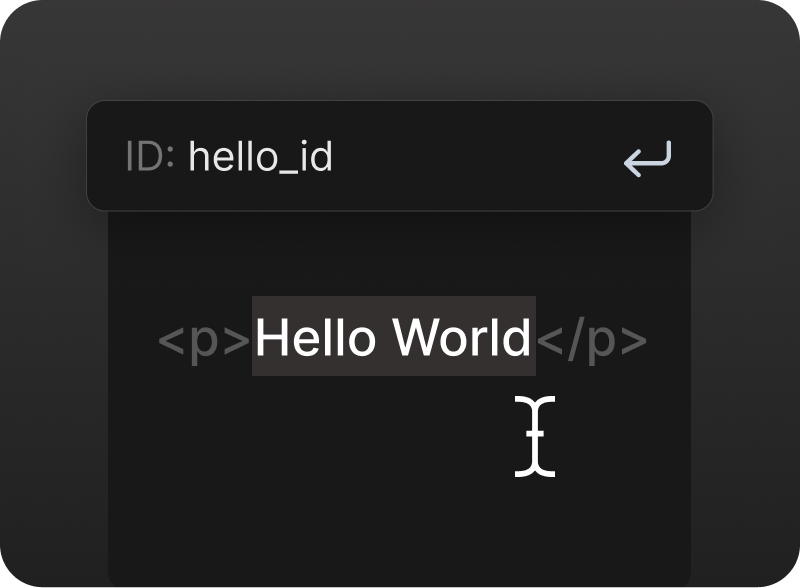
✂️ Extract Messages (translations)
Extract new strings with a simple click, making localization tasks more intuitive and efficient. Visualize, edit, and lint translated strings effortlessly using Inline Decorations & Hover Support.
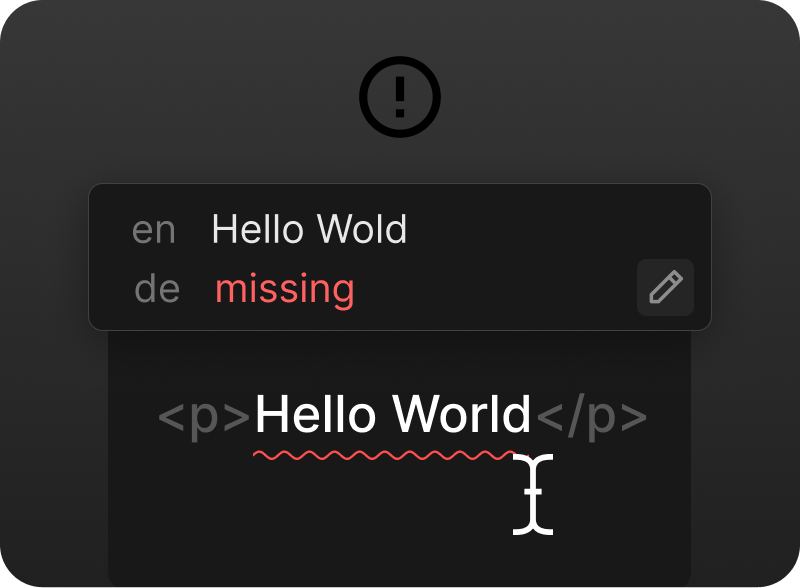
❌ Message Linting
Get notified about missing translations and other issues directly in your IDE.
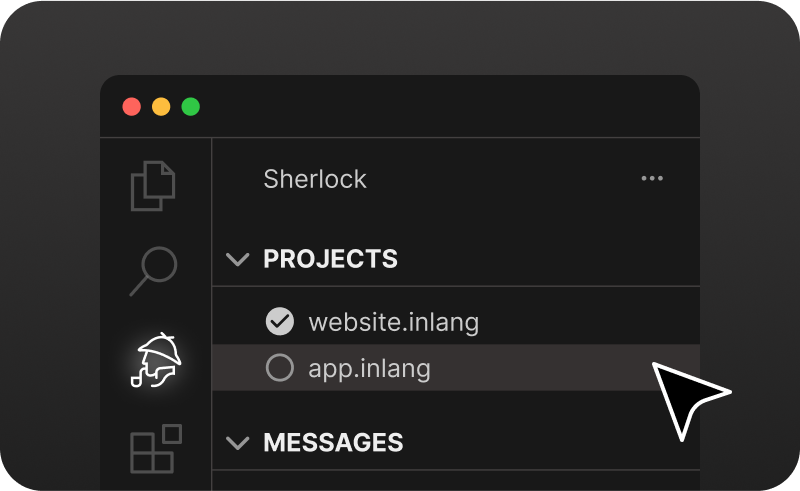
📦 Monorepo support
You can have multiple projects in your repository. The Sherlock tab makes it easy to switch from one to another.
🔁 Update Translations
Translations from the resource files are automatically updated when you change the source text.
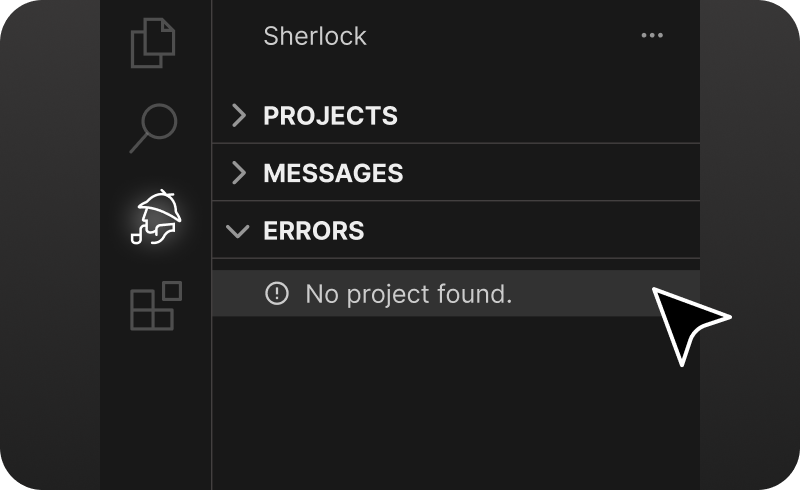
⚠ Transparent Errors
In the tab menu, you can see project errors if the setup is broken.
You can customize the preview language in the settings. This is useful if you want to see how your translations look in a specific language. This setting is also available in the bottom status bar.
"sherlock.previewLanguageTag": "de"You can customize the colors for inline annotations directly through the VS Code settings JSON file. This feature allows you to set different colors for info and error states, enhancing the readability and usability of inline annotations.
Add the following properties to your VS Code settings.json file to customize annotation colors:
"sherlock.editorColors": {
	"info": {
		"foreground": "#color",
		"background": "rgba(number, number, number, 0.2)", // needs transparency
		"border": "#color"
	},
	"error": {
		"foreground": "#color",
		"background": "rgba(number, number, number, 0.2)", // needs transparency
		"border": "#color"
	}
}

// or (for all extensions)

"workbench.colorCustomizations": {
	"editorError.foreground": "#color",
	"editorError.background": "#color",
	"editorError.border": "#color",
	"editorInfo.foreground": "#color",
	"editorInfo.background": "#color",
	"editorInfo.border": "#color"
}You can disable inline annotations by setting the following property to false in your VS Code settings.json file or by using the command Sherlock: Toggle Inline Annotations. The default value is true.
"sherlock.inlineAnnotations.enabled": falseYou can disable the automatic generation of human IDs by setting the following property to false in your VS Code settings.json file. The default value is true.
"sherlock.extract.autoHumanId.enabled": falseNote
Tip: It's best practice to use random names for your messages. Read this guide for more information.
If you are having trouble with the loading icon not disappearing, this is a known issue & we are working with Visual Studio Code to fix it. In the meantime, you can right-click the Inlang icon to hide it:
If something isn't working as expected or you have a feature suggestion, please join our Discord or create an issue. We are happy to help!
<style> .flex-container { display: flex; flex-wrap: wrap; align-items: center; } .flex-item { width: 100%; } @media (min-width: 600px) { .flex-item { width: calc(50% - 16px); /* Two columns with a small gap between them */ margin-bottom: 0; padding: 0 8px; } } .flex-item .bold { font-weight: bold; font-size: 20px; } </style>