How to debug with Mary 5 in Eclipse (under Windows)
It is possible to debug and develop Mary 5 using only the Eclipse IDE. This is good news for developers who cannot install or do not want to use the required tools (e.g., git and mvn) on the command line (“Command Prompt”).
Download and install an up-to-date Java Development Kit. (Mary has been tested with Java 6.)
Download and install the Eclipse IDE. Unless already installed, also install the EGit and m2e plugins. This is done from within Eclipse (Help → Install New Software…).
To access Mary’s public source code repository using git from within Eclipse, you’ll need the EGit plugin.
To build the Mary source code with Maven from within Eclipse, you’ll need the Maven Integration (m2e) plugin.
Login to your github account (or create a new account), then navigate to the https://github.com/marytts/marytts repository and fork it. You can then clone your fork of the Mary repository to your local machine.
For example, assuming my github username is psibre, I can access my fork of the Mary repository using a URL such as https://github.com/psibre/marytts.git.
Note: If you already have a working SSH key configuration to access your github account from your machine, skip to the next step.
You will have to configure Eclipse and github to agree on your SSH public key. In Eclipse, open Window → Preferences, then navigate to General → Network Connections → SSH2. In the Key Management tab, click on Generate RSA Key…, after which you should see something like this:

Select the entire key text block and copy it into the clipboard.
Next, log into your github account, click on Edit your profile, then click on SSH Keys. Click Add SSH key, and paste the copied key text into the Key field. Give this key a meaningful Title, then click Add key.
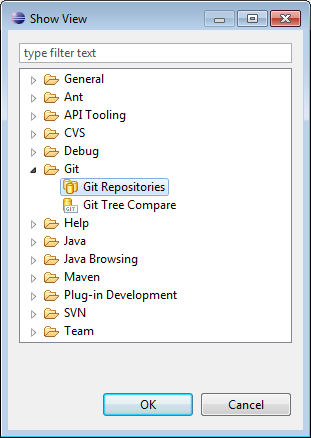
First, I bring up the Git Repositories view in Eclipse. To do this, I click on Window → Show View → Other…, followed by Git → Git Repositories:
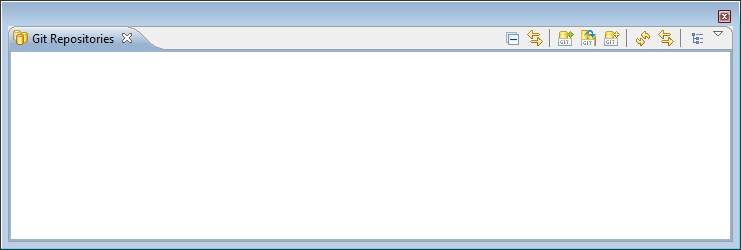
In the Git Repositories view,
I click on the ![]() icon to bring up the Clone Git Repository dialog. I fill in the necessary fields like this:
icon to bring up the Clone Git Repository dialog. I fill in the necessary fields like this:

Then, I click on Next >.
Upon successful authentication with github, I’m presented with the Branch Selection dialog. The 4.x branch is the old but stable source code for Mary 4.3.1 and later, but I want to work with the development version of Mary 5, which is in the master branch, so this is what I’ll select:

I click on Next > to select the Local Destination:

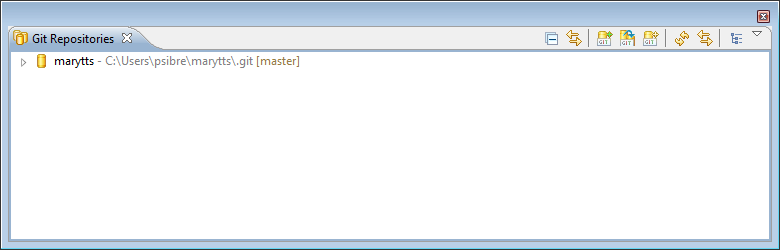
Finally, I click on Finish. After the repository has finished cloning, it shows up in my Git Repositories view:
With the Mary repository cloned to my local machine, I can now select File → Import… in Eclipse, to display the Import dialog:
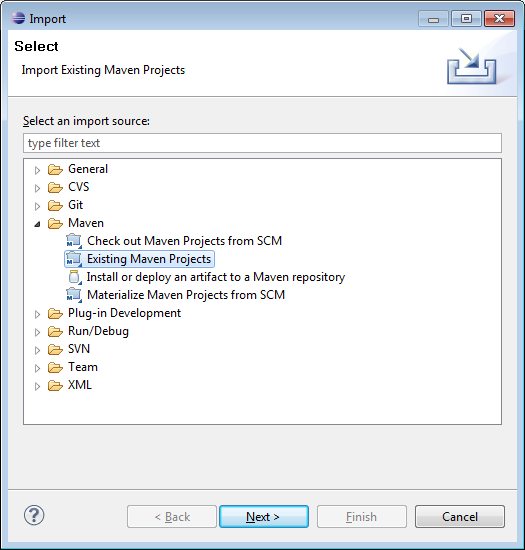
I select Maven → Existing Maven Project, then click Next >. I can then select the local directory into which I cloned the Mary repository:

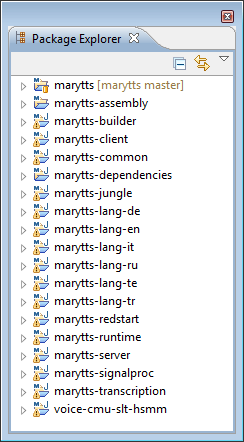
Eclipse will analyze Mary’s top-level pom.xml file (the Maven project file) and offer to import all of the modules that comprise the Mary system. Since this is exactly what I want, I leave them all selected, then click Finish. After some compiling, Eclipse shows me the top-level marytts project, and all of the modules, in the Package Explorer.
As a final step, I can tell the EGit plugin to track changes in my local repository, so that any modifications to the code can be easily managed within Eclipse. This is accomplished by right-clicking on the top-level marytts project, and selecting Team → Share Project…, which displays the following dialog:
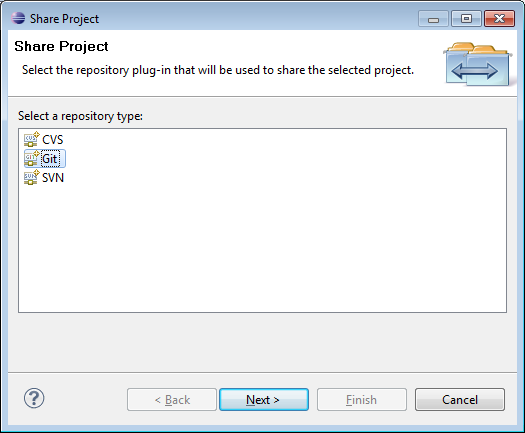
I select Git, then click Next > to configure the Git Repository:
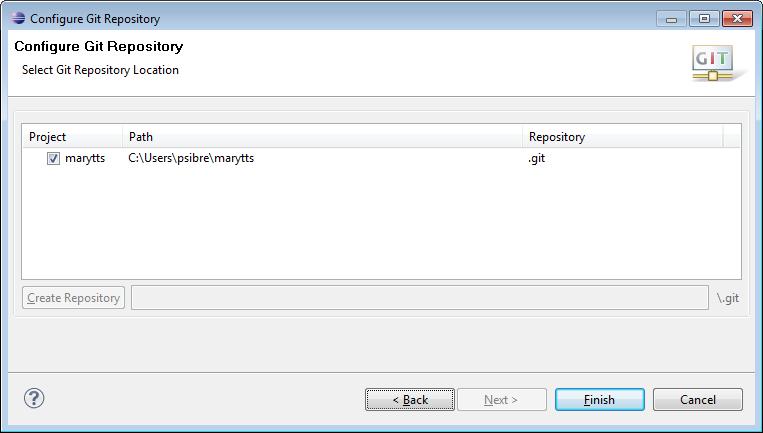
After I click Finish, the Package Explorer now shows the repository and branch beside the top-level marytts project, and if I make any modifications, they are marked by corresponding icon decorations. Since I’ve done this only for the top-level project and all of the modules are also contained within it, the rest of the module projects in the Package Explorer will not be cluttered by SCM-specific decorations later.