TkStyle is a Python library to style your GUI with a modern and pragmatic paradigm. It's part of the Pyrustic Open Ecosystem.
Installation | Reference | Cyberpunk
TkStyle is a styling library for Tkinter that takes advantage of the autocomplete feature of IDEs so that you hardly need any prior Tkinter styling knowledge.
Each Tkinter widget has a set of options that allow you to define its look. For example, the tkinter.Button widget has the background and foreground options to change the background color and the text color on the button respectively.
TkStyle reproduces for each widget a class which bears the name of the widget and which has attributes representing the options to modify the appearance of the widget.
Here is the definition of the tkstyle.Button class which is supposed to modify the look of the tkinter.Button widget:
class Button(_Style):
    _CLASS_NAME = "Button"

    def __init__(self):
        super().__init__()
        self.activeBackground = None  # "#ececec"
        self.activeForeground = None  # "#000000"
        self.anchor = None  # "center"
        self.background = None  # "#d9d9d9"
        self.borderWidth = None  # 1
        self.compound = None  # "none"
        self.default = None  # "disabled"
        self.disabledForeground = None  # "#a3a3a3"
        self.font = None  # TkDefaultFont
        self.foreground = None  # "#000000"
        self.height = None  # 0
        self.highlightBackground = None  # "#d9d9d9"
        self.highlightColor = None  # "#000000"
        self.highlightThickness = None  # 1
        self.justify = None  # "center"
        self.padX = None  # 3
        self.padY = None  # 1
        self.relief = None  # "raised"
        self.repeatDelay = None  # 0
        self.repeatInterval = None  # 0
        self.state = None  # "normal"
        self.underline = None  # -1
        self.width = None  # 0
        self.wrapLength = None  # 0
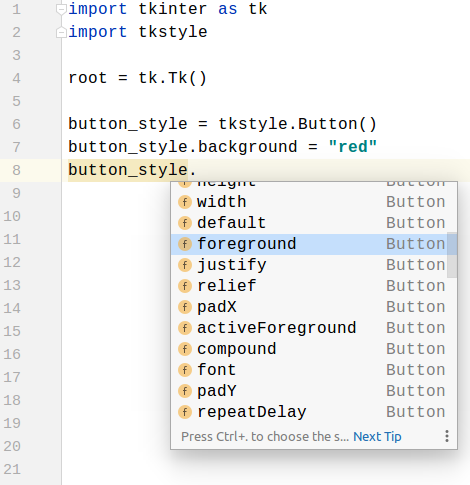
Since a style is a Python object and thanks to the autocomplete feature of the IDEs, we no longer need to know by heart the options to change the look of widgets:

PyCharm's autocomplete
Since Tkinter is a mature GUI toolkit, it sometimes indicates the legal values of an option when you don't set the correct value. For example, if you don't know which values the relief option of the tkinter.Button widget accepts, you can put an arbitrary string like oops and at runtime Tkinter will raise an informative exception:
_tkinter.TclError: bad relief "oops": must be flat, groove, raised, ridge, solid, or sunkenThese details combined make TkStyle a great modern paradigm for GUI styling that will save you a lot of time.
This code snippet shows how to style the instance of a widget:
import tkinter as tk
import tkstyle


root = tk.Tk()

# create and pack button_1
button_1 = tk.Button(root, text="Button 1")
button_1.pack(side=tk.LEFT, padx=5, pady=5)
# create and pack button_2
button_2 = tk.Button(root, text="Button 2")
button_2.pack(side=tk.LEFT, padx=5, pady=5)

# create the button_style
button_style = tkstyle.Button()
button_style.background = "tomato"
button_style.foreground = "white"
# apply the button_style to button_2
button_style.target(button_2)

# mainloop
root.mainloop()A megawidget is a custom widget built with other native widgets.
For example, megawidget.Table is built with tkinter.Listbox, tkinter.Label, and tkinter.Scrollbar.
Since a megawidget is not a native widget, it does not have a class that represents it in TkStyle.
So how do you style a megawidget ?
Well, megawidgets subclass tkinter.Frame or tkinter.Toplevel and TkStyle allows styles to be nested like Matryoshka dolls.
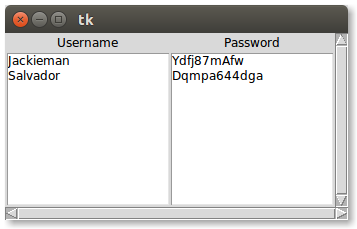
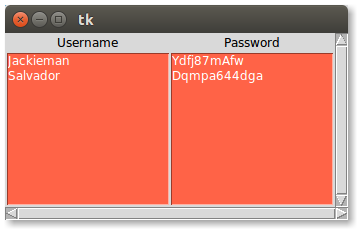
Here's how we can style the Listboxes that make up a Table:
import tkinter as tk
import tkstyle
from megawidget.table import Table


root = tk.Tk()

# table titles
titles = ("Username", "Password")
# table data
data = [("Jackieman", "Ydfj87mAfw"),
        ("Salvador", "Dqmpa644dga")]
# create and pack table
table = Table(root, titles=titles, data=data)
table.pack()

# create the listbox_style
listbox_style = tkstyle.Listbox()
listbox_style.background = "tomato"
listbox_style.foreground = "white"

# create the table_style
table_style = tkstyle.Frame()  # megawidgets subclass tk.Frame
# add the listbox_style to the table_style by specifying
# a XResources-like pattern that matches Listboxes: "*Listbox"
table_style.add(listbox_style, pattern="*Listbox")
# apply the table_style to table
table_style.target(table)

# mainloop
root.mainloop()A theme is a collection of styles. While a style allows you to change the look of a particular (mega)widget instance, a theme allows you to apply a style to multiple (mega)widgets or also to a particular widget.
In this example, we'll create a theme that changes the look of all the buttons:
import tkinter as tk
import tkstyle


def get_button_style():
    # create the button_style
    button_style = tkstyle.Button()
    button_style.background = "tomato"
    button_style.foreground = "white"
    return button_style


def get_theme():
    # create the theme
    theme = tkstyle.Theme()
    # add the button_style to the theme
    button_style = get_button_style()
    theme.add(button_style, pattern="*Button")
    # the previous line could be this:
    # theme.add(button_style)
    # When you don't set a pattern, by default, the added style
    # class name prefixed with "*" is used as pattern
    return theme


root = tk.Tk()
theme = get_theme()
theme.target(root)

# create and pack button_1
button_1 = tk.Button(root, text="Button 1")
button_1.pack(side=tk.LEFT, padx=5, pady=5)
# create and pack button_2
button_2 = tk.Button(root, text="Button 2")
button_2.pack(side=tk.LEFT, padx=5, pady=5)

# mainloop
root.mainloop()In this other example, the theme contains a style that targets a particular instance of tkinter.Button:
import tkinter as tk
import tkstyle


def get_button_style():
    # create the button_style
    button_style = tkstyle.Button()
    button_style.background = "tomato"
    button_style.foreground = "white"
    return button_style


def get_theme():
    # create the theme
    theme = tkstyle.Theme()
    # add the button_style to the theme
    button_style = get_button_style()
    theme.add(button_style, pattern="*mybutton")
    return theme


root = tk.Tk()
theme = get_theme()
theme.target(root)

# create and pack button_1
button_1 = tk.Button(root, text="Button 1")
button_1.pack(side=tk.LEFT, padx=5, pady=5)
# create and pack button_2
button_2 = tk.Button(root, name="mybutton", text="Button 2")
button_2.pack(side=tk.LEFT, padx=5, pady=5)

# mainloop
root.mainloop()So in short:
- You don't need to know the options by heart to customize the look of a widget.
- You don't need to learn yet another DSL.
TkStyleuses object oriented programming and takes advantage of your IDE.- There is a flag that allows TkStyle to forgive your mistakes (by default ignore_error = True), so your app doesn't crash just because you misspelled a color name.
- You can determine which widgets used a given style since a style is just a Python object and therefore your IDE can locate usages.
- You can use code organization best practices to manage the styling aspect of your project since
TkStylelets you use object oriented programming.
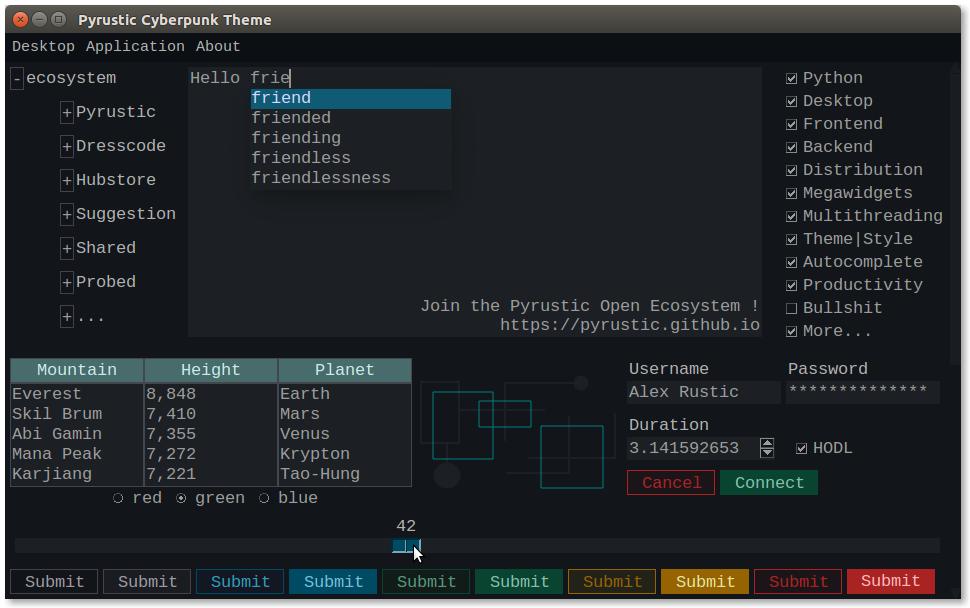
I invite you to check out the Cyberpunk dark theme which uses the TkStyle library.
$ pip install cyberpunk-themeimport tkinter as tk
from cyberpunk_theme import Cyberpunk
from cyberpunk_theme.widget.button import get_button_style_4
root = tk.Tk()
# apply the Cyberpunk theme to the GUI
cyberpunk_theme = Cyberpunk()
cyberpunk_theme.target(root)
# write your awesome code here
# ...
# ...
button = tk.Button(root, text="Button")
button.pack()
# do you need to set dynamically a specific style to a button ?
# there are 10 styles for buttons ! from the black to the red style !
button_style_4 = get_button_style_4()
button_style_4.target(button)
# mainloop
root.mainloop()Install for the first time:
$ pip install tkstyleTo upgrade TkStyle:
$ pip install tkstyle --upgrade --upgrade-strategy eager


