The Application Interface
- Now that all of your content is registered and staged, it's time to go to the application.
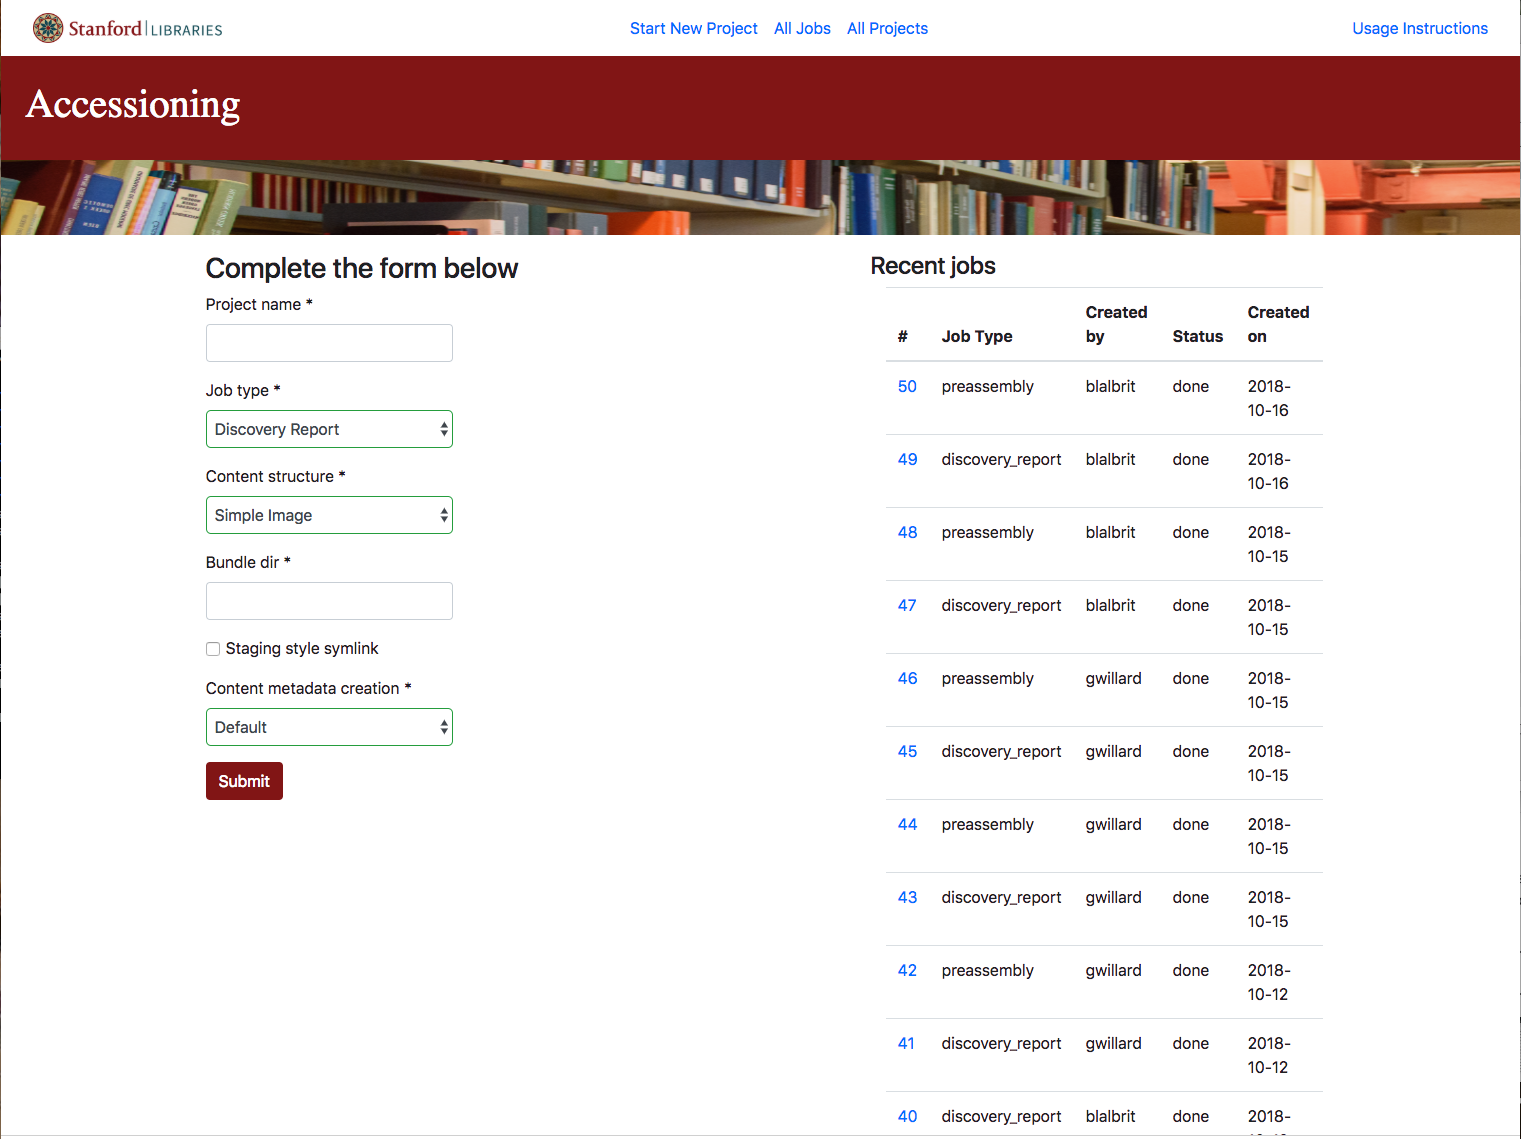
- When you first arrive on the main page of the application, you are presented with a form on the left-hand side of the screen and a job history on the right-hand side of the screen.

-
To prepare a job, there are only seven pieces of information needed
-
Project name[required]- This must be unique for a specific user, but does not need to be universally unique. You will get an error if you have already submitted a job with an identical name
- Job names cannot include spaces. The allowable characters are: A-Z, a-z, 0-9, hyphen and underscore.
- Hint: It's often easiest to use the accessioning ticket number for the Project Name - and makes it easier for the accessioning manager to track your job
-
Job type[required]- You must always start with the
Discovery Reportin order to make sure that your job is valid and able to be accessioned - After the Discovery Report comes back with no errors (this might take several tries), then the
Pre Assembly Runoption can be chosen, but there is another way to do that which we will address later.
- You must always start with the
-
Content structure[required]- Note: this is not a perfect match to what is offered on the Argo registration screen
-
Simple Imageis for any non-book-like image materials -
Simple Bookcovers book-like materials -
Book as Imageis for book-like materials that should not be paginated -
Fileis for objects that should be file-download only -
Mediais for material that should be presented in the embedded streaming viewer (audio or visual) -
3dis for 3d objects
-
- If your content doesn't easily fit into one of these categories, please consult with the Accessioning Manager before accessioning the content.
- Note: this is not a perfect match to what is offered on the Argo registration screen
-
Bundle dir[required]- The bundle directory is where your content is stored - this will always take the form
/{storageMount}/{projectDirectory}/{contentDirectory}- Note the preceding slash in the above model
- Your {storageMount} value must be in the pre-approved list described elsewhere or you will get an almost immediate error
- The bundle directory is where your content is stored - this will always take the form
-
Staging style symlink[optional]- Most projects should not use this option.
- If you have questions about whether it is better to symlink or not for your content, please contact the Repository Manager.
-
Content metadata creation[required]-
Defaultputs each file in a separate resource in the digital object -
Filenamebundles files with the same filename but different extensions into a single resource (for instance foo.tif and foo.jp2), so this is the preferred method for image and book projects -
Mediauses a special Media manifest to organize the content into custom resource dispositions
-
-
Preserve, Shelve, Publish Settings[required]-
Defaultuses the publish, shelve, and preserve settings that are appropriate to most pre-assembly projects. These settings generally distinguish "access" files from "preservation master" files based on file type and only make the access files available on the Purl. Note that if using themediacontent type, you should use this setting: it will not affect the settings in yourmedia_manifest.csvfile. -
Preserve=Yes, Shelve=Yes, Publish=Yeswill make all files in your pre-assembly job available from the Purl as well as send them to preservation storage. Only use this setting if you know that the default settings will not be appropriate for your pre-assembly job, and that all files in the job should be made available online. If in doubt about whether to use this setting, please contact the Repository Manager.
-
-
-
Once you have filled out the form correctly and clicked the
Submitbutton, a job will be created and will appear in the right-handRecent jobscolumn. -
You can refresh the page, impatiently, to see if your job status changes from
not donetodoneOR you can just walk away... the system will email you when your report (or preassembly run) is complete.