How to configure HAProxy and automatic updation of it’s configuration file each time managed node is added using Ansible over AWS EC2 Instance
- About Ansible
- About HAProxy
- About Apache Httpd Webserver
- Project Understanding : Dynamic Inventory Setup
- Project Understanding : Ansible Playbook Setup
Ansible is a radically simple IT automation engine that automates cloud provisioning, configuration management, application deployment, intra-service orchestration, and many other IT needs.
-
Simple
- Human readable automation
- No special coding skills needed
- Tasks executed in order
- Get productive quickly
-
Powerful
- App deployment
- Configuration management
- Workflow orchestration
- Orchestrate the app lifecycle
-
Agentless
- Agentless architecture
- Uses OpenSSH and WinRM
- No agents to exploit or update
- Predictable, reliable and secure
- Human readable automation
- No special coding skills needed
- Tasks executed in order
- Get productive quickly
- App deployment
- Configuration management
- Workflow orchestration
- Orchestrate the app lifecycle
- Agentless architecture
- Uses OpenSSH and WinRM
- No agents to exploit or update
- Predictable, reliable and secure
https://docs.ansible.com/
. . .
- HAProxy is free, open source software that provides a high availability load balancer and proxy server for TCP and HTTP-based applications that spreads requests across multiple servers.
- It’s written in C and has a reputation for being fast and efficient in terms of processor and memory usage.
For HAProxy Documentation, visit the link mentioned below:
https://www.haproxy.com/documentation/hapee/latest/onepage/intro/
. . .
- The Apache HTTP Server, colloquially called Apache, is a free and open-source cross-platform web server software, released under the terms of Apache License 2.0.
- Apache is developed and maintained by an open community of developers under the auspices of the Apache Software Foundation.
- The vast majority of Apache HTTP Server instances run on a Linux distribution, but current versions also run on Microsoft Windows, OpenVMS and a wide variety of Unix-like systems.
For Apache HTTPD Documentation, visit the link mentioned below:
https://httpd.apache.org/docs/
. . .
Dynamic inventory is an Ansible plugin that makes an API call to AWS to get the instance information in the run time. It gives the ec2 instance details dynamically to manage the AWS infrastructure.
Lets understand the procedure to setup Dynamic Inventory for AWS EC2 Instance one by one :
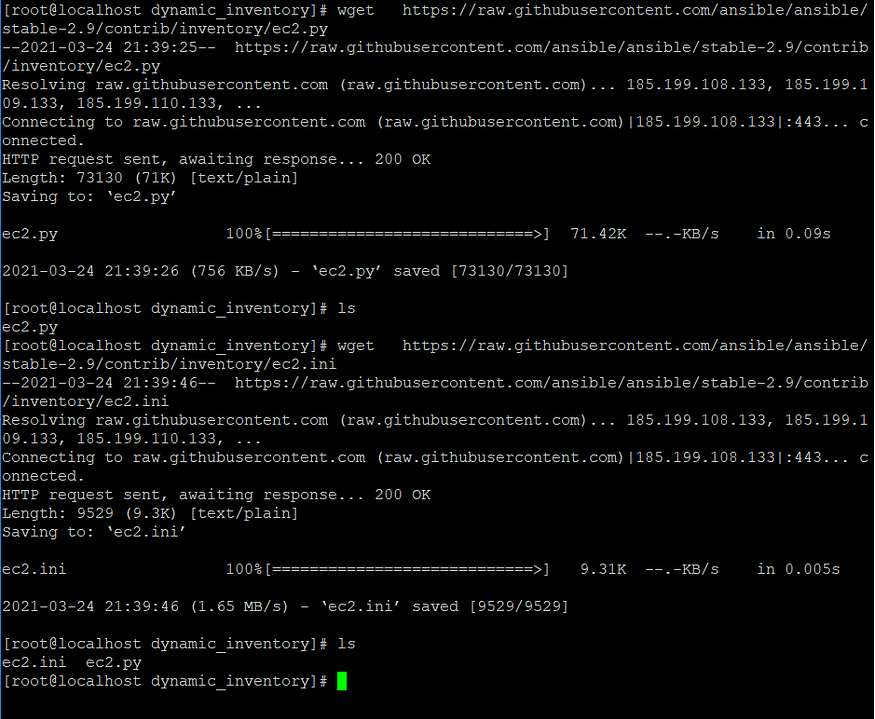
- Create a directory for installing dynamic inventory modules for Amazon EC2.
- Install dynamic inventory modules i.e., ec2.py and ec2.ini, also both files are interdependent on each other. ec2.ini is responsible for storing information related to AWS account whereas ec2.py is responsible for executing modules that collects the information of instances launched on AWS.
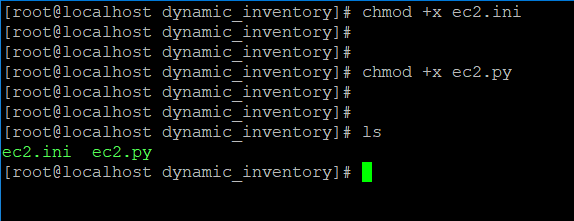
- Next, make the dynamic inventory files executable using chmod command.
- Key needs to be provided in order to login to the instances newly launched. Also key with .pem format works in this case and not the one with .ppk format. Permission needs to be provided to respective key to set it up in read mode.
- Ansible Configuration Setup
- Mention the path to the directory created for installing dynamic inventory module under inventory keyword in the configuration file.
- Since Ansible works on SSH protocol for Linux OS and it prompts yes/no by default when used, in order to disable it , host_key_checking needs to be set to false.
- Warnings given by commmands could be disabled by setting command_warnings to false.
- The path to the private key could be provided under private_key_file in the configuration file.
- Let’s execute the command to check if there is any issue in the dynamic inventory files in the directory containing the same.
- As per the output correct above, some changes needs to be made in the respective file. In case of ec2.py, version specified needs to be changed i.e., from python to python3.
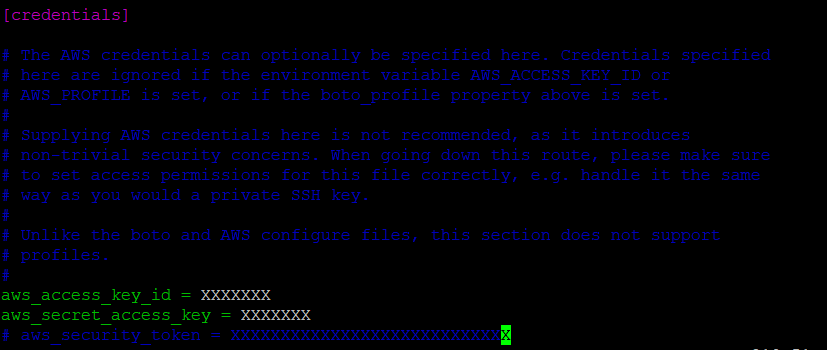
- Also, we need to update regions, AWS account access_key and secret_access_key inside ec2.ini file.
- After the changes made in the previous step, export aws_region, aws_access_key and aws_access_secret_key on the command line.
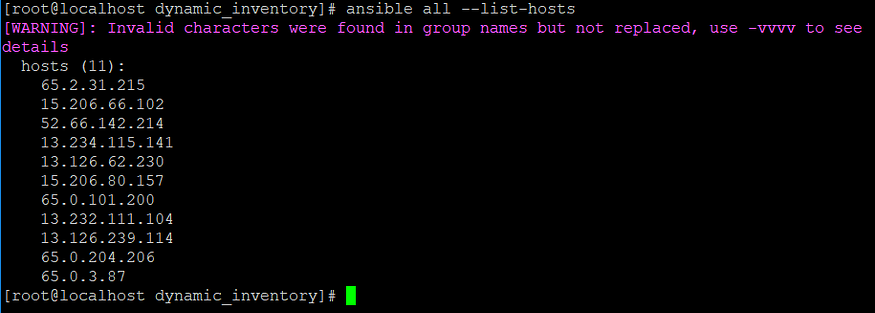
- After the following setup, the command used before provides the list of hosts in AWS properly. It indicates that the particular issue has been resolved successfully.
mkdir dynamic_inventoryCommand for creation of ec2.py dynamic inventory file 👇
wget https://raw.githubusercontent.com/ansible/ansible/stable-2.9/contrib/inventory/ec2.pyCommand for creation of ec2.ini dynamic inventory file 👇
wget https://raw.githubusercontent.com/ansible/ansible/stable-2.9/contrib/inventory/ec2.iniNote: Install wget command in case it’s not present. The command for the same(for RHEL) is mentioned below:
sudo yum install wgetchmod +x ec2.py
chmod +x ec2.inichmod 400 keypair.pemNote:
Permissions in Linux
0 -> No Permission      -> ---
1 -> Execute            -> --x
2 -> Write              -> -w-
3 -> Execute+Write      -> -wx
4 -> Read               -> r--
5 -> Read+Execute       -> r-x
6 -> Read+Write         -> rw-
7 -> Read+Write+Execute -> rwx
[defaults]

inventory = path_to_directory
host_key_checking = false
command_warnings = false
private_key_file = path_to_key
ask_pass = false

[privilege_escalation]
become=true
become_method=sudo
become_user=root
become_ask_pass=false
ec2.py
#!/usr/bin/python3ec2.ini
Region specified is ‘ap-south-1’ : ec2.ini
export AWS_REGION='ap-south-1'(in this case)
export AWS_ACCESS_KEY=XXXX
export AWS_ACCESS_SECRET_KEY=XXXX
. . .
Let’s understand its implementation part by part
- Prerequisite: Installation of boto3 (Python SDK for AWS)
- “Creation of VPC for EC2 Instance”: Creates AWS VPC(Virtual Private Cloud) using the ec2_vpc_net module and stores the value in the variable ec2_vpc. The required parameters to be specified are cidr_block and name.
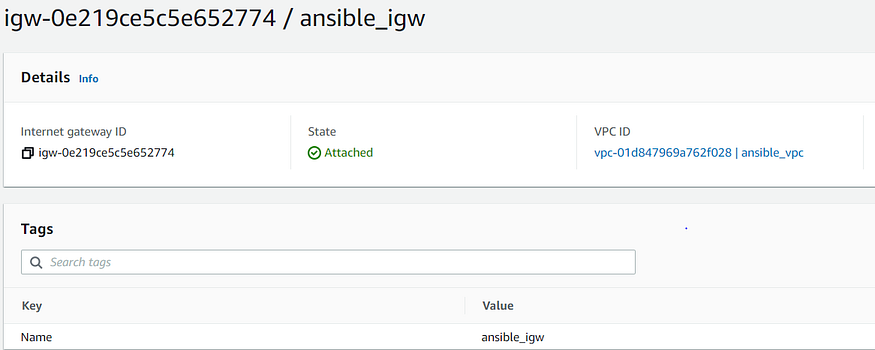
- “Internet Gateway for VPC”: Sets up internet gateway for VPC created in the previous task. One of the parameters required for this setup is vpc_id (return value of ec2_vpc_net module). It uses ec2_vpc_igw module and stores the value in variable igw_info.
- “VPC Subnet Creation”: Creates Subnet for VPC created before in the specified availability zone in the region. One of the parameters required for this setup is vpc_id(return value of ec2_vpc_net module). Also, map_public should be set to yes so that the instances launched within it would be assigned public IP by default. It uses ec2_vpc_subnet module and stores the value in variable subnet_info.
- “Creation of VPC Subnet Route Table”: Creates Route Table and associates it with the subnet. Also, it specifies the route to the internet gateway created before in the route table. Parameters like vpc_id(required), subnets & gateway_id could be obtained as return value from ec2_vpc_net, ec2_vpc_subnet and ec2_vpc_igw respectively.
- “Security Group Creation”: Creates Security Group for both loadbalancer & webserver. One of the attributes i.e., vpc_id could be obtained as a return value from ec2_vpc_net module. Incoming traffic could be limited by specifying the rules that includes protocol, ports as well CIDR IP. It uses ec2_group module and stores the value in variable security_group_info.
- “Creation of EC2 Instance for Load Balancer”: Creates EC2 Instance for Load Balancer. Parameters like vpc_subnet_id & group_id could be obtained as a return value from ec2_vpc_subnet and ec2_group module. exact_count parameter is set to 1 in this case. wait parameter is used to wait for the instances created to reach its desired state, also timeout w.r.t. waiting has also been set using wait_timeout parameter.
- “Creation of EC2 Instance for Web Server”: Same as previous task. Except in this case , the value of exact_count parameter is dynamic and could be specified as per requirement.
- “meta: refresh_inventory”: Meta tasks are a special kind of task that influences Ansible internal execution or state. refresh_inventory is the meta task that reloads the dynamic inventory generated. In this case, it reloads the dynamic inventory that makes it easier to scale up or scale down the number of EC2 Instances without much hindrance.
- “pause”: This module is used for pausing Ansible playbook execution. In this case, it pauses the execution to provide meta task to refresh the dynamic inventory.
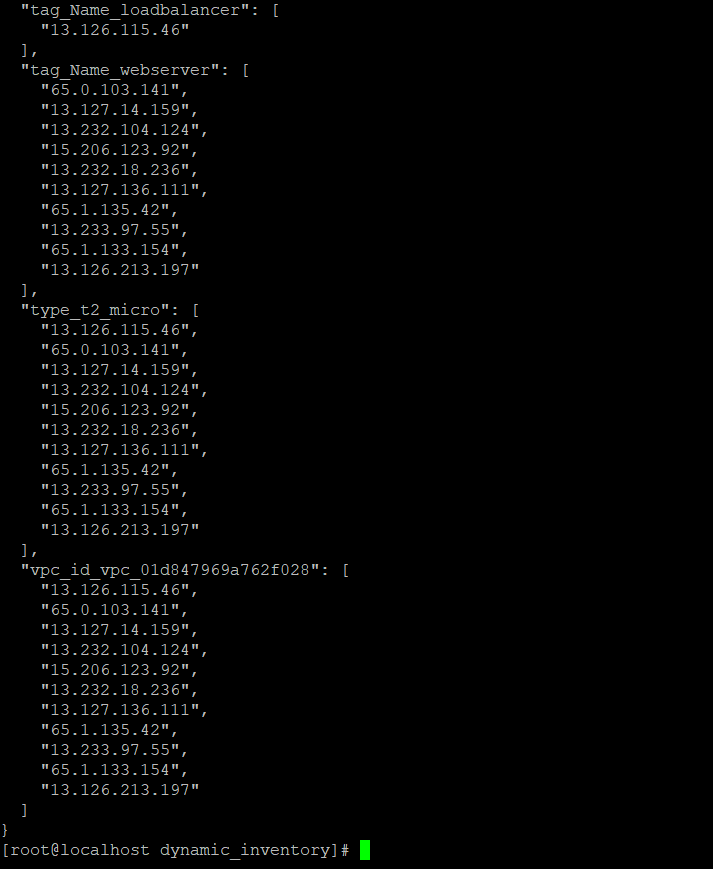
- The main reason behind specifying the instance_tags for both loadbalancer and webserver, as dynamic inventory would create host groups accordingly which provides a proper distinction between loadbalancer and webserver instances. The list of dynamic host groups could be obtained using the command mentioned below:
- The reason behind usage of ignore_errors keyword in “Creation of EC2 Instance for Web Server” task is because there are chances where it might fail due to timeout, though the required number of instances are set up. This would break the flow of execution of the playbook, thereby to prevent this, the keyword has been set to yes.
- Parameters i.e., aws_access_key, aws_secret_key and region specified in each task above could be skipped, if its value has been already exported as mentioned below:
- count_tag parameter needs to mandatorily specified along with exact_count parameter to determine the number of instances running based on a tag criteria.
- name: Installation of boto3 library
  pip:
    name: boto3
state: present- name: Creation of VPC for EC2 Instance
ec2_vpc_net:
aws_access_key: "{{ aws_access_key }}"
aws_secret_key: "{{ aws_secret_key }}"
region: "{{ region }}"
name: "{{ vpc_name}}"
cidr_block: "{{ cidr_block_vpc }}"
state: present
register: ec2_vpc- name: Internet Gateway for VPC
ec2_vpc_igw:
aws_access_key: "{{ aws_access_key }}"
aws_secret_key: "{{ aws_secret_key }}"
region: "{{ region }}"
state: present
vpc_id: "{{ ec2_vpc.vpc.id }}"
tags:
Name: "{{ igw_name }}"
register: igw_info- name: VPC Subnet Creation
ec2_vpc_subnet:
aws_access_key: "{{ aws_access_key }}"
aws_secret_key: "{{ aws_secret_key }}"
region: "{{ region }}"
vpc_id: "{{ ec2_vpc.vpc.id }}"
az: "{{ availability_zone }}"
state: present
cidr: "{{ cidr_subnet }}"
map_public: yes
tags:
Name: "{{ subnet_name }}"
register: subnet_info
- name: Creation of VPC Subnet Route Table
ec2_vpc_route_table:
aws_access_key: "{{ aws_access_key }}"
aws_secret_key: "{{ aws_secret_key }}"
region: "{{ region }}"
vpc_id: "{{ ec2_vpc.vpc.id }}"
state: present
tags:
Name: "{{ route_table_name }}"
subnets: [ "{{ subnet_info.subnet.id }}" ]
routes:
- dest: 0.0.0.0/0
gateway_id: "{{ igw_info.gateway_id }}"- name: Security Group Creation
ec2_group:
aws_access_key: "{{ aws_access_key }}"
aws_secret_key: "{{ aws_secret_key }}"
region: "{{ region }}"
name: "{{ sg_name }}"
vpc_id: "{{ ec2_vpc.vpc.id }}"
state: present
description: Security Group for both Loadbalancer & Webserver
tags:
Name: "{{ sg_name }}"
rules:
- proto: tcp
ports:
- 80
- 8080
- 22
cidr_ip: 0.0.0.0/0
register: security_group_info- name: Creation of EC2 Instance for Load Balancer
ec2:
aws_access_key: "{{ aws_access_key }}"
aws_secret_key: "{{ aws_secret_key }}"
region: "{{ region }}"
image: "{{ image_id }}"
exact_count: 1
instance_type: "{{ instance_type }}"
vpc_subnet_id: "{{ subnet_info.subnet.id }}"
key_name: "{{ key_name }}"
group_id: "{{ security_group_info.group_id }}"
wait: yes
wait_timeout: 600
instance_tags:
Name: loadbalancer
count_tag:
Name: loadbalancer- name: Creation of EC2 Instance for Web Server
ec2:
aws_access_key: "{{ aws_access_key }}"
aws_secret_key: "{{ aws_secret_key }}"
region: "{{ region }}"
image: "{{ image_id }}"
instance_type: "{{ instance_type }}"
vpc_subnet_id: "{{ subnet_info.subnet.id }}"
key_name: "{{ key_name }}"
group_id: "{{ security_group_info.group_id }}"
exact_count: "{{ instance_count }}"
wait: yes
wait_timeout: 600
instance_tags:
Name: webserver
count_tag:
Name: webserver
ignore_errors: yes```yaml
- meta: refresh_inventory
```
- pause:
minutes: 2Note:
./ec2.py --listexport AWS_REGION='ap-south-1'(in this case)
export AWS_ACCESS_KEY=XXXX
export AWS_ACCESS_SECRET_KEY=XXXX- "Installation of HAProxy Software" : Installs HAProxy Software
- “HAProxy Configuration File Setup” : Copies the configuration file from templates directory in the Controller Node to the default path of HAProxy configuration file in the Managed Node. Changes in configuration file notifies the handler that results in restart of HAProxy service.
- “Starting Load Balancer Service” : Starts HAProxy Service
- handlers -“Restart Load Balancer” : Restarts HAProxy service in case of change in configuration file(when new managed node configured with Httpd Webserver is added).
- name: Installation of HAProxy Software
package:
name: "haproxy"
state: present- name: HAProxy Configuration File Setup
template:
dest: "/etc/haproxy/haproxy.cfg"
src: "templates/haproxy.cfg"
notify: Restart Load Balancer- name: Starting Load Balancer Service
service:
name: "haproxy"
state: started
enabled: yes- name: Restart Load Balancer
systemd:
name: "haproxy"
state: restarted
enabled: yes- “HTTPD Installation” : Installs Apache Httpd Software
- “Web Page Setup” : Copies the web page from web directory in Controller Node to the Document Root in the Managed Node.
- “Starting HTTPD Service” : Starts Httpd Service
- name: HTTPD Installation
package:
name: "httpd"
state: present- name: Web Page Setup
template:
dest: "/var/www/html"
src: "web/index.html"- name: Starting HTTPD Service
service:
name: "httpd"
state: started
enabled: yes- hosts: localhost
gather_facts: no
vars_files:
- vars.yml
tasks:
- name:
pip: Installation of boto3 library
name: boto3
state: present
- name: Creation of VPC for EC2 Instance
  ec2_vpc_net:
    aws_access_key: "{{ aws_access_key }}"
    aws_secret_key: "{{ aws_secret_key }}"
    region: "{{ region }}"
    name: "{{ vpc_name}}"
    cidr_block: "{{ cidr_block_vpc }}"
    state: present
  register: ec2_vpc
- name: Internet Gateway for VPC
  ec2_vpc_igw:
    aws_access_key: "{{ aws_access_key }}"
    aws_secret_key: "{{ aws_secret_key }}"
    region: "{{ region }}"
    state: present
    vpc_id: "{{ ec2_vpc.vpc.id  }}"
    tags:
      Name: "{{ igw_name }}"
  register: igw_info
- name: VPC Subnet Creation
  ec2_vpc_subnet:
    aws_access_key: "{{ aws_access_key }}"
    aws_secret_key: "{{ aws_secret_key }}"
    region: "{{ region }}"
    vpc_id: "{{ ec2_vpc.vpc.id  }}"
    az: "{{ availability_zone }}"
    state: present
    cidr: "{{ cidr_subnet  }}"
    map_public: yes
    tags:
      Name: "{{ subnet_name }}"
  register: subnet_info
- name: Creation of VPC Subnet Route Table
  ec2_vpc_route_table:
    aws_access_key: "{{ aws_access_key }}"
    aws_secret_key: "{{ aws_secret_key }}"
    region: "{{ region }}"
    vpc_id: "{{ ec2_vpc.vpc.id  }}"
    state: present
    tags:
      Name: "{{ route_table_name }}"
    subnets: [ "{{ subnet_info.subnet.id }}" ]
    routes:
      - dest: 0.0.0.0/0
        gateway_id: "{{ igw_info.gateway_id }}"
- name: Security Group Creation
  ec2_group:
    aws_access_key: "{{ aws_access_key }}"
    aws_secret_key: "{{ aws_secret_key }}"
    region: "{{ region }}"
    name: "{{ sg_name  }}"
    vpc_id: "{{ ec2_vpc.vpc.id  }}"
    state: present
    description: Security Group for both Loadbalancer & Webserver
    tags:
      Name: "{{ sg_name  }}"
    rules:
    - proto: tcp
      ports:
        - 80
        - 8080
        - 22
      cidr_ip: 0.0.0.0/0
  register: security_group_info
- name: Creation of EC2 Instance for Load Balancer
  ec2:
    aws_access_key: "{{ aws_access_key }}"
    aws_secret_key: "{{ aws_secret_key }}"
    region: "{{ region }}"
    image: "{{ image_id }}"
    exact_count: 1
    instance_type: "{{ instance_type }}"
    vpc_subnet_id: "{{ subnet_info.subnet.id }}"
    key_name: "{{ key_name }}"
    group_id: "{{ security_group_info.group_id  }}"
    wait: yes
    wait_timeout: 600
    instance_tags:
      Name: loadbalancer
    count_tag:
      Name: loadbalancer
- name: Creation of EC2 Instance for Web Server
  ec2:
    aws_access_key: "{{ aws_access_key }}"
    aws_secret_key: "{{ aws_secret_key }}"
    region: "{{ region }}"
    image: "{{ image_id }}"
    instance_type: "{{ instance_type }}"
    vpc_subnet_id: "{{ subnet_info.subnet.id }}"
    key_name: "{{ key_name }}"
    group_id: "{{ security_group_info.group_id  }}"
    exact_count: "{{ instance_count }}"
    wait: yes
    wait_timeout: 600
    instance_tags:
      Name: webserver
    count_tag:
      Name: webserver
  ignore_errors: yes
- meta: refresh_inventory
- pause:
    minutes: 2
- hosts: tag_Name_loadbalancer
vars_files:
- vars.yml
remote_user: "{{ remote_user }}"
tasks:
- name: Installation of HAProxy Software
  package:
    name: "haproxy"
    state: present
- name: HAProxy Configuration File Setup
  template:
    dest: "/etc/haproxy/haproxy.cfg"
    src: "templates/haproxy.cfg"
  notify: Restart Load Balancer
- name: Starting Load Balancer Service
  service:
    name: "haproxy"
    state: started
    enabled: yes
handlers:
- name: Restart Load Balancer
  systemd:
    name: "haproxy"
    state: restarted
    enabled: yes
- hosts: tag_Name_webserver
vars_files:
- vars.yml
remote_user: "{{ remote_user }}"
tasks:
- name: HTTPD Installation
  package:
    name: "httpd"
    state: present
- name: Web Page Setup
  template:
    dest: "/var/www/html"
    src: "web/index.html"
- name: Starting HTTPD Service
  service:
    name: "httpd"
    state: started
enabled: yesNote:
In case of hosts corrresponding to loadbalancer and webserver i.e., “tag_Name_loadbalancer” and “tag_Name_webserver” respectively, remote-user needs to be setup in this case as the setup is present in the remote system like EC2 Instance.
aws_access_key: "XXXX"
aws_secret_key: "XXXX"
region: "ap-south-1"
vpc_name: "ansible_vpc"
cidr_block_vpc: "10.0.0.0/16"
igw_name: "ansible_igw"
cidr_subnet: "10.0.1.0/24"
subnet_name: "ansible_subnet"
route_table_name: "ansible_route_table"
sg_name: "ansible_sg"
instance_type: "t2.micro"
key_name: "bastion"
instance_count: 10
image_id: "ami-068d43a544160b7ef"
availability_zone: "ap-south-1a"
remote_user: "ec2-user"<body bgcolor='aqua'>
<br><br>
<b>IP Addresses</b> : {{ ansible_all_ipv4_addresses }}#---------------------------------------------------------------------
# Example configuration for a possible web application. See the
# full configuration options online.
#
# https://www.haproxy.org/download/1.8/doc/configuration.txt
#
#---------------------------------------------------------------------#---------------------------------------------------------------------
# Global settings
#---------------------------------------------------------------------
global
# to have these messages end up in /var/log/haproxy.log you will
# need to:
#
# 1) configure syslog to accept network log events. This is done
# by adding the '-r' option to the SYSLOGD_OPTIONS in
# /etc/sysconfig/syslog
#
# 2) configure local2 events to go to the /var/log/haproxy.log
# file. A line like the following can be added to
# /etc/sysconfig/syslog
#
# local2.* /var/log/haproxy.log
#
log 127.0.0.1 local2chroot /var/lib/haproxy
pidfile /var/run/haproxy.pid
maxconn 4000
user haproxy
group haproxy
daemon# turn on stats unix socket
stats socket /var/lib/haproxy/stats# utilize system-wide crypto-policies
ssl-default-bind-ciphers PROFILE=SYSTEM
ssl-default-server-ciphers PROFILE=SYSTEM#---------------------------------------------------------------------
# common defaults that all the 'listen' and 'backend' sections will
# use if not designated in their block
#---------------------------------------------------------------------
defaults
mode http
log global
option httplog
option dontlognull
option http-server-close
option forwardfor except 127.0.0.0/8
option redispatch
retries 3
timeout http-request 10s
timeout queue 1m
timeout connect 10s
timeout client 1m
timeout server 1m
timeout http-keep-alive 10s
timeout check 10s
maxconn 3000#---------------------------------------------------------------------
# main frontend which proxys to the backends
#---------------------------------------------------------------------
frontend main
bind *:8080
acl url_static path_beg -i /static /images /javascript /stylesheets
acl url_static path_end -i .jpg .gif .png .css .jsuse_backend static if url_static
default_backend app#---------------------------------------------------------------------
# static backend for serving up images, stylesheets and such
#---------------------------------------------------------------------
backend static
balance roundrobin
server static 127.0.0.1:4331 check#---------------------------------------------------------------------
# round robin balancing between the various backends
#---------------------------------------------------------------------
backend app
balance roundrobin
{% for hosts in groups['tag_Name_webserver'] %}
server app1 {{ hosts }}:80 check
{% endfor %}
Jinja template and for loop specified above makes HAProxy configuration file more dynamic as it would add managed nodes specified under ‘tag_Name_webserver’ host dynamically.
Output GIF
. . .
https://www.linkedin.com/in/satyam-singh-95a266182
