Home
Welcome to the pds_HealthData_Transfer_app wiki!
- Xcodeをインストール (https://i-app-tec.com/ios/xcode-install.html)
- Xcodeを立ち上げ、pds_healthData_Transfer_appの読み込み
- Apple IDの作成 (https://i-app-tec.com/ios/developer-registration.html)
- XcodeにApple IDの設定 (https://i-app-tec.com/ios/device-test.html)
- iPhoneにアプリのインストール
-
HealthDataTransferアプリをタップして、アプリを立ち上げる
-
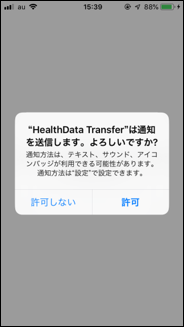
アプリ起動後、通知機能を許可の有無の選択
-
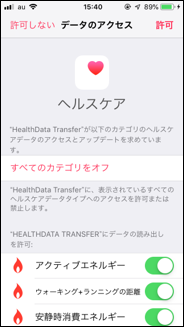
Personiumに格納するヘルスケアデータの選択
-
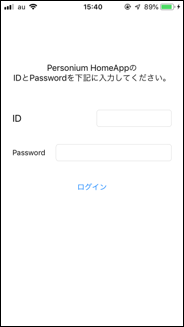
Personium HomeAppの同じログインのIDとpasswordを入力
-
HealthData Transferアプリの初期設定完了
-
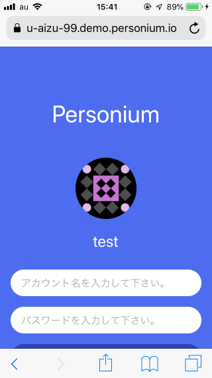
Safari上でPersonium HomeAppを起動し、ログインする
-
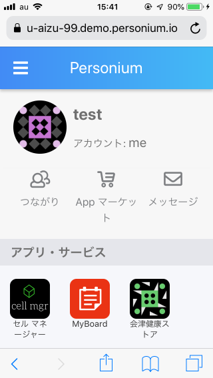
会津健康ストアをクリック
-
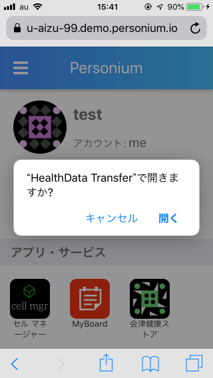
開くをクリック
-
HealthData Transferアプリが起動
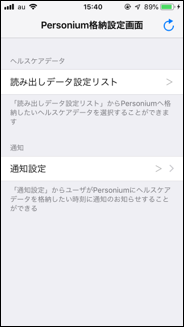
・読み出しデータ設定リスト・・・Personiumに格納するヘルスケアデータの選択ができる。 ・通知設定・・・ユーザにPersoniumに格納した時刻に通知を設定ができる。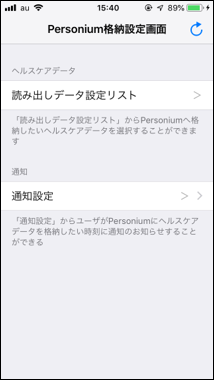
- アプリが起動時に、Personiumにデータの格納ができる(バックグラウンド状態はデータ格納されません)
- Personiumに格納するヘルスケアデータを選択ができる
- 通知機能を設定ができる