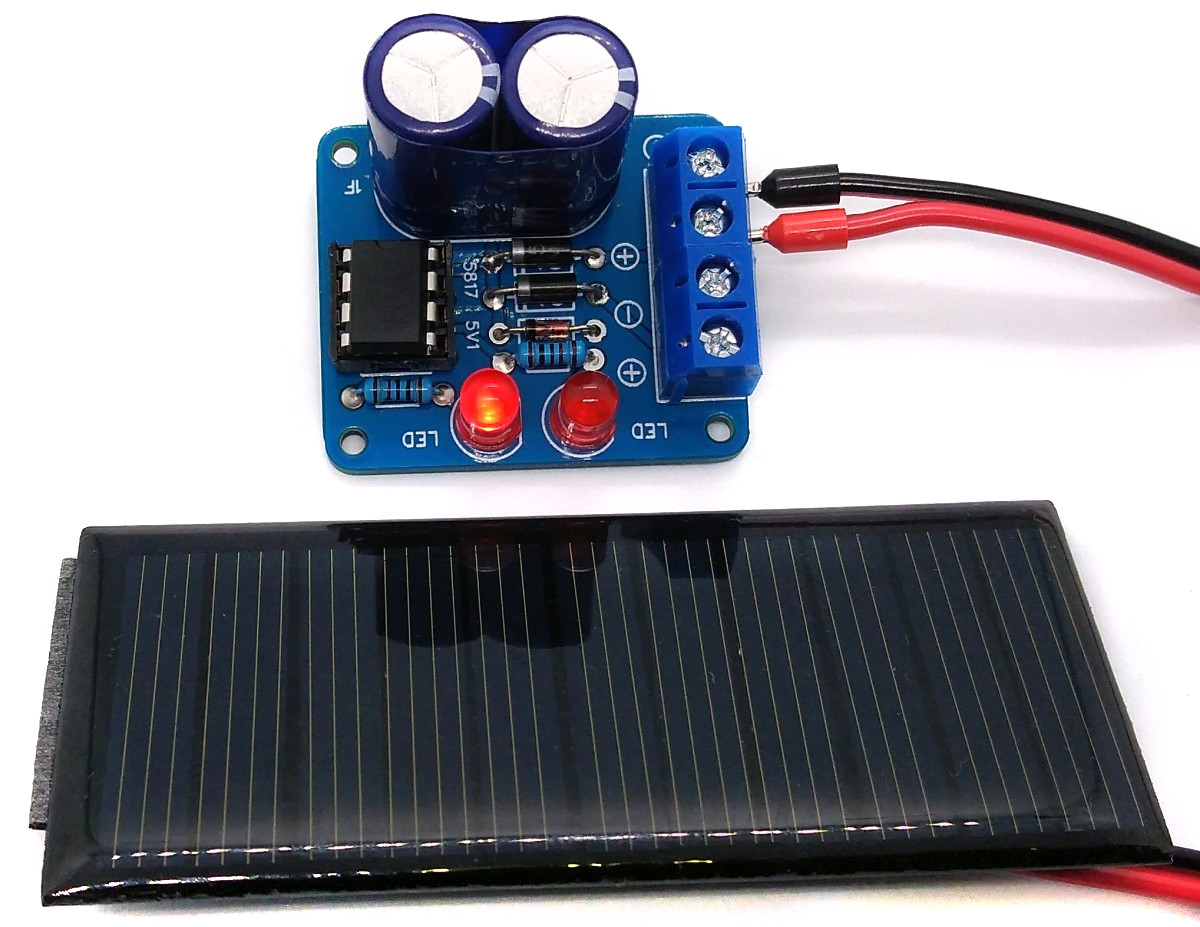
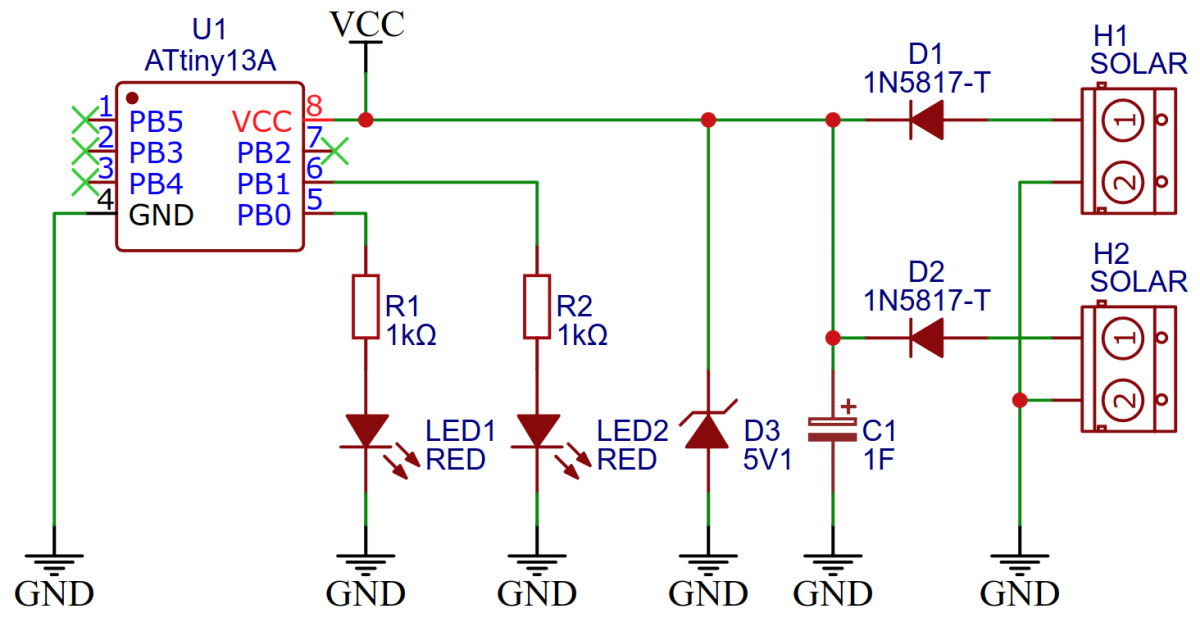
TinySat collects the energy from up to two solar panels (max 6V) and stores it in a 1 Farad super capacitor. The ATtiny13A uses this stored energy to make two LEDs blink - even when the sun is not shining.
- Design Files (EasyEDA): https://easyeda.com/wagiminator/attiny13-tinysat
Since there is no ICSP header on the board, you have to program the ATtiny before putting it into the IC socket. The AVR Programmer Adapter can help with this.
- Make sure you have installed MicroCore.
- Go to Tools -> Board -> MicroCore and select ATtiny13.
- Go to Tools and choose the following board options:
- Clock: 128 kHz internal osc.
- BOD: disabled
- Timing: Micros disabled
- Connect your programmer to your PC and to the ATtiny.
- Go to Tools -> Programmer and select your ISP programmer (e.g. USBasp).
- Go to Tools -> Burn Bootloader to burn the fuses.
- Open the TinySat sketch and click Upload.
- Make sure you have installed avrdude.
- Connect your programmer to your PC and to the ATtiny.
- Open a terminal.
- Navigate to the folder with the hex-file.
- Execute the following command (if necessary replace "usbasp" with the programmer you use):
avrdude -c usbasp -p t13 -U lfuse:w:0x3b:m -U hfuse:w:0xff:m -U flash:w:tinysat.hex
- Make sure you have installed avr-gcc toolchain and avrdude.
- Connect your programmer to your PC and to the ATtiny.
- Open a terminal.
- Navigate to the folder with the makefile and the sketch.
- Run
PROGRMR=usbasp make installto compile, burn the fuses and upload the firmware (change PROGRMR accordingly).
This work is licensed under Creative Commons Attribution-ShareAlike 3.0 Unported License. (http://creativecommons.org/licenses/by-sa/3.0/)


