-
Notifications
You must be signed in to change notification settings - Fork 44
Security in GSN
Regarding the security, GSN can run in the three following modes.
| Mode | SSL (HTTPS) | Description |
|---|---|---|
| Open | Optional | The default mode. All the virtual sensors are available to any client |
| HTTP Basic Authentication | Optional | All the virtual sensors are available to any authenticated client. The SSL support should be enabled. |
| Access Control | Mandatory | The administrator and the logged in users can access a set of individual sensors and groups of sensors. |
In order to get data out of GSN, whenever it is through the web interface, the rest wrappers or a web service, we are always using a servlet handled by the Jetty Container. The table below lists the differents PATH in GSN and how they are securised regarding the security mode.
| Path | Description | Open Mode | HTTP Basic Mode | Access Control Mode |
|---|---|---|---|---|
| /gsn, /field, /data, /multidata, /geodata | Basic GSN URLs | Open | HTTP Basic | Form |
| /streaming | Remote Wrapper Implementation | Open | HTTP Basic | HTTP Basic |
| /gsn/My* | Access Control web interface | Form | Form | Form |
| /services/GSNWebService | GSN Standard Web Service | Open | HTTP Basic | Form (SOAP Content) |
| /services/Service | Microsoft [http://www.sensormap.org SensorMap] Web Service | Open (protected by IP source) | Open (protected by IP source) | Open (protected by IP source) |
| /services/A3DWebService | Alpine3D Web Service | Open | HTTP Basic | HTTP Basic (No AC support) |
GSN uses the Basic Access Authentication scheme for HTTP authentication. By default the authentication is not activated. To activate the authentication, you should edit conf/realm.properties and add one or more line like the following:
username:password,rolename
The rolename you must provide is gsnuser. Once you provided at least one such line in the conf/realm.properties and started GSN, the HTTP authentication is activated and everything under http://host:port/ path is protected. Any access to the web interface needs a username/password that matches one of the lines you provided in the configuration file. Also, remote wrappers (Push and Rest) need to have the username/password predicates provided to them to be able to connect to the secured remote instance.
Please note that this mode is not finalized and should not be used in production yet.
The following operations have to be done in order to enable this mode
- Disable the HTTP Basic authentication mode by commenting/removing all the users in the file
conf/realm.properties - Set the SMTP server used by AC to send emails to the users. A GMAIL account would suit.
conf/emails.properties - Configure SSL. The default configuration would suit for tests.
conf/gsn.xml- Default certificates should work, but if you want to Create a X.509 certificate
- Keystor name: servertestkeystore
- certificate name: servertestcer, store password for keystore in keystore.properties
- Set the following tag in the
conf/gsn.xmlfile
...
<access-control>true</access-control>
<!-- Main Storage Database, Mandatory -->
...
Once GSN has been restarted, the web interface will show a new menu containing the following new buttons
- ACCESS RIGHTS MANAGEMENT: Click on this button to create a new user, manage your account and do the administrative tasks.
- LOGIN: Click on this button to login to your account. The default user is the administrator:
- username:
Admin - password:
changeit
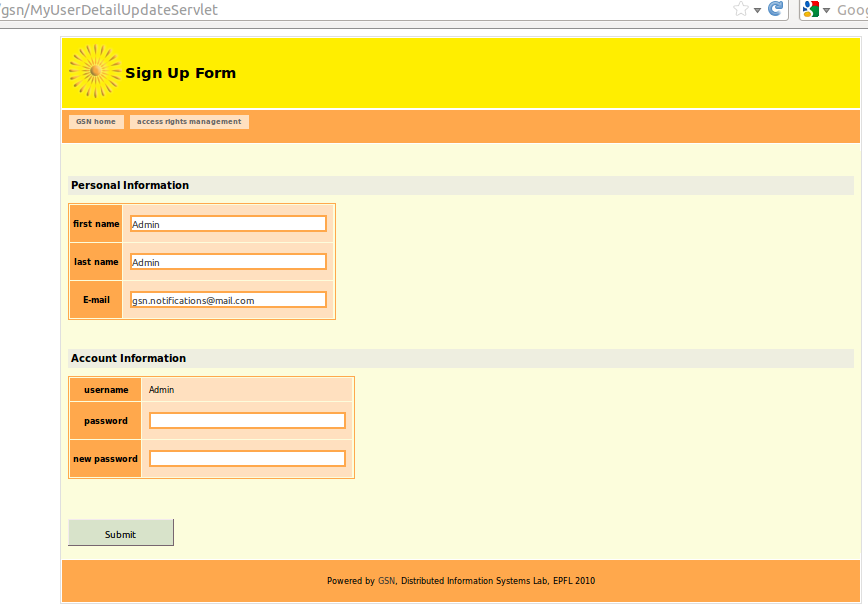
Sign Up
-
Notification (email) of the Admin when a new account is created.
-
Notification of the User that their new account awaits activation.
-
When a User creates an account (Access Rights Management -> Sign Up Form) the above two email notifications are sent:

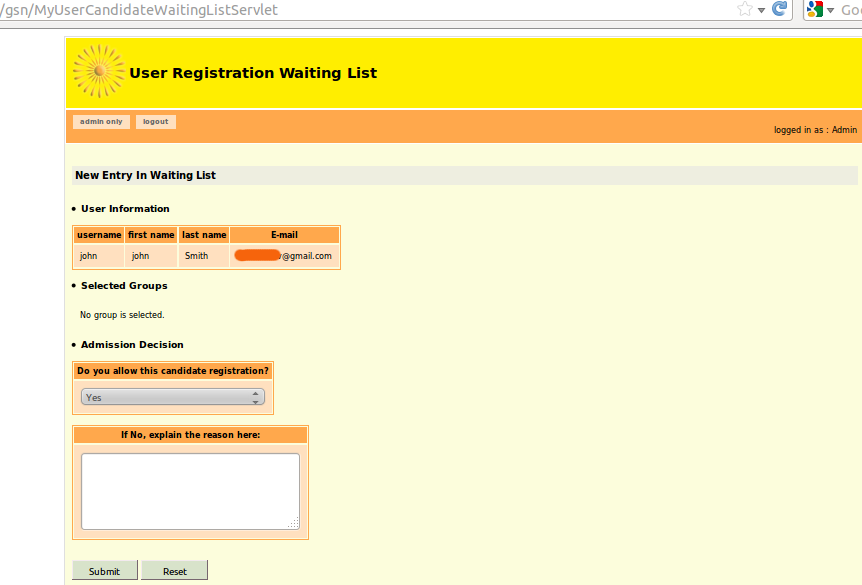
- After reviewing their notification the administrator can accept the new account by accessing the menu: "Access Rights Management -> Admin Only -> User Registration Waiting List". After the new account has been accepted, a notification is sent, informing the respective user about the activation and prompting them to login.
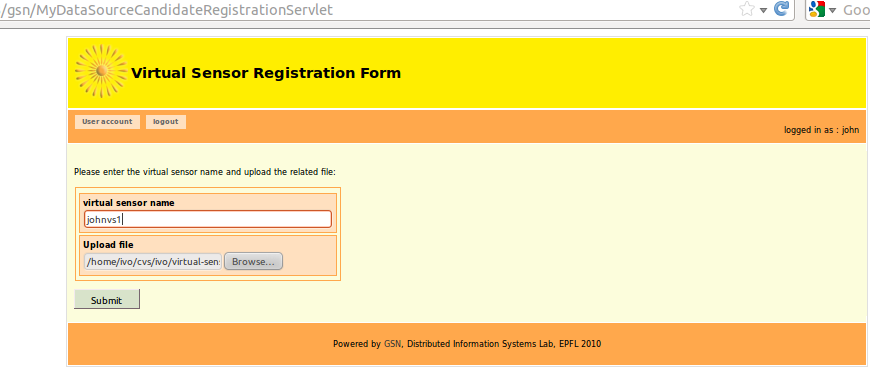
Addition of a New Virtual Sensor
-
The name of the uploaded file is automatically changed to the one specified by the user in the upload form.
-
The name of the Virtual sensor inside the xml file () is automatically changed to the one specified by the user in the upload form.
-
Notification is sent to the Administrator about the new Virtual Sensor.
-
The user goes to "Access Rights Management -> User Account Management -> Virtual Sensor Registration Form" in order to upload a new Virtual Sensor.
As it can be seen below, the uploaded file is renamed and stored inside the directory "/gsn/virtual-sensors/receivedVSFiles". However, it is not active yet.
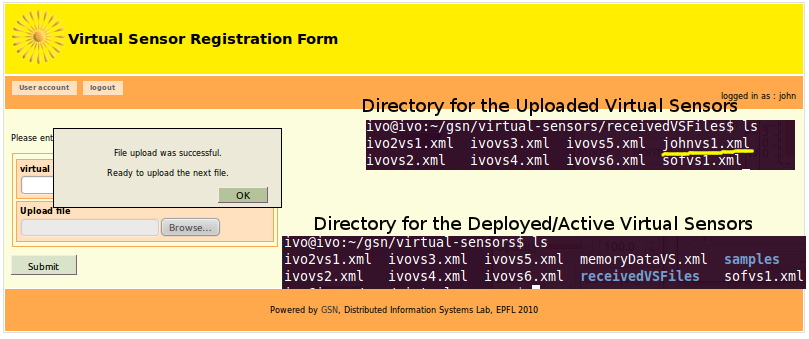
In addition, the initial name of the virtual sensor () is renamed into ().
- The administrator is sent a notification and s/he goes to "Access Rights Management -> Admin Only -> Virtual Sensor Registration Waiting List" in order to manage the request. The respective user receives a notification about the administrator's decision.
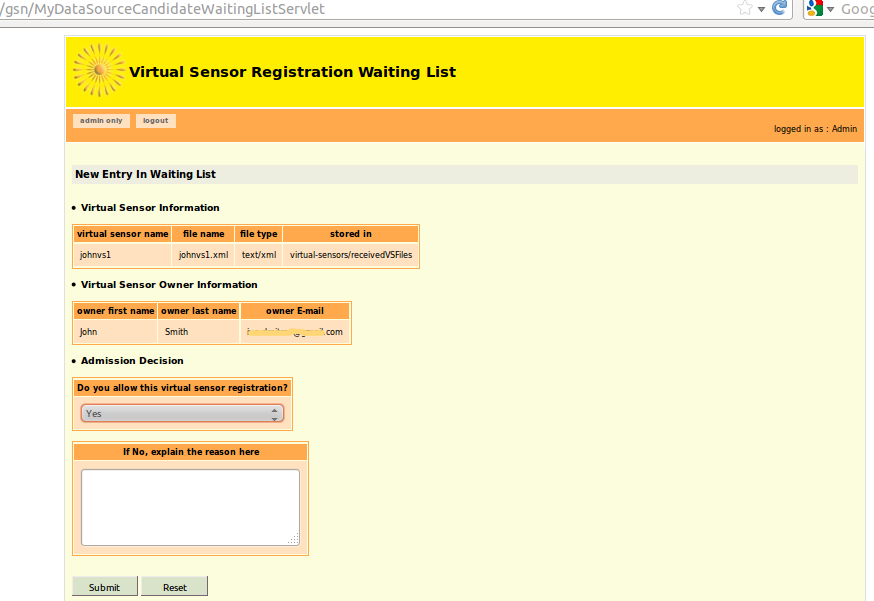
If the administrator decides to activate the sensor, the .xml sensor file is automatically copied inside the "gsn/virtual-sensors" directory and deployed.
Access Request to a Virtual Sensor
-
Notification of the owner with details about the VS and the user that wants to access it.
-
Notification of the administrator with details about the VS, its owner and the user that wants to access it.
-
The administrator is notified of the decision taken by the owner, receiving appropriate details.
-
The user is informed about the result of their request for a Virtual Sensor access.
-
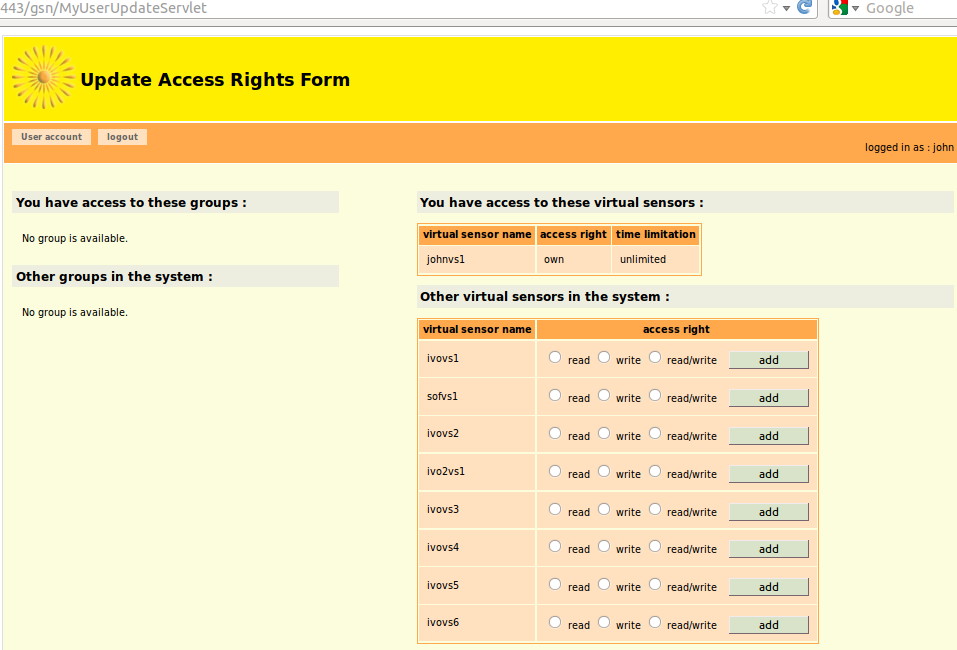
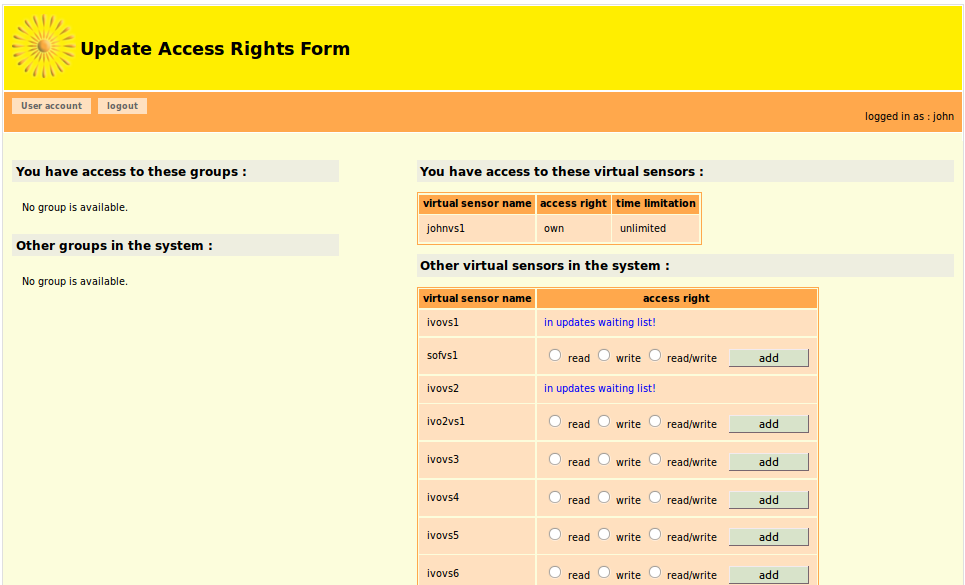
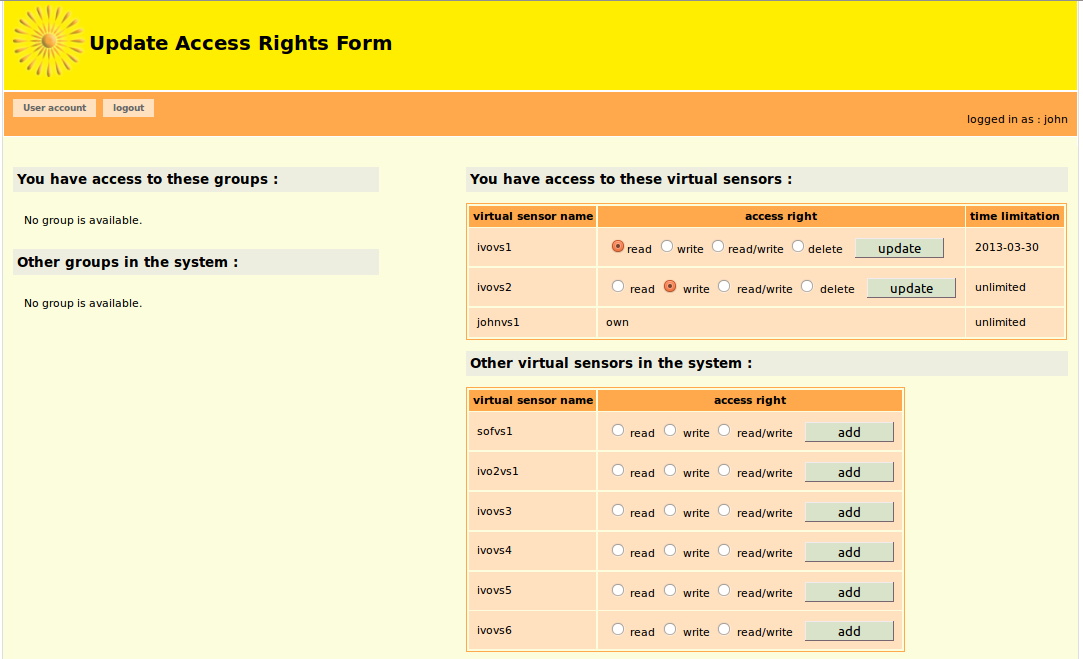
A user can express interest to access a Virtual Sensor by going to "Access Rights Management -> User Account Management -> Update Access Rights Form". The 'read' access right is defined as having access to a virtual sensor output stream and the 'write' refers to being able to modify the XML file describing a virtual sensor. When the user selects an access right and clicks "add" a notification is sent to the owner of this Virtual Sensor, so that they can manage this application. An additional notification is also sent to the administrator containing the relevant details.
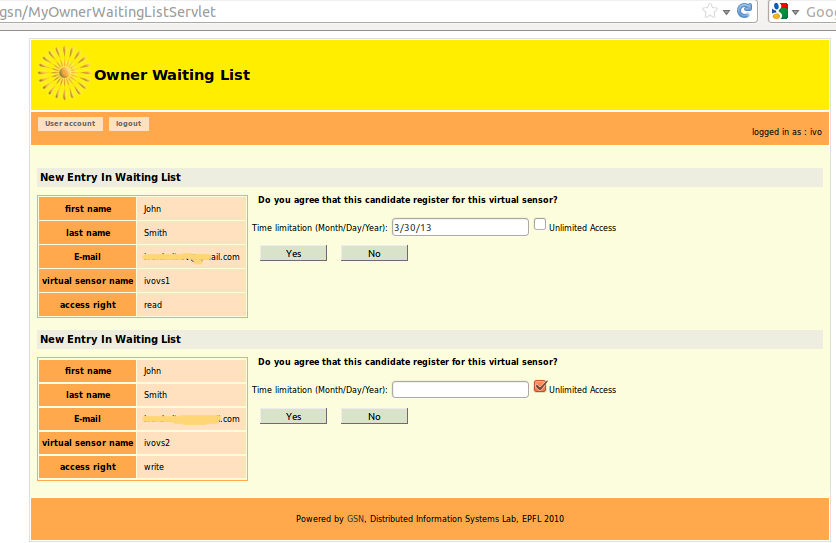
- The owner can visit their page (Access Rights Management -> User Account Management -> Owner Waiting List) and handle the request. A notification regarding the owner's decision is sent to the the administrator in order to act accordingly. The owner can restrict the access to their Virtual Sensor until a defined date in the form Month/Day/Year (ie 3/25/13 for the 25 May, 2013). If using the Mozilla browser and the Date popup does not show up, please specify a date using the format Year/Month/Day. Furthermore, if the owner does not wish to apply a restriction, they can check the "Unlimited Access" checkbox.
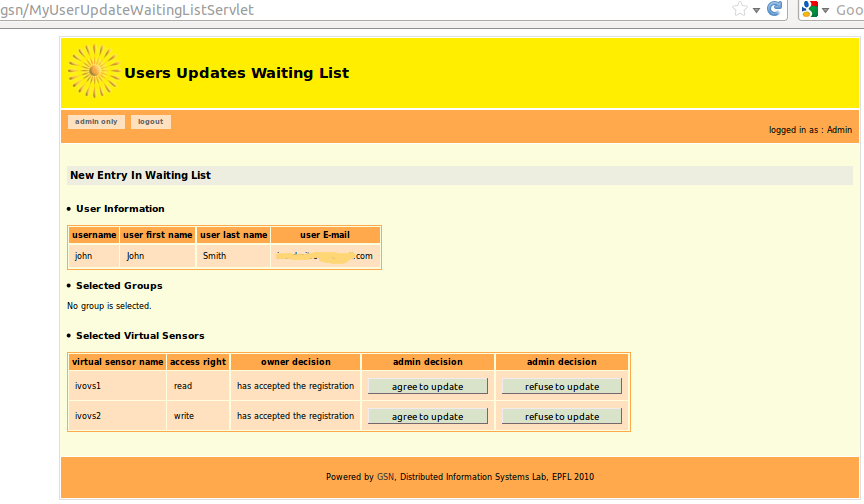
- The administrator can grant permission to a Virtual Sensor by visiting the menu (Access Rights Management -> Admin Only -> Users Updates Waiting List). The user receives the appropriate notification, depending on the decision of the Administrator. If the Administrator does not wait for the decision of the owner, it is possible that the user may have unlimited access to the desired Virtual Sensor.
- The user can see their available Virtual Sensors by visiting "Access Rights Management -> User Account Management -> Update Access Rights Form". There s/he can view the Virtual Sensors to which they have access, together with the respective time limitation in the format Year/Month/Day. When this time limitation expires, the user does not have access anymore to the particular sensor. The user is also notified when this event occurs, so that they can act accordingly. The owner of a Virtual Sensor has unlimited access to it.
You should edit the file gsn/conf/emails.properties and populate it with the appropriate email details. A sample configuration for gmail is the following:
mail.smtp.from="POPULATE EMAIL"
mail.smtp.password= "POPULATE PASS"
mail.smtp.host=smtp.gmail.com
mail.smtp.user="POPULATE EMAIL"
mail.smtp.port=587
mail.smtp.starttls.enable=true
mail.smtp.auth=true
mail.smtp.debug=true
In addition, do not forget to change the default email address of your Admin account by going to: "Access Rights Management -> User Account Management -> Update Your User Details":
