-
Notifications
You must be signed in to change notification settings - Fork 18
Qosmetics Bloq Exporter
If you haven't already, check out the General Setup Guide
Now that you've setup your qosmetics project, let's get to exporting a bloq! This guide will not cover making an actual model, there are enough resources available online on how to make models with for example blender.
You'll find the QuestBloq exporter in Tools->Qosmetics->Exporters->QuestBloq:

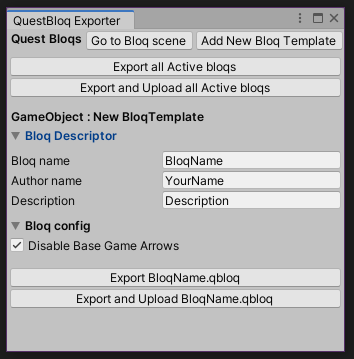
After opening the exporter if it's not already opened, you'll find the options to fill out. (if you don't see any options, click the triangles)
At the top you will find the name of the exporter (QuestBloq), and 4 buttons, the first one will load the scene with name questnotes from Assets/Scenes, just like the scene changer mentioned in the Generic guide.
The second button will spawn in a new bloq template so that all neccesary data is already added to it. (Adding scripts to an object is not really supported due to some issues I was having with that) This is the intended way of making more than 1 bloq in the same scene!
The 3rd button will export all currently active bloqs to a directory you select, this is ideal for making lots of models in one go! I recommend to enable the set layer mask option in the exporter config menu, as this will make the thumbnails correct.
The last button will not only export all currently active bloqs in the same manner as the third, but it will also upload them all to the correct folder on your quest, that way you do not have to do so manually!
The Descriptor is what you will need to fill out so people in game can see who made these awesome models! The 3 fields are used as follows:
-
Bloq namePut the name of the bloq here, this can be the same as other bloqs, but is recommended to not be obviously. -
Author namePut your name here! If you are a modeler in the Qosmetics discord, or someone who's helped develop the mod, you can even request a colored name -
DescriptionPut a small description here, and people who hover over your qosmetic item will get a small piece of text to read
Currently there is only 1 option here, the possibility of disabling the base game arrows (and dots), if you add your own arrows, disable this. else leave it on.
When making a bloq, you will first want to spawn in a new bloq template for easy adding of models to a default hierarchy:
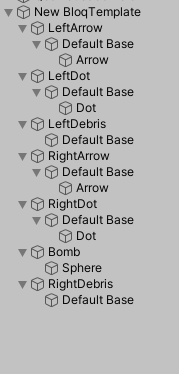
If you do not wish to make bloqs with custom bombs or custom debris, remove those objects (select them and just click the delete key on your keyboard)
If you want to add a model to the bloq, just drag it in from the bottom project file browser:
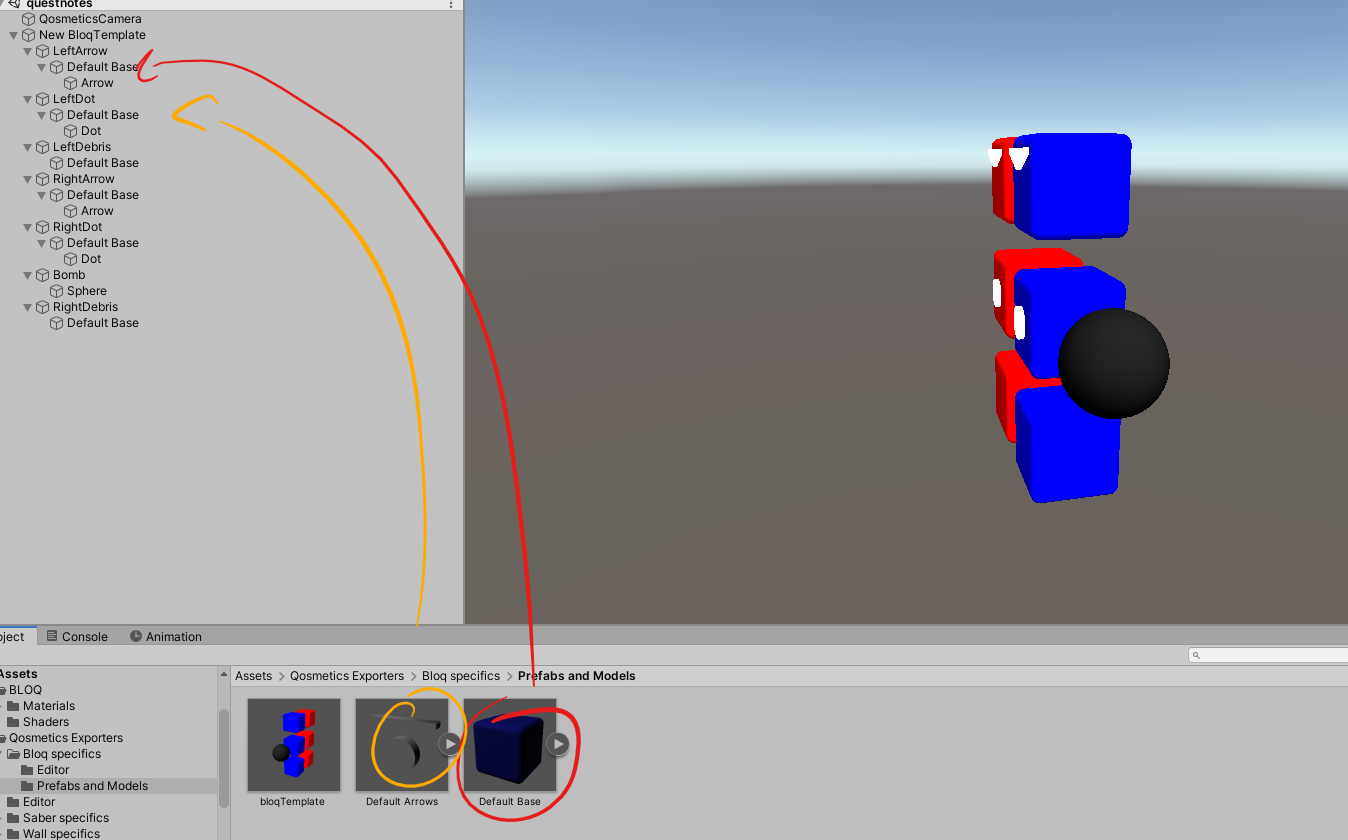
you don't have to follow this exact hierarchy, as long as the objects LeftArrow, LeftDot, RightArrow and RightDot (and Bomb, LeftDebris, RightDebris if they exist) keep their names like that, because otherwise the mod will not work right!
Then when you have the models in the bloq object, you can add the models from the bottom file browser by dragging them onto the objects that need specific materials:
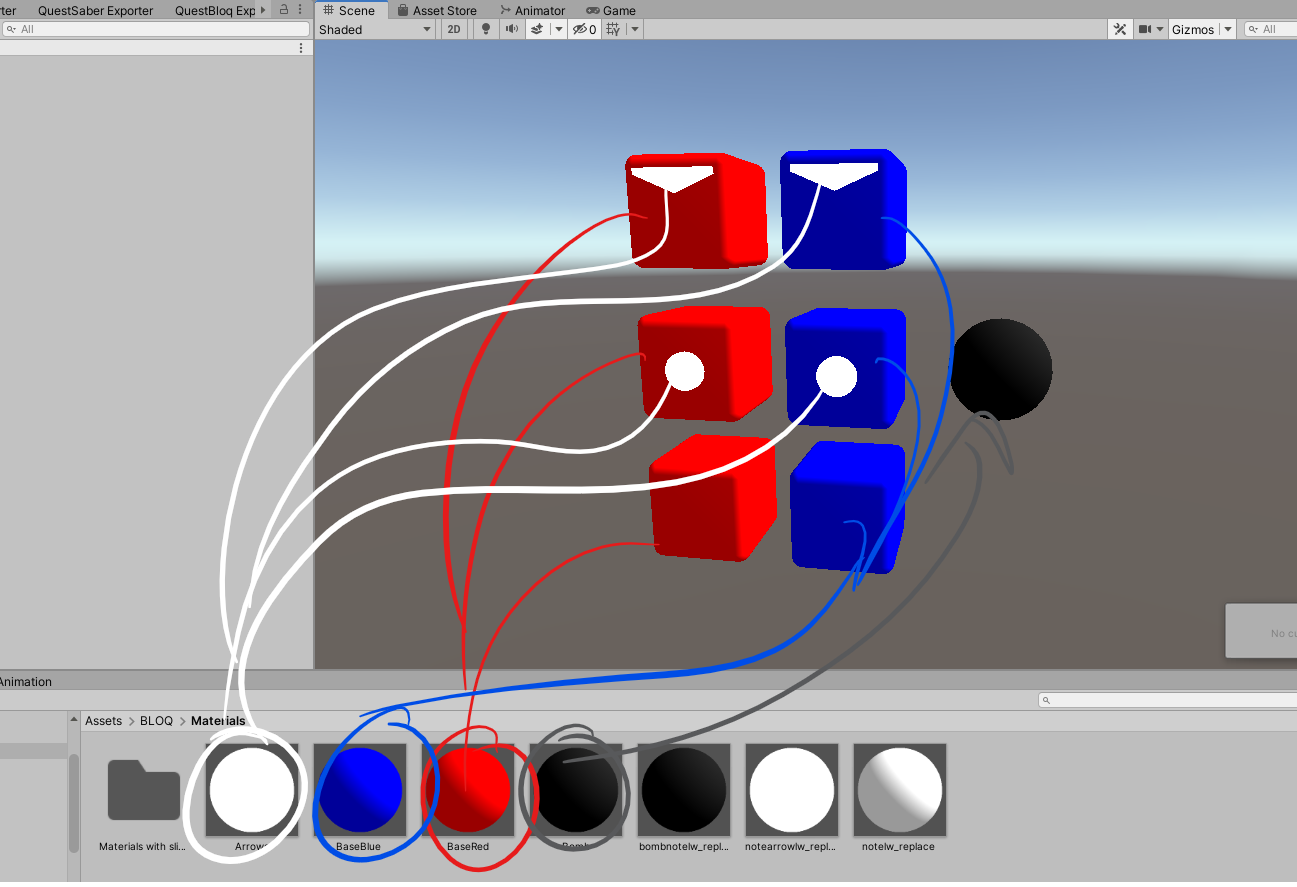
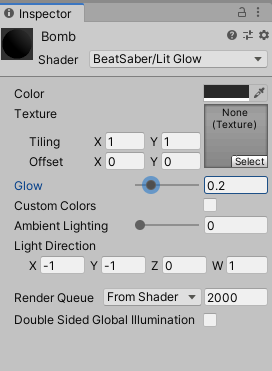
Now that you have materials on the bloq, you probably also want some custom colors (or not) on some materials. Qosmetics will, by default, not put custom colors on your materials, you have to do something to them to get custom colors on your materials. To make the mod put a custom Color on your Color variable you need to either toggle a Custom Colors tickbox or have a Glow value higher than 0. The following material does not get custom materials, even though the Glow value is higher than 0, this is because the Custom Colors tickbox takes priority over the Glow value.
The same applies here as with sabers, if you want to use the same material on left and right and it needs custom colors, make sure that you make 2 seperate versions of the same material because otherwise you will end up with the same color on both bloqs.
Now that the materials have been applied, and the models added, you can export from the bloq exporter! The project will automatically make a file ready for upload, but you can also let the project upload the file for you! if you press the export and upload button the project will, if your quest is connected through adb, close your game, upload the bloq to the correct place, and start the game again!
Normal Bloqs can use any normal shaders, this also goes for Bombs. An issue arises however when dealing with debris. The debris in beat saber has a slice effect to it, so it looks like you cut it in half, this effect is achieved with a special shader which, luckily for us, had it's effect recreated by Bobbie and Ikeiwa (I was told mostly Ikeiwa). This effect is easily added to an existing shader if you add the following things to your shader:
In the properties block, add these properties:
_SlicePos("Slice Local Position", Vector) = (0,0,0)
_CutPlane("Slice Local Normal", Vector) = (0,0,0)
_TransformOffset("Transform Offset", Vector) = (0,0,0)
_SliceEdge("Slice Glow Edge", Float) = 0.025
On the next line after #include "UnityCG.cginc" add this line:
#include "Assets/Qosmetics Exporters/CGINC files/slice.cginc"
Then before the v2f vert function add these to tell the cg program what properties we used:
float3 _SlicePos;
half3 _CutPlane;
float3 _TransformOffset;
float _SliceEdge;
Lastly in the fixed4 frag function, right at the beginning add these lines:
if (slice(_CutPlane, _SlicePos, i.localPos, _TransformOffset, _SliceEdge))
{
	discard;
}
For a practical example just open up the file at Assets/Bloq/Shaders/sh_custom_lit_slice.shader

Of course for debris the same color rules apply as laid out earlier in this guide.
On bloqs, material replacement is available, any materials available on the base game notes can be put on your own bloqs. Just name them the base game name and add _replace after it. this process will honor custom color settings on your original material, the same goes for bombs and debris. available names are:
For Bloqs:
notehd -> notehd_replace
notelw -> notelw_replace
notearrowhd -> notearrowhd_replace
notearrowlw -> notearrowlw_replace
notesprite -> notesprite_replace
notecircle -> notecircle_replace
For Debris:
notedebrishd -> notedebrishd_replace
notedebrislw -> notedebrislw_replace
For Bombs:
bombnotehd -> bombnotehd_replace
bombnotelw -> bombnotelw_replace
using materials cross-object is not supported due to the way references to the materials have to be gathered (no bomb material on your bloqs), also bombs do not get a custom color even if it is enabled.
This section is for the people who make shaders, or who want to edit shaders, and will tell you the special Property names used within the Qosmetics mod:
- _Color is the keyword used to put the CustomColor into, if the custom color is allowed
- _OtherColor if custom colors are enabled, this color gets set to the other bloq color, have fun with this :)
- _CustomColors normally paired with a [MaterialToggle] in front of it, this property name has the highest priority when it comes to allowing custom colors
- _Glow in absence of a _CustomColors property this property will be used to determine wether or not to use custom colors, if it's above 0 the material gets custom colors
- _Bloom Lowest priority property to decide wether or not to use custom colors
Next are some examples of how these properties can be added into your properties block:
Properties
{
    _Color ("Color", Color) = (1,1,1,1)
    _OtherColor ("Other Color", Color) = (1,1,1,1)
    [MaterialToggle] _CustomColors("Custom Colors", Float) = 0
    _Glow ("Glow", Range (0, 1)) = 0
    _Bloom ("Bloom", Range (0, 1)) = 0
}