Based on the official guide.
First you need to clone the repository to your local computer
git clone https://github.com/Improbable-AI/walk-these-waysThe second step is to connect your development machine to the robot.
You should ping the robot to verify the connection: ping 192.168.123.15 should return x packets transmitted, x received, 0% packet loss.
Once you have confirmed the robot is connected, run the following command on your computer to transfer files to the robot. The first time you run it, the script will download and transfer the zipped docker image for development on the robot (deployment_image.tar). This file is quite large (3.5GB), but it only needs to be downloaded and transferred once.
cd go1_gym_deploy/scripts && ./send_to_unitree.sh
Next, you will log onto the robot's onboard computer and install the docker environment. To enter the onboard computer, the command is:
ssh unitree@192.168.123.15
The password is 123.
Now, run the following commands on the robot's onboard computer:
chmod +x installer/install_deployment_code.sh
cd ~/go1_gym/go1_gym_deploy/scripts
sudo ../installer/install_deployment_code.sh
The installer will automatically unzip and install the docker image containing the deployment environment.
Place the robot into damping mode. The control sequence is: [L2+A], [L2+B], [L1+L2+START]. After this, the robot should sit on the ground and the joints should move freely.
Now, ssh to unitree@192.168.123.15 and run the following two commands to start the controller. This will operate the robot in low-level control mode. Make sure your Go1 is hung up.
First:
cd ~/go1_gym/go1_gym_deploy/autostart
./start_unitree_sdk.sh
Second:
cd ~/go1_gym/go1_gym_deploy/docker
sudo make autostart
The robot will wait for you to press [R2], then calibrate, then wait for a second press of [R2] before running the control loop.
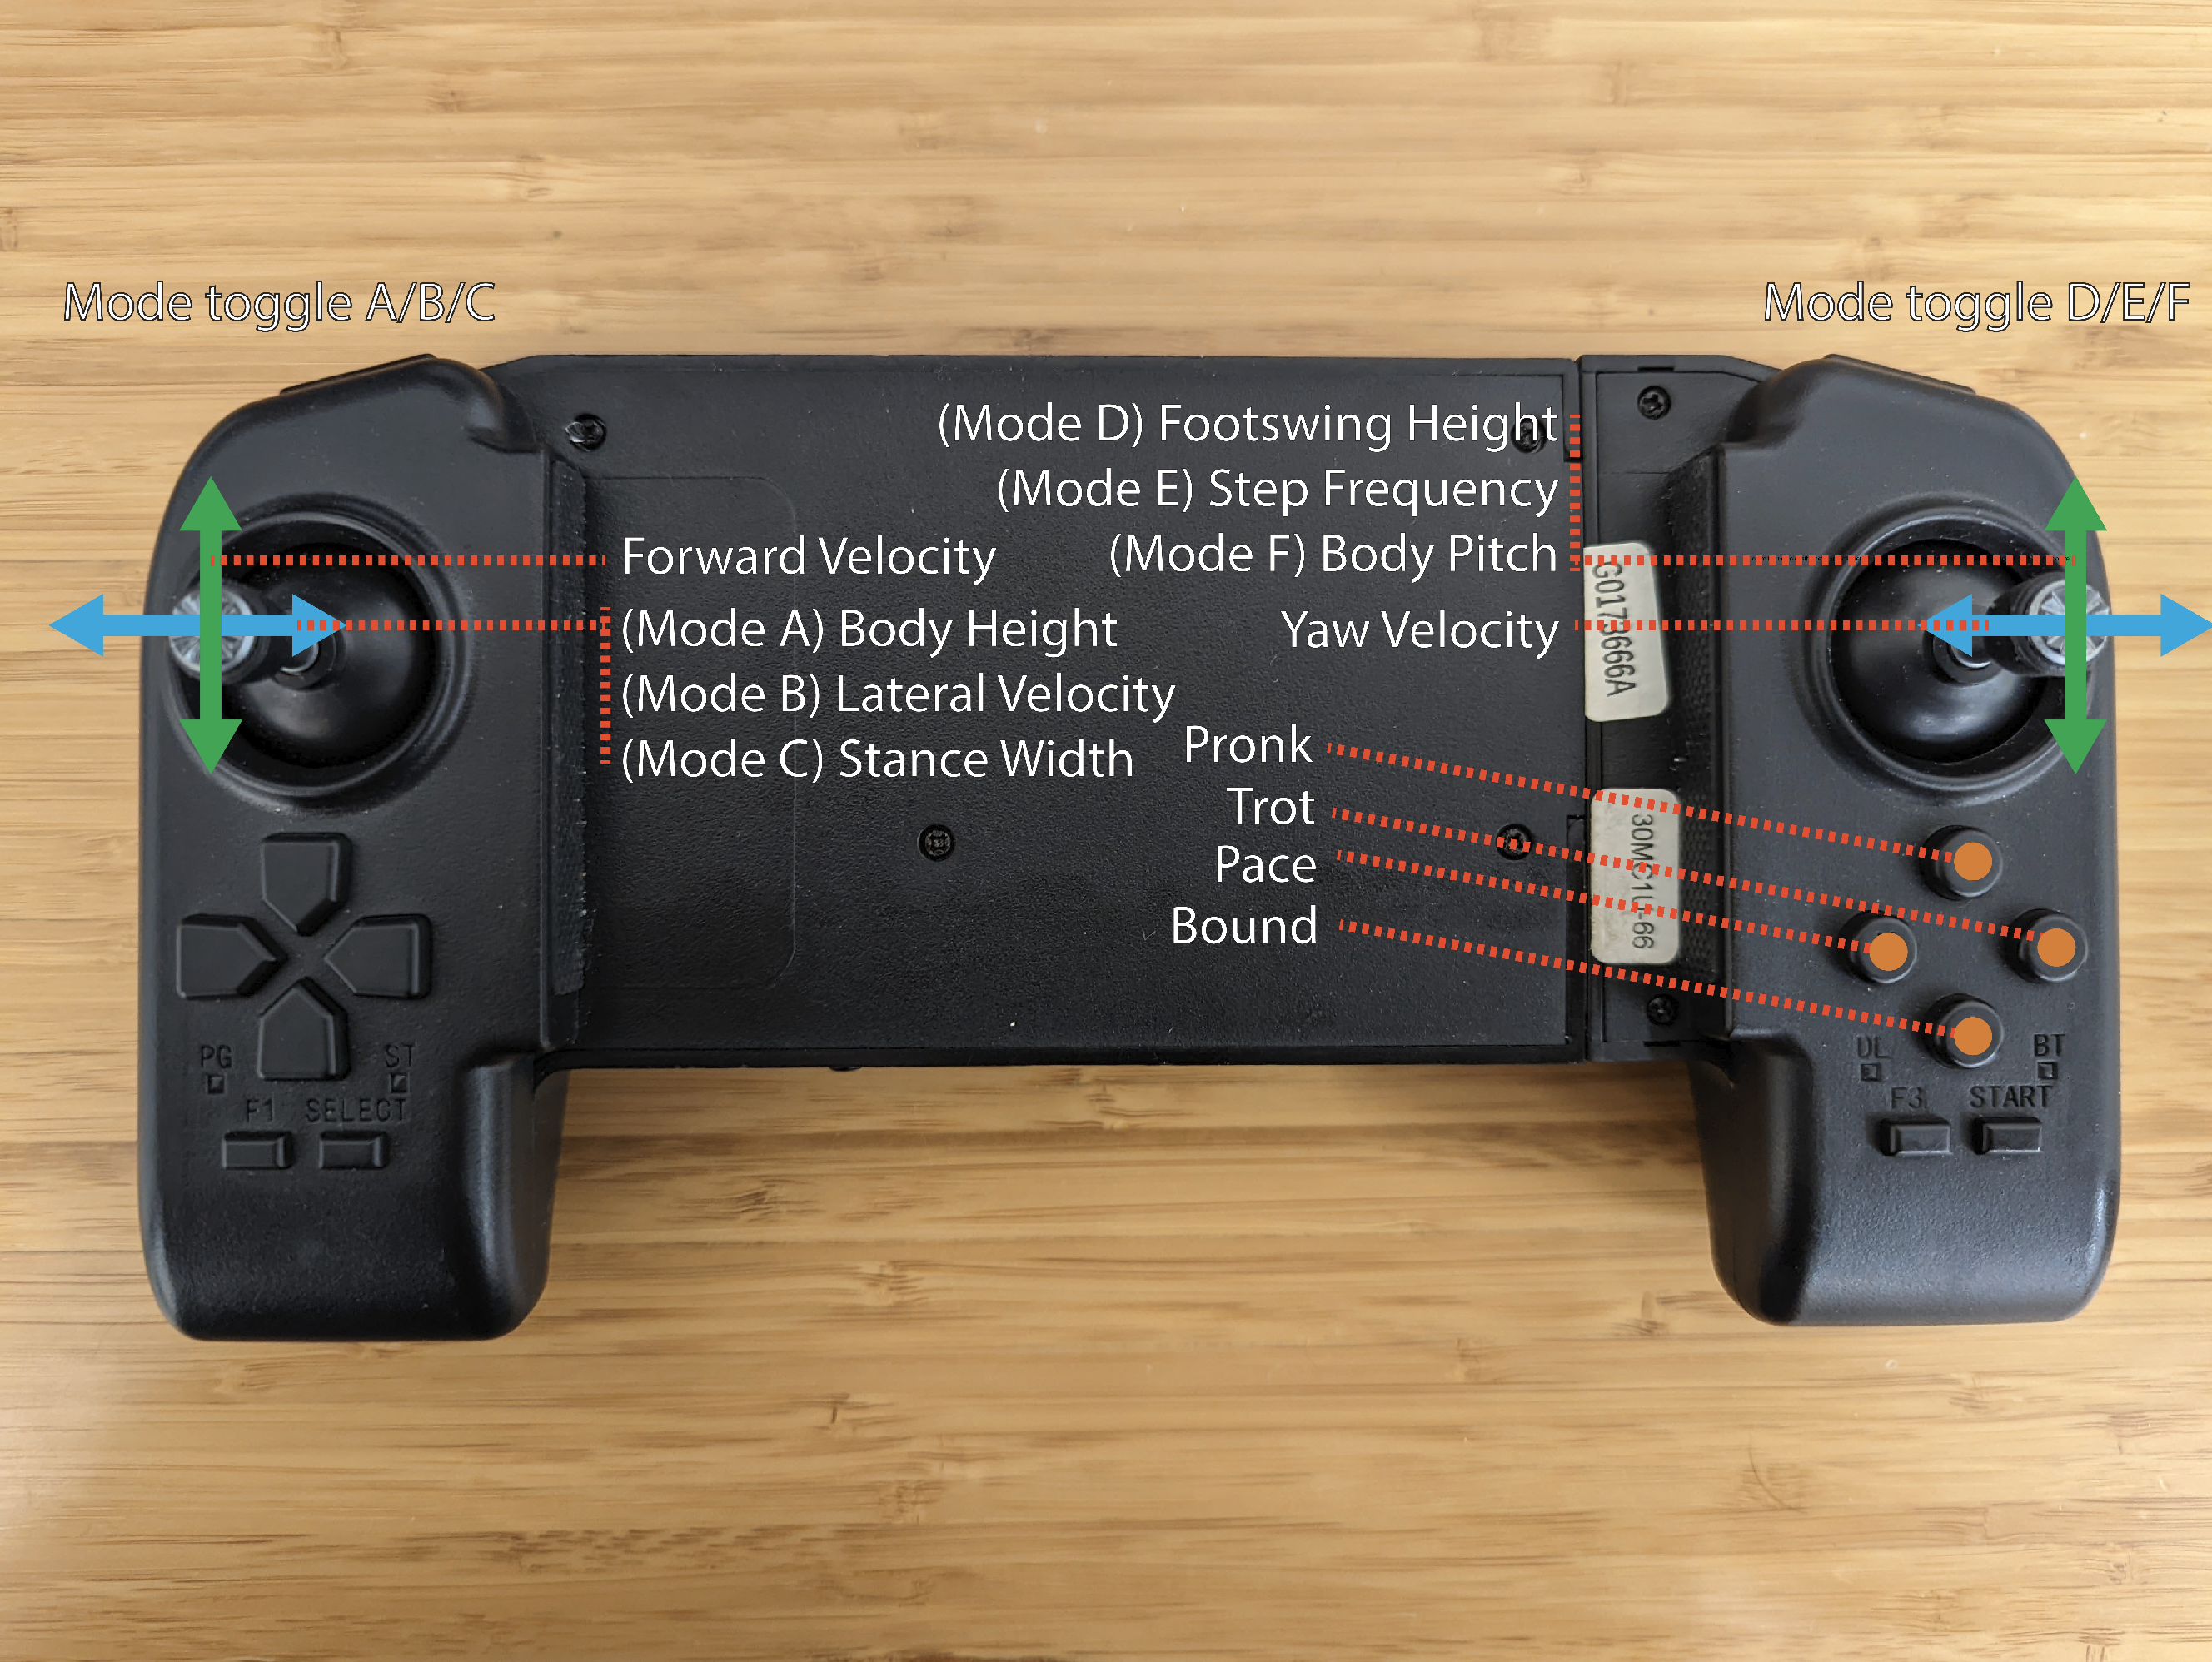 The RC mapping is depicted above.
- Connect to the Go1's WiFi
cachorro_robo. The password is0000000 - Make sure that ip forwarding is enabled. (How to enable ip forwarding)
- You should ping the robot to verify the connection:
ping 192.168.123.15should returnx packets transmitted, x received, 0% packet loss.
- Connect the ethernet cable.
- Make sure that the subnet of your ethernet adapter is 192.168.123.42/24. (How to change subnet)
- You should ping the robot to verify the connection:
ping 192.168.123.15should returnx packets transmitted, x received, 0% packet loss.
ifconfig to list all interfaces (they look like enp1s0 for ethernet and wlp2s0 for wifi)
sudo ifconfig <interface> down
sudo ifconfig <interface> 192.168.123.42/24
sudo ifconfig <interface> up
- SSH to Pi with password 123
ssh pi@192.168.12.1- Execute the following code on the robot's Raspberry Pi:
sudo vi /etc/sysctl.conf-
Remove the comment in front of
net.ipv4.ip_forward=1 -
Reload sysctl
sudo sysctl -p- Setup iptables for wireless config
- Flush iptables
sudo iptables -F- Flush NAT table
sudo iptables -t nat -F- Setup NAT table routing
sudo iptables -t nat -A POSTROUTING -o wlan1 -j MASQUERADE
sudo iptables -t nat -A POSTROUTING -o eth0 -j MASQUERADE
sudo iptables -A FORWARD -i wlan1 -o eth0 -j ACCEPT
sudo iptables -A FORWARD -i eth0 -o wlan1 -j ACCEPT