-
Notifications
You must be signed in to change notification settings - Fork 0
gluu configuration
This is about how to configure Gluu after installation.
- Configuration through the web is highly inspired on https://gluu.org/docs/ce/latest/admin-guide/oxtrust-ui/ (where 'latest' might be replaced by a specific version number such as '3.0.1') .
- The Gluu Server webapp is located at
https://${your.gluu.server.host.name}.
We don't know if this is actually used. But we can configure it anyway
Note: this only applies to hosts managed by iLab.t; use the same domain name as the server you're working on.
- Log in with admin rights on the Gluu Server webapp.
- Navigate to
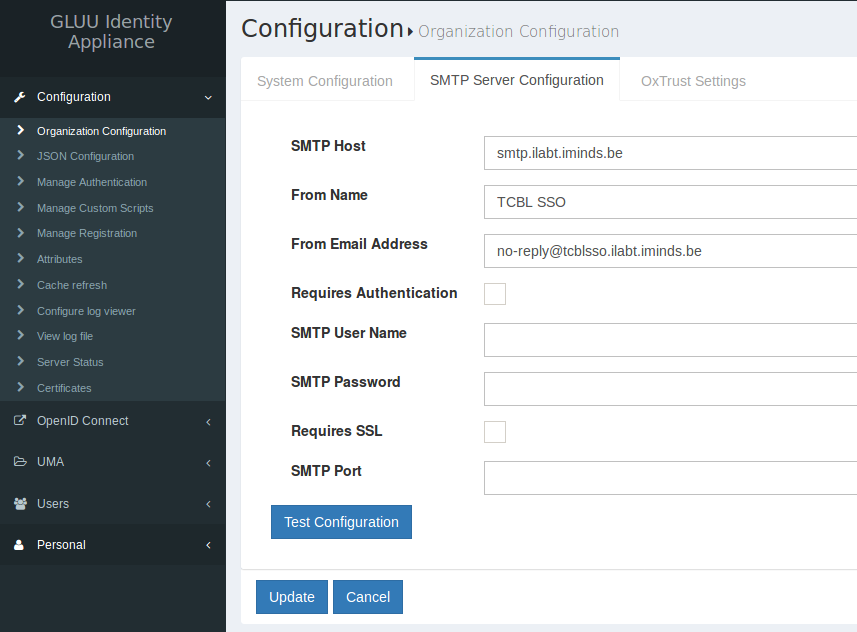
Configuration->Organization Configuration. - Select tab
SMTP Server Configuration. - Fill out the following fields:
SMTP Host: smtp.ilabt.iminds.be | smtp.ilabt.imec.be
From Name: TCBL SSO
From Email Address: no-reply@tcblsso.ilabt.iminds.be | no-reply@tcblsso2.ilabt.imec.be
SMTP Password: nothing to fill out here. Gluu Server shows some stars or dots, just leave them be.
- Test the configuration by pressing
Test Configuration(this does nothing more than showing a popup that it works or not; no mail is sent) - If it works, click
Update.
(See also https://gluu.org/docs/ce/latest/api-guide/scim-api/, https://gluu.org/docs/ce/latest/admin-guide/scim-uma/, https://gluu.org/docs/ce/latest/admin-guide/user-scim/ )
SCIM is an identity management protocol over HTTP(S). We can use it to manage users via a (remote) application on the Gluu Server, i.e. create, update and delete users.
This section describes how to make the Gluu Server ready to allow SCIM clients.
If you want to add a SCIM client app, see Setting up a SCIM 2.0 client.
- Log in with admin rights on the Gluu Server webapp.
- Navigate to
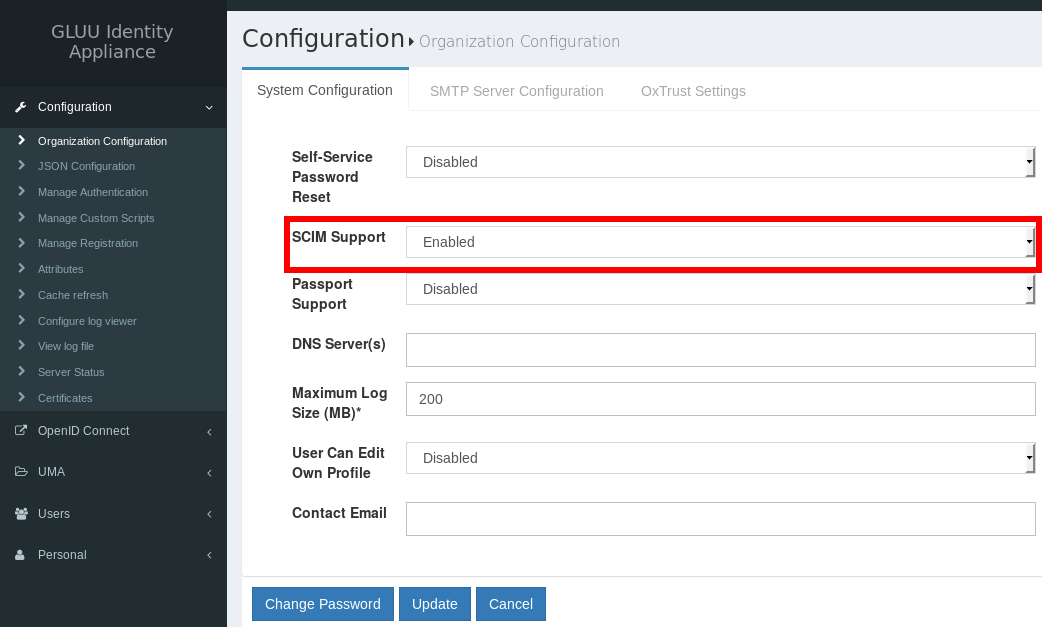
Configuration->Organization Configuration, tabSystem Configuration. - Set the drop-down next to
SCIM SupporttoEnabled. - Then click the
Updatebutton.
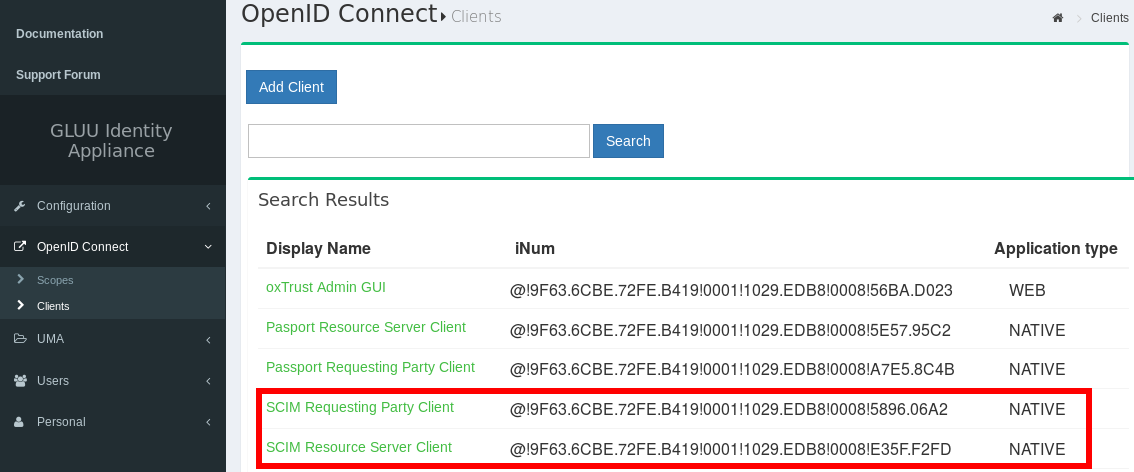
The Gluu server installs a SCIM Requesting Party Client and a SCIM Resource Server Client by default. Our client apps will use the RP Client. They should be added to (of all places) the OpenID Connect clients.
Navigate to OpenID Connect -> Clients. They should be listed.
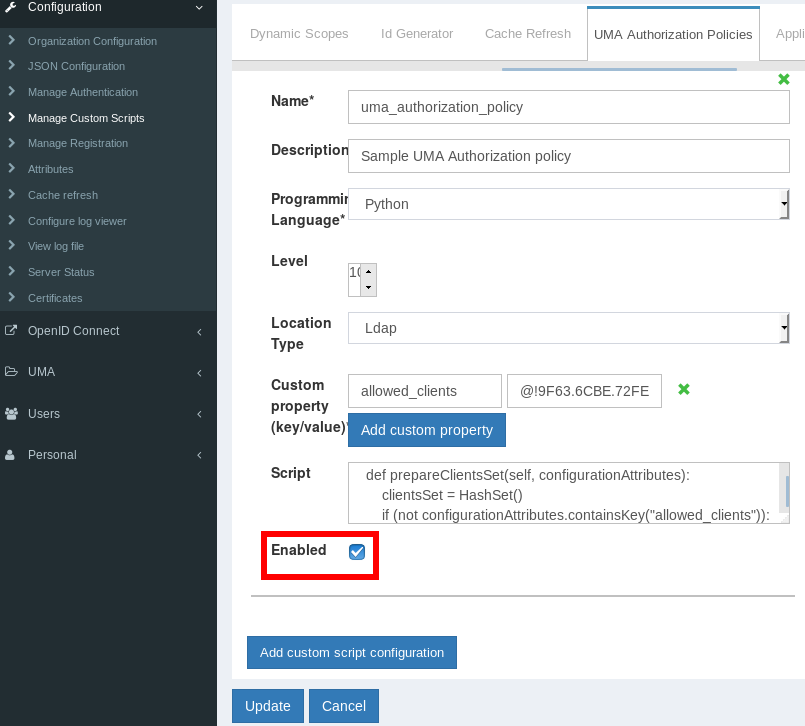
The Gluu Server uses the User-Managed Access protocol to authorize the client. Therefore a policy for the client must be enabled.
- Navigate to
Configuration->Manage Custom Scripts->UMA Authorization Policies. - Activate the checkbox next to
Enabled. - Then click the
Updatebutton.
The Gluu Server supports OpenID Connect's dynamic client registration described here.
That is good, but we do not want to enable this at all times, so let's disable it initially and only enable it temporary if somebody contacts us.
- Navigate to
Configuration->JSON Configuration->OxAuth Configuration. - Set the value of attribute
dynamicRegistrationEnabledtofalse.
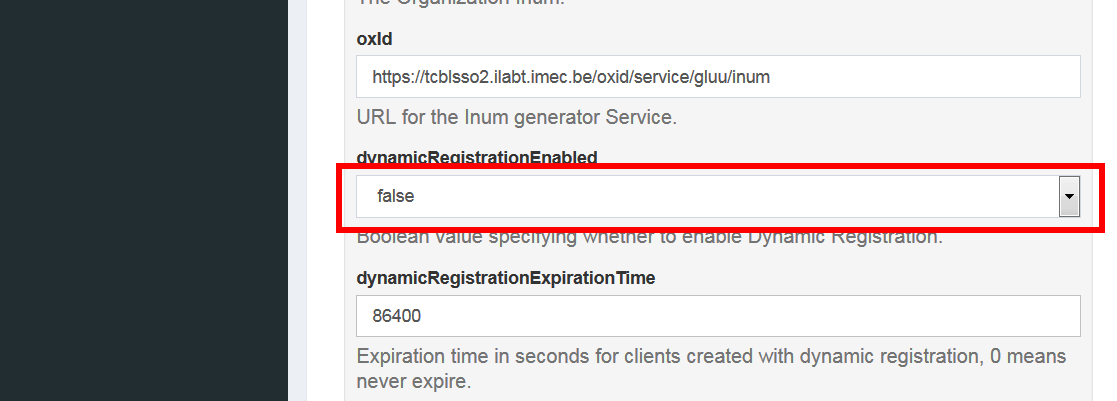
While at this configuration page, we can configure some more dynamic client registration settings.
To enforce the authorization page to end-users after each login:
- Set the value of attribute
dynamicRegistrationPersistClientAuthorizationstofalse.

Finally:
- Click the
Save Configurationbutton at the bottom.
Note: what to do to register a new client is explained in detail at Gluu client registration and summarized in the public documentation at https://github.com/TCBL/single-sign-on-docs/wiki/gluu_server_settings.
We define the following list of additional user profile attributes for the TCBL project:
| Display Name | Name | oxAuth claim name | Origin | Description |
|---|---|---|---|---|
| Accepted TCBL privacy policy | gcpAcceptedTCBLprivacyPolicy | tcbl_pp | gluuCustomPerson | Indicates whether the user accepted the TCBL privacy policy |
| Subscribed to TCBL newsletter | gcpSubscribedToTCBLnewsletter | tcbl_nl | gluuCustomPerson | Indicates whether the user is subscribed to the TCBL newsletter |
| Picture Location | gcpPictureURL | extended_picture_url | gluuCustomPerson | The URL to a profile picture |
| Allowed TCBL activity monitoring | gcpAllowedTCBLactivityMon | tcbl_am | gluuCustomPerson | Indicates whether the user allowed TCBL activity monitoring |
To add these attributes, we follow the guideline in https://gluu.org/docs/ce/3.0.2/admin-guide/attribute/#custom-attributes, as detailed below.
Login to the Gluu container
service gluu-server-3.0.2 login
Become ldap user
su - ldap
Edit the custom shema
cd /opt/gluu/schema/openldap
cp -a custom.schema custom.schema.dist
vim custom.schema
Insertion after the existing attributetype definitions, assuming the last one was numbered 1002:
Attention when copying below snippet: indents should be converted to tabs (8 spaces = 1 tab)
attributetype ( oxAttribute:1003 NAME 'gcpSubscribedToTCBLnewsletter'
	EQUALITY caseIgnoreMatch
	SUBSTR caseIgnoreSubstringsMatch
	SYNTAX 1.3.6.1.4.1.1466.115.121.1.15
	X-ORIGIN 'Gluu - custom person attribute' )

attributetype ( oxAttribute:1004 NAME 'gcpAcceptedTCBLprivacyPolicy'
	EQUALITY caseIgnoreMatch
	SUBSTR caseIgnoreSubstringsMatch
	SYNTAX 1.3.6.1.4.1.1466.115.121.1.15
	X-ORIGIN 'Gluu - custom person attribute' )

attributetype ( oxAttribute:1005 NAME 'gcpPictureURL'
	EQUALITY caseIgnoreMatch
	SUBSTR caseIgnoreSubstringsMatch
	SYNTAX 1.3.6.1.4.1.1466.115.121.1.15
	X-ORIGIN 'Gluu - custom person attribute' )

attributetype ( oxAttribute:1006 NAME 'gcpAllowedTCBLactivityMon'
	EQUALITY caseIgnoreMatch
	SUBSTR caseIgnoreSubstringsMatch
	SYNTAX 1.3.6.1.4.1.1466.115.121.1.15
	X-ORIGIN 'Gluu - custom person attribute' )
New contents for the line MAY in the objectclass named gluuCustomPerson:
Attention when copying below snippet: indents should be converted to tabs (8 spaces = 1 tab)
MAY ( telephoneNumber $ mobile $ gcpSubscribedToTCBLnewsletter $ gcpAcceptedTCBLprivacyPolicy $ gcpPictureURL $ gcpAllowedTCBLactivityMon )
Stop being ldap user and become root again
exit
Test
service solserver stop
# next one should indicate success...
/opt/symas/bin/slaptest -f /opt/symas/etc/openldap/slapd.conf
service solserver start
Leave the Gluu container
exit
This is through-the-web stuff, so login as an admin to the Gluu server.
Navigate to Configuration -> Attributes and for each attribute:
- Click the
Register Attributebutton. - Fill in the fields as follows (leave unmentioned fields blank):
-
Name: (see table above) -
Display Name: (see table above) -
Type:Text(even for binary fields; seen they did that too, no further thoughts here...) -
Edit Type:adminanduser(is nice for testing; in final setup we won't let users edit their own profile on the Gluu server) -
View Type:adminanduser -
Usage Type:Not defined -
Multivalued:False -
oxAuth claim name: (see table above) -
SCIM Attribute:True -
Description: (see table above) -
Status:Active(if you later would need to, setInactivehere rather than deleting the attribute...)
-
- Click
Registerto save.
We can't do this part of the guideline, because we have not installed Shibboleth SAML IDP, so the files to modify do not exist. But that doesn't harm us...
As an admin:
- Navigate to
Users->Manage People, search a person and open its profile by double-clicking it. From the tabgluuCustomPersonyou can add the new attributes to the user profile...
As a normal user:
- First you have to navigate as an admin to
Organization Configuration->System Configurationand setUser Can Edit Own ProfiletoEnabled. - Now, as a normal user, you can navigate to
Personal->Profileand there you see the new custom attributes and you can add them to your profile. - Don't forget to go back as an admin to
Organization Configuration->System Configurationand setUser Can Edit Own ProfiletoDisabledagain!
We define the following list of additional scopes for the TCBL project:
| Display Name | Description | Scope Type | Default scope | Claims | Comment |
|---|---|---|---|---|---|
| inum | The internal id assigned by the server | OpenID | False | Inum | Available to the TCBL usermanager only |
| minimum | Your email, first name, last name. | OpenID | True | Email, First Name, Last Name | Available to all TCBL platforms |
| extended | Your optional picture. | OpenID | True | Picture Location | Available to selected TCBL platforms |
| tcblinfo | Your acceptance of the TCBL privacy policy, your subscription to the TCBL newsletter. | OpenID | False | Accepted TCBL privacy policy, Subscribed to TCBL newsletter | Available to selected TCBL platforms |
| tcblactivity | Your TCBL activity monitoring preferences. | OpenID | True | Allowed TCBL activity monitoring | Available to all TCBL platforms |
To add these scopes, per scope:
- Navigate to
OpenID Connect->Scopes. - Click on
Add Scope. - Enter all fields using the table above.
- Click on
Add Claim. - Add all claims using the table above.
- Finally click on
Addat the bottom to add the scope.
Remember that default scopes will be added to newly registered clients.
Note: when updating this table, update the table in the Scopes section of the public page https://github.com/TCBL/single-sign-on-docs/wiki/gluu_server_settings as well.
| Scope | oxAuth claim name | Description |
|---|---|---|
| extended | extended_picture_url | String containing the user profile picture URL, e.g.: https://tcblsso.ilabt.iminds.be/usermanager/p/pp/abcdef, _ (meaning no picture) or no value (equivalent to _) |
| tcblinfo | tcbl_nl | String indicating whether the user is subscribed to the TCBL newsletter, true, false or no value (equivalent to false) |
| tcblinfo | tcbl_pp | String indicating whether the user accepted the TCBL privacy policy, true, false or no value (equivalent to false) |
| tcblactivity | tcbl_am | String indicating whether the user allowed to monitor TCBL activity, true, false or no value (equivalent to false) |
Prevent login screen from "expiring" too soon. This occurs for new users return to the login screen after having left it to sign up first...
- Navigate to
Configuration->JSON Configuration->OxAuth Configuration. - Set the value of attribute
sessionIdUnauthenticatedUnusedLifetimeto 86400 (which is equal to 1 day; the unit is seconds).