-
Notifications
You must be signed in to change notification settings - Fork 0
migration
This document explains how to migrate an existing Gluu 3.0.2 + Usermanager installation to another machine and with another domain (in this case tcblsso.tcbl.eu).
It presumes the new server (vm) is installed and configured as in Server installation.
Don't install or enable the Apache web server.
Make sure tcblsso.tcbl.eu is added to the line after the global IP address in /etc/hosts.
Throughout this document, you're supposed to be root unless stated otherwise.
This step can be done before the actual migration to save time.
Install Gluu 3.0.2 on the new server, as described in Gluu 3 0 x installation, but stop before running setup.py, since the configuration is going to be overwritten anyway.
Before starting the migration, make sure nobody can access the Usermanager.
service tcbl-usermanager stopTo backup and shut down the Gluu server (so nobady can access it anymore):
cd /opt
# (or cd /srv/opt )
./backup-gluu-3.0.2.sh 20181112-before-migration do-not-restart
Now copy the resulting tar file, e.g., gluu-server-3.0.2-20181112-before-migration.tgz, to the new server.
All next steps are performed on the new server!
On the new server, outside the Gluu container:
- Make sure
gluu-server-3.0.2-20181112-before-migration.tgzis located in/opt(or/srv/opt). - Stop the Gluu container, remove the gluu directory and untar the backup:
cd /opt
service gluu-server-3.0.2 stop
rm -rf gluu-server-3.0.2
tar xvf gluu-server-3.0.2-20181112-before-migration.tgz
Now the configuration and data of the old server is migrated, but the Gluu server will not work yet (wrong IP address, wrong domain, wrong certificates).
Original documentation: https://gluu.org/docs/ce/3.0.2/operation/changeip/.
service gluu-server-3.0.2 start- Use another terminal to log in as user
twwith X11 tunneling:
ssh -X tw@tcblsso.tcbl.eu- Install and/or open Apache Directory Studio, as described in Appendix A;
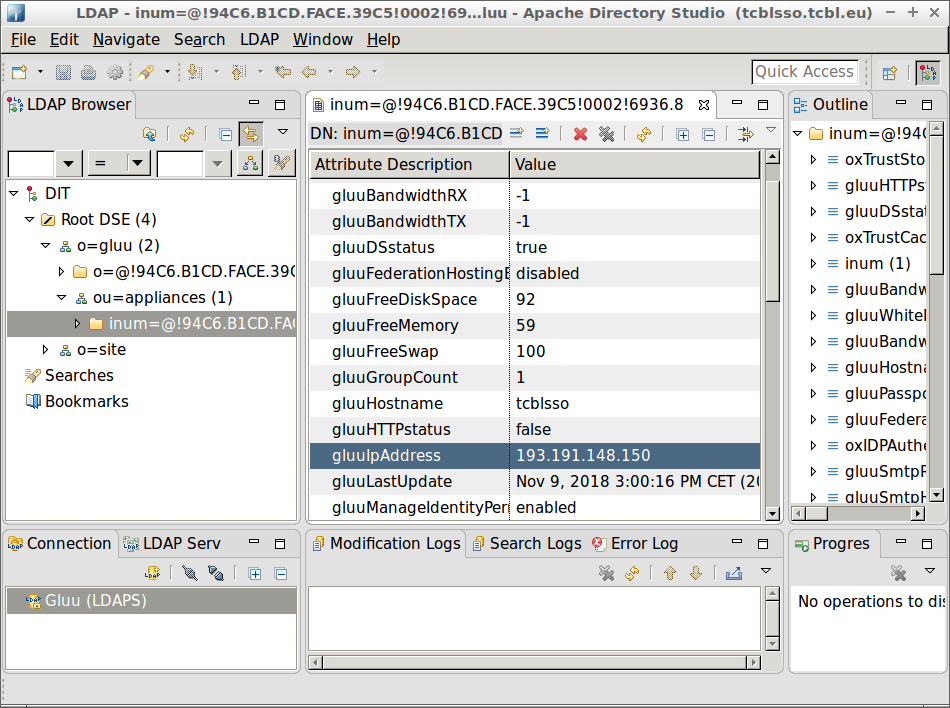
- Change the Gluu IP address as in the image below. Click DIT -> Root DSE -> ou=appliances -> inum=@94C....
In the middle panel click on the value of
gluuIpAddressto change it to the (public) IP address of the new server.
Back in the terminal Log into the container and run fix-restart-services.sh:
service gluu-server-3.0.2 login
./fix-restart-services.shOriginal documentation: https://github.com/GluuFederation/community-edition-setup/tree/master/static/scripts/change_hostname. We are going to use modified scripts, because those provided by the Gluu Federation don't work on Gluu 3.0.2.
Make sure to have Python 2, pip and virtualenv installed on the server. Make sure the Gluu container is running, but do not log in.
In the root home directory:
mkdir change_domain
cd change_domain
wget https://github.com/TCBL/internal-server-docs/raw/master/migration/change_domain/change_config.py
wget https://github.com/TCBL/internal-server-docs/raw/master/migration/change_domain/change_gluu_host.py
mkdir env
virtualenv --python=python2.7 env
source env/bin/activate
Edit the values in change_config.py to whatever is appropriate. The current values are the ones of the latest migration.
If ready, run
python change_config.pyIf all goes well, all configuration and data are changed to use the new domain. Then deactivate the virtual environment:
deactivateCheck /opt/gluu-server-3.0.2/etc/apache2/sites-enabled/https_gluu.conf and make sure the new domain is used in stead of the old one.
Restart the Gluu Server:
service gluu-server-3.0.2 stop
service gluu-server-3.0.2 start
service gluu-server-3.0.2 login
./fix-restart-services.sh
At his point, you should be able to log in (at https://tcblsso.tcbl.eu).
Proceed the Gluu 3.0.x installation instructions from surviving a system reboot.
Notes:
- You can skip Reverse proxy: it is already copied;
- You can skip Configure: it is already copied. Though you might take a look at SMTP configuration since that might be different on the new server. In our case, we have to replace iminds.be with imec.be.
- You can skip Customizing public pages, but some links have to be changed; see below.
The custom pages contain links to the Usermanager that need updates. Edit
/opt/gluu-server-3.0.2/opt/gluu/jetty/oxauth/custom/pages/login.xhtml (when inside
the Gluu container, this is /opt/gluu/jetty/oxauth/custom/pages/login.xhtml):
Replace the old domain name with the new one. In our case ilabt.iminds.be becomes
tcbl.eu:
...
 <li class="row-fluid">
        <div class="span9 offset3">
                <p class="tcbl-margin">
                        <a class="need-account,register" target="_blank"
                           href="https://tcblsso.tcbl.eu/usermanager/user/register">New to TCBL? Sign up!</a>
                </p>
                <p class="tcbl-margin">
                        <a class="need-account,register" target="_blank"
                           href="https://tcblsso.tcbl.eu/usermanager/user/resetpw">Forgot your password?</a>
                </p>
                <p class="tcbl-margin">
                        <a class="need-account,register" target="_blank"
                           href="https://tcblsso.tcbl.eu/usermanager">More about TCBL Single Sign On</a>
                </p>
        </div>
</li>
...
An extra patch: by default the logo at the login page is the Gluu one. It would be nice to have the TCBL logo and URL to the TCBL site over there:
...
 <div class="logo span2">
     <ui:param name="client"
         value="#{clientService.getClient(sessionAttributes['client_id'])}"/>

      <s:div rendered='#{!empty client.getLogoUri()}'>
           <h:graphicImage url='#{client.getLogoUri()}'/>
      </s:div>
       <s:div rendered='#{empty client.getLogoUri()}'>
        <a href="https://tcbl.eu/">
            <h:graphicImage url="https://tcbl.eu/sites/tcbl.eu/themes/tcbl/img/tcbl-logo.svg" />
        </a>
      </s:div>
 </div><!-- end logo-->
...
Changes are applied on-the-fly; restarting is not necessary.
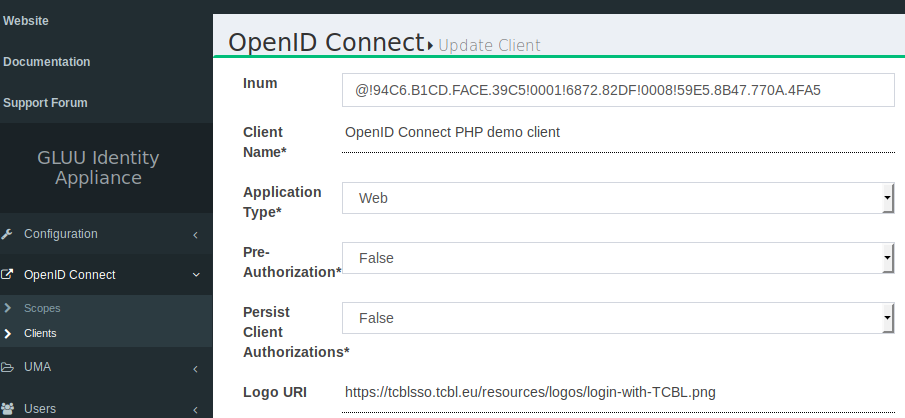
Log in as admin on the webinterface (https://tcblsso.tcbl.eu). Change the Logo URI
for every client to https://tcblsso.tcbl.eu/resources/logos/login-with-TCBL.png
This is in fact installing the Usermanager as described in Usermanager on production. Of course with the right domain/server names. Bear in mind that the SCIM Client configuration on the server is copied and thus OK.
The first time, run with configuration parameter tudm.sync-userdata-at-boot in application.yml set to true.
This will fill the (now empty) database with user info from the Gluu Server. !! Do not forget to set this
parameter back to false when synchronisation is completed!!.
Apache Directory Studio is an eclipse-based OpenLDAP browser / editor. We will set it up to work with a Gluu Server. For ease of use, we opt for the approach of running it on the server as the tw user with X11 tunneling. Another option is to make a local TLS tunnel, but this requires to use the root user directly.
Make sure at least jre 1.8 and xauth are installed on the server.
Login as tw user, with X11 tunneling enabled:
ssh -X tw@tcblsso.tcbl.euFind the download link on the website, and wget it on the server, and untar it
(of course use the right version):
wget http://apache.belnet.be/directory/studio/2.0.0.v20180908-M14/ApacheDirectoryStudio-2.0.0.v20180908-M14-linux.gtk.x86_64.tar.gz
tar xvf ApacheDirectoryStudio-2.0.0.v20180908-M14-linux.gtk.x86_64.tar.gz
Now run it. We will configure it here to connect to an OpenLDAP instance used by Gluu. We assume the Gluu Server is running.
cd ApacheDirectoryStudio
./ApacheDirectoryStudio
If you run it for the first time:
Open LDAP -> New Connection..
Then fill in as follows:
- Connection name: Gluu (you can choose...)
- Hostname: localhost
- Port: 1636
- Encryption: SSL (ldaps)
- Provider: JNDI
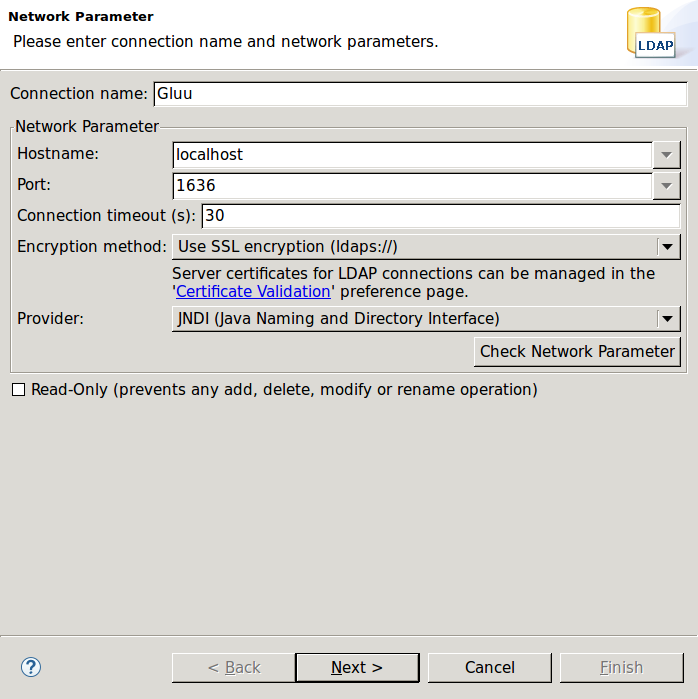
Then click Check Network Parameter
You probalby get a certificate warning. In this case, we can Always trust this certificate.
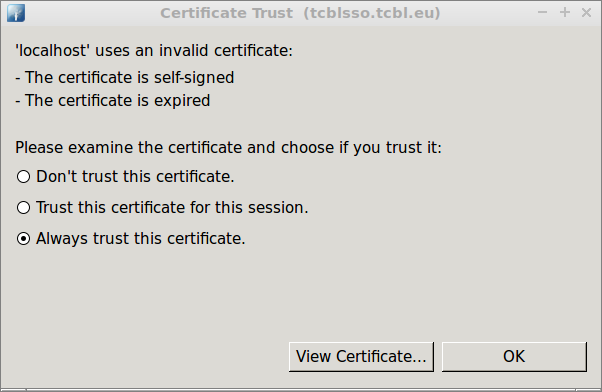
Now you should get a message that the connection was established successfully. Click OK to close the dialog.
Click Next to define a user and password.
- Authentication Method: Simple Authentication
- Bind DN or user: cn=directory manager,o=gluu
- Bind password:
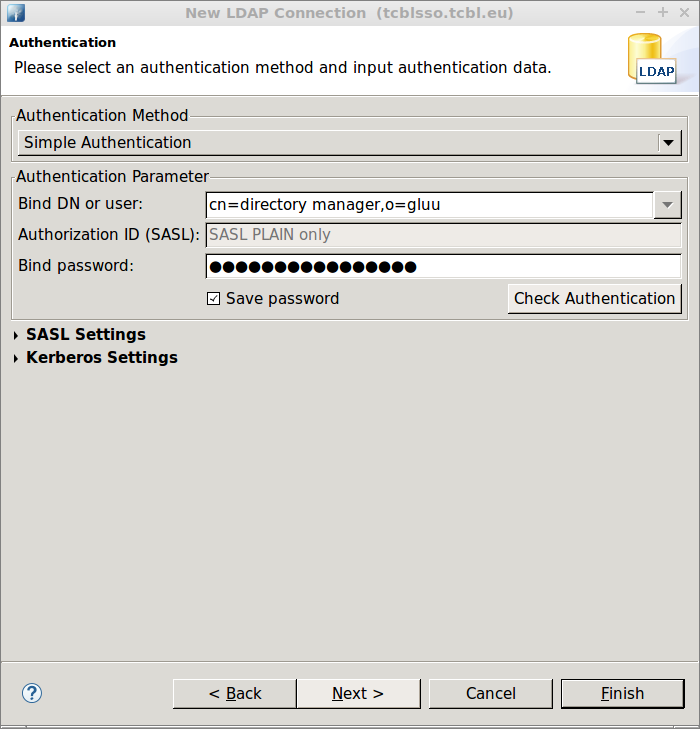
Click Check Authentication. You should get a message that the authentication was successful. Click Finish.
If you don't see the LDAP Browser (as shown below), click Window -> Open Perspective -> LDAP. You can click below left on the Gluu (LDAPS) connection to start browsing / editing.
