5. Assembling mechanical parts, lenses and filters
Hardware - Firmware - Software
❗️All filters must be mounted with the filter layer towards the light source.
- Glue the lens (Edmund 45429 PCX 4x10) to the emission filter with Norland NOA81 optical glue (https://www.norlandprod.com/adhesives/NOA%2081.html) using a glue jig. The lens must be glued on the filter-side because of the direction of the light. Use a UV-light to cure the glue.
Remnants of the glue should be carefully removed with a scalpel.


- Coat all filters black on the sides with a thin layer of chalkboard paint or a good black permanent marker.

- Mount the dichroic mirror and excitation filter in the housing.


- Mount the half-ball lens and slide the sleeve a little bit over the housing.

- Hold the LED in place and slide the sleeve further over the housing.


- Mount the emission filter in the housing. It will be in place when the top of the filter is about 2.8mm below the top of the housing.


- Glue the filter in place with a quick set epoxy glue applied with very small dots at the corners.

- Pull off the protective foil and put the sensor into the sensor housing.
- Check if the LED wires and the excitation LED are on the same side.
- Connect the coax cable to the DAQ and the LED wires with a bit of epoxy glue
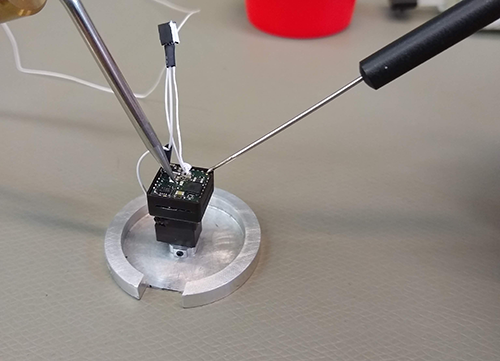
- Also tip each corner of the sensor to the sensor housing.
